Admin Extensions
- Magento 2 Update Order Email Address
- Magento 2 Order Tagger
- Magento 2 Export Custom Product Attribute
- Magento 2 Subcategory Grid/List Extension
- Magento 2 Admin Action Log
- Magento 2 Content Security Policy (CSP) Whitelist Manager
- Magento 2 OTP Login
- Magento 2 Order Delete or Archive
- Magento 2 Custom Stock Status Extension
- Magento 2 Ajax Login and Add to Wishlist
- Magento 2 Associated or Linked Product Stock Update
- Magento 2 Repeat Order
- Magento 2 AI Content Generator
- Magento 2 Admin Account Switcher
- Magento 2 Admin Message Manager
- Magento 2 Advanced Admin Login Security
- Magento 2 Admin Security Checklist
- Magento 2 Security Suite
- Magento 2 Advanced Reporting Extension
- Magento 2 Product Packs & Bulk Quantity Sync
- Magento 2 Affiliate Program
- Magento 2 Distance Based Shipping
- Magento 2 VAT Switcher
- Magento 2 Custom Currency Manager
- Magento 2 Sample Product
- Magento 2 Barcode Scanner
- Magento 2 Content Protection
Magento 2 Update Order Email Address
Installation and User Guide for Magento 2 Update Order Email Address Extension
Table of Contents
- Installation
- Download Extension
- Installation via app/code
- Installation via Composer
- Configuration Settings for Update Order Email Address
- General Settings
- Update Email Address from Order Detail View Page
- Updated Email Address Visible on the Order Detail View Page
Installation
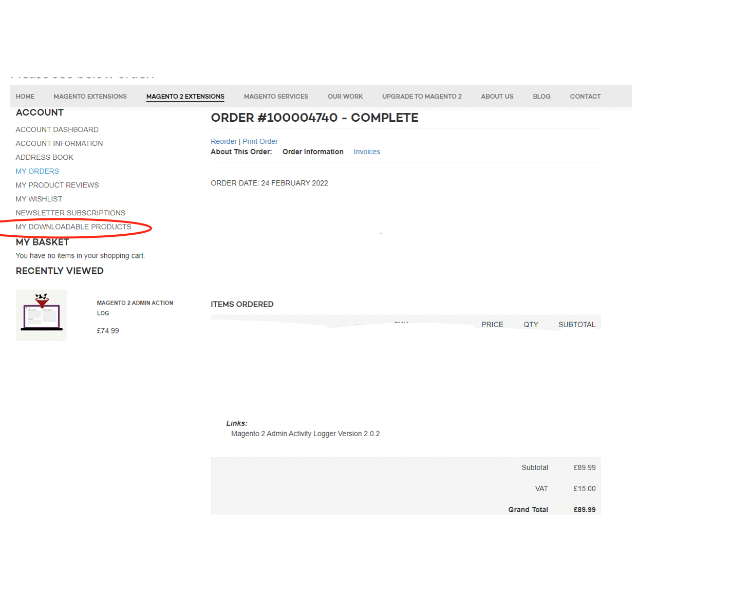
- Download Extension: Once you have placed the order from our site then go to Account section and click on My Downloadable Products and download the extension package.
-
Installation via app/code: Upload the content of the module to your root folder. This will not overwrite the existing Magento folder or files, only the new contents will be added. After the successful upload of the package, run below commands on Magento 2 root directory.
php bin/magento setup:upgrade php bin/magento setup:di:compile php bin/magento setup:static-content:deploy -
Installation via Composer: Please follow the guide provided in the below link to complete the installation via composer.
Configuration Settings for Update Order Email Address
Go to Admin > Stores > Configuration > Scommerce Configuration > Update Order Email
General Settings
- Enabled – Select "Yes" or "No" to enable or disable the module.
- License Key – Please add the license for the extension which is provided in the order confirmation email. Please note license keys are site URL specific. If you require license keys for dev/staging sites then please email us at support@scommerce-mage.com.
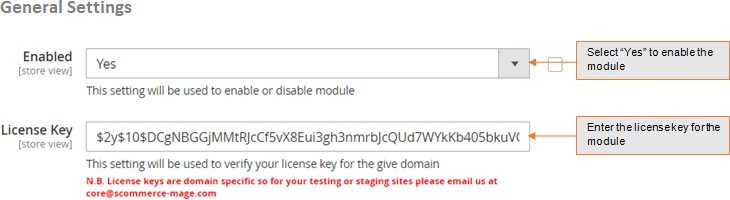
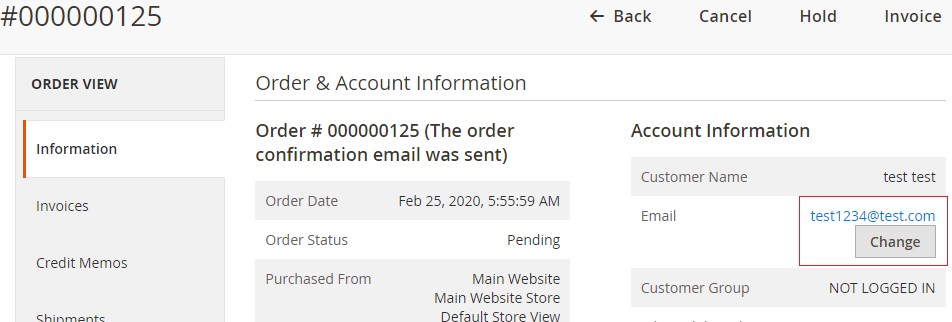
- Update Email Address from Order Detail View Page - You can update email address from Admin > Sales > Orders > Select Order > Click on "Change" then add new email address > Click "Save".
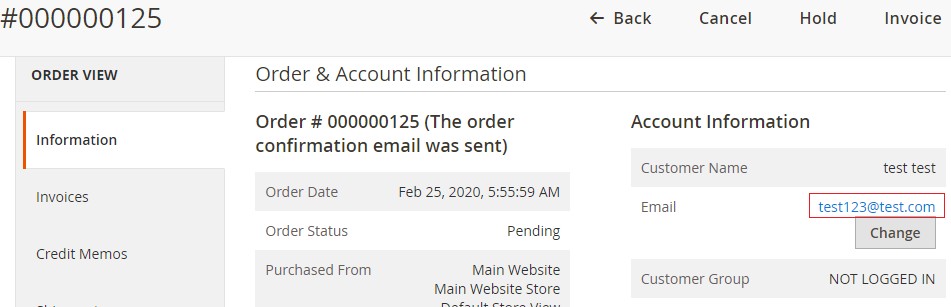
- Updated Email Address Visible on the Order Detail View Page - The updated email address will be shown on the order detail view page under "Account Information" section.
If you have a question related to this extension please check out our FAQ Section first. If you can't find the answer you are looking for then please contact support@scommerce-mage.com.
Magento 2 Order Tagger
Installation and User Guide for Magento 2 Order Tagger Extension
Table of Contents
- Installation
- Installation via app/code
- Installation via Composer
- Configuration Settings for Order Tagger
- Order Tags Logs
- Order Tags Grid
- General Settings
- Types of Tags
- Static Tags
- Dynamic Tags
- Predefined Tags
- Assign Tags
- Manually Assign/Remove Tags
- Assign Tags Based on Conditions
- Tags in Action
- Order Grid
- Filter Order Grid
Installation
-
Installation via app/code: Upload the content of the module to your root folder. This will not overwrite the existing Magento folder or files, only the new contents will be added. After the successful upload of the package, run below commands on Magento 2 root directory.
php bin/magento setup:upgrade php bin/magento setup:di:compile php bin/magento setup:static-content:deploy -
Installation via Composer: Please follow the guide provided in the below link to complete the installation via composer.
Configuration Settings for Order Tagger
Go to Admin > Stores > Configuration > Scommerce Configuration > Order Tagger
General Settings
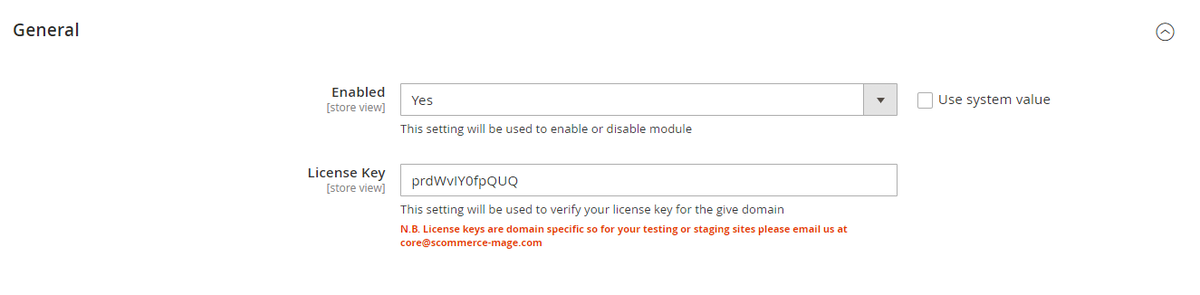
- Enabled – Select "Yes" or "No" to enable or disable the module.
- License Key – Please add the license for the extension which is provided in the order confirmation email. Please note license keys are site URL specific. If you require license keys for dev/staging sites then please email us at support@scommerce-mage.com.
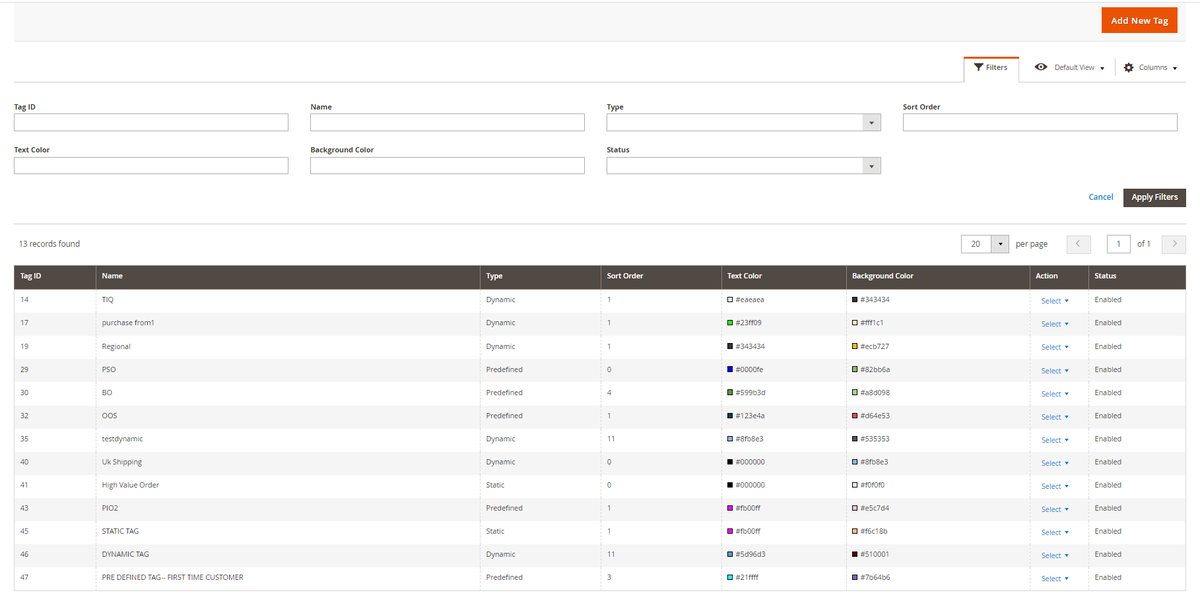
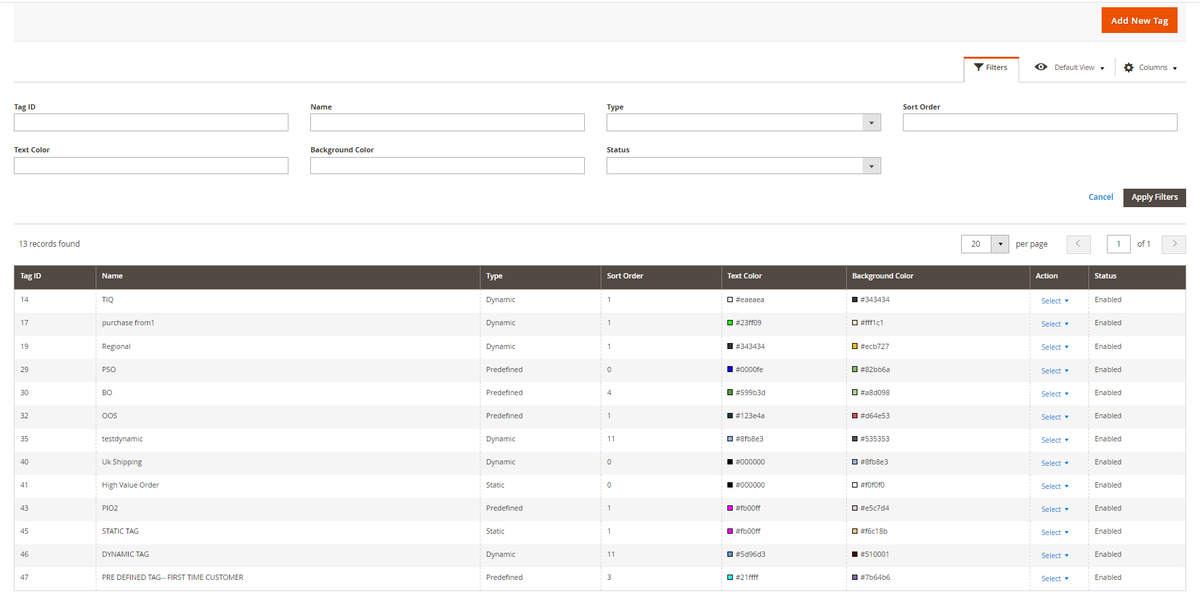
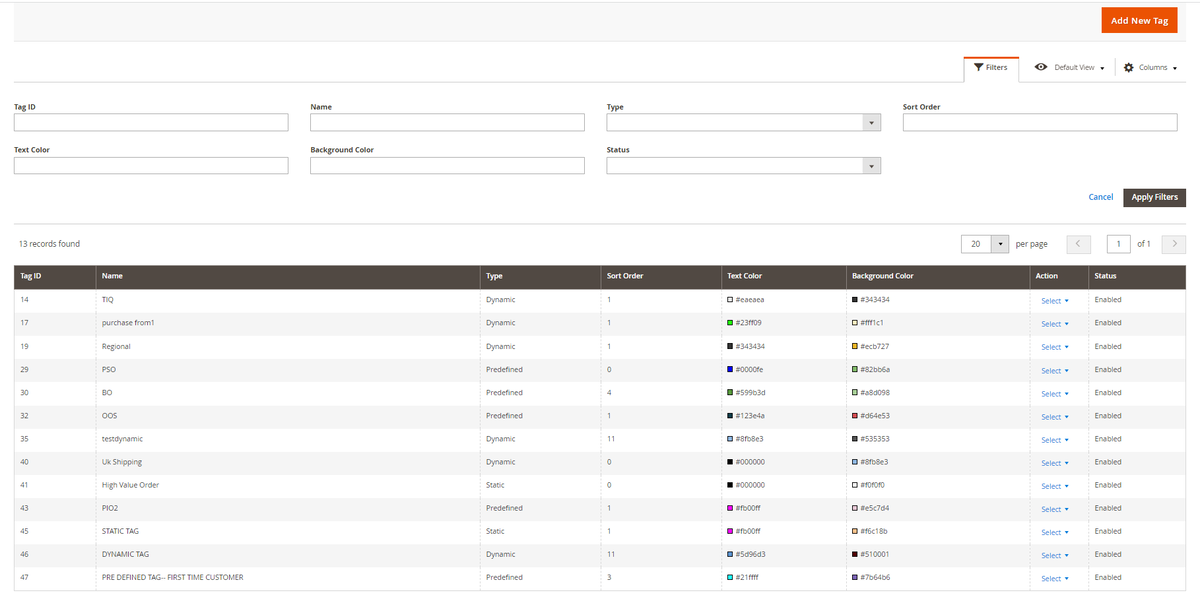
Order Tags Grid
Go to Admin>Sales>Scommerce Order Tagger>Order Tags
- Name– Enter the name of the tag.
- Type– Select "Static" or "Dynamic" or "Predefined". Static tags can be manually assigned and dynamic tags can be assigned using conditions. Predefined tags already have conditions set so you only to select the predefined tag type.
- Sort Order– Define the priority of the tag(0 being the highest priority), the highest priority tag will be displayed first.
- Text Color– Add the text color for the tag.
- Background Color– Add the background color for the tag
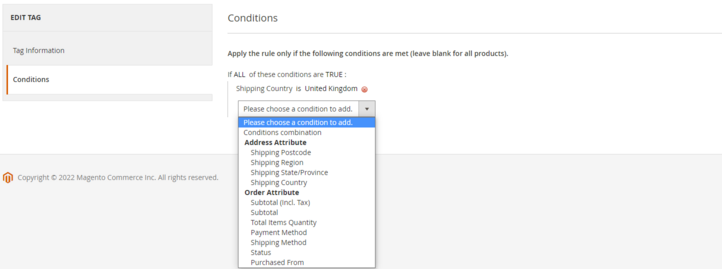
Conditions– Add the conditions using order or address attributes.
Order Tags Logs
Go to Admin>Sales>Scommerce Order Tagger>Order Tags Logs
The logs keep track of all the dynamic tags that are assigned to orders. It has its own set of filters which can be used to identify a specific assigned tag.
Types of Tags
There are three of tags within the extension static, dynamic, and predefined tags.
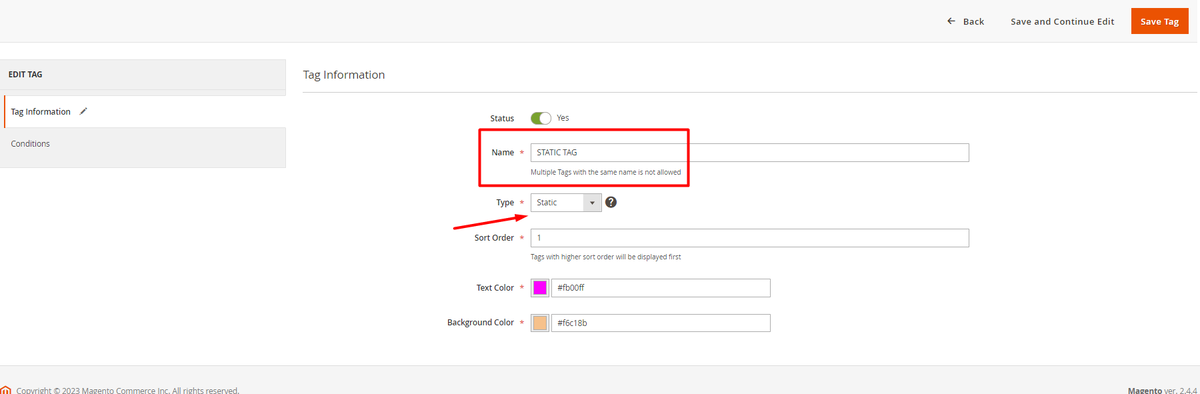
Static Tags
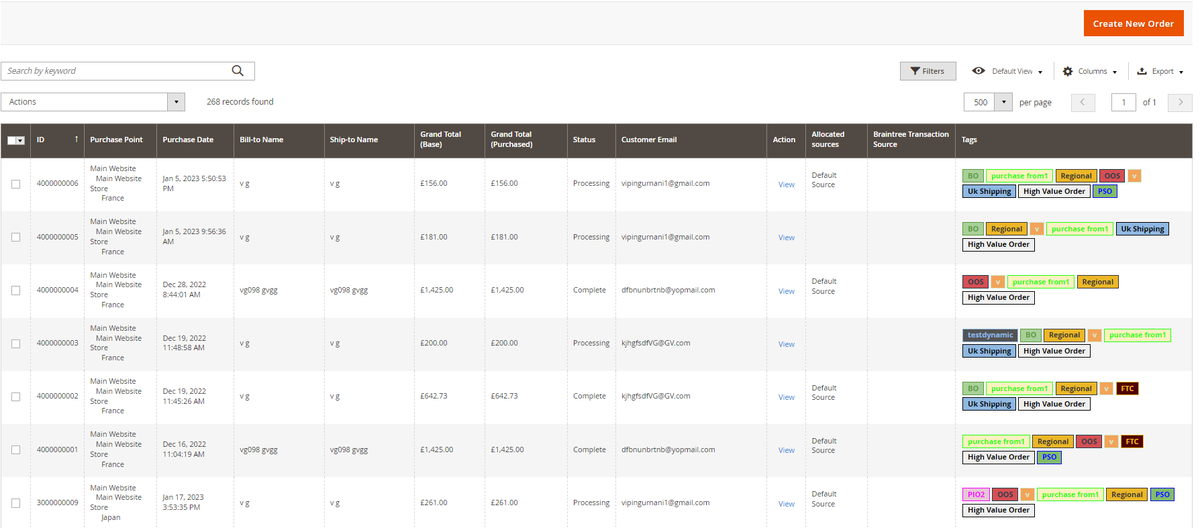
After creation, these types of tags are added manually via Magento order grid. Conditions are not added in these types of tags. They are not shown in order tags logs.
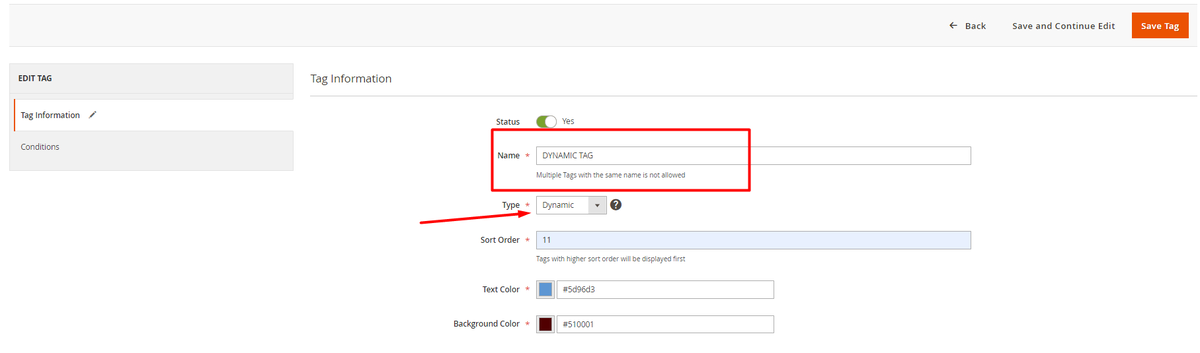
Dynamic Tags
After creation, these types of tags are added automatically to the orders applicable.Conditions are added in these types of tags.They are shown in the Order tags logs.
Predefined Tags
After creation, these types of tags are added automatically to the orders applicable.Conditions are not added in these types of tags as they are already set. They are shown in the Order tags logs Irrespective of the name, only one type of tag can be created for one 'Predefined' field.
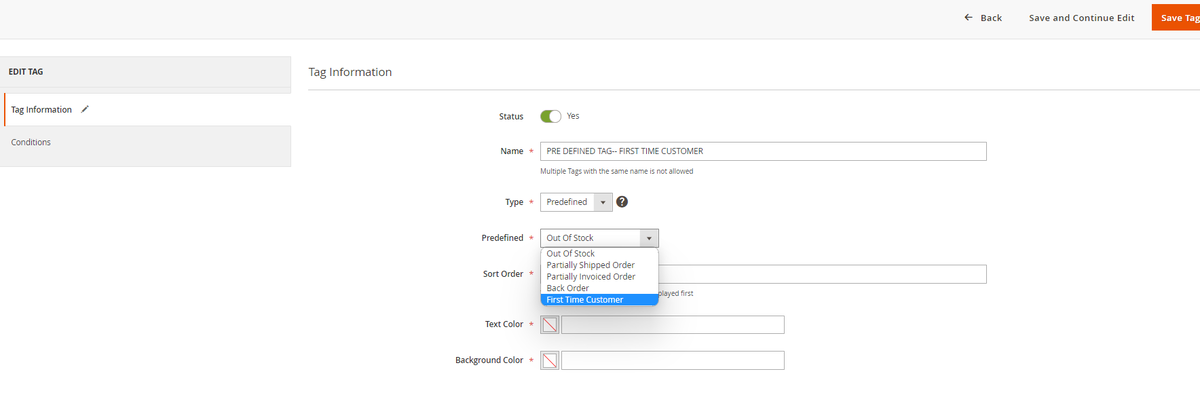
There are five types of predefined tags to choose from:-
- Out of Stock :- Gets automatically assigned to the orders whose products are out of stock. As soon as the product is available the tag gets removed automatically.
- Partially Shipped Order:- Gets automatically assigned to orders that are partially shipped i.e only a few quantities are shipped from the order. As soon all the entire order is invoiced the tag gets removed automatically.
- Partially Invoiced Order:- Gets automatically assigned to orders that are partially invoiced i.e only some quantity of the order is invoiced. As soon all the entire order is invoiced the tag gets removed automatically.
- Back Order:- Gets automatically assigned to backorders. This tag doesn't work with downloadable and virtual products. As soon as all the items in the order are shipped the tag gets removed automatically.
- First Time Customer:- Gets automatically assigned to the orders that are placed by first-time customers. This works for both guest/registered users.
Assign Tags
Manually Assign/Remove Tags
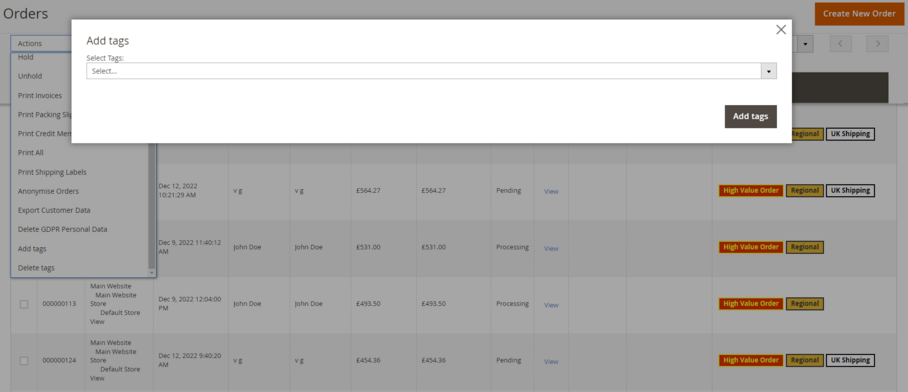
Go to Admin>Sales>Orders then select the order or multiple orders then click on the Actions dropdown and click on 'Add tags' or 'Remove tags'. Select the tag that you want add with the order from the 'Select Tags' dropdown and finally click on Add tags.
Note:- Only static Tags can be manually assigned.
Assign Tags Based on Conditions
Tags in Action
Order Grid
Filter Order Grid
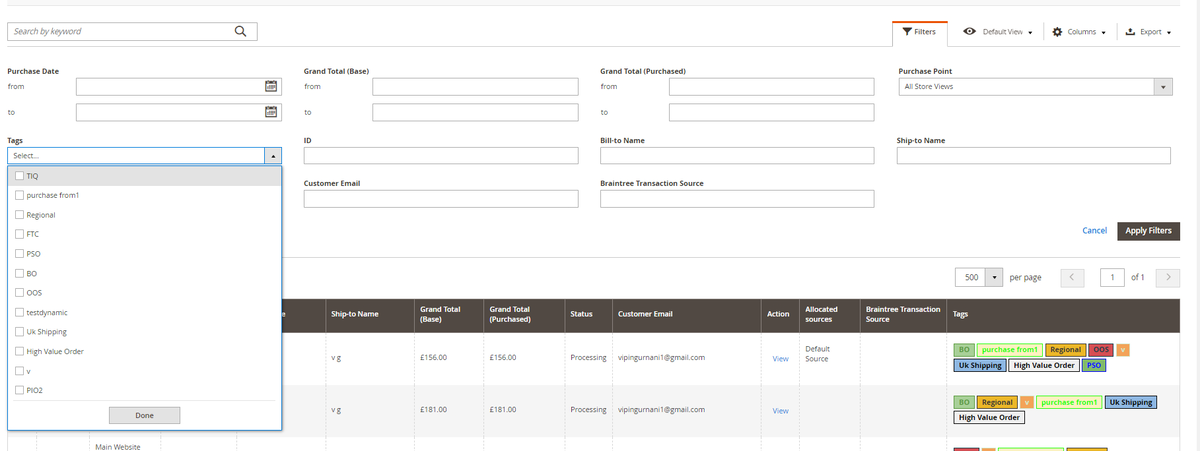
Orders can be filtered based on the tags. New filter option can be found in the filters where orders can be sorted based on the tags selected. Go to Admin>Sales>Filters and click on the Tags dropdown to select the tags.
If you have a question related to this extension please check out our FAQ Section first. If you can't find the answer you are looking for then please contact support@scommerce-mage.com.
Magento 2 Export Custom Product Attribute
Installation and User Guide for Magento 2 Export Custom Product Attribute Extension
Table of Contents
- Installation
- Installation via app/code
- Installation via Composer
- Configuration Settings for Export Custom Product Attribute
- General Settings
- Exporting Custom Product Attributes
Installation
-
Installation via app/code: Upload the content of the module to your root folder. This will not overwrite the existing Magento folder or files, only the new contents will be added. After the successful upload of the package, run below commands on Magento 2 root directory.
php bin/magento setup:upgrade php bin/magento setup:di:compile php bin/magento setup:static-content:deploy -
Installation via Composer: Please follow the guide provided in the below link to complete the installation via composer.
Configuration Settings for Export Custom Product Attribute
Go to Admin > Stores > Configuration > Scommerce Configuration > Export Product Attribute
General Settings
- Enabled – Select "Yes" or "No" to enable or disable the module.
- License Key – Please add the license for the extension which is provided in the order confirmation email. Please note license keys are site URL specific. If you require license keys for dev/staging sites then please email us at support@scommerce-mage.com.
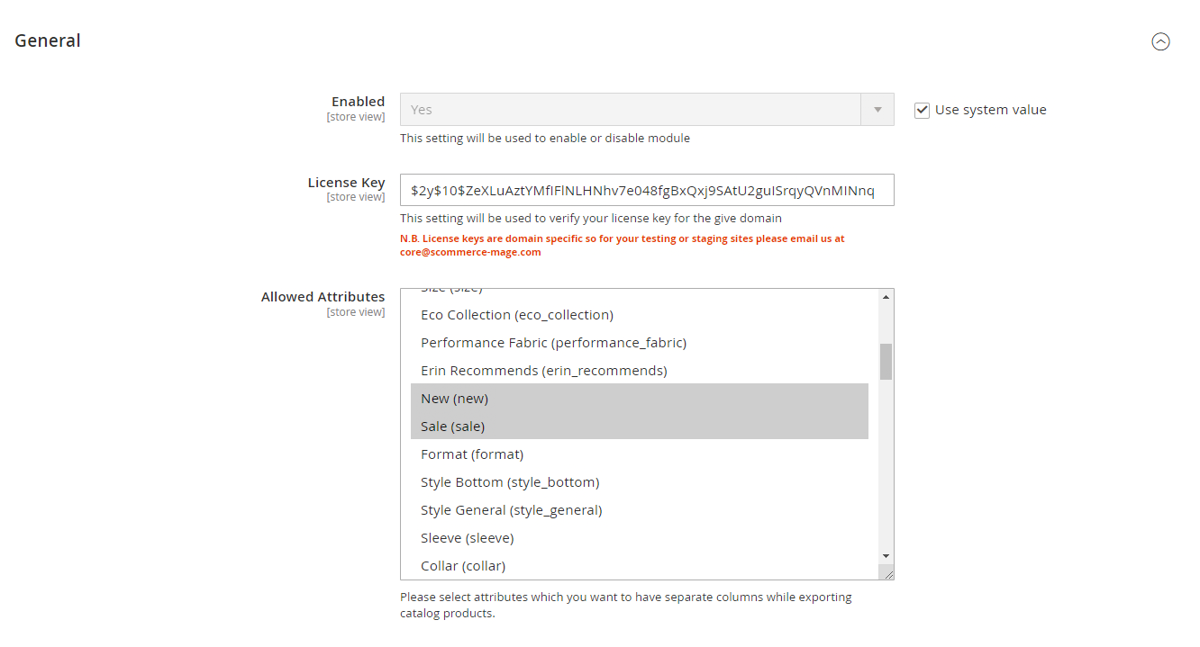
- Allowed Attributes – Select the product attributes that you want to list in separate columns while exporting the catalog products.
Exporting Custom Product Attributes
Make sure the custom attributes that you want to import are selected under Admin>Stores>Configuration>Scommerce Configuration>Export Custom Attributes>Allowed Attributes. Please follow the steps below to do the export.
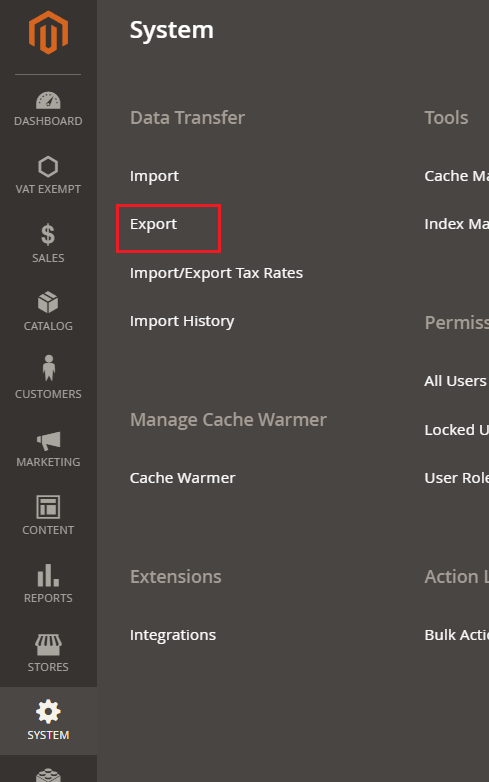
Step 1:- Go to Admin>System>Export
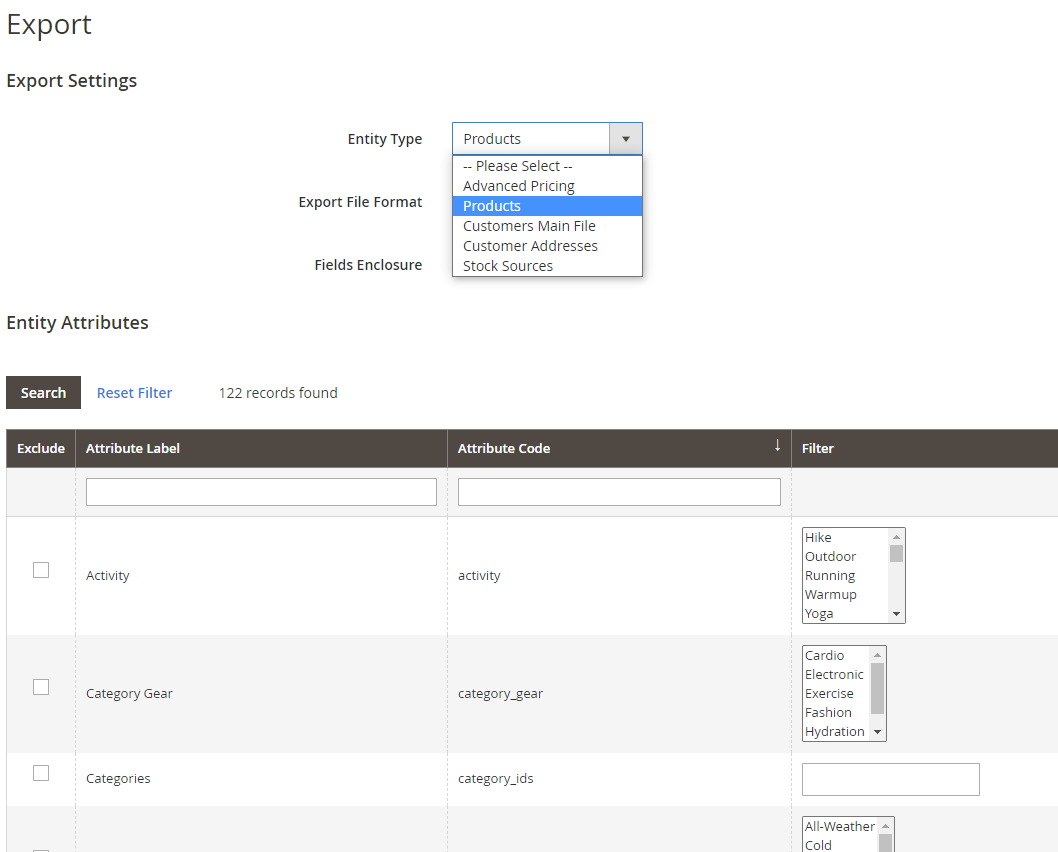
Step 2:- Select product from the 'Entity Type' dropdown list and select the attributes that you want to exclude from the export.
Step 3:- Click on continue and when the cron runs the export will be generated and added in the list below
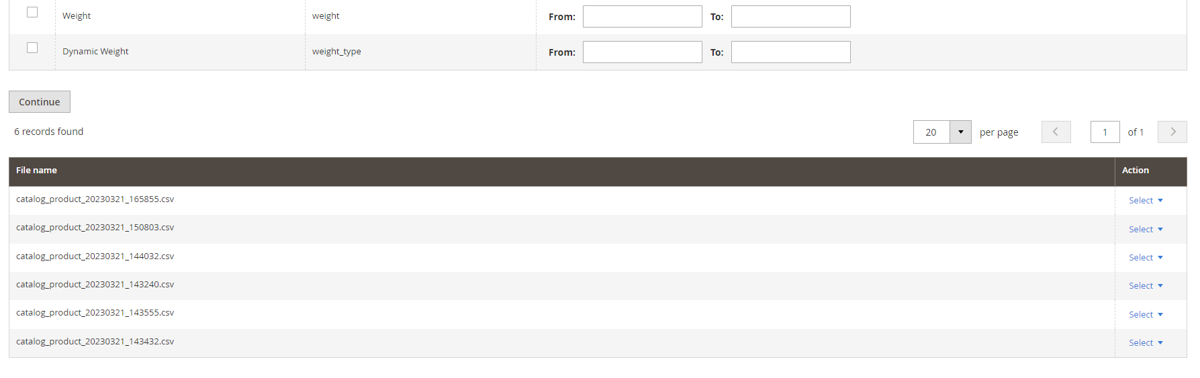
Step 4:- Finally, download the export file from the select dropdown.

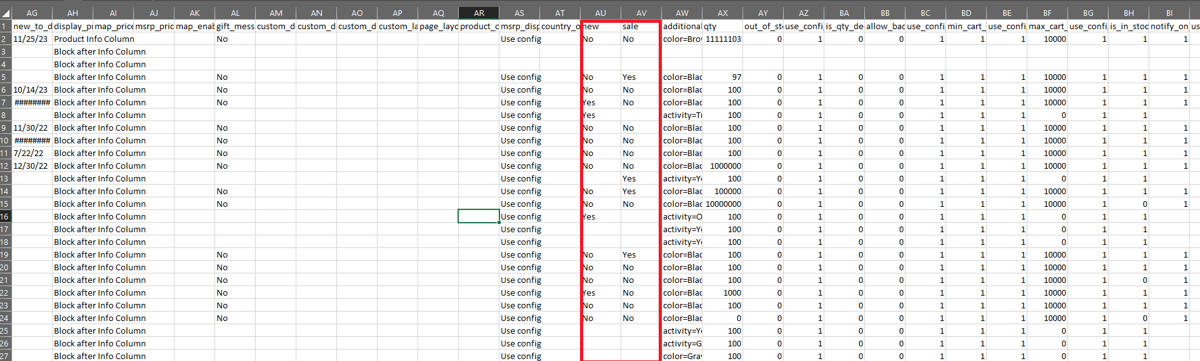
Step 5:- You can see in the export file that our custom attributes new and sale are present in separate columns.
If you have a question related to this extension please check out our FAQ Section first. If you can't find the answer you are looking for then please contact support@scommerce-mage.com.
Magento 2 Subcategory Grid/List Extension
Installation and User Guide for Magento 2 Subcategory Extension
Table of Contents
- Installation
- Installation via app/code
- Installation via Composer
- Configuration Settings for Subcategory Extension
- General Settings
- Subcategories Widget
- Display Mode Selection Drop-down "Subcategories Only"
- Sub-categories Settings Dropdown
- Front-end Screenshots
- Subcategories Grid View on the Front- end
- Subcategories List View on the Front- end
Installation
-
Installation via app/code: Upload the content of the module to your root folder. This will not overwrite the existing Magento folder or files, only the new contents will be added. After the successful upload of the package, run below commands on Magento 2 root directory.
php bin/magento setup:upgrade php bin/magento setup:di:compile php bin/magento setup:static-content:deploy -
Installation via Composer: Please follow the guide provided in the below link to complete the installation via composer.
Configuration Settings for Subcategory Extension
Go to Admin > Stores > Configuration > Scommerce Configuration > SubCategory
General Settings
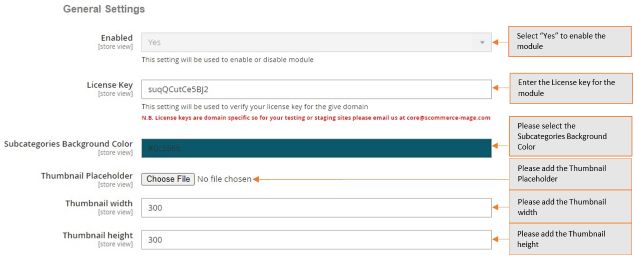
- Enabled - Select "Yes" or "No" to enable or disable the module.
- License Key - Please add the license for the extension which is provided in the order confirmation email. Please note license keys are site URL specific. If you require license keys for dev/staging sites then please email us at support@scommerce-mage.com.
- Subcategories Background Color – Please select the Subcategories background colour.
- Thumbnail Placeholder – Please choose the file of Thumbnail placeholder
- Thumbnail width – Please add the Thumbnail width.
- Thumbnail height – Please add the Thumbnail height.
Subcategories Widget
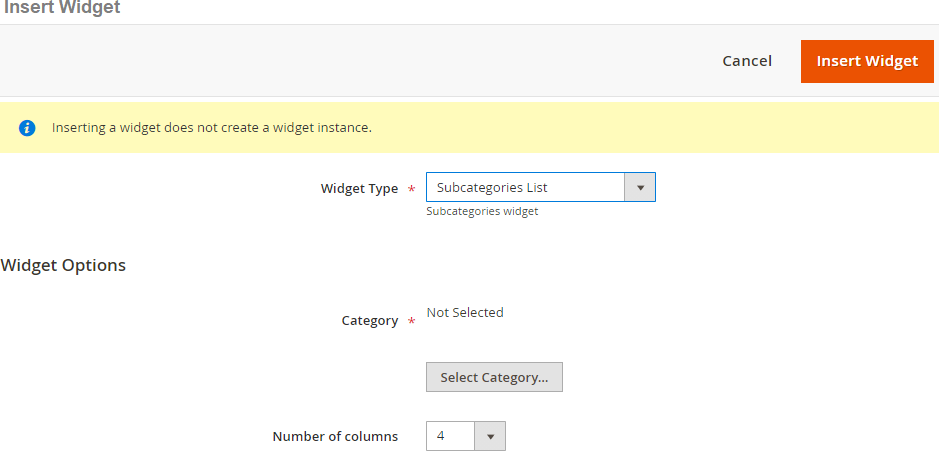
Subcategories widget will allow you to display subcategories in a Grid/list view on any page. Navigate to Content > Pages, edit the page that where you want to display the subcategories. Go into Content and then simply click on insert widget and you will have options such as widget type where you have to select the widget named "Subcategories List" then select the category and the number of columns you want to display the subcategories in. Then Lastly click on insert widget.
Display Mode Selection Drop-down "Subcategories Only"
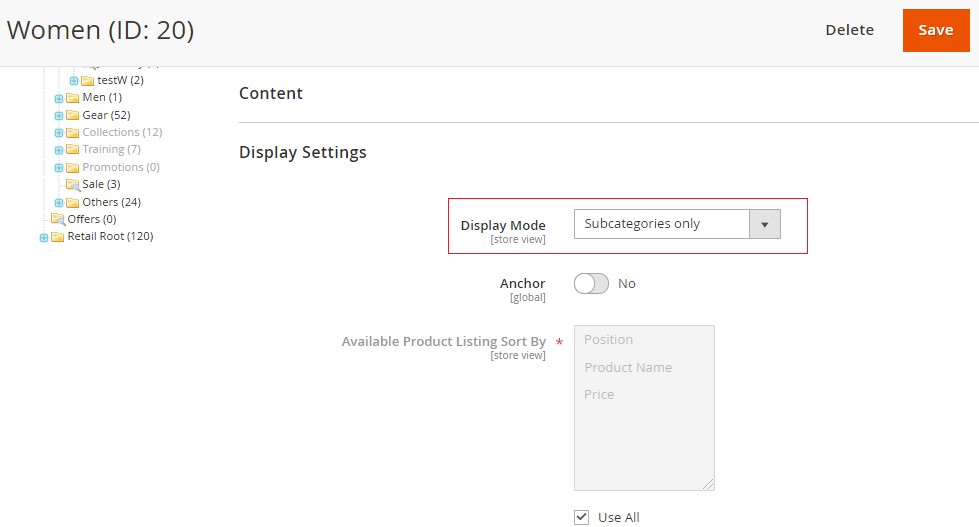
Go to any of the categories page where you want to display subcategories on by navigating to Catalog > Categories. Next go to display settings where you can select the display mode as "subcategories only" so that the page can display subcategories instead of products.
Sub-categories Settings Dropdown
Go to any of the categories pages where you can select the settings by going into
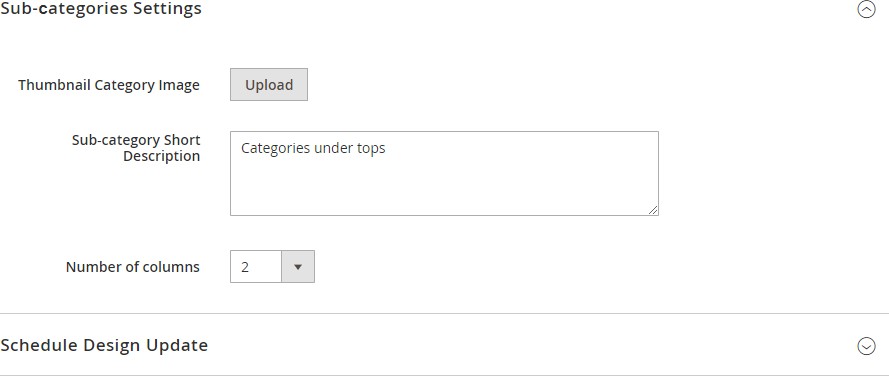
Sub-categories settings dropdown. You can change the following settings: -
- Thumbnail Category Image – Here you can upload a thumbnail image for the category.
- Sub-category Short Description – You can add a short description here.
- Number of columns – Select the number of columns you want to display your subcategories in.
Front-end Screenshots
Subcategories Grid View on the Front- end
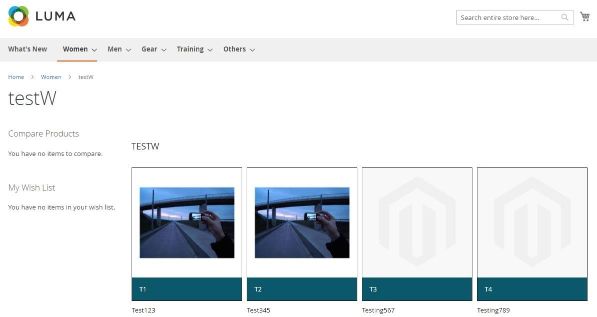
After successfully enabling subcategories you can see them listed in a Grid view on the frontend. You can select the number of columns depending upon that the frontend will review the Grid view. To select the columns Navigate to Catalog > Categories and then select the category. Scroll down to Sub-Categories Settings. Here you will have the option to upload the thumbnail image, short description and number of columns. Each of the subcategories will be listed with a description, background and image as defined by you.
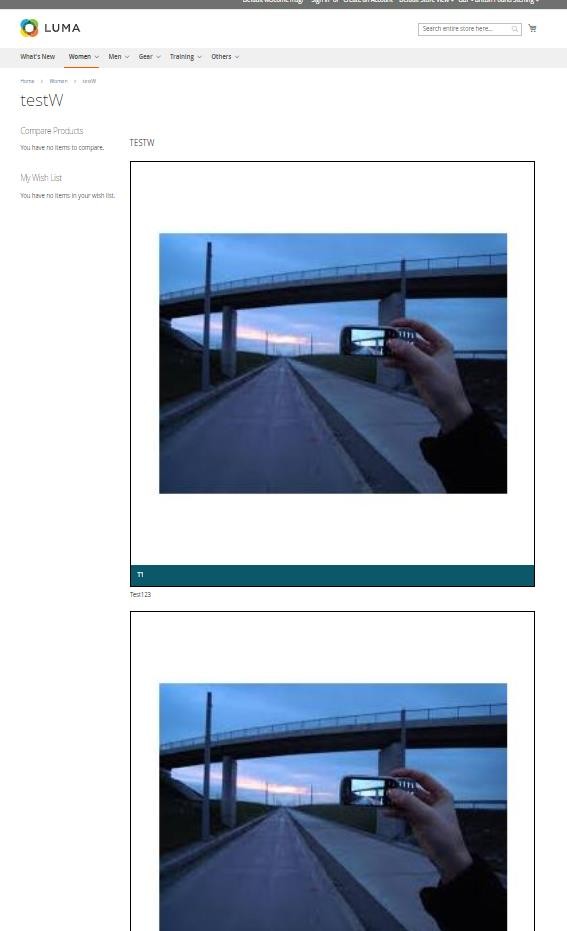
Subcategories List View on the Front- end
If you have a question related to this extension please check out our FAQ Section first. If you can't find the answer you are looking for then please contact support@scommerce-mage.com.
Magento 2 Admin Action Log
Installation and User Guide for Magento 2 Admin Activity Logger Extension
Table of Contents
- Installation
- Download Extension
- Installation via app/code
- Installation via Composer
- Configuration Settings for Security Base
- General Settings
- Configuration Settings for Admin Activity Logger
- General Settings
- Modules Activity Logger
- Admin Activity Logger
- Admin Activity Grid
- Admin Logger Detailed View for Admin Activities
- Admin Logger Detailed View for Item Info
- Login Activity Grid
- Active Sessions Grid
Installation
-
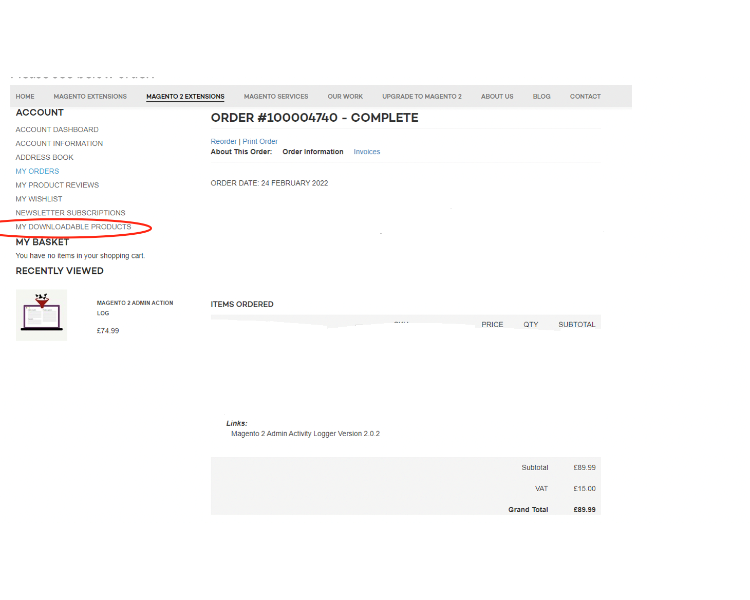
Download Extension: Once you have placed the order from our site then go to Account section and click on My Downloadable Products and download the extension package.
-
Installation via app/code: Upload the content of the module to your root folder. This will not overwrite the existing Magento folder or files, only the new contents will be added. After the successful upload of the package, run below commands on Magento 2 root directory.
php bin/magento setup:upgrade php bin/magento setup:di:compile php bin/magento setup:static-content:deploy -
Installation via Composer: Please follow the guide provided in the below link to complete the installation via composer.
Configuration Settings for Security Base
Go to Admin > Stores > Configuration > Scommerce Configuration > Security Base
General Settings
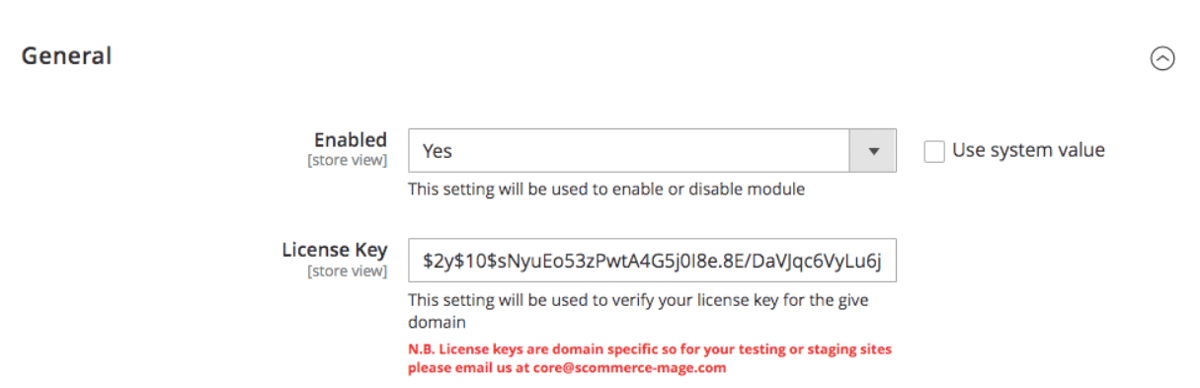
- Enabled – Select "Yes" or "No" to enable or disable the module.
- License Key – Please add the license for the extension which is provided in the order confirmation email. Please note license keys are site URL specific. If you require license keys for dev/staging sites then please email us at support@scommerce-mage.com.
Configuration Settings for Admin Activity Logger
Go to Admin > Stores > Configuration > Scommerce Configuration > Admin Activity Logger
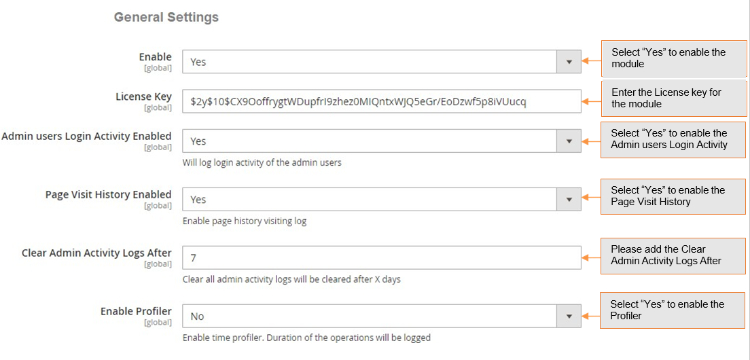
General Settings
- Enabled - Select "Yes" or "No" to enable or disable the module.
- License Key - Please add the license for the extension which is provided in the order confirmation email. Please note license keys are site URL specific. If you require license keys for dev/staging sites then please email us at core@scommerce-mage.com
- Admin Users Login Activity Enabled - Enable / Disable activity. It will log login activity of the admin users.
- Page visit History Enabled - Enable / Disable page history visiting log.
- Clear Admin Activity Logs After - Enter value. Clear all admin activity logs will be cleared after X days.
- Enabled Profiler - Enable / Disable time profiler. Duration of the operations will be logged.
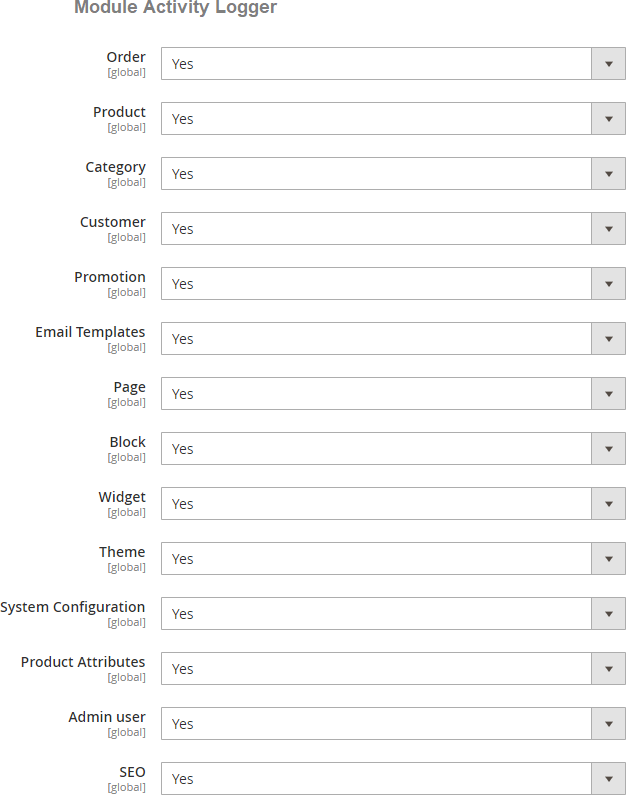
Modules Activity Logger
-
Order - Select "Yes" to enable. It will log order related activities.
-
Product - Select "Yes" to enable. It will log product related activities.
-
Category - Select "Yes" to enable. It will log category related activities.
-
Customer - Select "Yes" to enable. It will log customer related activities.
- Promotion- Select "Yes" to enable.
-
Email Template - Select "Yes" to enable.
-
Page - Select "Yes" or "No" to Enable / Disable.
-
Block - Select "Yes" or "No" to Enable / Disable.
-
Widget - Select "Yes" or "No" to Enable / Disable.
-
Theme - Select "Yes or "No" to Enable / Disable.
-
System Configuration - Select "Yes" or "No" to Enable / Disable.
-
Product Attributes - Select "Yes" or "No" to Enable / Disable.
-
Admin User - Select "Yes" to enable. It will log all users activities.
-
SEO - Select "Yes" or "No" to Enable / Disable.
-
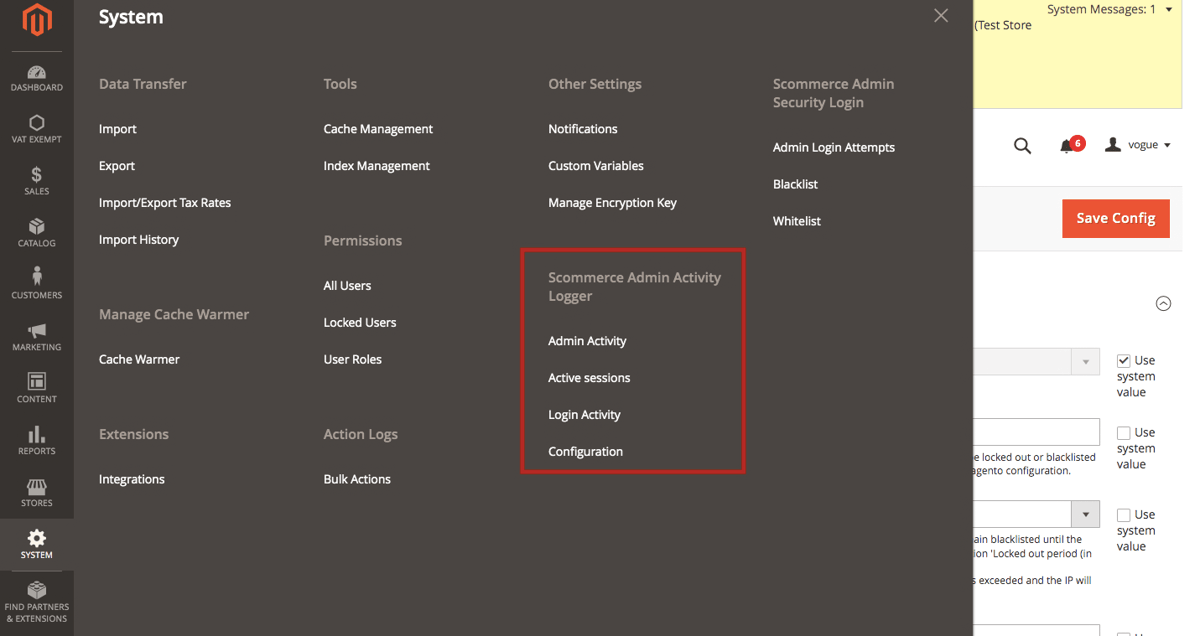
Admin Activity Logger - You can view admin activity logger from, Admin > System > Scommerce Admin Activity Logger > Admin Activity / Login Activity.
-
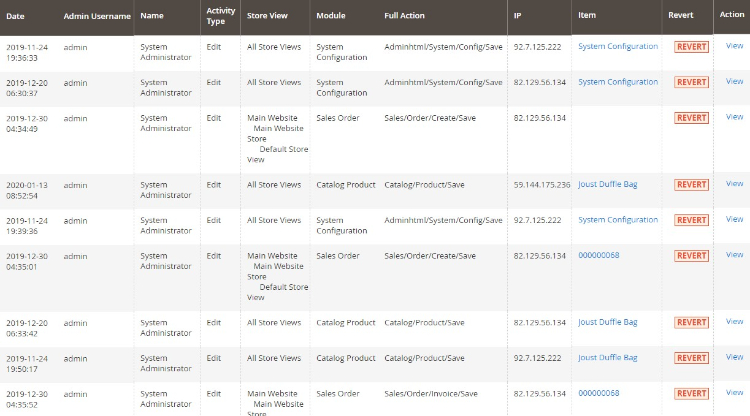
Admin Activity Grid - In the back-end under Admin Activity Logger grid you can view all the admin activities details from Admin > System > Admin Activity Logger. This grid will have, Admin Username, Name, Activity Type, Store View, Module, Full Action, IP, Item, Revert and Action columns.
- Date: - The exact date and time of the activity performed.
- Admin Username: - user name of the admin.
- Name: - The name of the admin.
- Activity Type: - Type of activity performed
- Store view: - Name of the store view
- Module: - The name of the module used in the activity.
- Full Action: - It contains the URL path of the activity performed.
- IP Address: - The IP address of the user.
- Item: - Activity related item such as a product or system configuration changes.
- Revert: - If the action is not complete then the REVERT column will have the notification.
- Action: - It contains view where you can see the key details of the activity such as general and item info.
Admin Activity Logger
-
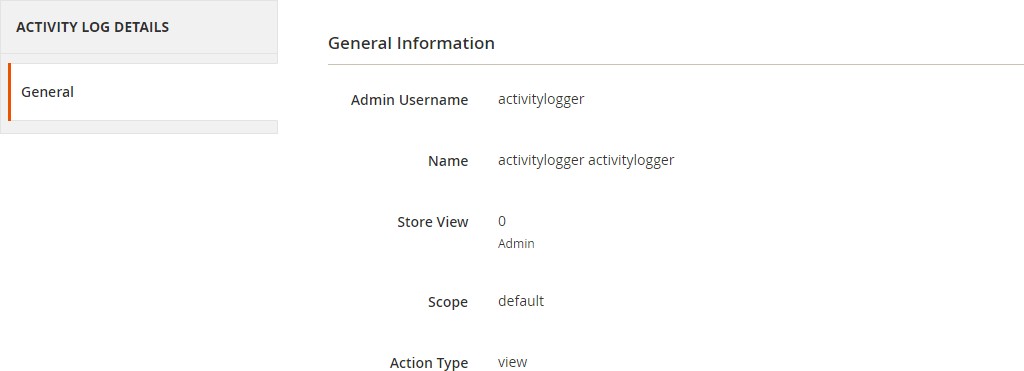
Admin Logger Detailed View for Admin Activities - To get more details about each particular action simply click on the 'View' link from Admin > System > Admin Activity Logger > Select Log > Click on 'View' > General, to view all the detailed data.
- You can view all the general details of the user's activity in the general tab.
-
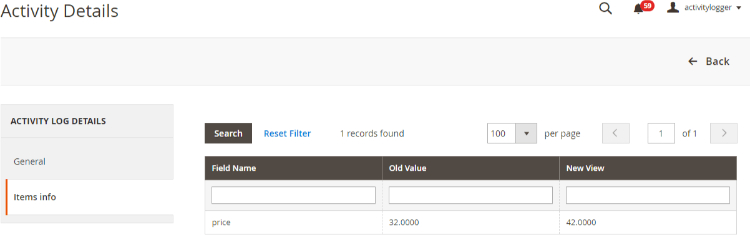
Admin Logger Detailed View for Items Info - You can view the item details from Admin > System > Admin Activity Logger > Select Log > Click on 'View' > Items info.
- This section contains all granular information. For instance if you place an order from the admin panel then all the details of the order such as price, store, etc. Are visible in this section.
-
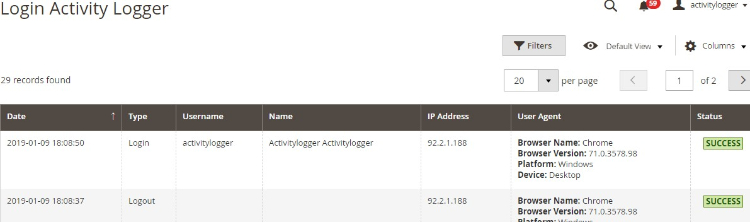
Login Activity Grid - You can view login activities from Admin > System > Scommerce Admin Activity Logger > Active Sessions. It logs details of each and every single activity along with what value being changed by who and when. This section contains following information: -
- Date: - The precise date and time of the log.
- Type: - whether logged in or logged out.
- Username: - Username of the person is stored here.
- Name: - Name of the user
- Ip Address: - You can see the IP address here.
- User Agent: - The browser and device details of the user are shown here.
- Status: - If the login fails then the status will show FAILED and if the login or logout is successful then it shows SUCCESS
-
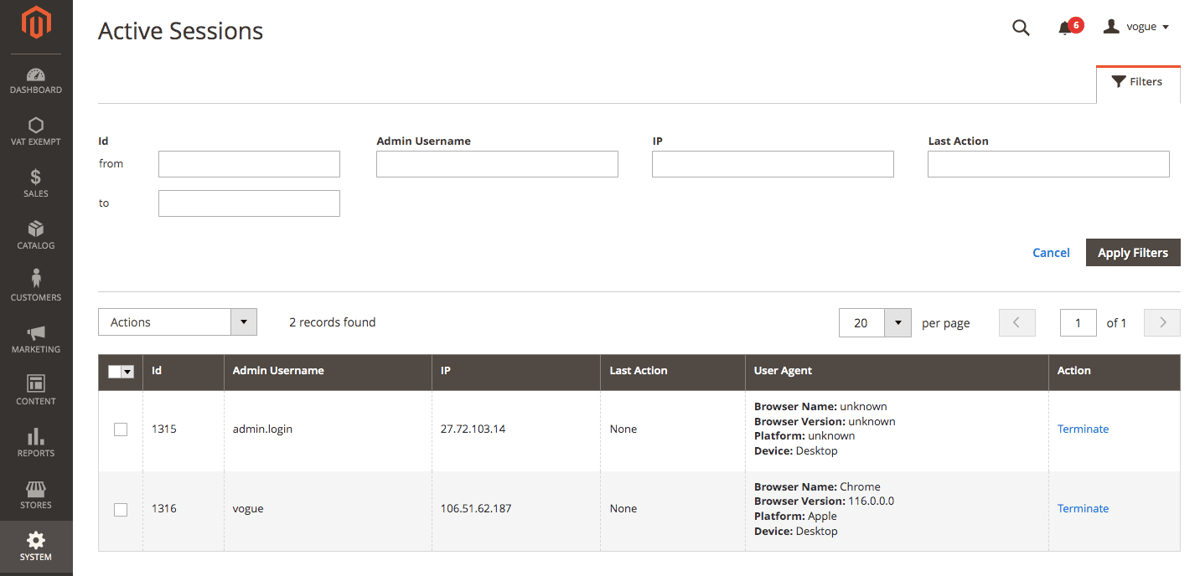
Active Sessions Grid- You can view Active Sessions from Admin > System > Login Activity > Login Acti. It logs details of every active admin session on the store. The active session is listed with various useful details. Also, it gives the admin the option to terminate any active admin session through the "Terminate" button under the action column. Once terminated that admin will be logged out of the account automatically. Furthermore, the grid is completely filterable using various columns. This section contains the following information: -
- Id: - A Unique ID for each active session.
- Admin Username: - Username of the admin of that particular active session.
- IP: - IP address of the admin of that session.
- Last Action: - Last action performed by the admin of this session.
- User Agent: - Various platform, device, and browser information of the admin of this session.
- Action: - Contains the option to terminate this particular session.
If you have a question related to this extension please check out our FAQ Section first. If you can't find the answer you are looking for then please contact support@scommerce-mage.com.
Magento 2 Content Security Policy (CSP) Whitelist Manager
Installation and User Guide for Magento 2 Content Security Policy (CSP) Whitelist Manager
Table of Contents
- Installation
- Download Extension
- Installation via app/code
- Installation via Composer
- Configuration Settings for Content Security Policy (CSP) Whitelist
- General Settings
- CSP Directives
- Critical Security Overrides
- CSP Reports Grid
- Working of the extension
- Steps to Check and Fix Console CSP Errors through CSP Grid
- Steps to Check and Fix Console CSP Errors
- Fixing Inline Script and Inline Style Content Security Policy Issues
- Inline Style Error Example
- Inline Script Error Example
Installation
-
Download Extension: Once you have placed the order from our site then go to My Account section and click on My Downloadable Products and download the extension package.

-
Installation via app/code: Upload the content of the module to your root folder. This will not overwrite the existing Magento folder or files, only the new contents will be added. After the successful upload of the package, run below commands on Magento 2 root directory.
php bin/magento setup:upgrade php bin/magento setup:di:compile php bin/magento setup:static-content:deploy en_GB en_US -
Installation via Composer: Please follow the guide provided in the below link to complete the installation via composer.
Configuration Settings for Content Security Policy (CSP) Whitelist
Go to Admin > Stores > Configuration > Scommerce Configuration > CSP Whitelist
General Settings
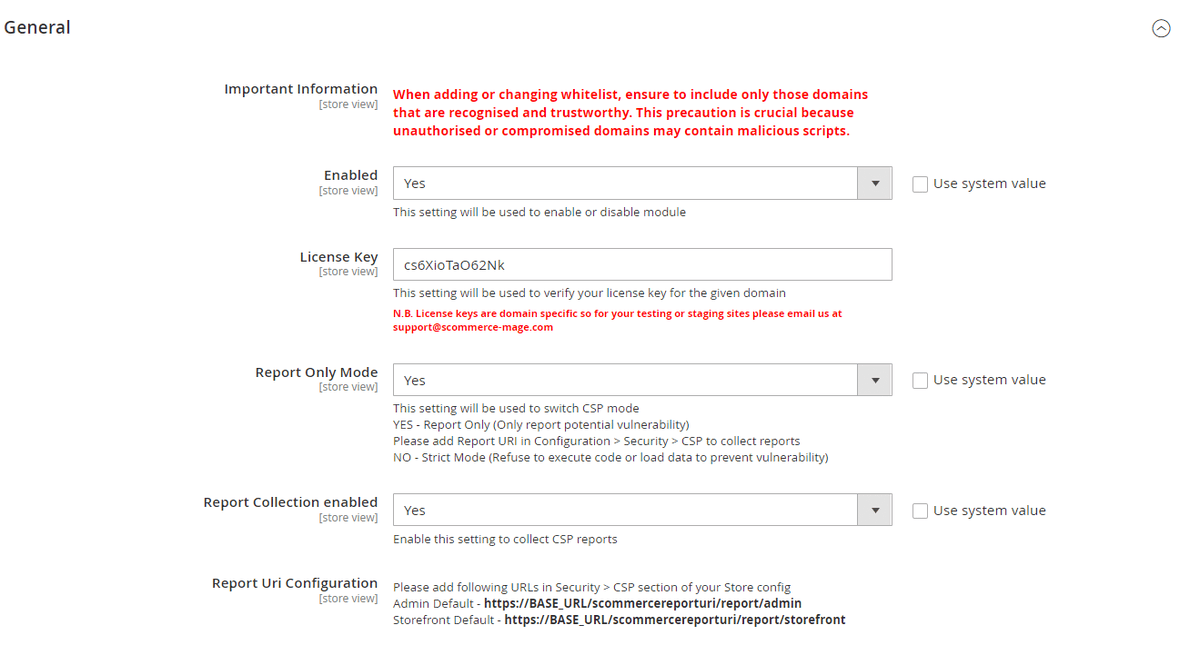
- IMPORTANT INFORMATION- When adding or changing whitelist, ensure to include only those domains that are recognized and trustworthy. This precaution is crucial because unauthorized or compromised domains may contain malicious scripts.
- Enabled – Select "Yes" or "No" to enable or disable the module.
- License Key – Please add the license for the extension which is provided in the order confirmation email. Please note license keys are site URL specific. If you require license keys for dev/staging sites then please email us at support@scommerce-mage.com.
- Report Only Mode - Set "Yes" to enable Report Only mode for CSP ( it will only report CSP vulnerabilities in the CSP reports grid and browser console. Make sure to add Report URL in Configuration>Security>CSP for the CSP grid to collect reports. Set "No" to enable Strict Mode ( it will prevent data from loading or code from getting executed to prevent vulnerabilities).
- Report Collection Enabled:- Set "Yes" to enable collecting CSP reports in the CSP grid, Set "No" these errors will only be available in the browser console
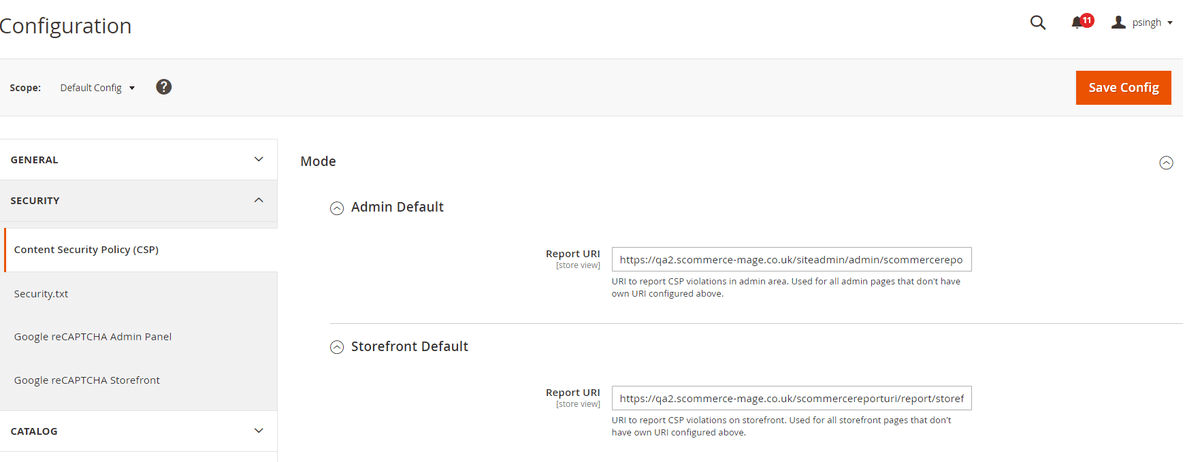
- Report URL Configuration:- Please add following URLs in Security > CSP section of your Store config Admin Default - https://BASE_URL/scommercereporturi/report/admin Storefront** Default** - https://BASE_URL/scommercereporturi/report/storefront
CSP Directives
-
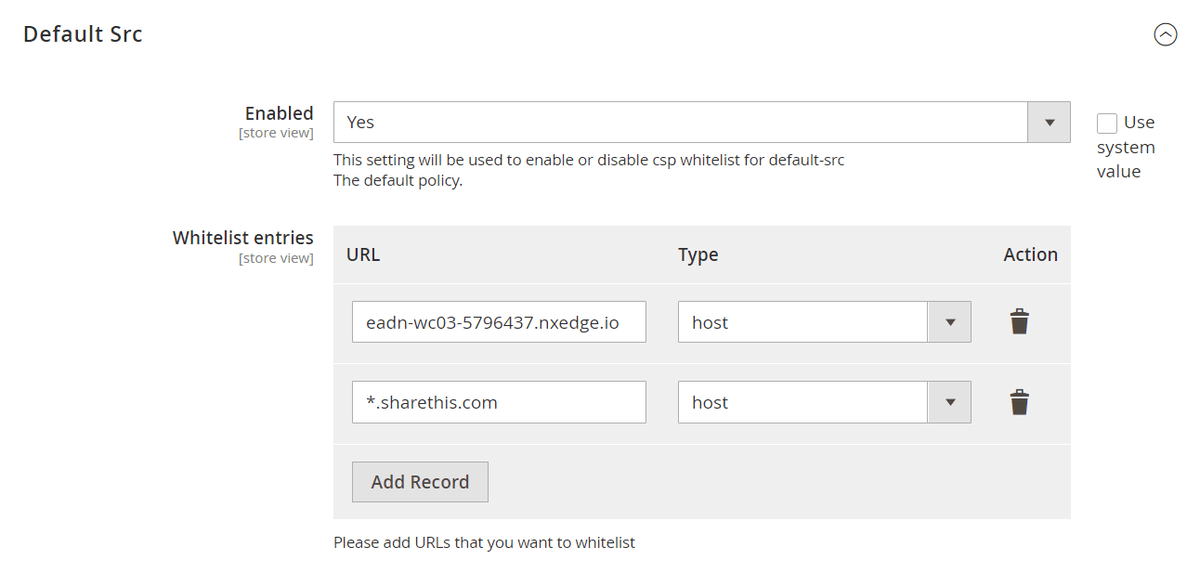
Default Src
- Enabled- Select "Yes" or "No" to enable or disable csp whitelist for default-src
- Whitelist entries- Please add URLs that you want to whitelist. By default, the type of entry added would be host. You can also delete this entry and add multiple entries.
-
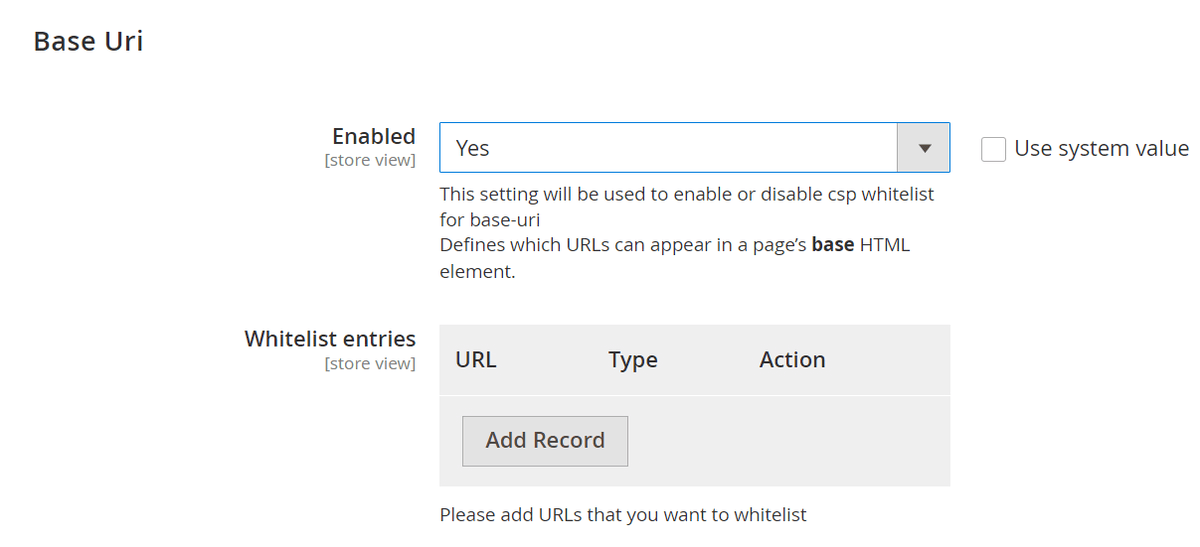
Base Uri
- Enabled- Select "Yes" or "No" to enable or disable csp whitelist for base-uri
- Whitelist entries- Please add URLs that you want to whitelist. By default, the type of entry added would be host. You can also delete this entry and add multiple entries.
-
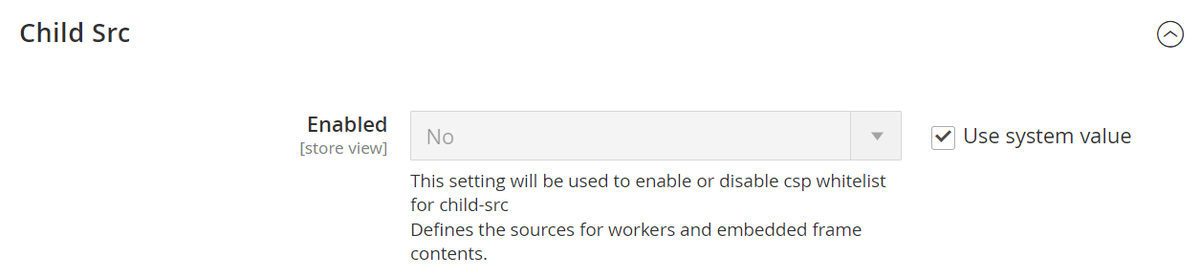
Child Src
- Enabled- Select "Yes" or "No" to enable or disable csp whitelist for child-src
- Whitelist entries- Please add URLs that you want to whitelist. By default, the type of entry added would be host. You can also delete this entry and add multiple entries.
-
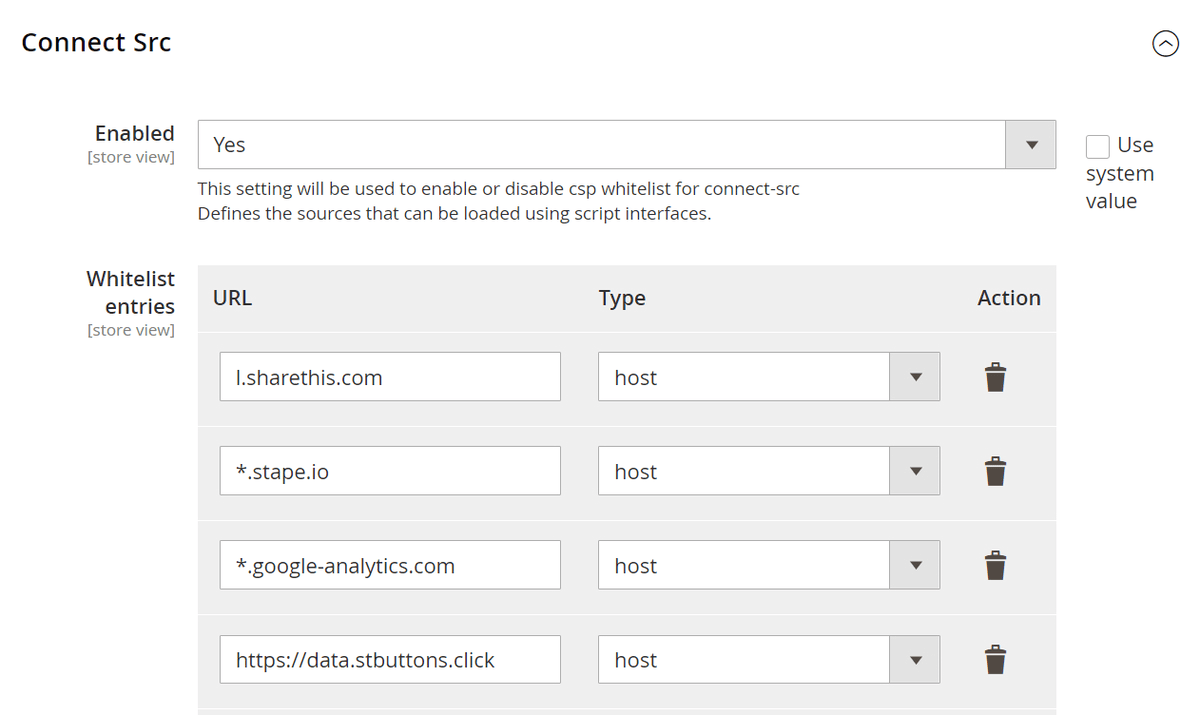
Connect Src
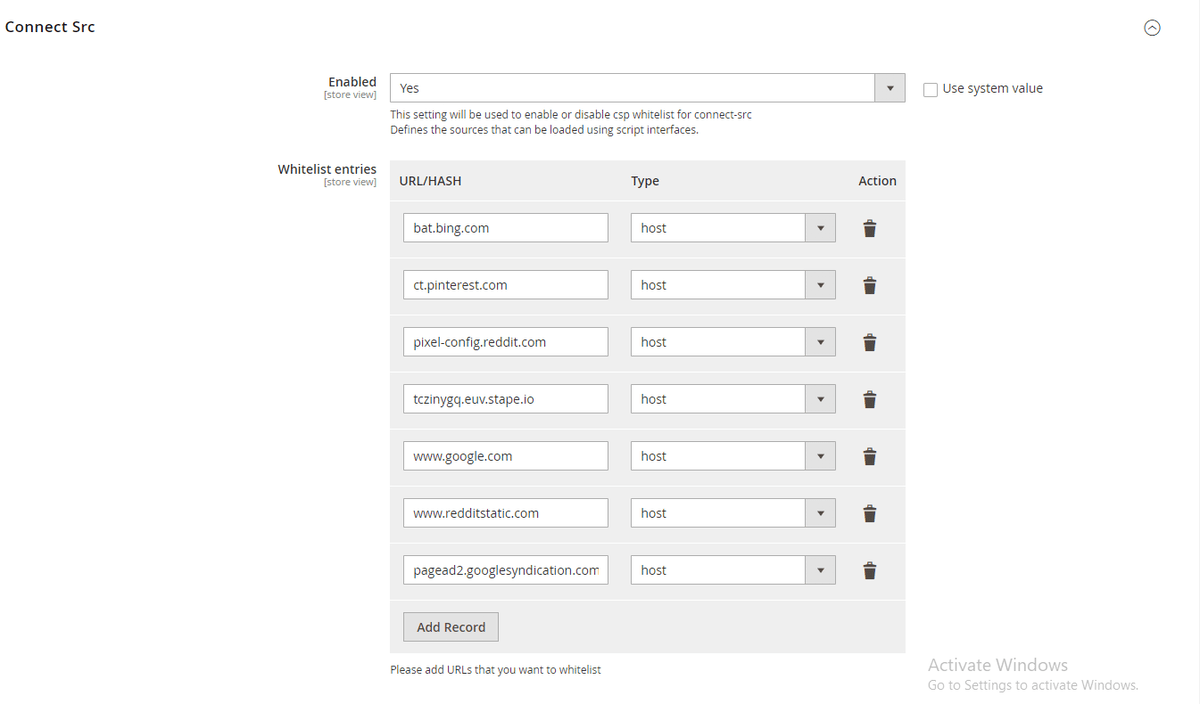
- Enabled- Select "Yes" or "No" to enable or disable csp whitelist for connect-src
- Whitelist entries- Please add URLs that you want to whitelist. By default, the type of entry added would be host. You can also delete this entry and add multiple entries.
-
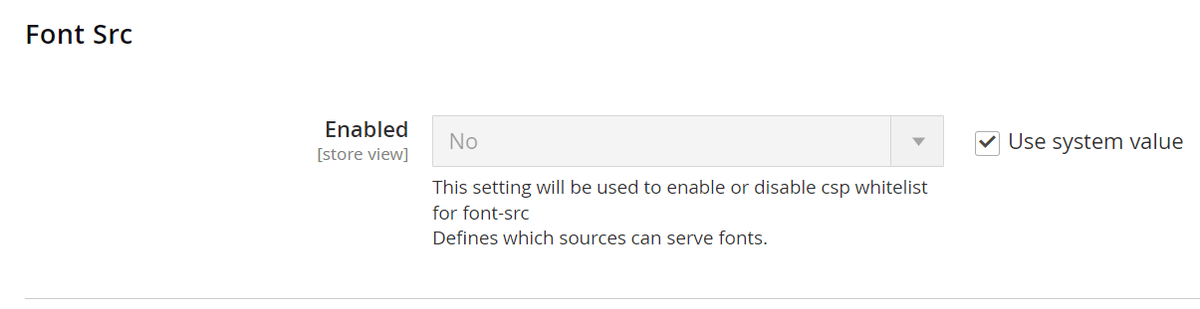
Font Src
- Enabled- Select "Yes" or "No" to enable or disable csp whitelist for font-src
- Whitelist entries- Please add URLs that you want to whitelist. By default, the type of entry added would be host. You can also delete this entry and add multiple entries.
-
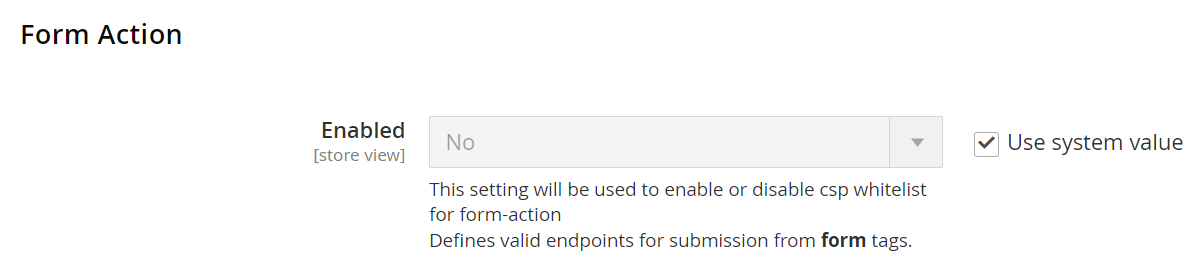
Form Action
- Enabled- Select "Yes" or "No" to enable or disable csp whitelist for form-action
- Whitelist entries- Please add URLs that you want to whitelist. By default, the type of entry added would be host. You can also delete this entry and add multiple entries.
-
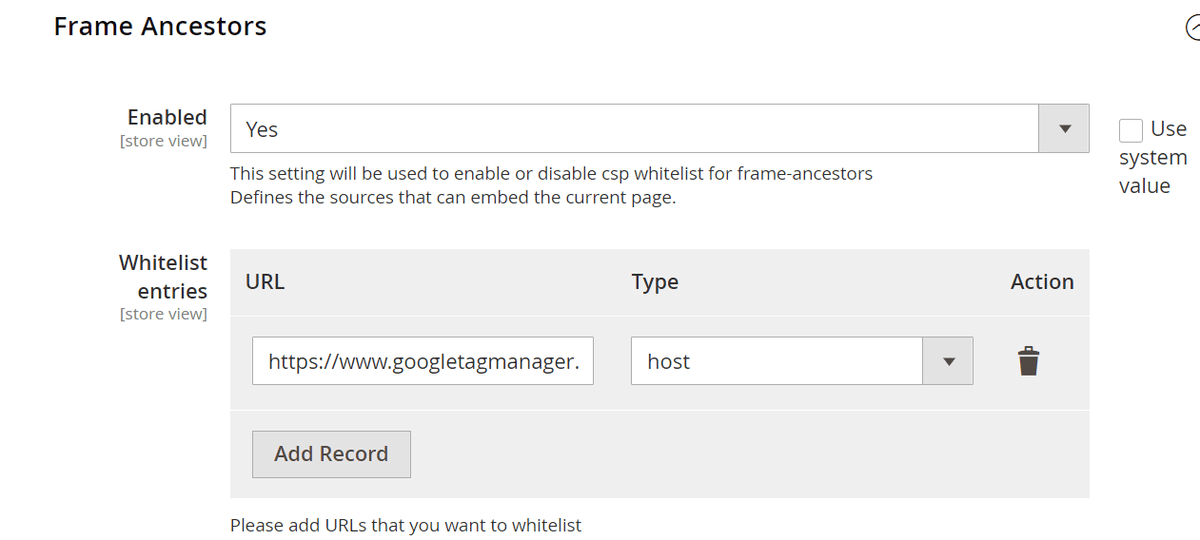
Frame Ancestors
- Enabled- Select "Yes" or "No" to enable or disable csp whitelist for frame-ancestors
- Whitelist entries- Please add URLs that you want to whitelist. By default, the type of entry added would be host. You can also delete this entry and add multiple entries.
-
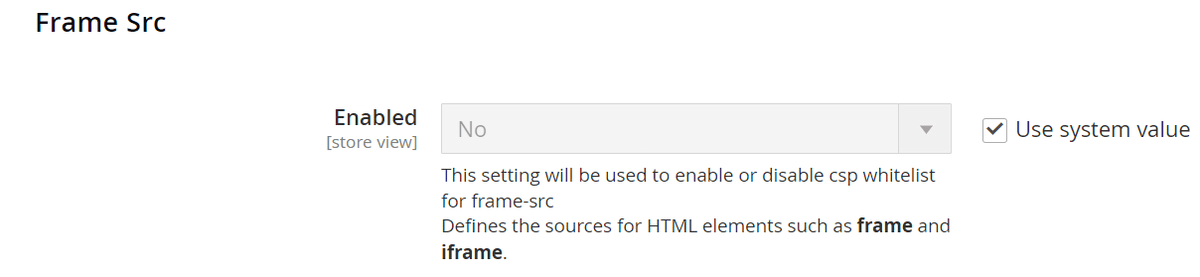
Frame Src
- Enabled- Select "Yes" or "No" to enable or disable csp whitelist for frame-src
- Whitelist entries- Please add URLs that you want to whitelist. By default, the type of entry added would be host. You can also delete this entry and add multiple entries.
-
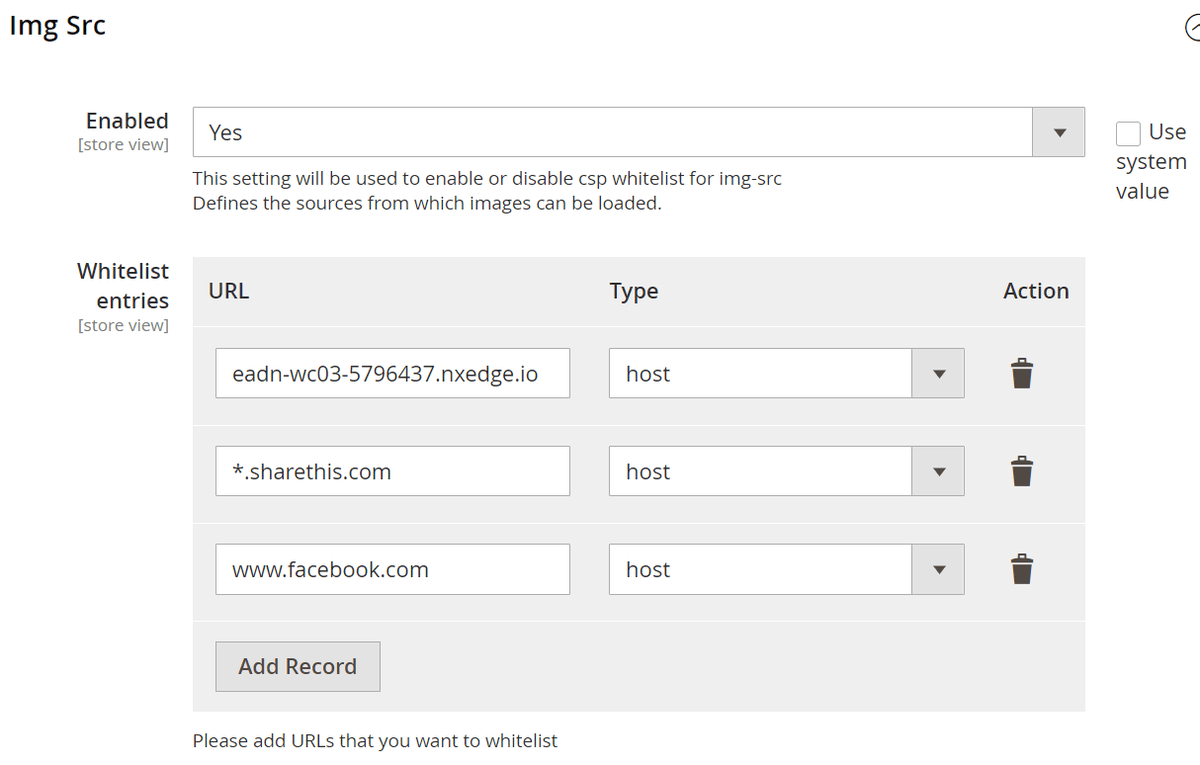
Img Src
- Enabled- Select "Yes" or "No" to enable or disable csp whitelist for img-src
- Whitelist entries- Please add URLs that you want to whitelist. By default, the type of entry added would be host. You can also delete this entry and add multiple entries.
-
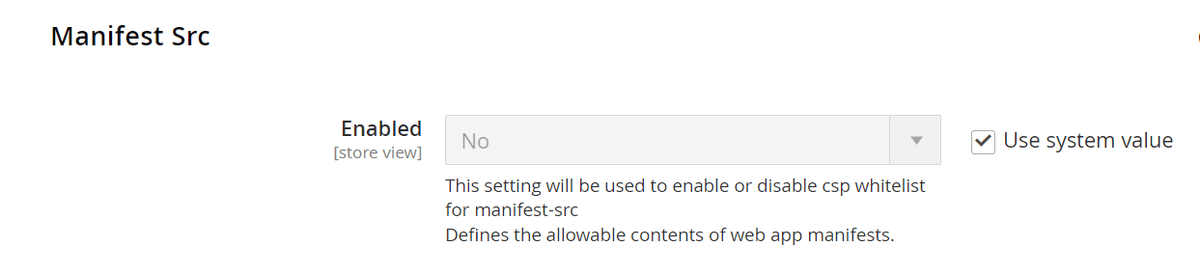
Manifest Src
- Enabled- Select "Yes" or "No" to enable or disable csp whitelist for manifest-src
- Whitelist entries- Please add URLs that you want to whitelist. By default, the type of entry added would be host. You can also delete this entry and add multiple entries.
-
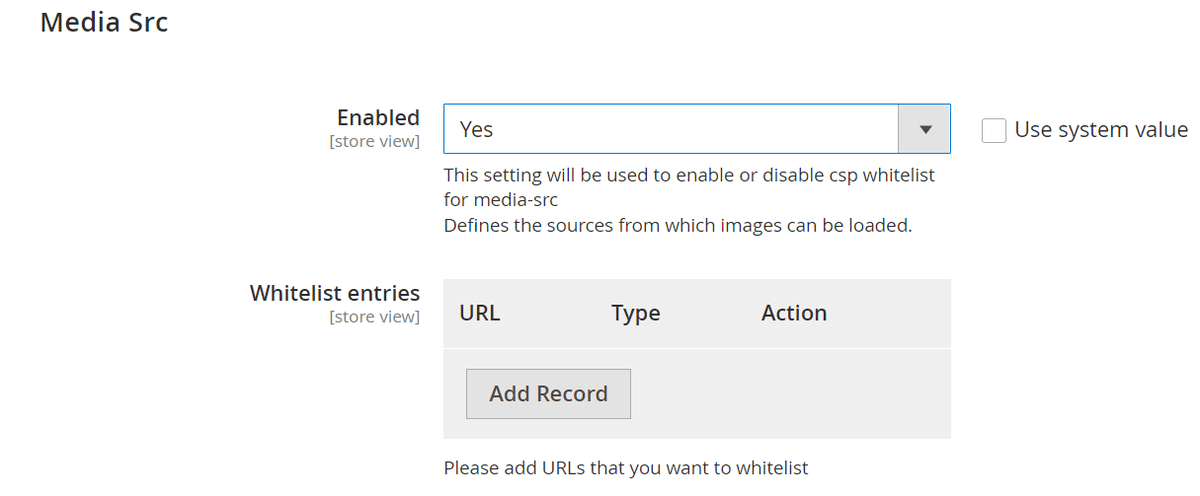
Media Src
- Enabled- Select "Yes" or "No" to enable or disable csp whitelist for media-src
- Whitelist entries- Please add URLs that you want to whitelist. By default, the type of entry added would be host. You can also delete this entry and add multiple entries.
-
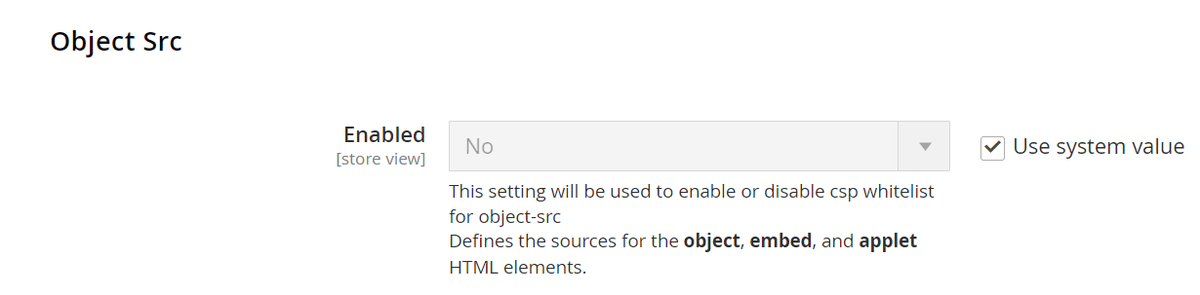
Object Src
- Enabled- Select "Yes" or "No" to enable or disable csp whitelist for object-src
- Whitelist entries- Please add URLs that you want to whitelist. By default, the type of entry added would be host. You can also delete this entry and add multiple entries.
-
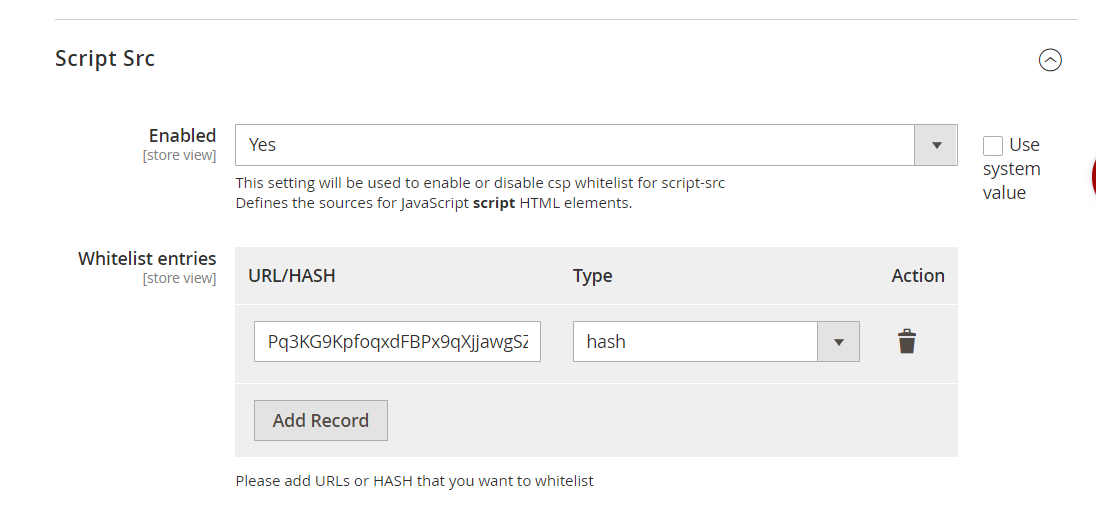
Script Src
- Enabled- Select "Yes" or "No" to enable or disable csp whitelist for script-src
- Whitelist entries- Please add URLs that you want to whitelist. By default, the type of entry added would be host. You can also delete this entry and add multiple entries.
-
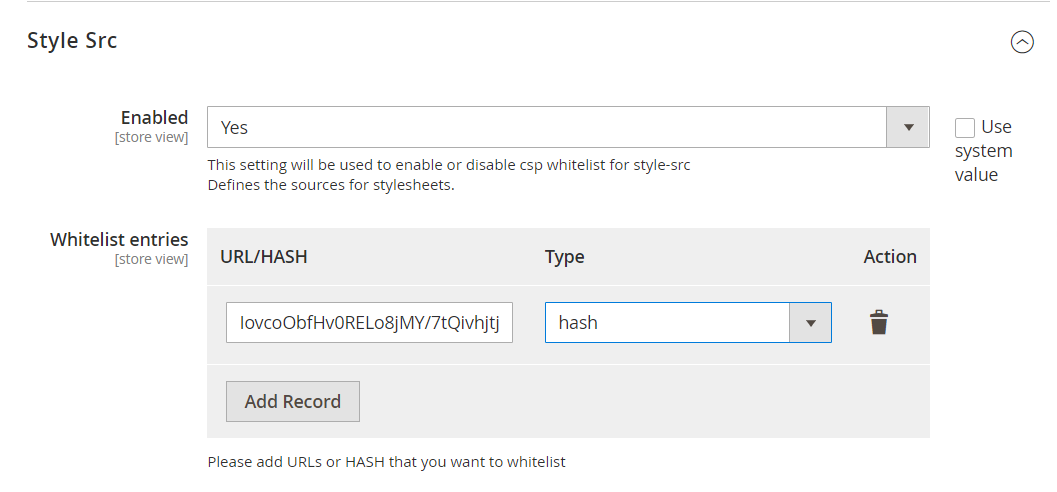
Style Src
- Enabled- Select "Yes" or "No" to enable or disable csp whitelist for style-src
- Whitelist entries- Please add URLs that you want to whitelist. By default, the type of entry added would be host. You can also delete this entry and add multiple entries.
Critical Security Overrides
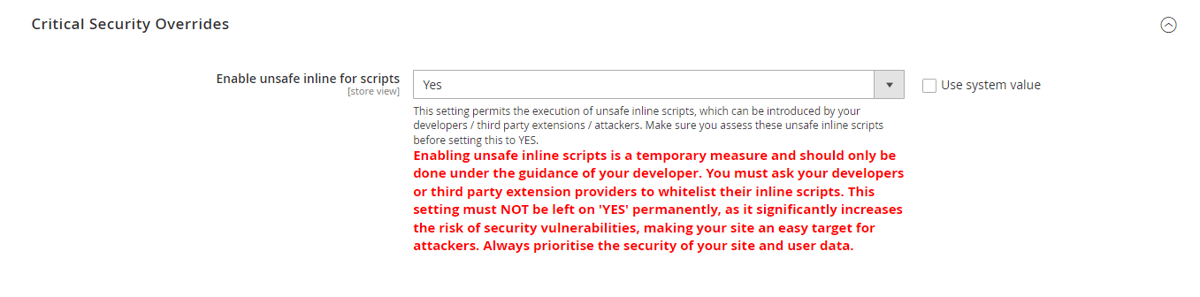
- Enable Unsafe Inline Script- This setting permits the execution of unsafe inline scripts, which can be introduced by your developers / third party extensions / attackers. Make sure you assess these unsafe inline scripts before setting this to YES.
Caution: Enabling unsafe inline scripts is a temporary measure and should only be done under the guidance of your developer. You must ask your developers or third party extension providers to whitelist their inline scripts. This setting must NOT be left on 'YES' permanently, as it significantly increases the risk of security vulnerabilities, making your site an easy target for attackers. Always prioritise the security of your site and user data.
CSP Reports Grid
The CSP Reports Grid collects and displays all the CSP errors on both frontend and backend. To enable report collection please make sure to add the following URLs in Security > CSP section of your Store config:-
- Admin Default - https://BASE_URL/scommercereporturi/report/admin
- Storefront** Default** - https://BASE_URL/scommercereporturi/report/storefront
To access the grid go to Admin>System>Scommerce CSP Records> CSP Report Only Grid
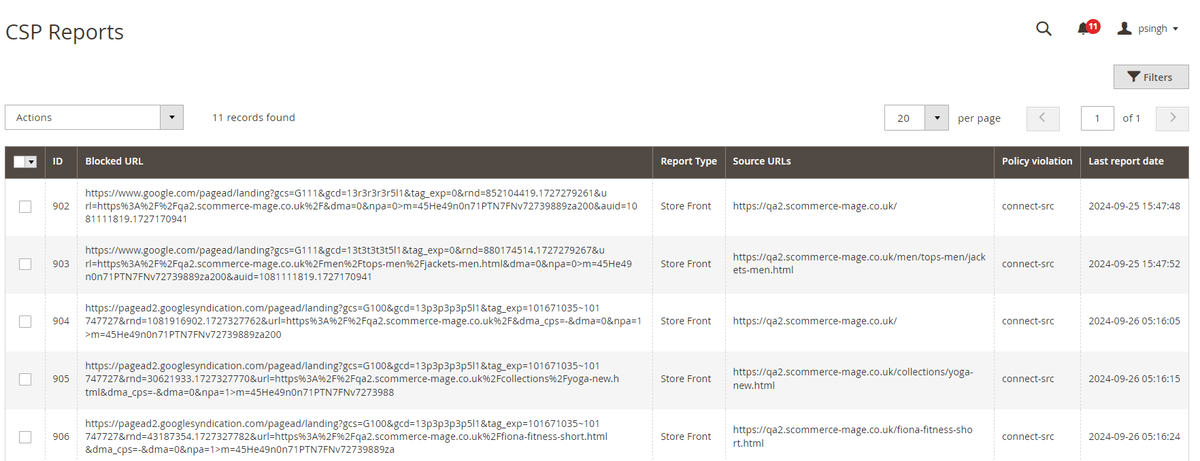
- ID:- Id of the record
- Blocked URL:- The URL reported in the CSP error
- Report Type:- Store Front (frontend) or Admin(backend), where the error was reported
- Source URLs:- The Source URL of the page where this error was reported
- Policy violation:- The CSP directive which was violated in this record.
- Last report date:- When was this error last reported.
Working of the extension
Steps to Check and Fix Console CSP Errors thorugh CSP Reports Grid
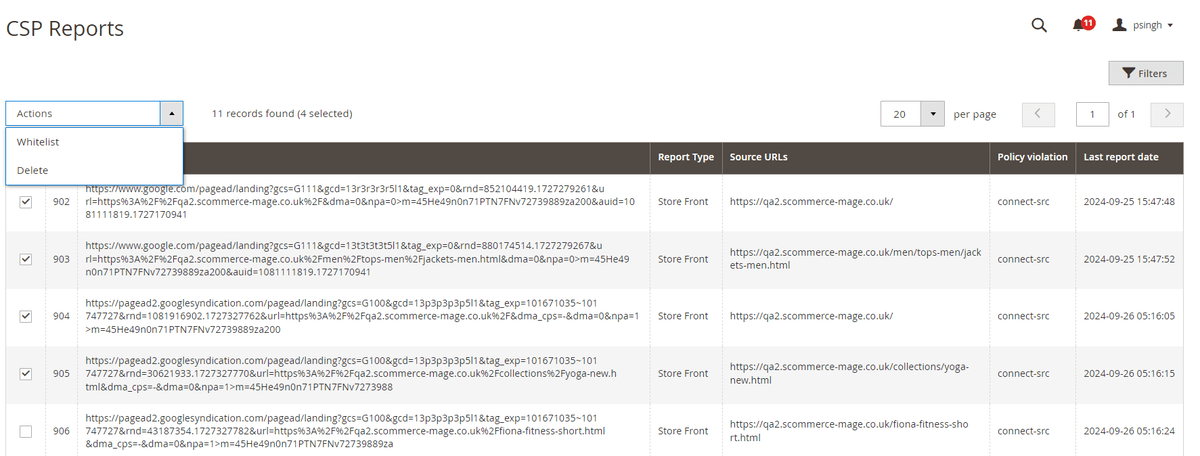
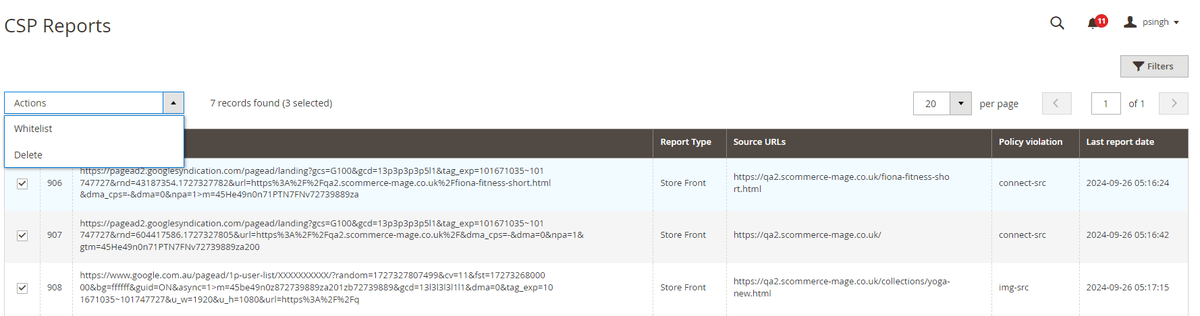
Go to Admin>System>Scommerce CSP Records> CSP Report Only Grid, select the error records that you want to whitelist then from the Actions dropdown, select whitelist.
Please clear caches as prompted:-
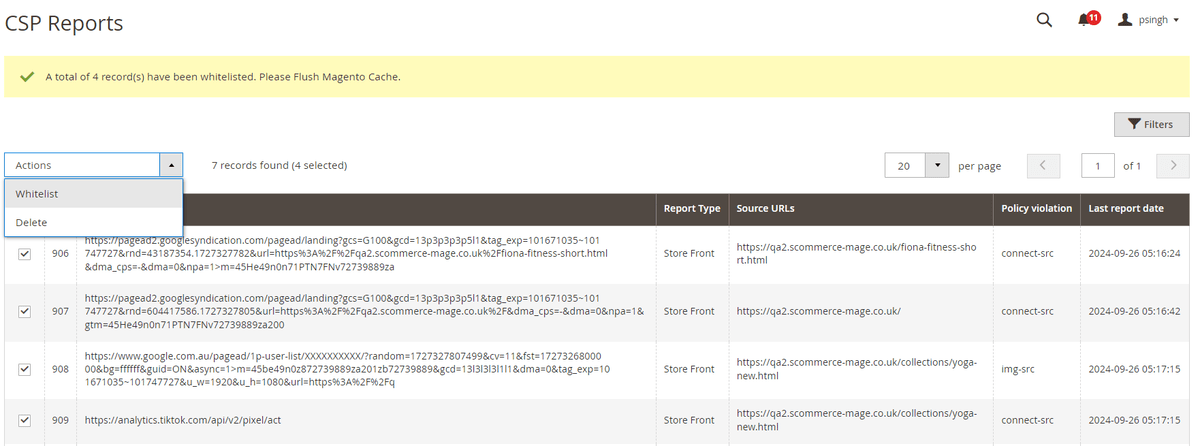
Once done all the selected entries will be whitelisted into their specific CSP directive and should be visible in the admin configuration.
Note:- If you have already whitelisted the entries manually in the configuration then you can delete these records from the grid by selection the records that you want to delete and then click on Action dropdown and select delete.
Steps to Check and Fix Console CSP Errors Manually
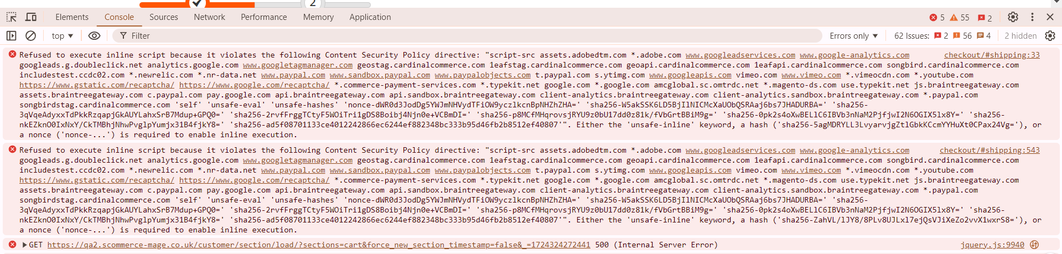
- Check the errors present in the frontend's console.

- Check the source of these errors.

- Check the URL present in these errors.

- In the backend, add the URL to the source to which that error belongs to.
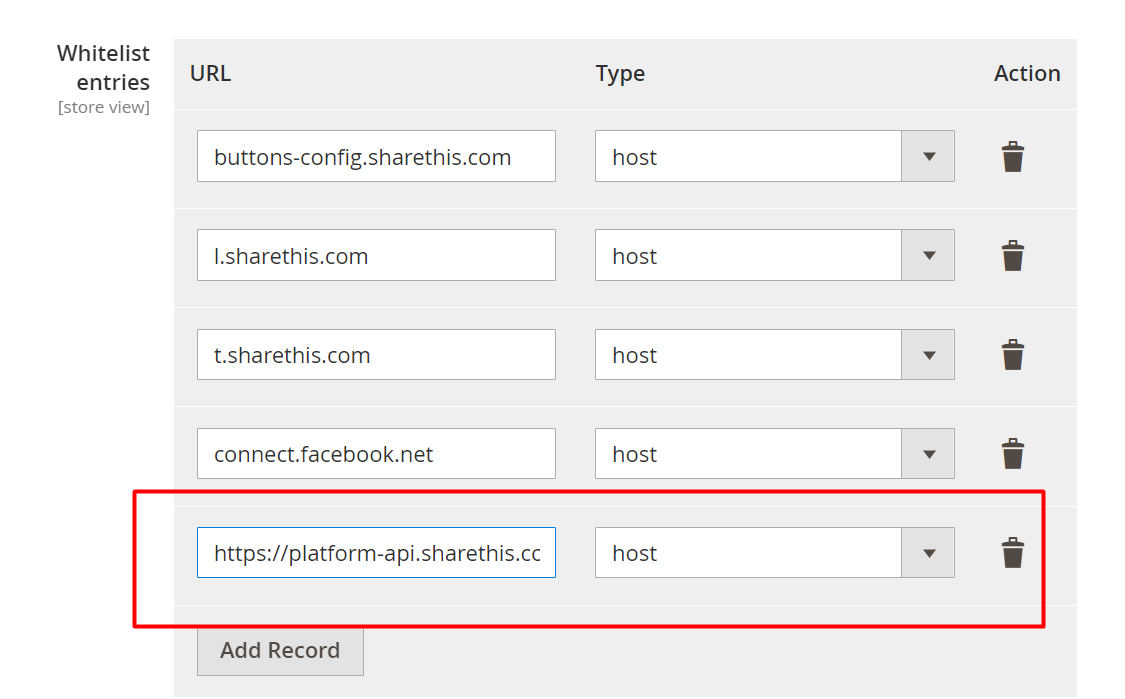
- You would no longer see the error on the frontend

Fixing Inline Script and Inline Style Content Security Policy Issues
In this section, we will show you how to fix the inline script and style related console errors for Content Security Policy. Please check the image below:
-
Identify the script or style tag that's causing the console error.
-
Create SHA256 hash of contents of with the script or style tag and then use bas64 to encode this hash. It can be done all together :- https://emn178.github.io/online-tools/sha256.html
-
Alternatively you can generate the hash using PHP as shown below.
$whitelistHash = base64_encode(hash('sha256', $content, true)); -
Next we add this hash to our module in the correct section i.e either style or script.
Let us look at examples to understand this process better:
Inline Style Error Example
- Suppose we identified the style thats causing the issue as follows:
<style>
body {
background-color: #f3f3f3;
}
</style>- Next we will go the site and create a SHA256 hash as well as the base64 encode of this hash of the contents of the style tag as shown in screengrab below:
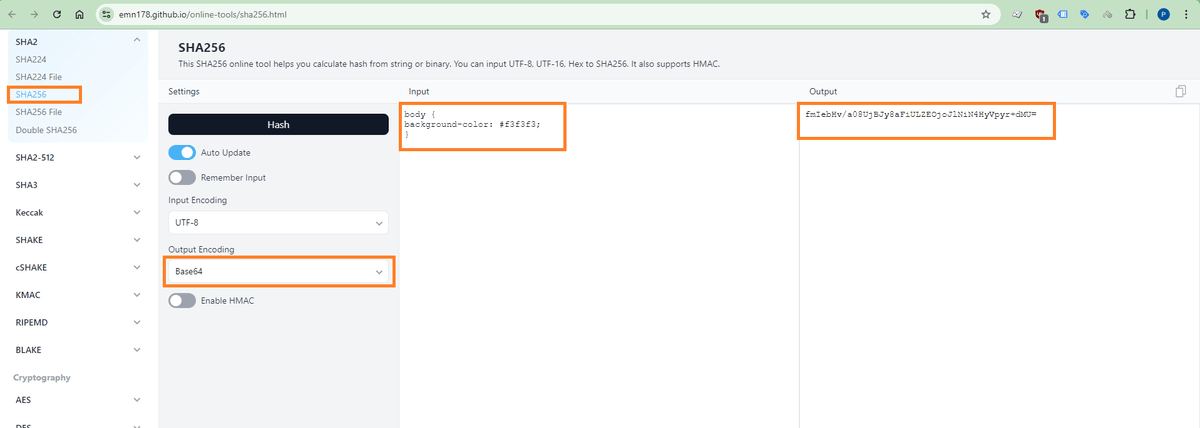
- Now copy this hash and go to Stores>Configuration>Scommerce Configuration>CSP Whitelist and scroll down to find the Style Src section. Add the hash here as shown in the image below:
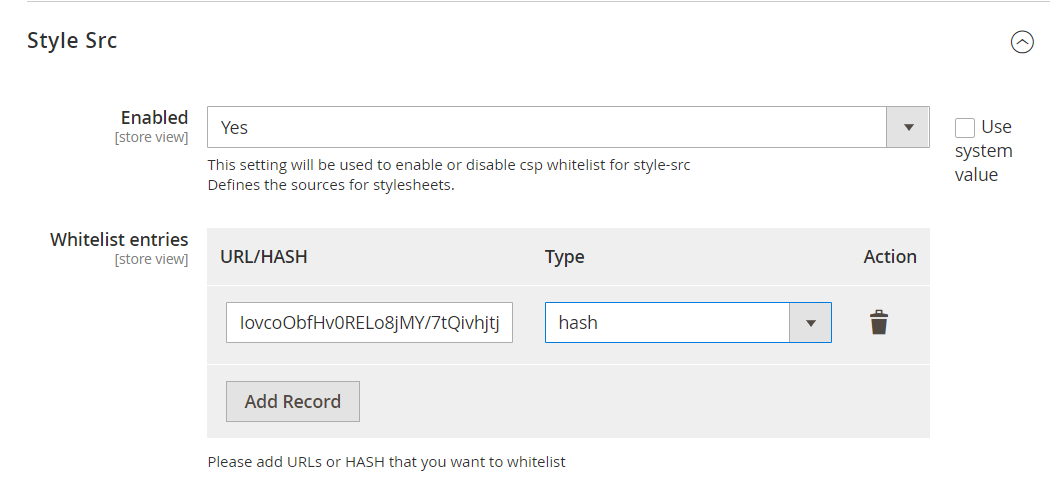
- Please make sure hash is selected in the type dropdown. This should resolve the console error.
Inline Script Error Example
- The identified script tag causing the issue is as follows:
<script>
console.log('Hello, world!');
</script>- We will go the site(https://emn178.github.io/online-tools/sha256.html) and create a SHA256 hash as well as the base64 encode of this hash of the contents of the style tag as shown in screengrab below:
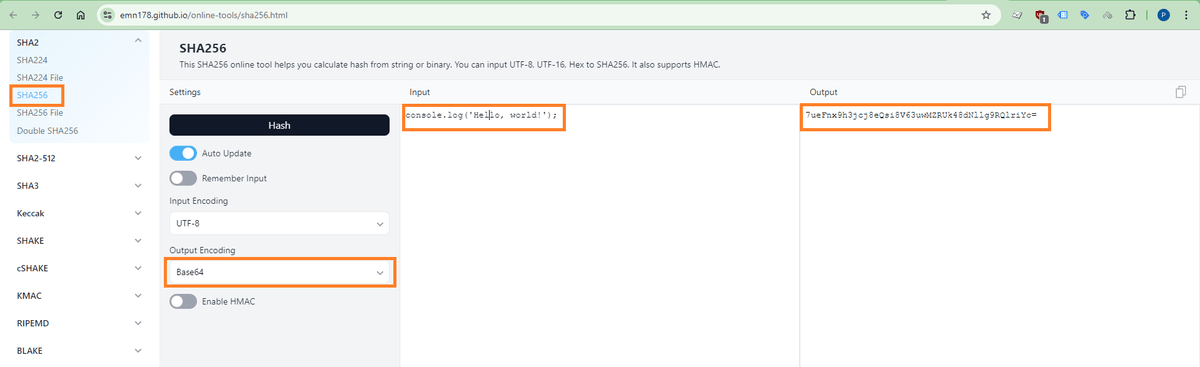
- Now copy this hash and go to Stores>Configuration>Scommerce Configuration>CSP Whitelist and scroll down to find the Script Src section. Add the hash here as shown in the image below:
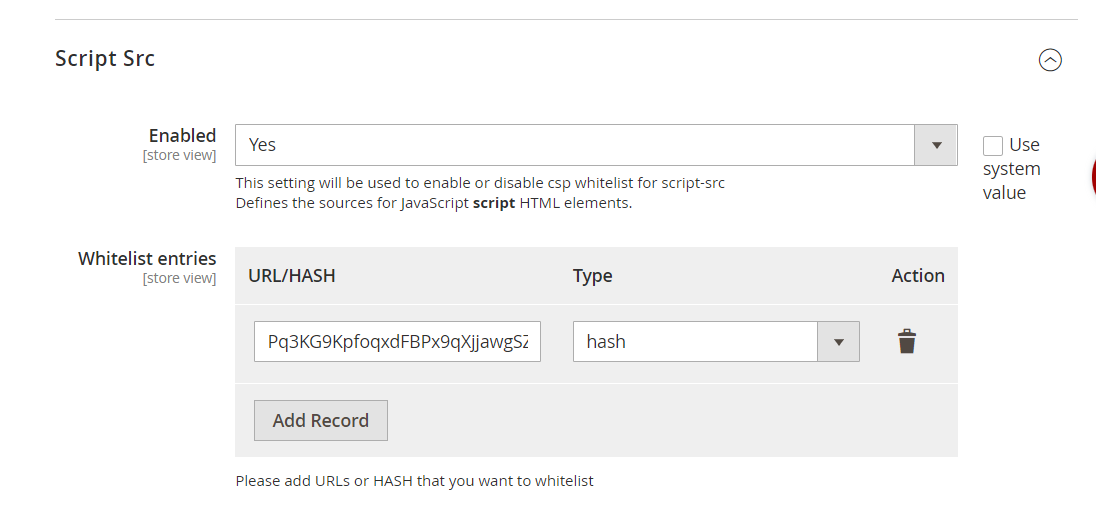
- Please make sure hash is selected in the type dropdown. This should resolve the console error.
If you have a question related to this extension please check out our FAQ Section first. If you can't find the answer you are looking for then please contact support@scommerce-mage.com.
Magento 2 OTP Login
Installation and User Guide for Magento 2 OTP Login Extension
Table of Contents
- Installation
- Installation via app/code
- Installation via Composer
- Configuration Settings for OTP Login
- Sign in using OTP
- Registration using OTP
- Update Mobile Number
Installation
-
Installation via app/code: Upload the content of the module to your root folder. This will not overwrite the existing Magento folder or files, only the new contents will be added. After the successful upload of the package, run below commands on Magento 2 root directory.
php bin/magento setup:upgrade php bin/magento setup:di:compile php bin/magento setup:static-content:deploy -
Installation via Composer: Please follow the guide provided in the below link to complete the installation via composer.
Configuration Settings for OTP Login
Go to Admin > Stores > Configuration > Scommerce Configuration > OTP Login
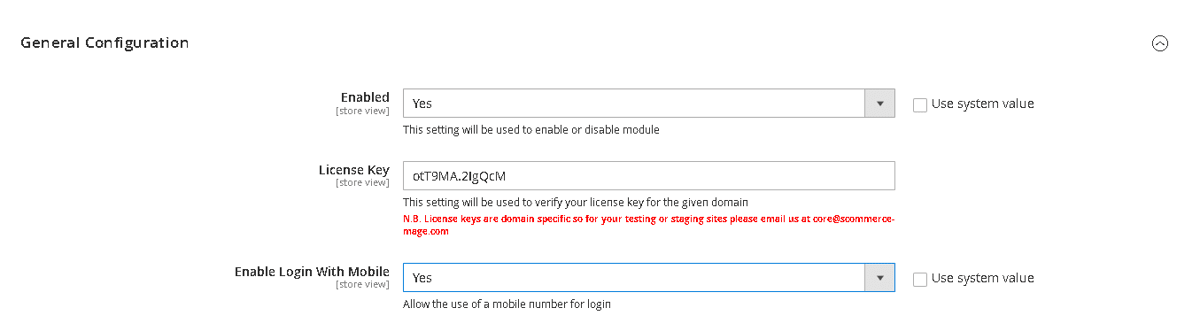
General Settings
- Enabled - Select "Yes" or "No" to enable or disable the module.
- License Key - Please add the license for the extension which is provided in the order confirmation email. Please note license keys are site URL specific. Please go to Admin > Stores > Configuration > Scommerce Configuration > Core and click on "Verify" to verify the license key.
- Enable Login with Mobile - Select "Yes" or "No". If set to "Yes" then users will be able to login to the store using their mobile number.
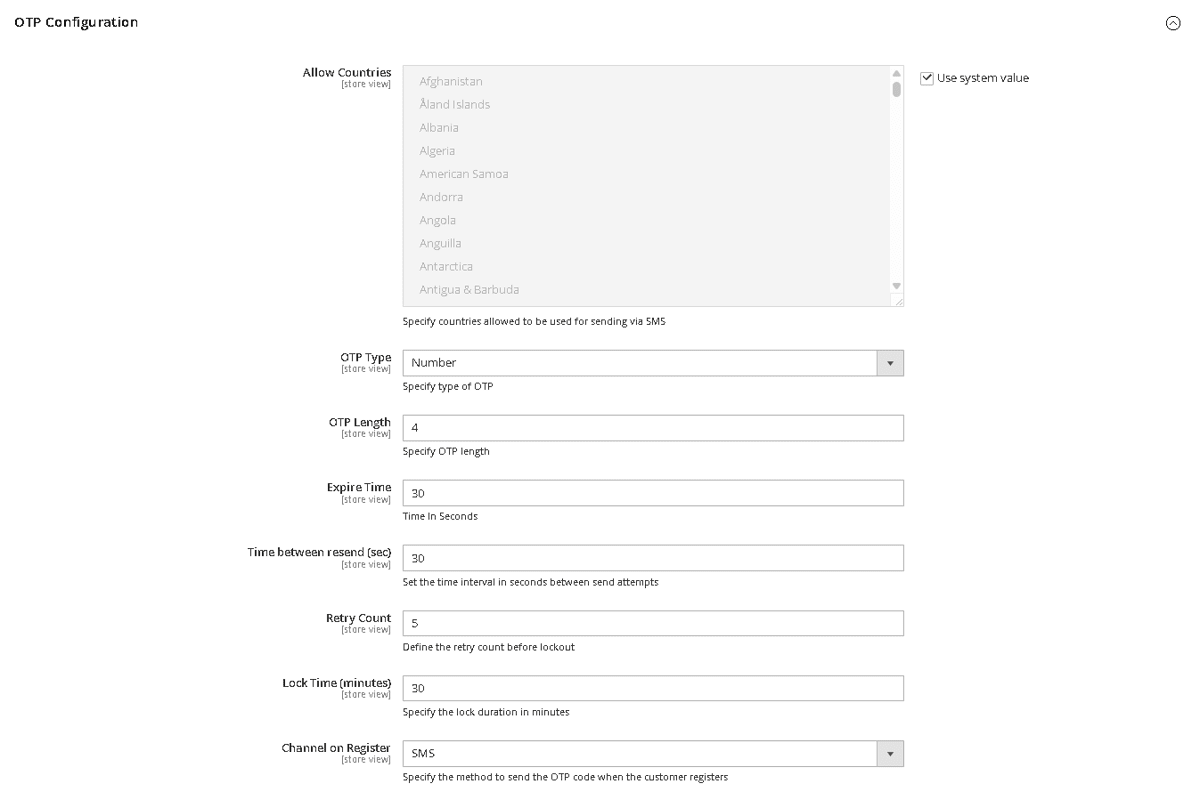
OTP Configuration
- Allowed Countries- Select the countries allowed to be used for sending via SMS.
- OTP Type - You can select the OTP type that sent via sms from Number, Alphabets, and Alphanumeric.
- OTP Length - Enter the length of the OTP sent.
- Expire Time- Add the time after which the OTP is expired and can't be used after this duration.
- Time Between Resend (sec)- Enter the time in seconds after which users will be able to resend the otp.
- Retry Count- Enter the number of retries allowed to resend otp before the user is locked out.
- Lock Time (minutes)- Add the lock time on multiple otp failures
- Channel on Register- Select the countries allowed to be used for sending via SMS.
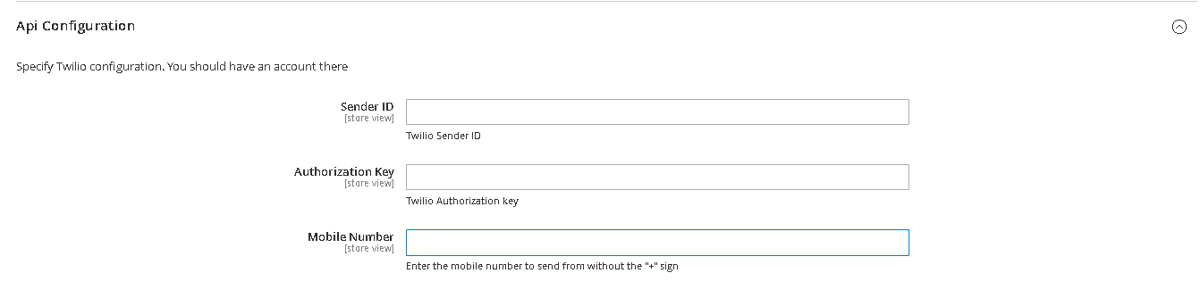
API Configuration
This section is to configure TWILIO as the SMS provider used for sending OTPs. Please visit https://www.twilio.com/en-us to create an account and extract the information to be added below:-
- Sender ID- Add the sender ID from Twilio.
- Authorization Key - Add the authorization key from Twilio
- Mobile Number- Add the mobile number from Twilio without the "+" sign
Emails
This section is to configure the Sender Email and the Email template used to send OTPs via Email:-
- Success Email Sender- Select the Email to be used for sending successful login emails.
- Otp Email Template - Select the Email template to be used for OTP emails.

Messages
This section is to configure the Sender Email and the Email template used to send OTPs via Email:-
- Register Channel Message- Enter the message to be displayed on the registeration page for the users.

Sign In Using OTP
Login with Mobile
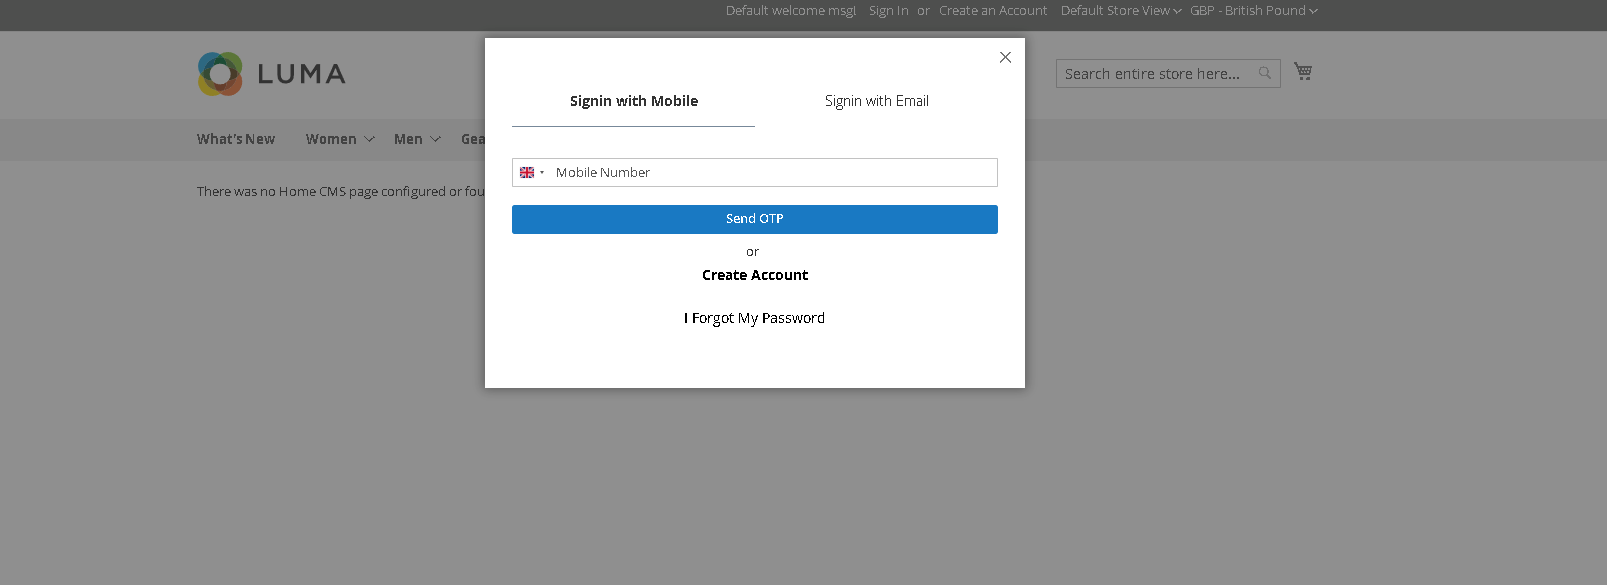
Go to the frontend and click on Sign In, you will it opens a popup to signin with Mobile. Add your Mobile number and click on Send OTP. Make sure Sign in with Mobile is enabled in the configuration only then you will be able to sign in using Mobile Number.
Enter the OTP to sign in
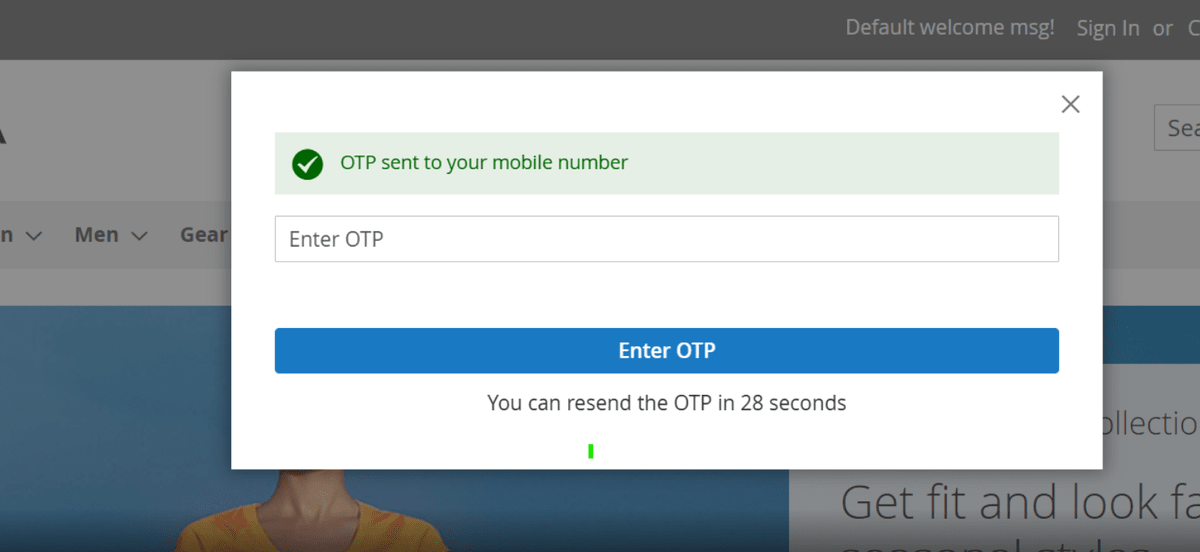
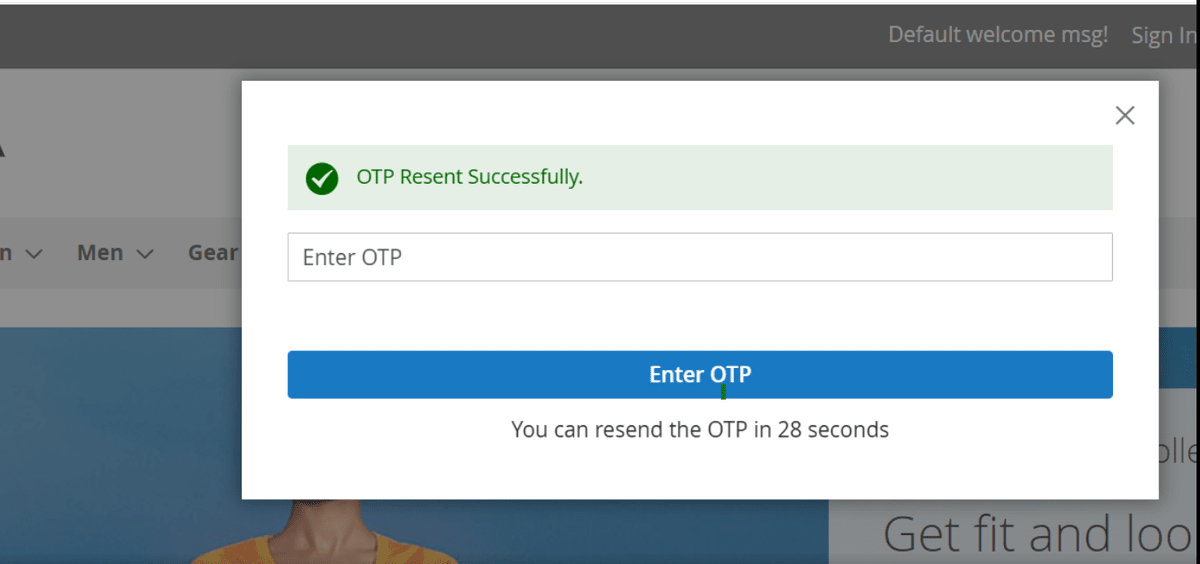
If the OTP is expired click on resend to resend the otp.
Login with Email
Go to the frontend and click on Sign In, you will it opens a popup, select Signin with Email.
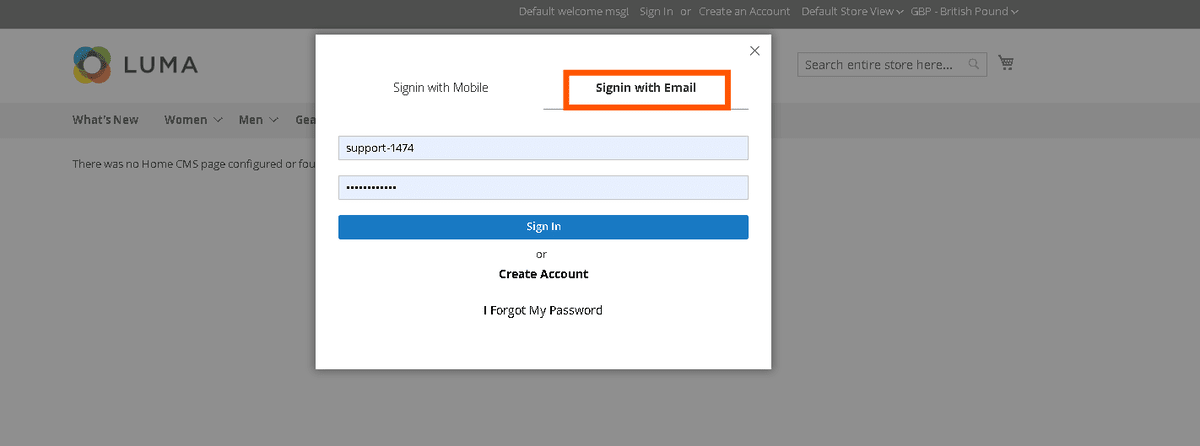
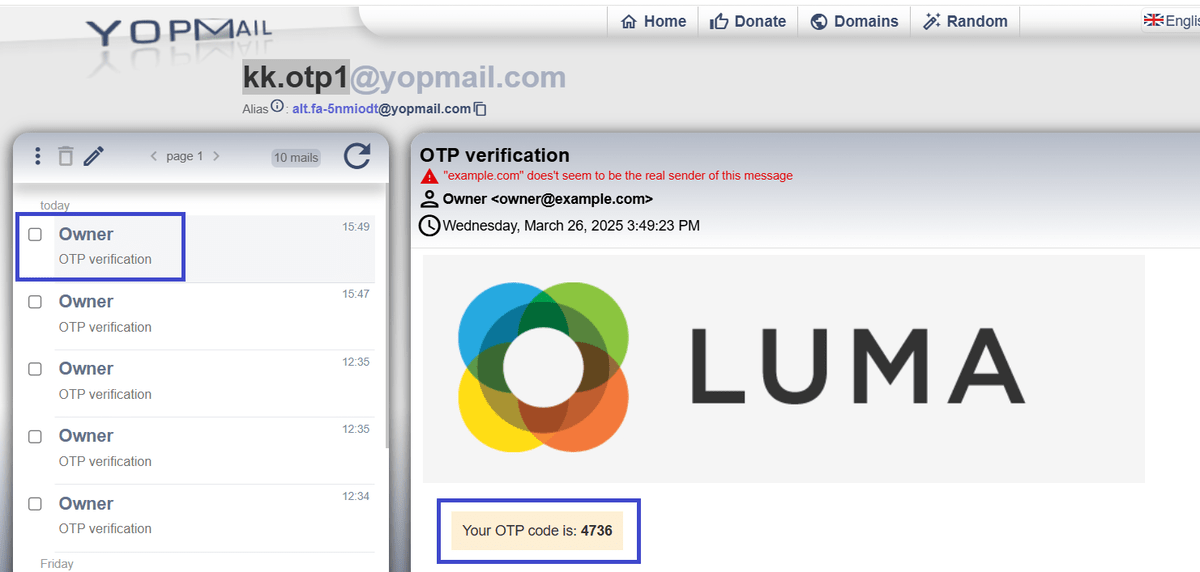
Add credentials and proceed an OTP will be sent to your email, add to login to the store.
Registration using OTP
Go to the store and click on "Create an account", the registration will popup, add your details alongwith your phone number.
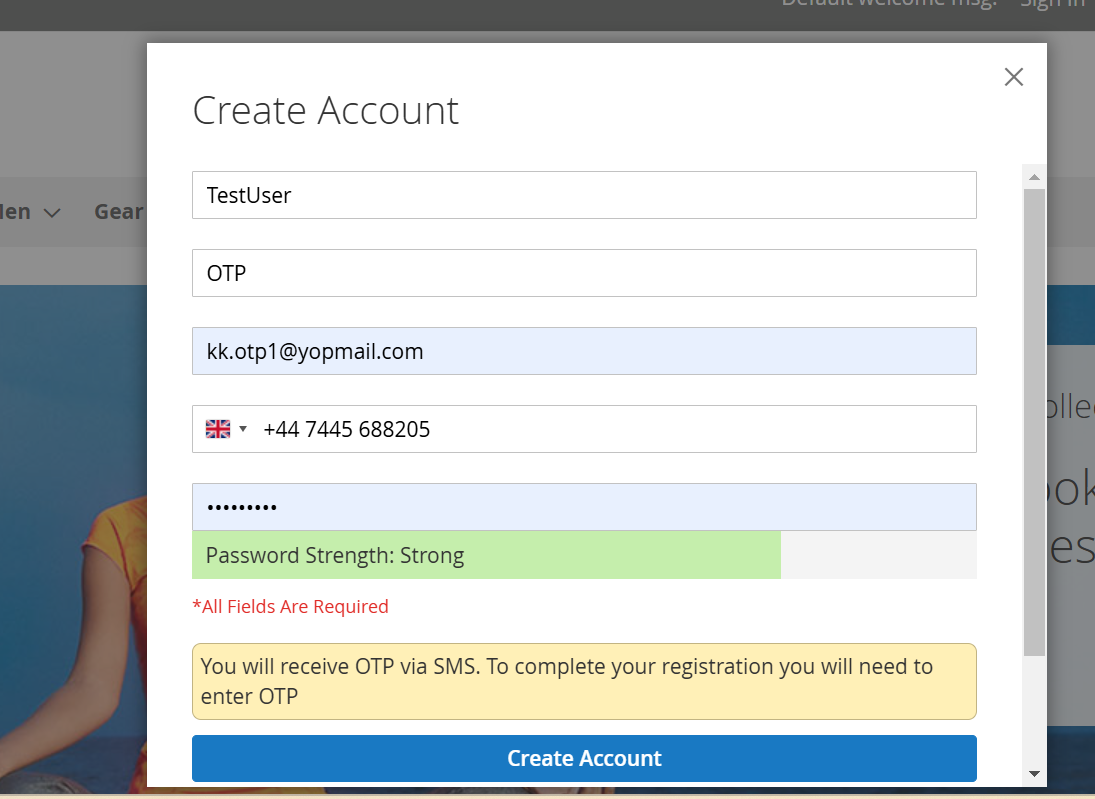
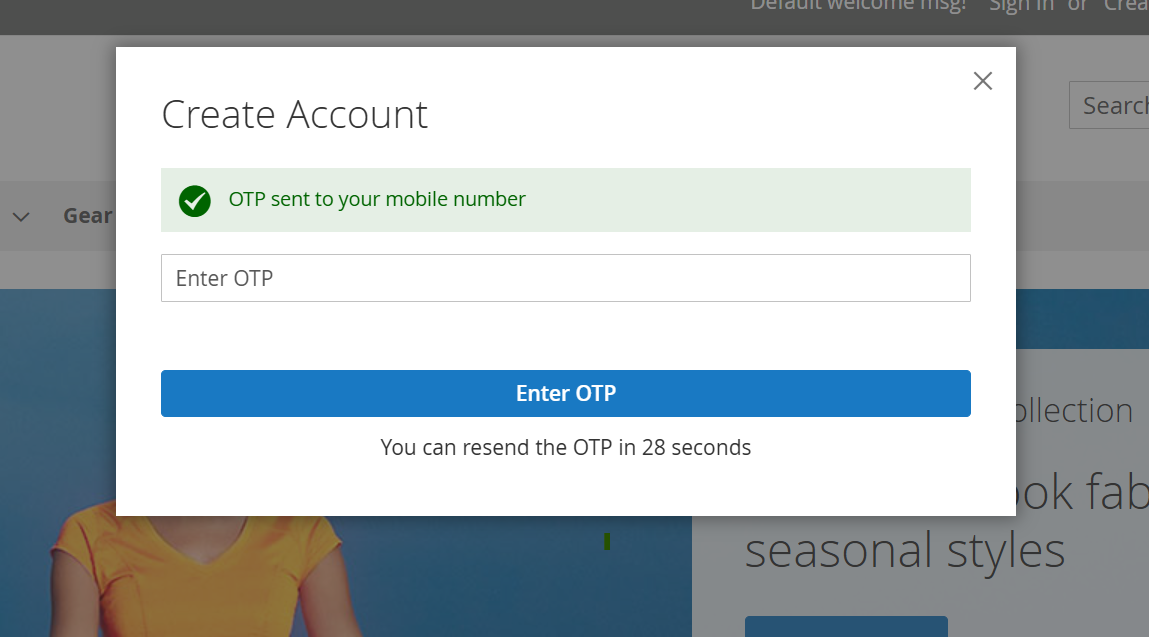
Finally click on Create Account and an OTP will be sent to your mobile number use it to register on the store.
Update Mobile Number
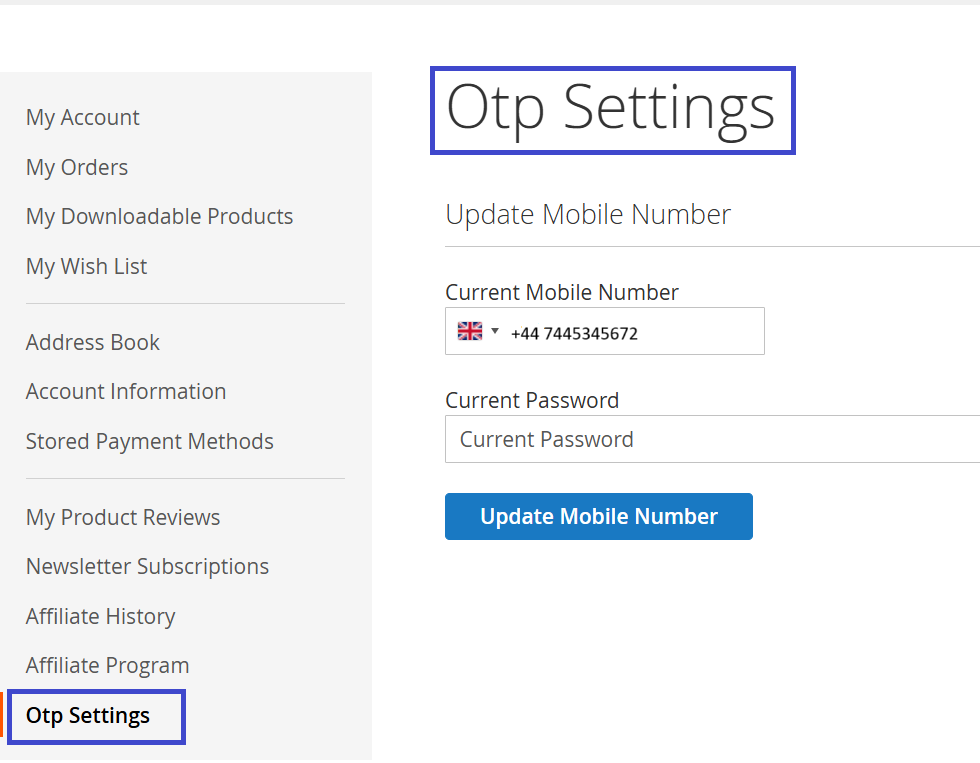
Users can update their Phone Number with the Account by signing in to the store and then going to the "My Account" section. From the left menu click on "OTP Settings". Add your new number and password to update the mobile number.
If you have a question related to this extension please check out our FAQ Section first. If you can't find the answer you are looking for then please contact support@scommerce-mage.com.
Magento 2 Order Delete or Archive
Installation and user Guide for Magento 2 Order Delete or Archive Extension
Table Of Contents
- Installation
- Installation via app/code
- Installation via Composer
- Configuration Settings for Order Delete or Archive
- General Settings
- Order Archive Settings
- Order Delete Settings
- Order Grid
- Archive or Delete Orders from Order View Page
- Archive Grid
- Restore
- Restore Orders From Archived Order View Page
- Automatically Archive Orders
Installation
-
Installation via app/code: Upload the content of the module to your root folder. This will not overwrite the existing Magento folder or files, only the new contents will be added. After the successful upload of the package, run below commands on Magento 2 root directory.
php bin/magento setup:upgrade php bin/magento setup:di:compile php bin/magento setup:static-content:deploy -
Installation via Composer: Please follow the guide provided in the below link to complete the installation via composer.
Configuration Settings for Order Delete or Archive
Go to Admin > Stores > Configuration > Scommerce Configuration > Archive Orders
General Settings
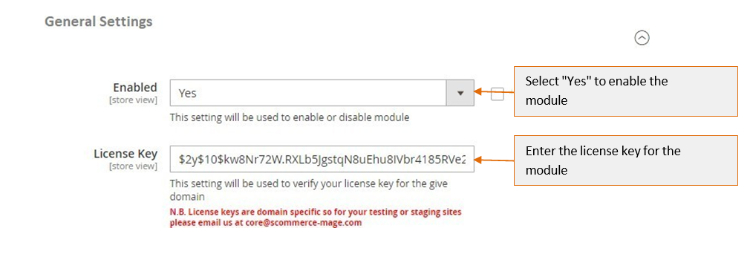
- Module Enable - Select "Yes" or "No" to enable or disable the module.
- License Key -. Please add the license for the extension which is provided in the order confirmation email. Please note license keys are site URL specific. If you require license keys for dev/staging sites then please email us at support@scommerce-mage.com.
Order Archive Settings
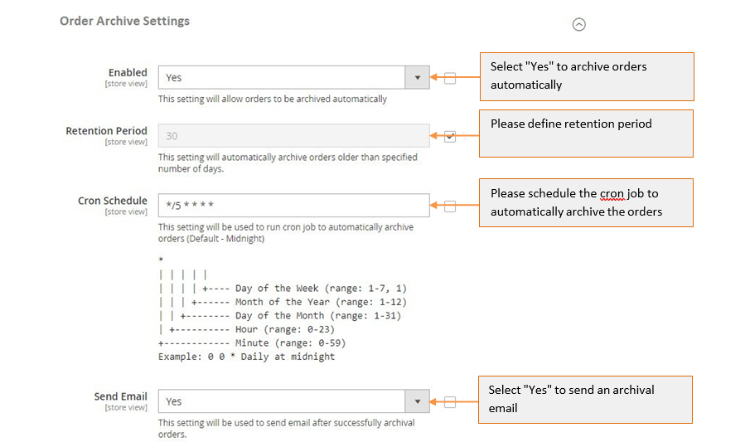
- Enabled (Yes / No) - Select "Yes" to archive orders automatically.
- Retention Period - Please define retention period. This setting will automatically archive orders older than specified number of days
- Cron Schedule - Schedule the cron job to automatically archive the orders (Default - Midnight)
- Send Email (Yes / No) - Select "Yes" to send email after successfully archival orders.
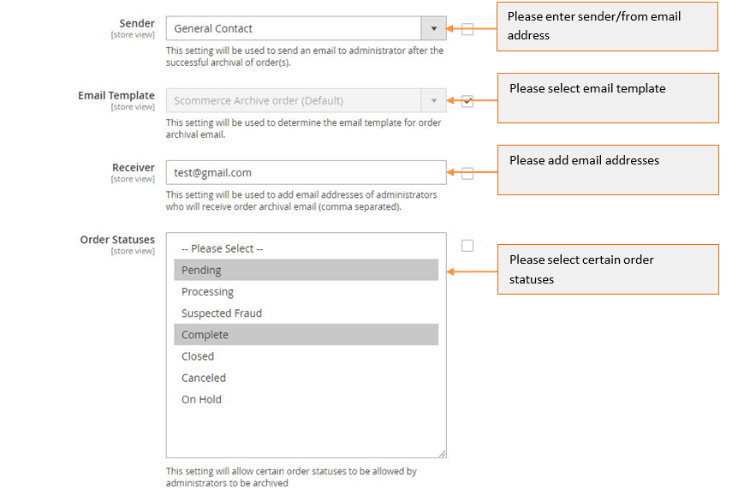
- Sender - Please enter sender/from email address to send an email to administrator after the successful archival of order(s).
- Email Template - Please select email template for order archival email.
- Receiver - Please add email addresses of administrators who will receive order archival email (comma separated).
- Order Statuses (Multi-select) - Please select certain order statuses to be allowed by administrators to be archived.
Order Delete Settings
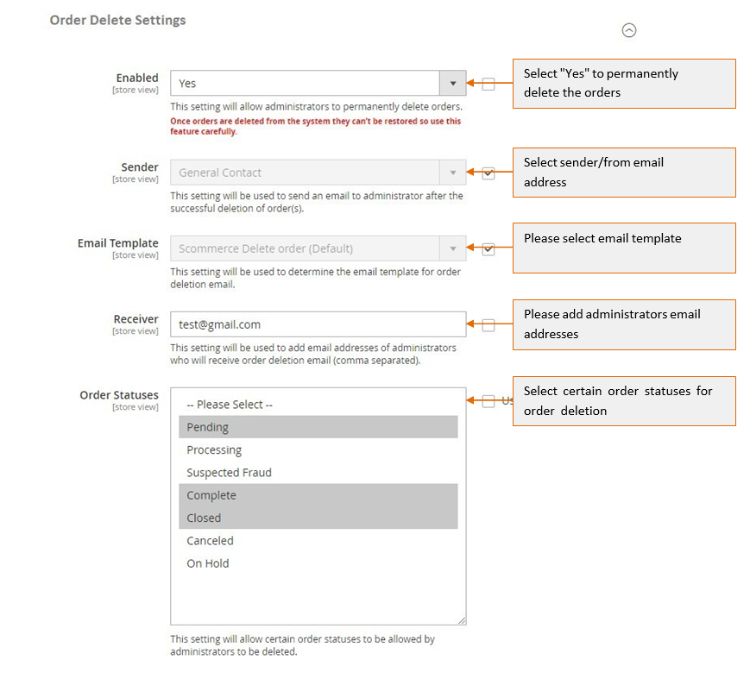
- Enabled (Yes / No) - Please select "Yes" or "No". If set to "Yes" then it will permanently delete orders.
- Sender - Please enter sender/from email address .
- Email Template - Please select email template for order deletion email.
- Receiver - Please add email addresses of administrator, who will receive order deletion email (comma separated).
- Order Statuses (Multi-select) - Please select certain order statuses for order deletion.
Order Grid
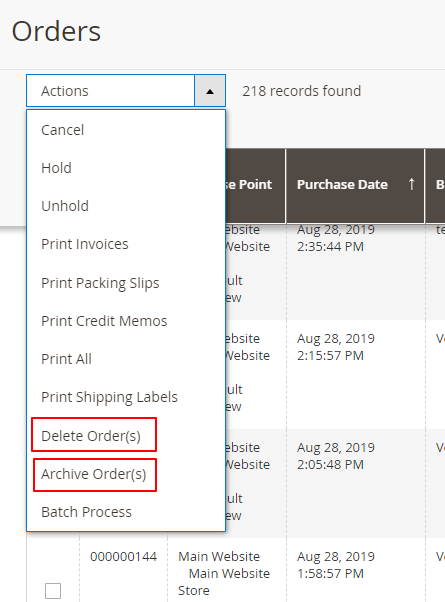
When you enable the "Order Archive" and "Order Delete" settings from Admin > Stores > Configuration > Scommerce Configuration > Archive Orders > Order Archive / Order Delete Settings > Enabled - "Yes" , then it adds two additional options "Archive" and "Delete " under the "Actions" drop-down at Admin > Sales > Order > Actions.
-
Archive - It moves/archives order(s) to another storage(archive grid) instead of deleting them. This action can be restored from the archive order view page.
-
Delete - It deletes order(s) permanently. The "Delete" action cannot be reversed and erases all order(s) and related information.
-
Archive or Delete Orders from Order View Page - You can delete and archive order(s) from, Admin > Sales > Orders > Select Order > View. The order view page will have two additional options "Delete" and "Archive" and using these two buttons you can perform "Delete" and "Archive" actions. Buttons will only be visible when the module is enabled and the administrator has right role to archive/delete order(s).

Archive Grid
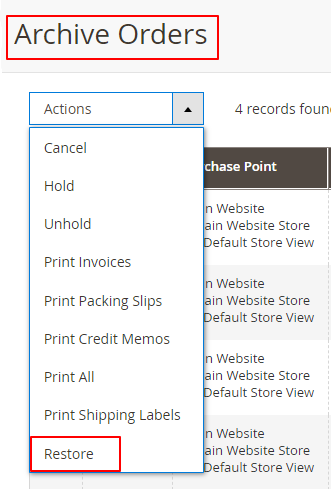
To view archived orders, go to Admin > Sales > Archive Orders. This grid will have an additional option "Restore "under "Actions" drop-down to restore the archived orders.
-
Restore - By selecting "Restore" from Admin > Sales > Archive Orders> Actions drop-down you can easily restore archived order(s).
-
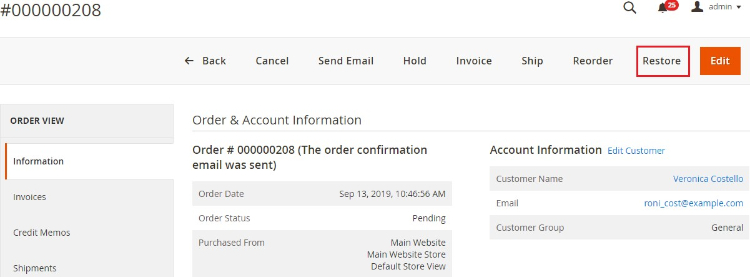
Restore Orders From Archived Order View Page - You can restore archived orders from Admin > Sales > Archive Orders > Select Order > View > Click "Restore".
Restore - It restores archived orders.
Automatically Archive Orders
When you enable the module and define the number of days for "Retention Period" from, Admin > Stores > Configuration > Scommerce Configuration > Archive Orders > Order Archive Settings, then it automatically archives order(s) older than defined days. After each successful order archival process, it sends an email to an administrator with details like how many numbers of orders being archived etc..
If you have a question related to this extension please check out our FAQ Section first. If you can't find the answer you are looking for then please contact support@scommerce-mage.com.
Magento 2 Custom Stock Status Extension
Installation and User Guide for Magento 2 Custom Stock Status Extension
Table of Contents
- Installation
- Installation via app/code
- Installation via Composer
- Configuration Settings for Custom Stock Status
- General Settings
- Stock Status Rules Grid
- Add New Rule
- Custom Stock Status and Rule Name at Product Level
- Salable Quantity
- Assign Custom Stock Status Rule to Products Automatically or Manually
- Manually
- Automatically on Cron Run
- Multi Websites Selection
- Custom Stock Status Product Attribute
- Front-end Site View
- Custom Stock Message for Simple Products on the Product Page
- Custom Stock Message for Configurable Products on the Product Page
- Custom Stock Message on the Cart & Checkout Pages
- Custom Stock Message on Related, Cross-sells and Up-sells Products
- Status Message in the Order Confirmation Email
Installation
-
Installation via app/code: Upload the content of the module to your root folder. This will not overwrite the existing Magento folder or files, only the new contents will be added. After the successful upload of the package, run below commands on Magento 2 root directory.
php bin/magento setup:upgrade php bin/magento setup:di:compile php bin/magento setup:static-content:deploy -
Installation via Composer: Please follow the guide provided in the below link to complete the installation via composer.
Configuration Settings for Custom Stock Status
Go to Admin > Stores > Configuration > Scommerce Configuration > Custom Stock Status
General Settings
- Enabled - Select "Yes" or "No" to enable or disable the module.
- License Key - Please add the license for the extension which is provided in the order confirmation email. Please note license keys are site URL specific. If you require license keys for dev/staging sites then please email us at support@scommerce-mage.com.
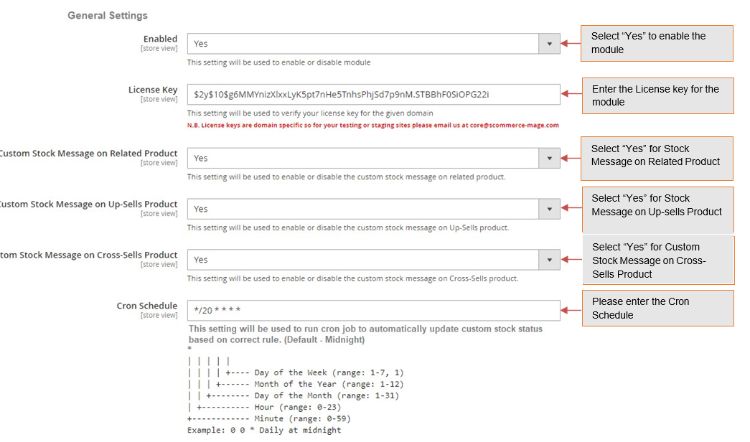
- Custom Stock Message on Related Product – Select "Yes" to enable the custom stock message on related product.
- Custom Stock Message on Up-Sells Product – Select "Yes" to enable the custom stock message on Up-sells product.
- Custom Stock Message or Cross-Sells Product – Select "Yes" to enable the custom stock message on Cross-sells product.
- Cron Schedule – Schedule cron job to automatically update custom stock status based on correct rule.
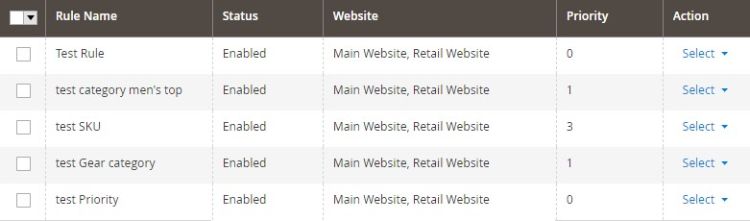
Stock Status Rules Grid – This will be a grid in admin > Catalog > Stock Status Rules, with below column: -
-
ID: ID, this is auto generated and non-editable
-
Rule Name: Name of the rule
-
Status: Status of the rule, Enabled/Disabled
-
Website: Name of the website
-
Priority: Priority of the rule
-
Action: Edit/Delete
-
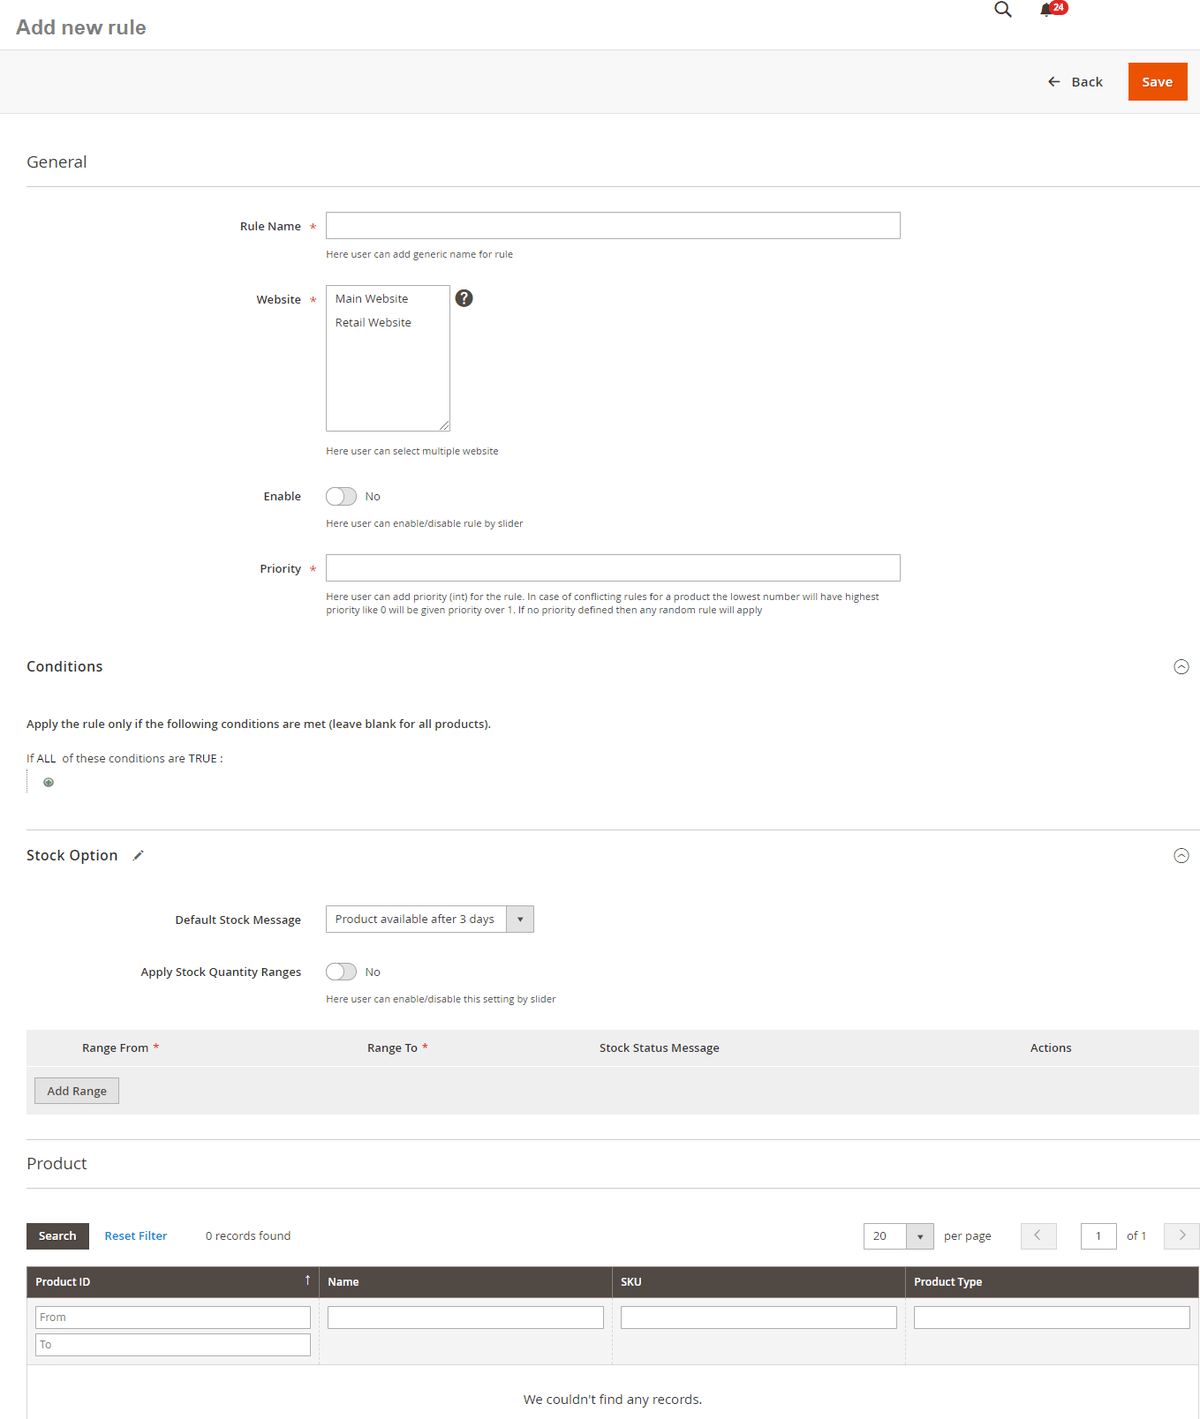
Add New Rule – You can add new rule by clicking "Add New Rule" from Admin > Catalog > Products > Stock Status Rules >Add New Rule, it redirects to the detailed view for Rule from where you can create a new rule by filling the required fields.
-
Rule Name - Add generic name for rule
-
Website - Select website from multi-select, from here you can select multiple website
-
Enable - Please enable/disable rule by slider
-
Priority - You can add priority (int) for the rule. In case of conflicting rules for a product the lowest number will have highest priority like 0 will be given priority over 1. If no priority defined then any random rule will apply
-
Conditions - Add the conditions to match, leave blank for all products
-
Default Stock Message - You can select default stock message from the drop- down, which will be shown on the frontend and replace availability (In Stock / Out Stock) message.
-
Apply Stock Quantity Ranges: You can enable it by turning "On" this option. If it is enabled then it shows below grid where you can define stock ranges and corresponding status. Please note that if the range is not provided for given stock quantity then the default message will be shown.
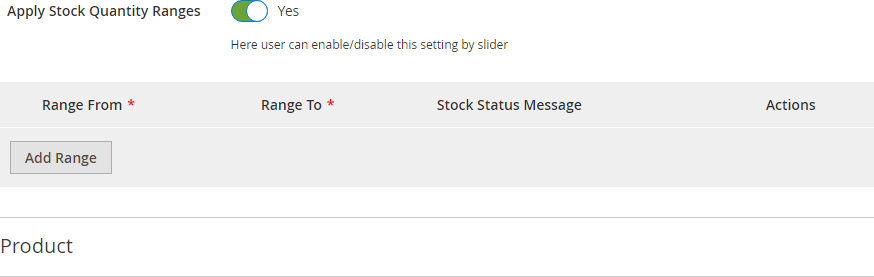
Add New Stock Status Rules - Admin Site View
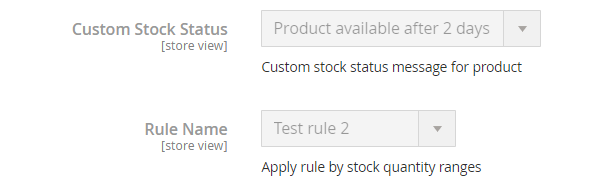
- Custom Stock Status and Rule Name at Product Level - You can view the associated rule to product from Admin > Catalog > Products > Select product.
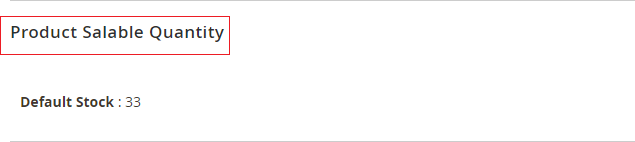
Salable Quantity - On product save it updates the stock status message based on the salable quantity and the quantity rule. To view salable quantity go to Admin > Catalog> products > Select Product > Product Salable Quantity.
Assign Custom Stock Status Rule to Products Automatically or Manually
-
Manually - You can assign rules to product manually from Admin > Catalog> Products > Select Product > Rule Name - Select rule from the "Rule Name" drop-down list.
-
Automatically on Cron Run - You can schedule the Cron job from Admin > Stores > Configuration > Scommerce Configuration > Custom Stock Status, on cron run the rule will be automatically assigned to products based on the matched condition and set the correct message.
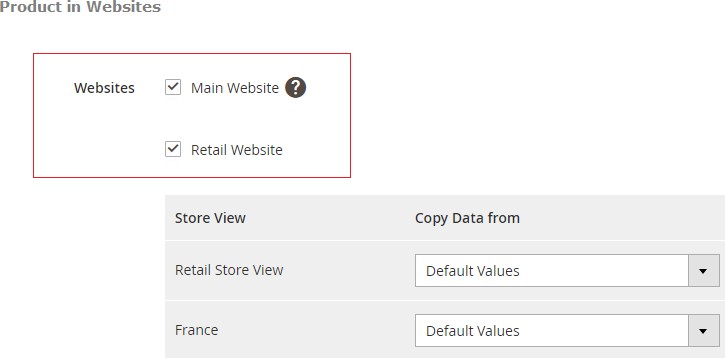
Multi Websites Selection - It fully supports multi-store and websites, you can select websites from Admin > Catalog > Products > Select Product > Product in Websites- check websites.
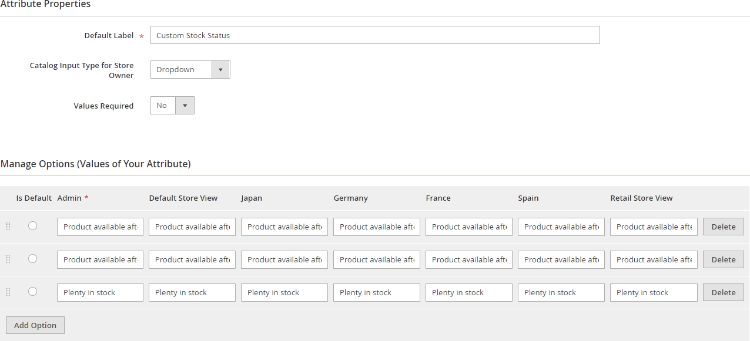
- Custom Stock Status Product Attribute - You can add values to custom stock status product attribute from Admin > Store >Attribute > Product> Product Attribute>Select - custom_stock_status > Properties > Add option, the added values will be populated in the default /custom stock status message drop-down.
Front-end Site View
-
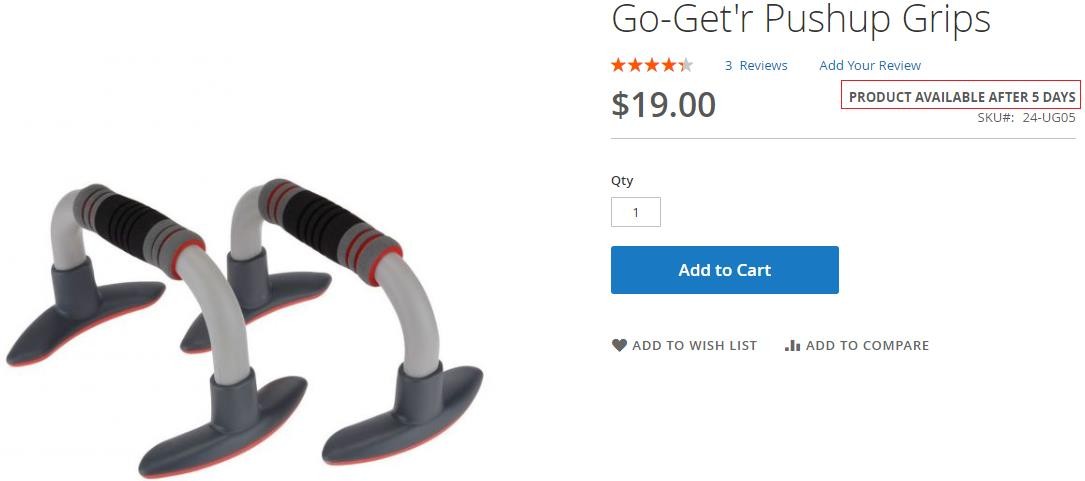
Custom Stock Message for Simple Products on the Product Page – It displays stock status message for simple product based on salable qty and quantity ranges rule.
-
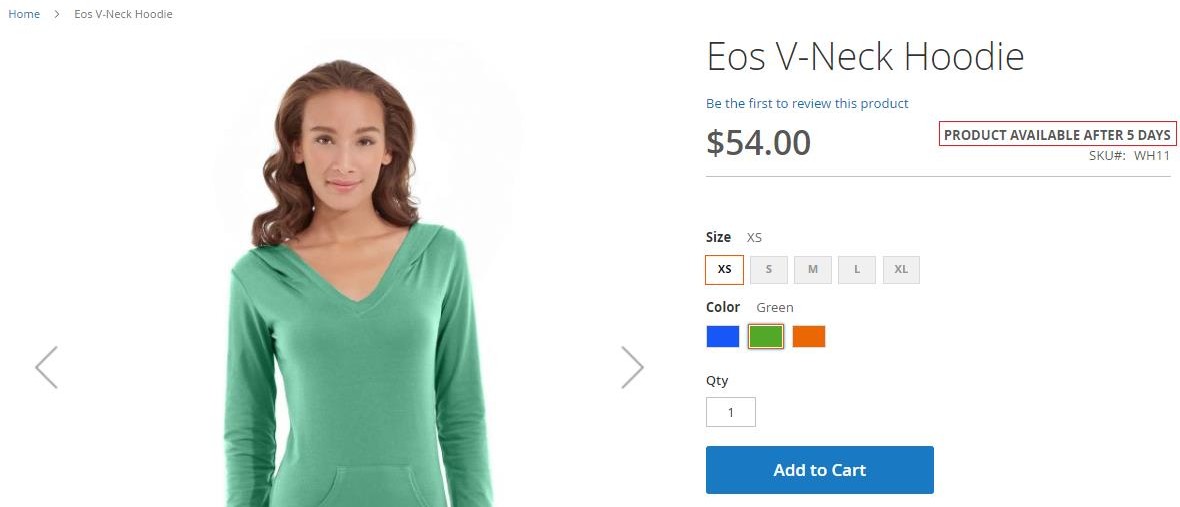
Custom Stock Message for Configurable Products on the Product Page :- For configurable product it displays stock status based on variant selection.
-
Custom Stock Message on the Cart & Checkout Pages – You can see the stock status message on cart and checkout pages.
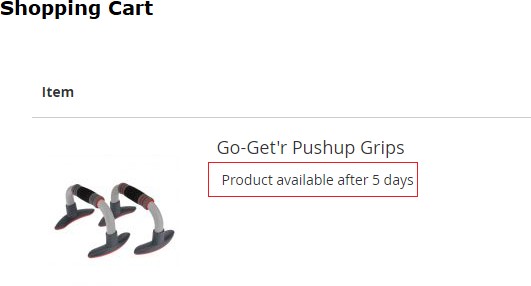
-
Custom Stock Message on Related, Cross-sells and Up-sells Products – When you select "Yes" for "Custom Stock Message on Related Product / Up-Sells/ Cross- Sells" from Admin > Stores > Configuration > Scommerce Configuration > Custom Stock Status, then it shows stock status message on related/up-sells/cross- sells products.
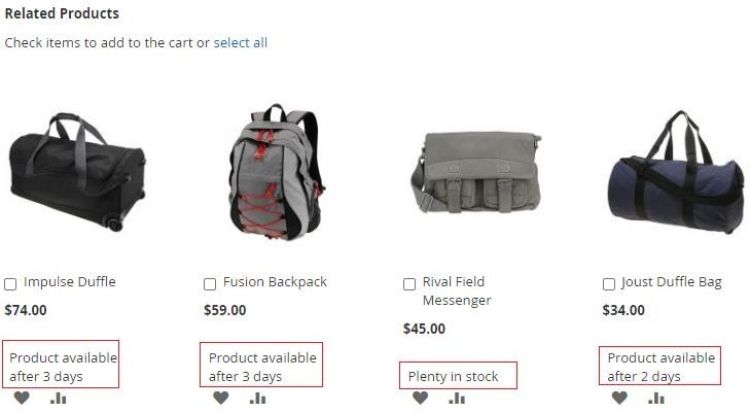
-
Status Message in the Order Confirmation Email – In the order confirmation email you can see the added stock status message.
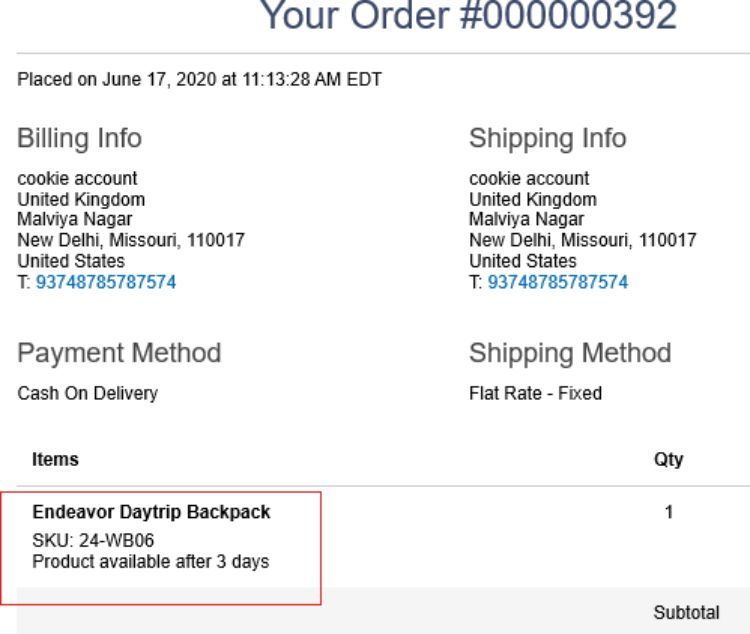
If you have a question related to this extension please check out our FAQ Section first. If you can't find the answer you are looking for then please contact support@scommerce-mage.com.
Magento 2 Ajax Login and Add to Wishlist
Installation and User Guide for Magento 2 AJAX Login and Add to Wishlist
Table of Contents
- Installation
- Installation via app/code
- Installation via Composer
- Configuration Settings for Ajax Login & Wishlist
- General Settings
- Front-end site view
- Ajax Add to Wishlist - Ajax SignIn Popup
- Ajax Add to Wishlist – Ajax Create an Account Popup
- Ajax Add to Wishlist – Mini Cart Drop-Down Slider
- Limit The Quantity of Products to Show In The Cart Slider
- Ajax Add to Wishlist – Ajax Add to Wishlist Popup
- Ajax Add to Wishlist – Ajax Add to Wishlist Confirmation Message
- Ajax Add to Wishlist – Wishlist Products Under my Account – My Wishlist Section
Installation
-
Installation via app/code: Upload the content of the module to your root folder. This will not overwrite the existing Magento folder or files, only the new contents will be added. After the successful upload of the package, run below commands on Magento 2 root directory.
php bin/magento setup:upgrade php bin/magento setup:di:compile php bin/magento setup:static-content:deploy -
Installation via Composer: Please follow the guide provided in the below link to complete the installation via composer.
Configuration Settings for Ajax Login & Wishlist
Go to Admin > Stores > Configuration > Scommerce Configuration > Ajax Login & Wishlist
General Settings
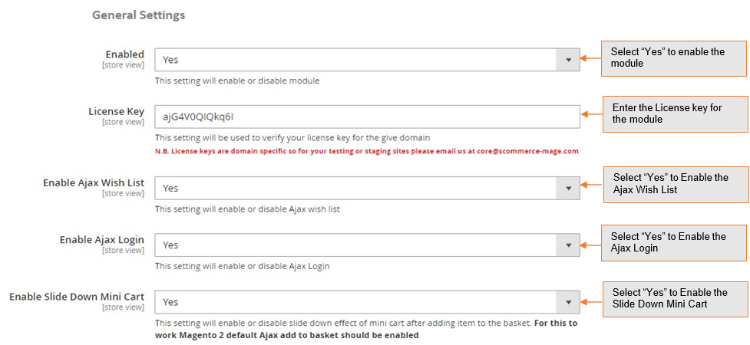
- Enabled - Select "Yes" or "No" to enable or disable the module.
- License Key - Please add the license for the extension which is provided in the order confirmation email. Please note license keys are site URL specific. If you require license keys for dev/staging sites then please email us at support@scommerce-mage.com.
- Enable Ajax Wish List – Select "Yes" or "No" to enable or disable the Ajax Wish List.
- Enable Ajax Login – Select "Yes" or "No" to enable or disable the Ajax Login
- Enable Slide Down Mini Cart – Select "Yes" or "No" to enable or disable slide down effect of mini cart after adding item to the basket.
Front-end site view
Ajax Add to Wishlist - Ajax SignIn Popup
No more waiting to be redirected to the Sign In page. When you click on Sign in a pop-up will appear on your screen and you will be able to login to the site without reloading the page. It is great for ease of access as well as saves time. Also, it does not matter which page you are browsing the pop-up will work with most pages. To enable the Ajax login feature first login to your admin panel.
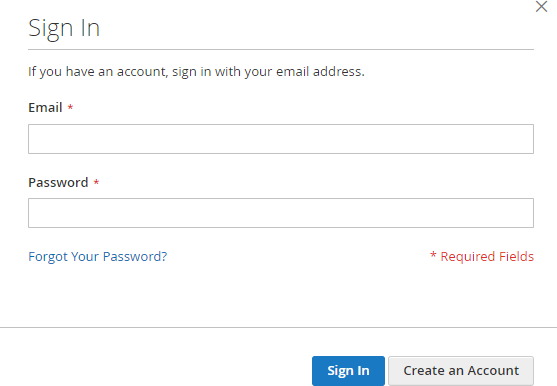
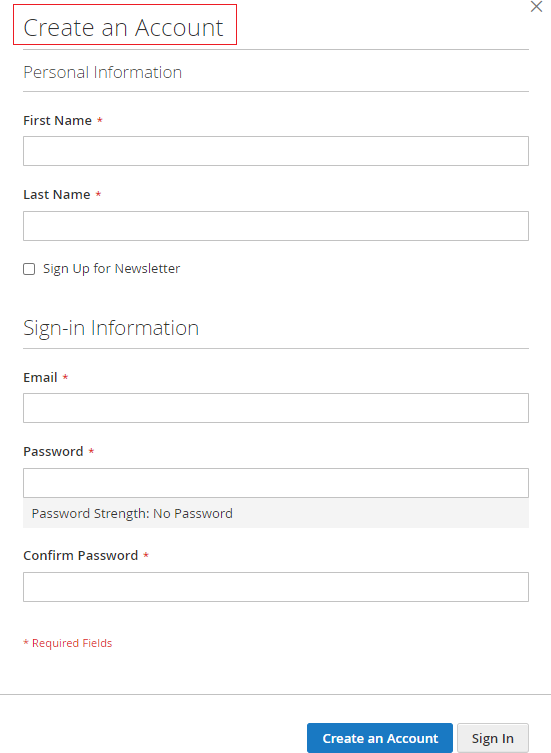
Ajax Add to Wishlist – Ajax Create an Account Popup
Enables users to create an account or register on the website via a pop-up. Initially upon clicking on create an account users were redirected to a different page but now you can stay where you are browsing and create an account without having to reload or redirect the page. It makes convenient for new users to gain access.
You can toggle this feature on or off by loggin into your admin panel and then going to the path Stores > Configuration > Scommerce Configuration > Ajax Login & Wishlist. There will be flag named Enable Ajax Login you can select "Yes" or "No" from the drop-down that will turn this feature on or off.
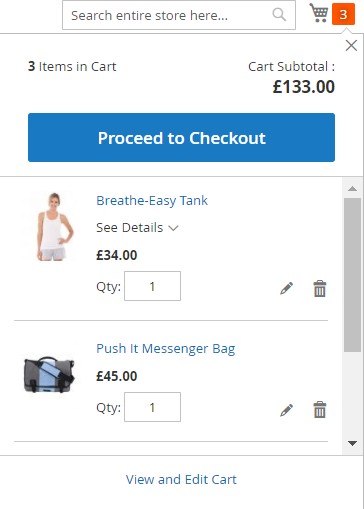
Ajax Add to Wishlist – Mini Cart Drop-Down Slider
When products are added to the cart a drop-down slider appears in the mini cart. It makes easy for users to keep track of their products that they have added to the cart. You can scroll down to browse your products in the cart. The number of products to appear in the list can be changed from settings.
This feature can be enabled or disabled from the admin panel. First Login to your admin panel then go to the following path Stores > Configuration > Scommerce Configuration > Ajax Login & Wishlist. There you will have an option named
Enable slide down mini cart, from the drop-down menu select "Yes/No" to Enable/Disable this feature.
Limit the Quantity of Products to Show in the Cart Slider
Also, you can limit the quantity of products to show in the cart slider. You can do that by going into Stores > Configuration > Sales > Checkout > Shopping cart sidebar. There you will see an option named Number of items to display scrollbar. Here enter your quantity and the scrollbar will appear after that many number of products are added to the cart.
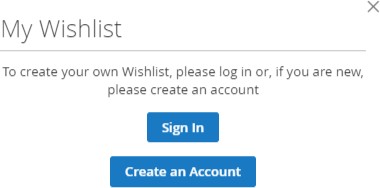
Ajax Add to Wishlist – Ajax Add to Wishlist Popup
Generally, when a product is added to the wishlist you are redirected to another page but while this setting is enabled you will be able to add products to wishlist without redirecting or reloading the page. If you are not signed In, a pop-up will appear on the screen saying either sign in or create an account. This feature can be enabled
or disabled by log in to your admin panel then going to the path Stores > Configuration > Scommerce Configuration > Ajax Login & Wishlist. Here you will see an option named Enable Ajax Wish List, from the drop-down select Yes/No to Enable/Disable this functionality.
Ajax Add to Wishlist – Ajax Add to Wishlist Confirmation Message
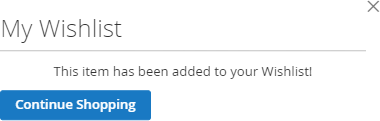
While this option is enabled when any product is added to the cart you will receive a pop-up message on the screen showing your product has been successfully added to the wishlist. Keep in mind you need to be logged in to add products to wishlist.
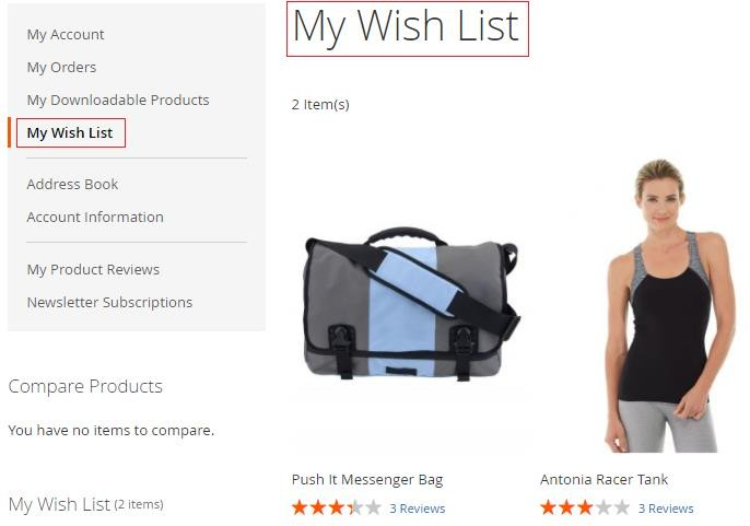
Ajax Add to Wishlist – Wishlist Products Under my Account – My Wishlist Section
All the products added to the wishlist should be visible under your account under the wishlist section. Add multiple products to Wishlist without reloading the page every time and view them listed in the wishlist section of your account.
If you have a question related to this extension please check out our FAQ Section first. If you can't find the answer you are looking for then please contact support@scommerce-mage.com.
Magento 2 Associated or Linked Product Stock Update
Installation and User Guide for Magento 2 Associated or Linked Product Stock Update Extension
Table of Contents
- Installation
- Installation via app/code
- Installation via Composer
- Configuration Settings for Associated Product
- General Settings
- Product Association at Product Level
- Product Association for Simple Product
- Product Association for Configurable/Child Product
- Product Grid at Product Level
- Associated or Linked Product Stock Update
- Fix Product Associations
- Import / Export
- Import
- Export
Installation
-
Installation via app/code: Upload the content of the module to your root folder. This will not overwrite the existing Magento folder or files, only the new contents will be added. After the successful upload of the package, run below commands on Magento 2 root directory.
php bin/magento setup:upgrade php bin/magento setup:di:compile php bin/magento setup:static-content:deploy -
Installation via Composer: Please follow the guide provided in the below link to complete the installation via composer.
Configuration Settings for Associated Product
Go to Admin > Stores > Configuration > Scommerce Configuration > Associated Product
General Settings
-
Enabled - Select "Yes" or "No" to enable or disable the module.
-
License Key - Please add the license for the extension which is provided in the order confirmation email. Please note license keys are site URL specific. If you require license keys for dev/staging sites then please email us at support@scommerce-mage.com.
-
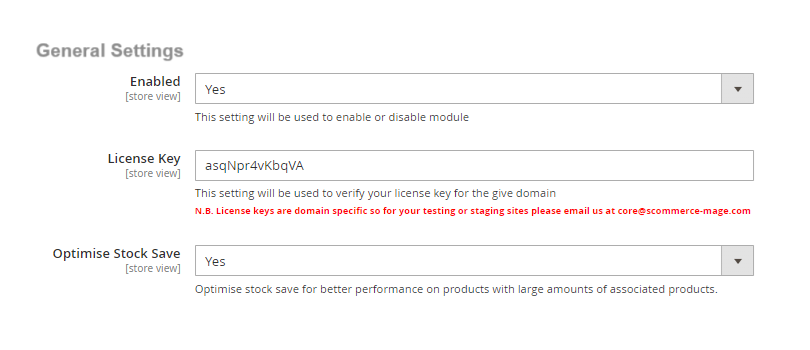
Optimise Stock save - Select "Yes" or "No". If set to "Yes" then it will optimise stock save for better performance on products with large amounts of associated products.
-
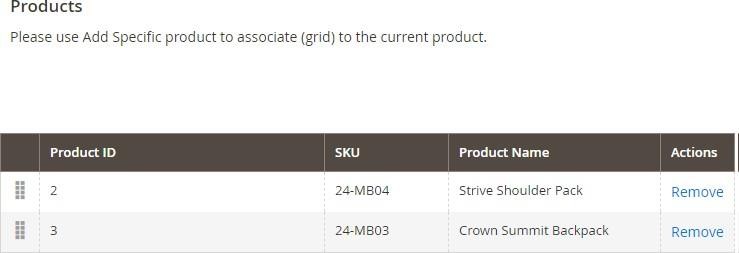
Product Association at Product Level – You can associate products from Admin > Catalog > Products > Select Product > Product Association > Click "AddProduct".
Product Association for Simple Product
Product Association for Configurable/Child Product
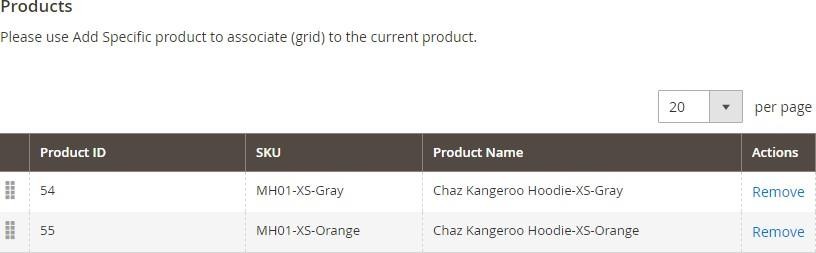
-
Product Grid at Product Level – You can add products from Admin > Catalog> Products > Select Product > Product Association > Click "Add Product" > Product Grid > Select Products > Click "Add Selected Products".
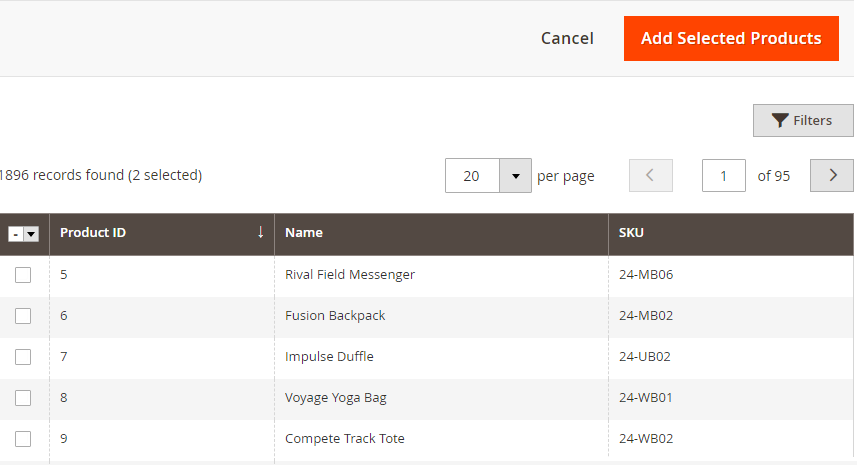
-
Associated or Linked Product Stock Update - Associated product stock/quantity will be updated based on the main product, which you can see in the below screen grab. It supports multiple linking where one product can have multiple associated products.
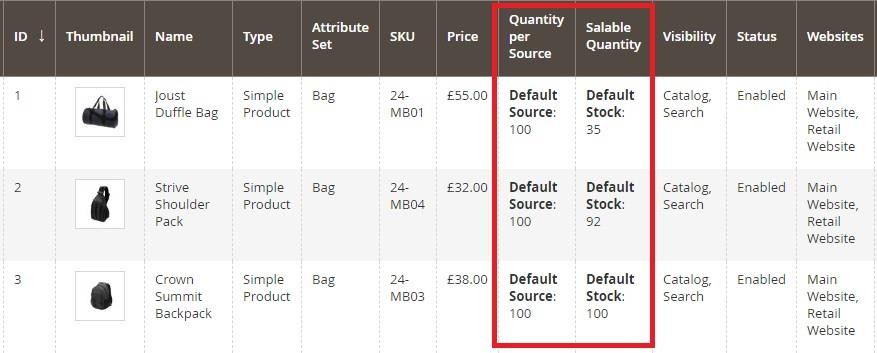
Fix Product Associations
Product associations can be fixed to make sure the following criterias are met:-
- Same product is not associated with itself
- One product is associated with only 1 parent
To fix product associations run the command given below:-
php bin/magento scommerce:associatedproducts:fixassociations -fImport / Export
Import
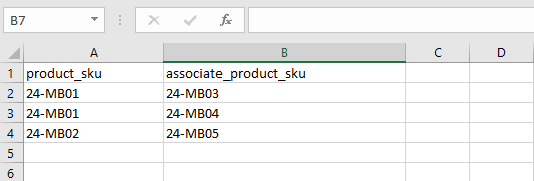
To import associated products go system > Data transfer > Import. Then select product association from the drop down list. You will see the importing menu opening on your screen as shown in the image below. Select the import file and add import behavior settings as per your preferences. Lastly click on check data button on the right corner of your screen.
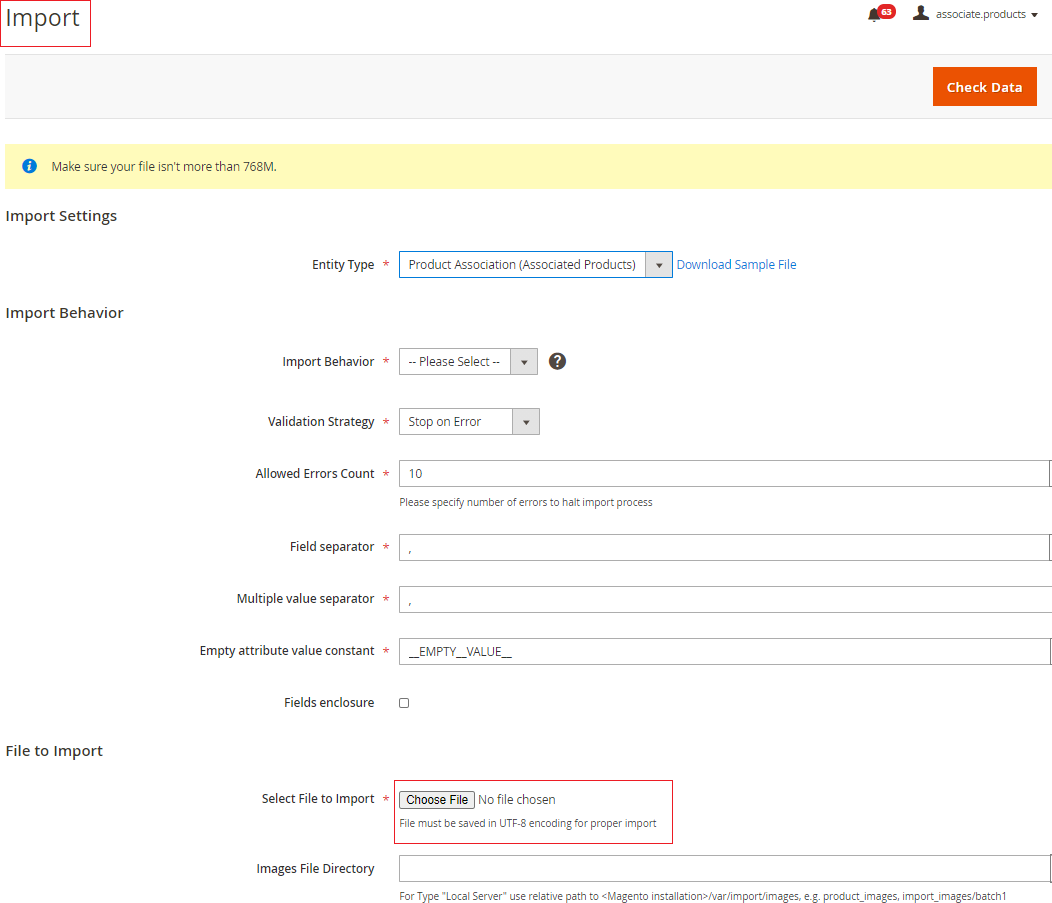
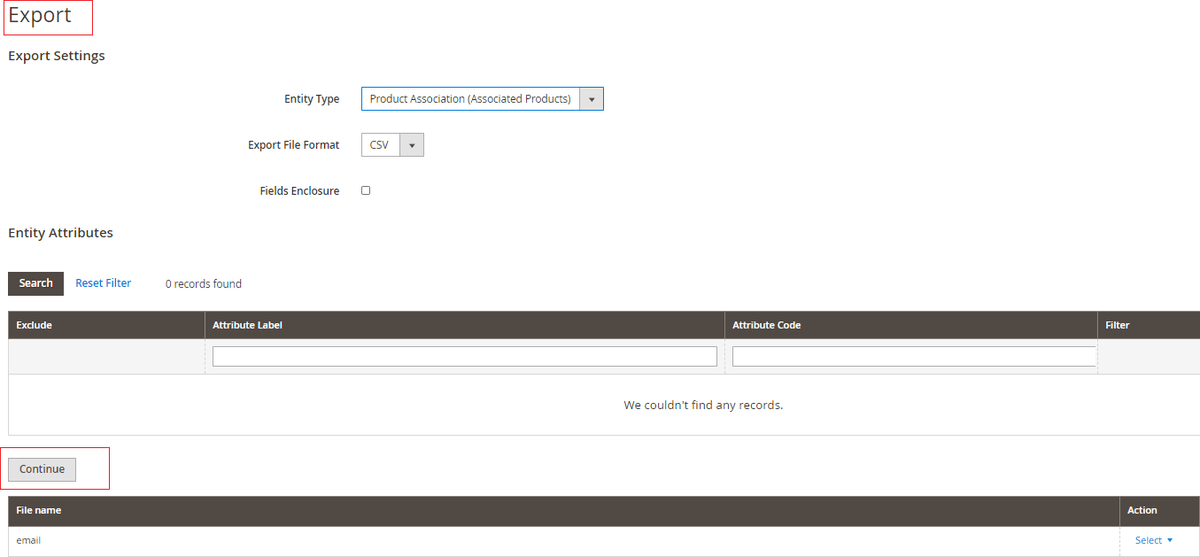
- Export – Go to System > Data Transfer > Export. Select product associated in the entity type dropdown list. You should see the export menu popup on your screen as shown in the image below: -
If you have a question related to this extension please check out our FAQ Section first. If you can't find the answer you are looking for then please contact support@scommerce-mage.com.
Magento 2 Repeat Order
Installation and User Guide for Magento 2 Repeat Order
Table of Contents
- Installation
- Installation via app/code
- Installation via Composer
- Configuration Settings for Repeat Order Subscription
- General Settings
- Repeat Order Subscription Email
- Payment / Order Failed Emailed
- Subscription Status Update Notification
- Manage Subscription Grid
- Re-start/Pause, Cancel Subscriptions
- Subscribed Items and Order History on the Edit Subscription Page
- Backend Order Page Link through Subscription Order
- Subscriptions Payment Grid
- View Subscription Payment Details
- Front-end Site View
- Subscription Options on the Checkout Page
- Frequency Selection Drop-down
- My Subscription Section on the My Account Page
- Subscription Details on the My Subscriptions Page
- View / Edit Subscription Information from the Front-end/ My Account
- Subscription Confirmation Email
Installation
-
Installation via app/code: Upload the content of the module to your root folder. This will not overwrite the existing Magento folder or files, only the new contents will be added. After the successful upload of the package, run below commands on Magento 2 root directory.
php bin/magento setup:upgrade php bin/magento setup:di:compile php bin/magento setup:static-content:deploy -
Installation via Composer: Please follow the guide provided in the below link to complete the installation via composer.
Configuration Settings for Repeat Order Subscription
Go to Admin > Stores > Configuration > Scommerce Configuration > Repeat Order Subscription
General Settings
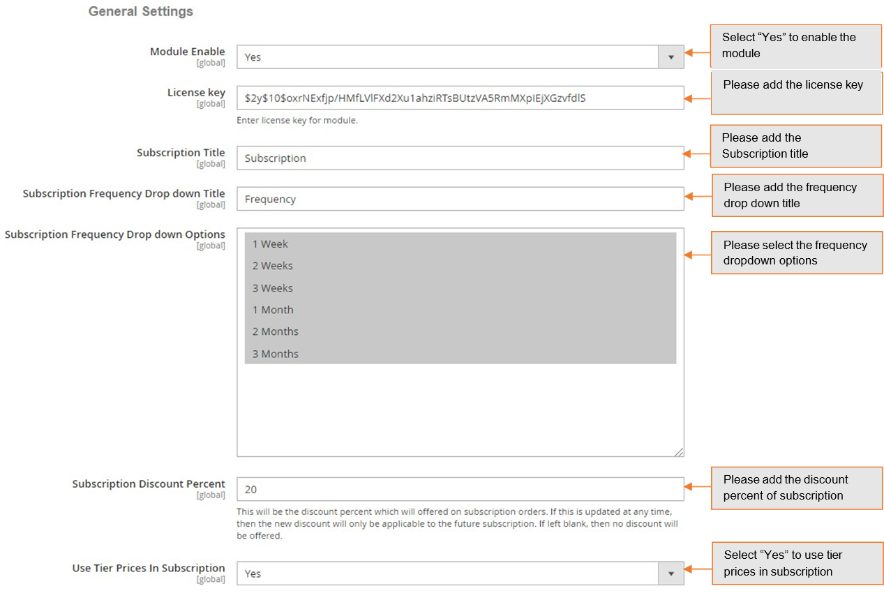
- Module Enable - Select "Yes" or "No" to enable or disable the module.
- License Key – Please add the license for the extension which is provided in the order confirmation email. Please note license keys are site URL specific. If you require license keys for dev/staging sites then please email us at support@scommerce-mage.com.
- Subscription Title – Enter the title of subscription, which will be shown on the front-end.
- Subscription Frequency Drop down Title – Enter the title of subscription frequency.
- Subscription Frequency Drop down Options – Select the frequency option from the dropdown list.
- Subscription Discount Percent – Enter the discount percent, this will be offered on subscription orders. If left blank, then no discount will be offered.
- Use Tier Prices in Subscription – Select "Yes" to use tier prices in subscription.
Repeat Order Subscription Email
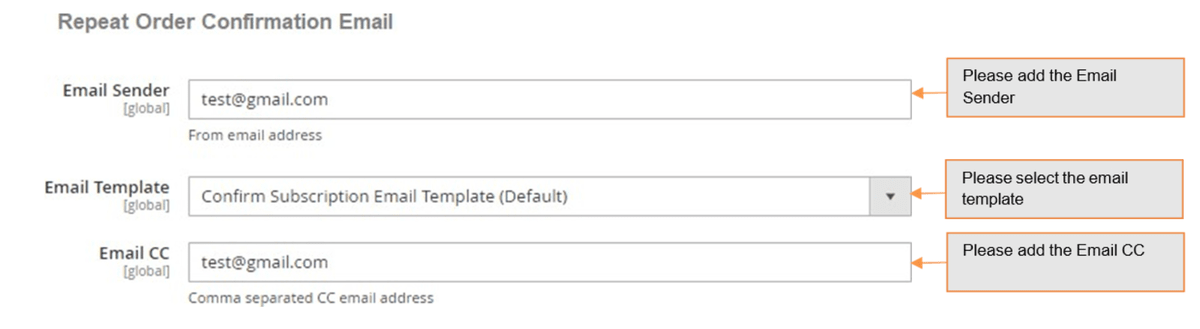
- Email Sender – Please enter sender/from email address for Repeat Order Confirmation Email.
- Email Template – Select order confirmation email template for repeat order. The template will contain Subscription Id, Order Amount, Discount Subscription Frequency, Subscription Start Date, Billing address, Shipping address, Payment Method, Subscribed items.
- Email CC – Please add CC email addresses for Repeat Order emails in comma separated format.
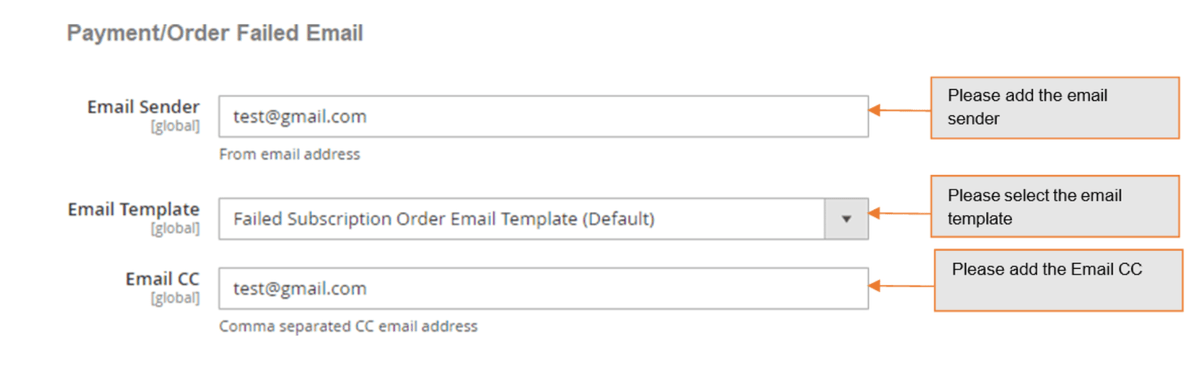
Payment / Order Failed Emailed
- Email Sender – Please enter sender/from email addresses for Payment order failed email.
- Email Template – Select Order/Payment failure email template for repeat order. The template will contain Subscription Id, Due Order Date (for which payment/order failed).
- Email CC – Enter CC email address.
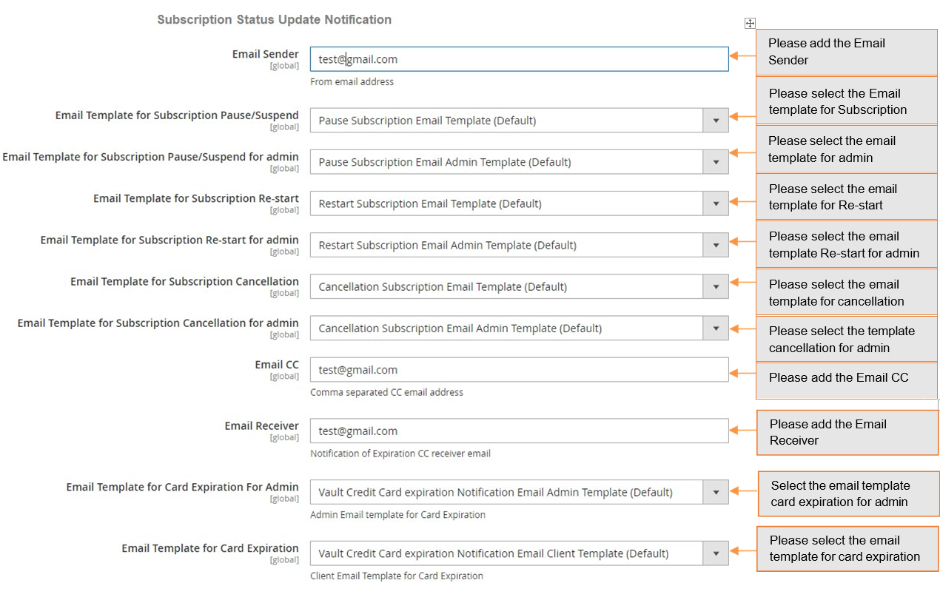
Subscription Status Update Notification
- Email Sender – Please enter sender/from email addresses for Subscription status update email.
- Email Template for Subscription Pause/Suspend – Select notification template for subscription pause.
- Email Template for Subscription Pause/Suspend for admin – Notification template for Subscription Pause for Admin.
- Email Template for Subscription Restart – Select notification template for subscription Re-start.
- Email Template for Subscription Restart for Admin – Notification template for subscription Re-start for Admin.
- Email Template for Subscription Cancellation – Select notification template for Subscription Cancellation.
- Email Template for Subscription Cancellation for Admin – Notification template for Subscription cancellation for admin.
- Email CC – Enter CC from email address.
- Email Receiver – Enter receiver email address to receive Card Expiration notification email.
- Email Template for Card Expiration for Admin – Email template for Card Expiration for admin.
- Email Template for Card Expiration – Select email template for Card Expiration.
Manage Subscription Grid
You can manage subscriptions from, Admin > Scommerce Mage > Repeat Order > Manage Subscriptions. This grid will have all the details about the subscriptions like Subscription ID, Frequency, Customer Email, Last Order date, Status, Action (Edit). With the action 'Edit' you can easily update subscription details and can also perform Cancel/Pause/Re-start actions.

-
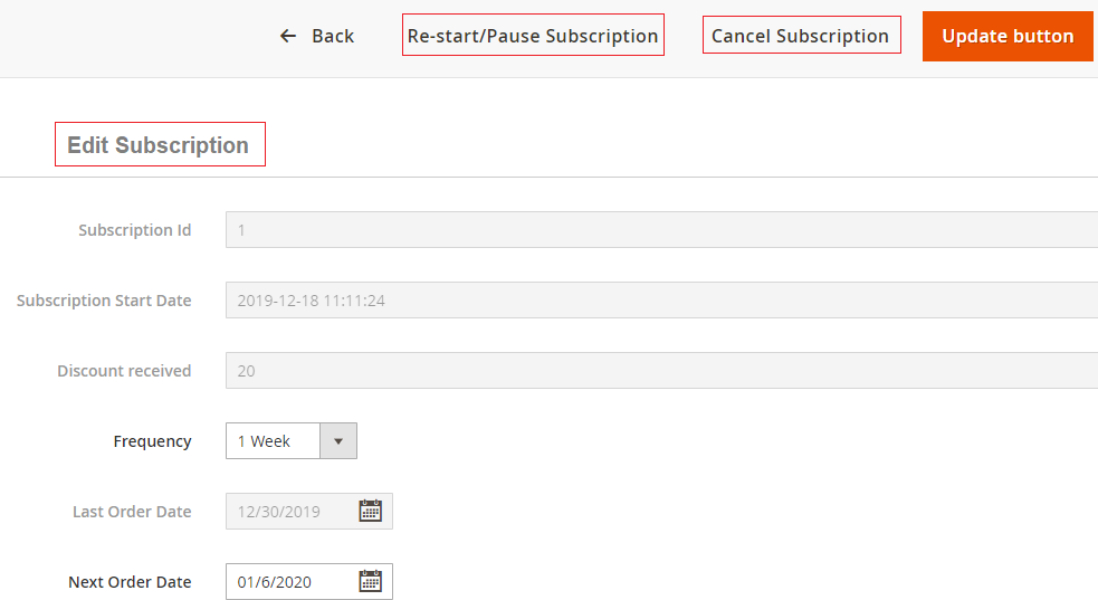
Re-start/Pause, Cancel Subscriptions - You can re-start, pause and cancel subscriptions from Admin > Scommerce Mage > Repeat Order > Manage Subscriptions > Select Subscription > Edit.
-
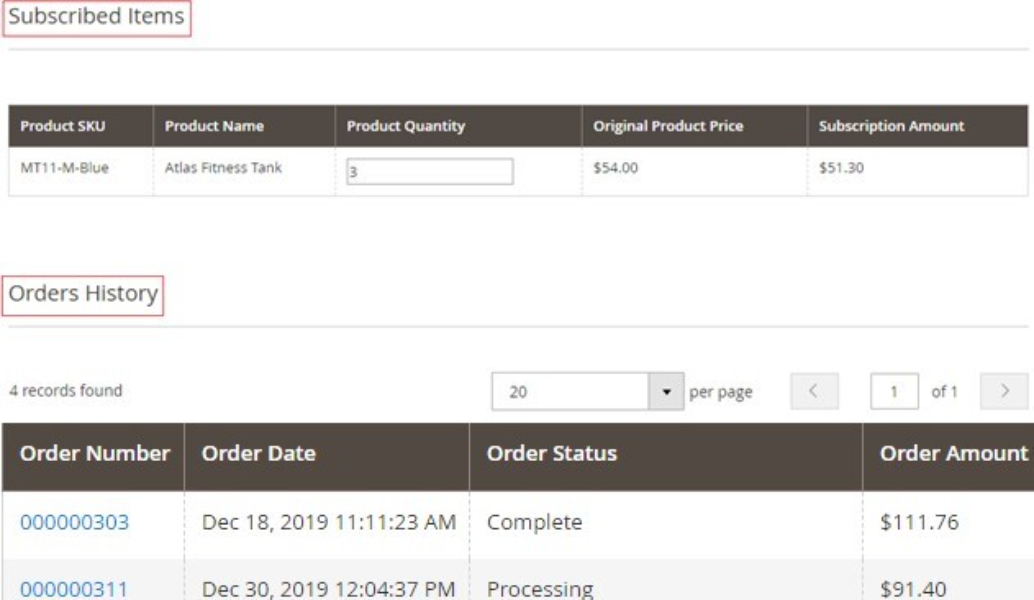
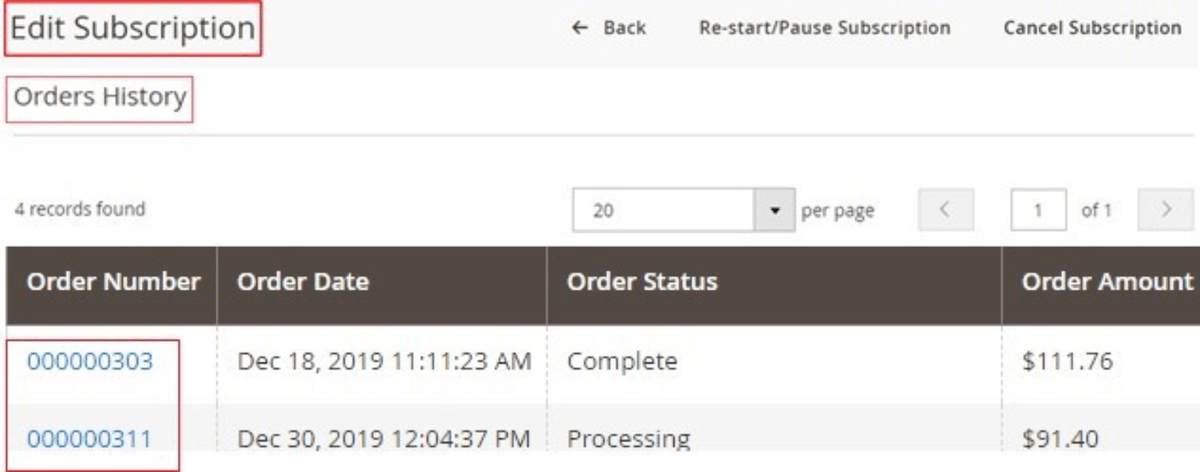
Subscribed Items and Order History on the Edit Subscription Page -** You** can see the subscribed items and order history from Admin > Scommerce Mage > Repeat Order > Manage Subscriptions > Select Subscription > Edit.
-
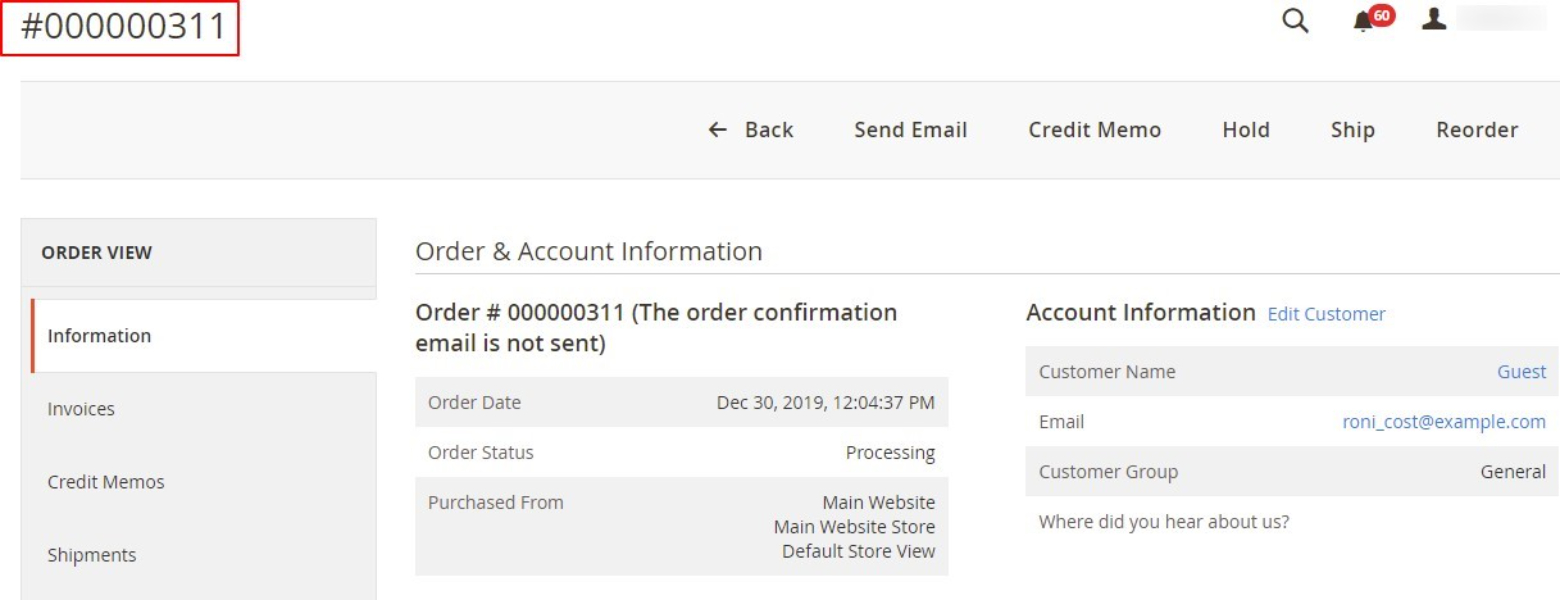
Backend Order Page Link through Subscription Order – When you click on subscription order URL visible under Orders History section at Admin > Scommerce Mage > Repeat Order > Manage Subscriptions > Select Subscription > Edit, then it redirects to backend order page.
Subscription order link redirected to order view page
Subscriptions Payment Grid
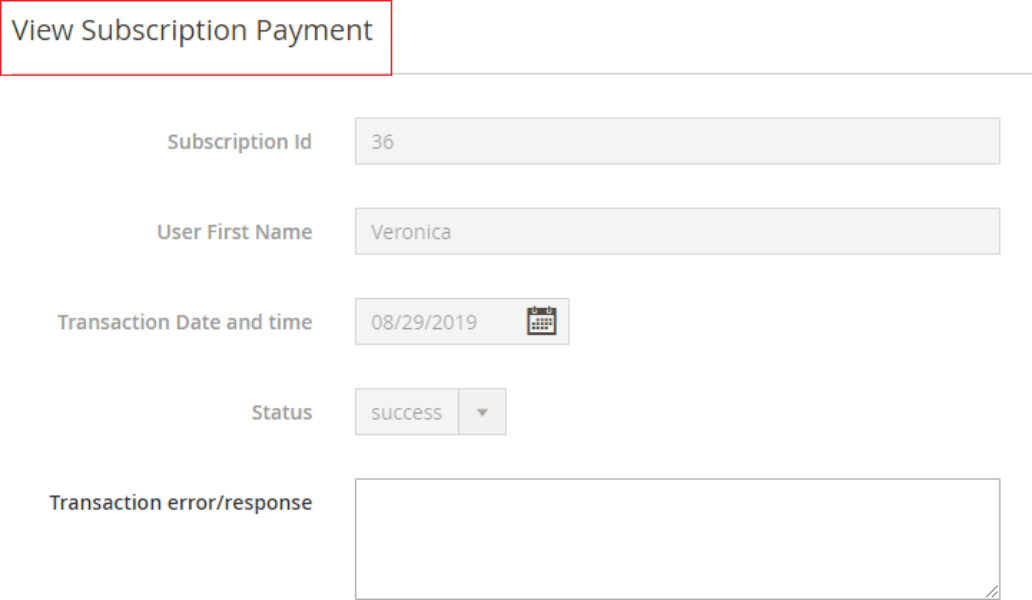
To see subscriptions payment details go to Admin> Scommerce Mage > Repeat Order > Subscription Payments. This grid will provide a view of payment status for the Payment transactions processed for automated subscription order. This will mainly have Subscription Id, First name, Transactions date and time, Transaction error/response.

- View Subscription Payment Details - You can view payment details from Admin> Scommerce Mage > Repeat Order > Subscription Payments > Select Subscription > View.
Front-end Site View
-
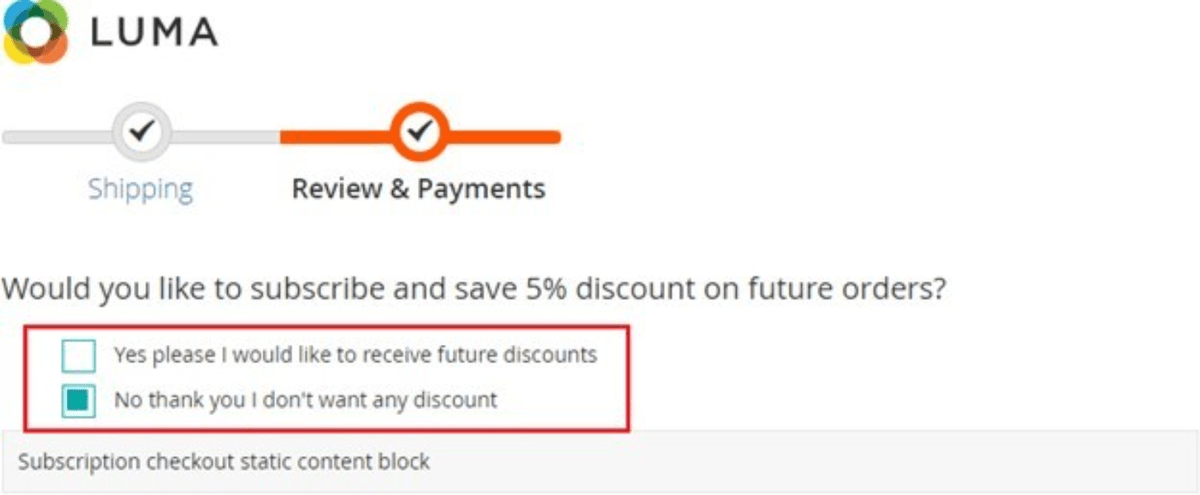
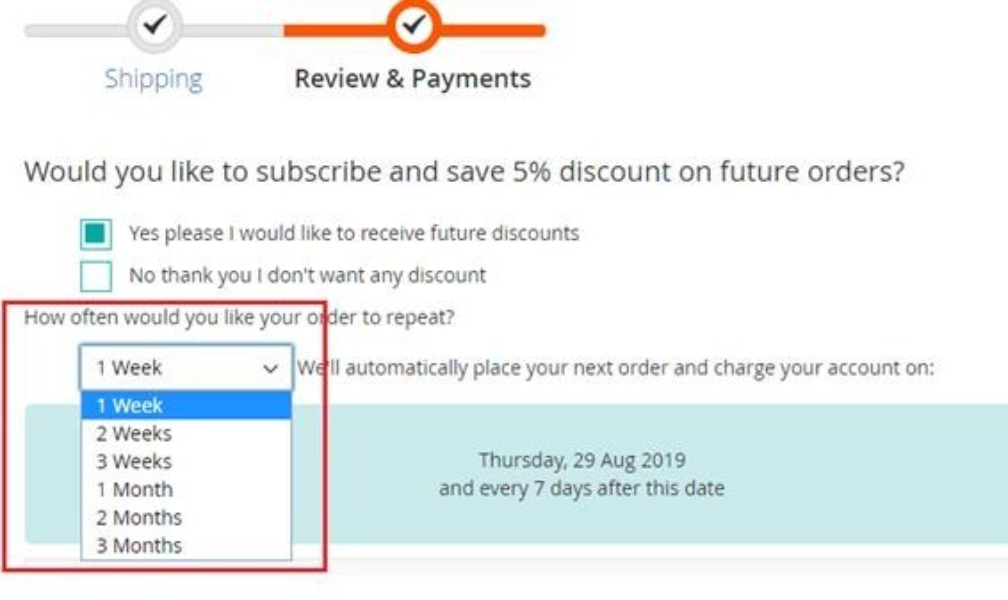
Subscription Options on the Checkout Page - When you enable the module then it shows subscription options on the checkout page, by checking "Yes please I would like to receive future discounts" you can subscribed for the repeat order.
-
Frequency Selection Drop-down - On the checkout page when you check the subscription option then it shows frequency drop down, from where you can select the repeat order frequency.
-
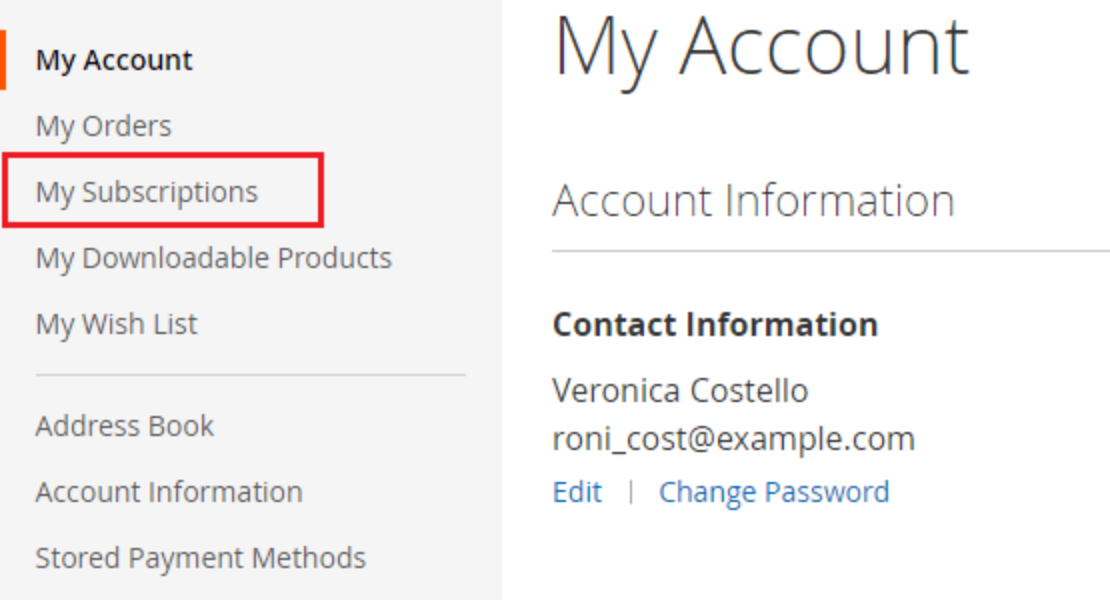
My Subscription Section on the My Account Page - On the front-end you can see the subscription details at My Account > My Subscriptions
-
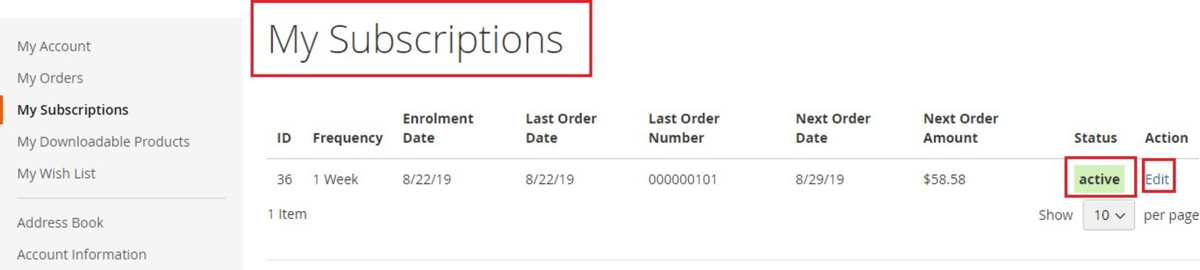
Subscription Details on the My Subscriptions Page - To view subscriptions details go to My Account > My Subscriptions.
-
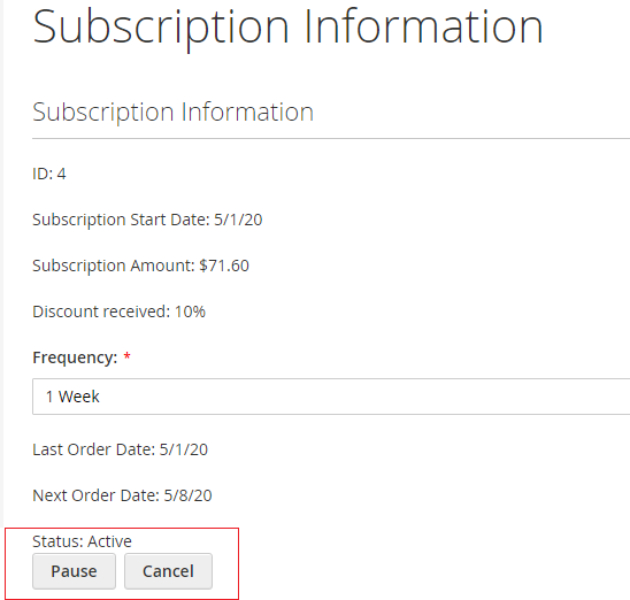
View / Edit Subscription Information from the Front-end/ My Account - On the front-end you can view and edit the subscriptions from My Account > My Subscriptions > Select Order > Edit.
-
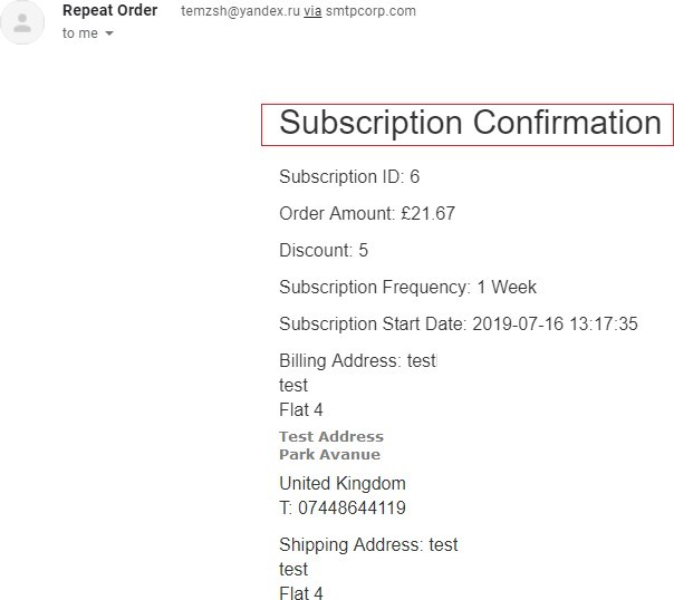
Subscription Confirmation Email – When you subscribed for repeat order, it sends subscription confirmation email.
If you have a question related to this extension please check out our FAQ Section first. If you can't find the answer you are looking for then please contact support@scommerce-mage.com.
Magento 2 AI Content Generator
Installation and User Guide for Magento 2 AI Content Generator
Table of Contents
- Installation
- Download Extension
- Installation via app/code
- Installation via Composer
- Configuration Settings for AI Content Generator
- General Settings
- Product Settings
- Category Settings
- CMS Page Settings
- AI Content Generator Settings on Product Pages
- Short Description
- Description
- Meta Title
- Meta Description
- Meta Keywords
- AI Content Generator Settings on Catgory Pages
- Description
- Meta Title
- Meta Description
- Meta Keywords
- AI Content Generator Settings on CMS Pages
- Page Content
- Meta Title
- Meta Description
- Meta Keywords
- AI Content Generator API Logs
Installation
-
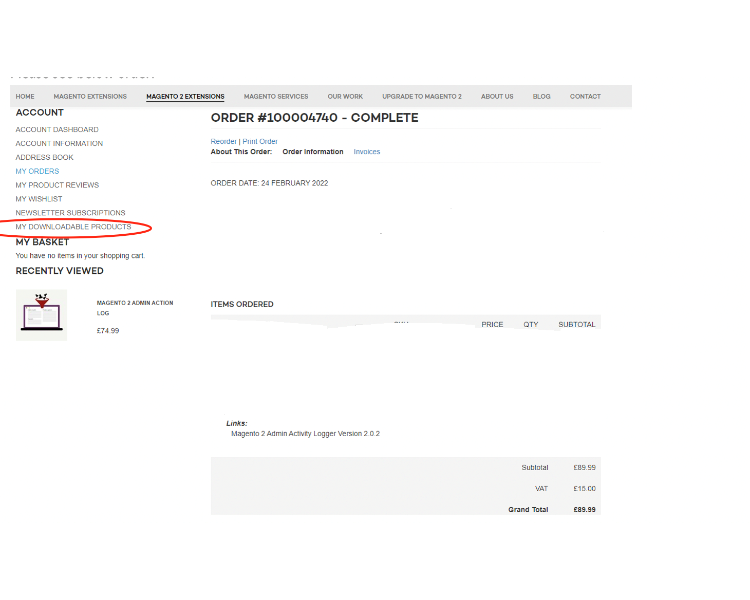
Download Extension: Once you have placed the order from our site then go to My Account section and click on My Downloadable Products and download the extension package.
-
Installation via app/code: Upload the content of the module to your root folder. This will not overwrite the existing Magento folder or files, only the new contents will be added. After the successful upload of the package, run below commands on Magento 2 root directory.
composer require orhanerday/open-ai php bin/magento setup:upgrade php bin/magento setup:di:compile php bin/magento setup:static-content:deploy en_GB en_US -
Installation via Composer: Please follow the guide provided in the below link to complete the installation via composer.
Configuration Settings for AI Content Generator
Go to Admin > Stores > Configuration > Scommerce Configuration > AI Content Generator
General Settings
-
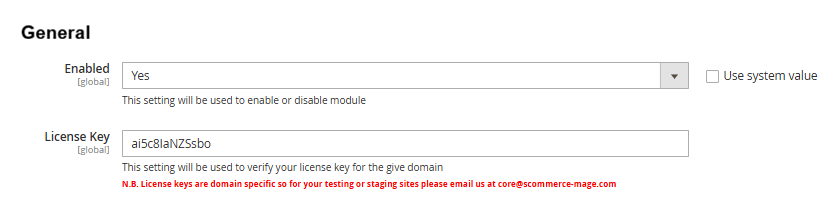
Enabled – Select "Yes" or "No" to enable or disable the module.
-
License Key – Please add the license for the extension which is provided in the order confirmation email. Please note license keys are site URL specific. If you require license keys for dev/staging sites then please email us at support@scommerce-mage.com.
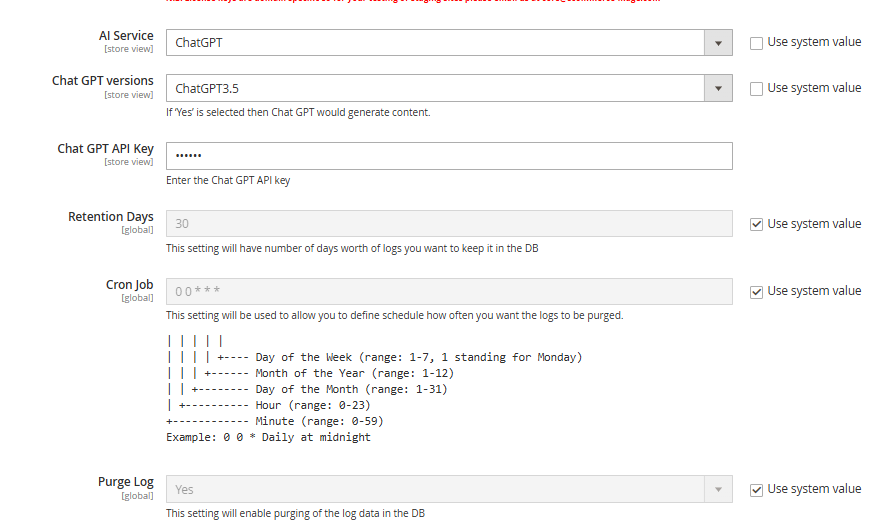
Chat GPT
-
AI Service - Please select the AI Service from the dropdown "ChatGPT".
-
Chat GPT versions - Please select the Chat GPT versions from the dropdown "ChatGPT3.5".
-
Chat GPT API key- Please enter the Chat GPT API key.
-
Retention Days - Define the retention days for the logs that are kept in the database.
-
Cron Job - Define Cron schedule for purging of the log data.
- Purge Log - Select 'Yes' to enable purging of log data in the database
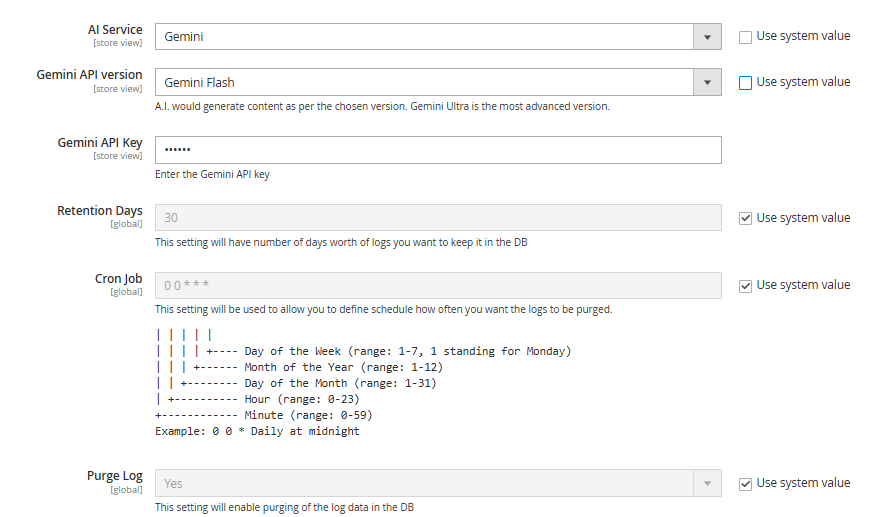
Gemini
-
AI Service - Please select the AI Service from the dropdown "Gemini".
-
Gemini API version - Please select the Gemini API version from the dropdown "Gemini Flash".
-
Gemini API key- Please enter the Gemini API key.
-
Retention Days - Define the retention days for the logs that are kept in the database.
-
Cron Job - Define Cron schedule for purging of the log data.
- Purge Log - Select 'Yes' to enable purging of log data in the database
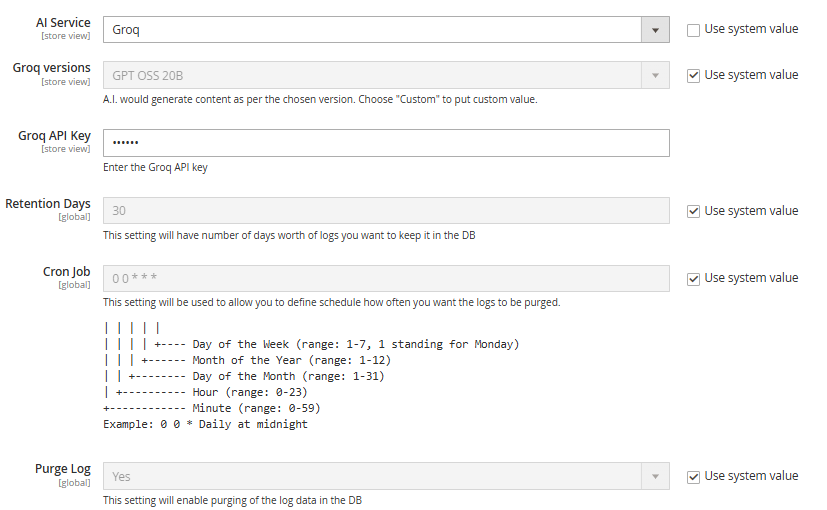
Groq
-
AI Service - Please select the AI Service from the dropdown
-
Groq Versions - Please add the Groq versions. The AI will generate content based on the selected version. Choose 'Custom' to enter a custom value
-
Groq API Key - Enter the API key from Groq (https://console.groq.com/)
-
Retention Days - Define the retention days for the logs that are kept in the database.
-
Cron Job - Define Cron schedule for purging of the log data.
- Purge Log - Select 'Yes' to enable purging of log data in the database
Note:- Switch store view or website to expose the settings below:-
Product Settings
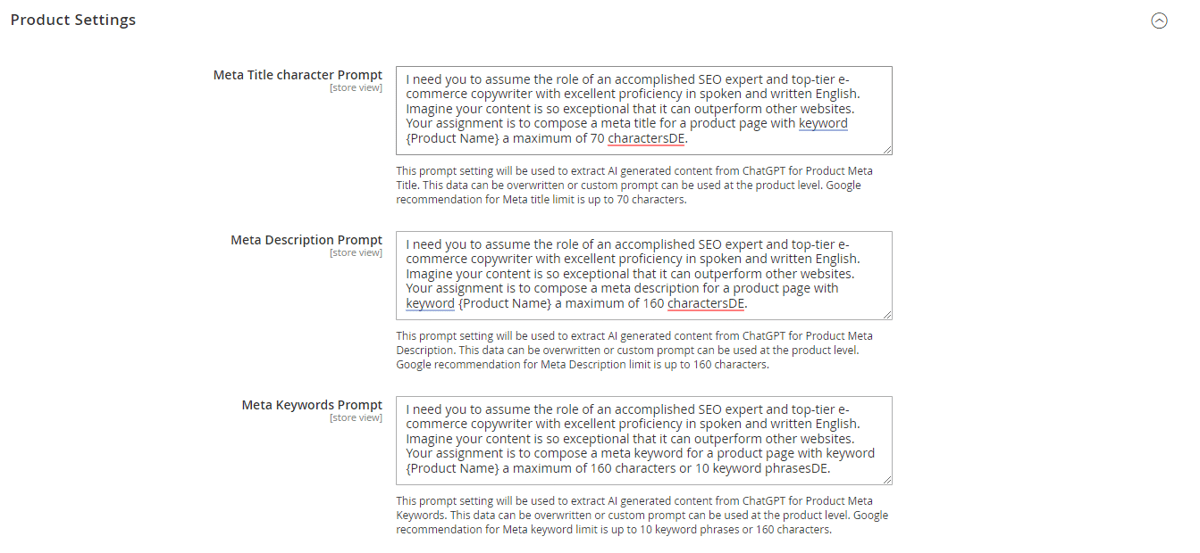
- Meta Title Character Prompt– Add the prompt for Meta Title on product pages. This prompt setting will be used to extract AI generated content from either ChatGPT or Google Gemini for Product Meta Title. This data can be overwritten or custom prompt can be used at the product level. Google recommendation for Meta title limit is up to 70 characters.
- Meta Description Prompt – Add the prompt for Meta Description on product pages. This prompt setting will be used to extract AI generated content from either ChatGPT or Google Gemini for Product Meta Description. This data can be overwritten or custom prompt can be used at the product level. Google recommendation for Meta Description limit is up to 160 characters.
- Meta Keywords Prompt– Add the prompt for Meta Keywords on product pages. This prompt setting will be used to extract AI generated content from either ChatGPT or Google Gemini for Product Meta Keywords. This data can be overwritten or custom prompt can be used at the product level. Google recommendation for Meta keyword limit is up to 10 keyword phrases or 160 characters.
- Short Description Prompt – Add the prompt for Short Description on product pages. This prompt setting will be used to extract AI generated content from either ChatGPT or Google Gemini for Product Short Description Title. This data can be overwritten or custom prompt can be used at the product level. Google recommendation for Short Description is up to 200 words.
- Product Description Prompt – Add the prompt for Product Description on product pages. This prompt setting will be used to extract AI generated content from either ChatGPT or Google Gemini for Product Description. This data can be overwritten or custom prompt can be used at the product level. Google recommendation for Page Description limit is up to 3600 characters.
Category Settings
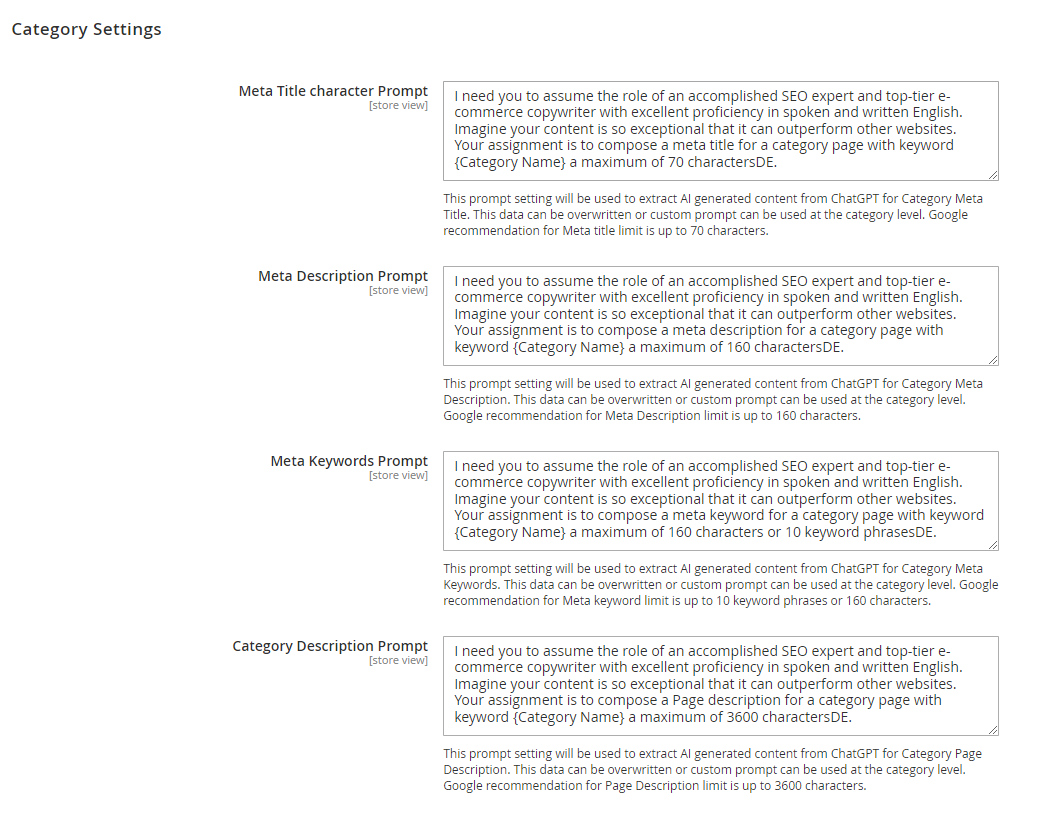
- Meta Title Character Prompt– Add the prompt for Meta Title on category pages. This prompt setting will be used to extract AI generated content from either ChatGPT or Google Gemini for Category Meta Title. This data can be overwritten or custom prompt can be used at the category level. Google recommendation for Meta title limit is up to 70 characters.
- Meta Description Prompt – Add the prompt for Meta Description on category pages. This prompt setting will be used to extract AI generated content from either ChatGPT or Google Gemini for Category Meta Description. This data can be overwritten or custom prompt can be used at the category level. Google recommendation for Meta Description limit is up to 160 characters.
- Meta Keywords Prompt– Add the prompt for Meta Keywords on category pages. This prompt setting will be used to extract AI generated content from either ChatGPT or Google Gemini for Category Meta Keywords. This data can be overwritten or custom prompt can be used at the category level. Google recommendation for Meta keyword limit is up to 10 keyword phrases or 160 characters.
- Category Description Prompt – Add the prompt for Category Description on category pages. This prompt setting will be used to extract AI generated content from either ChatGPT or Google Gemini for Category Page Description. This data can be overwritten or custom prompt can be used at the category level. Google recommendation for Page Description limit is up to 3600 characters.
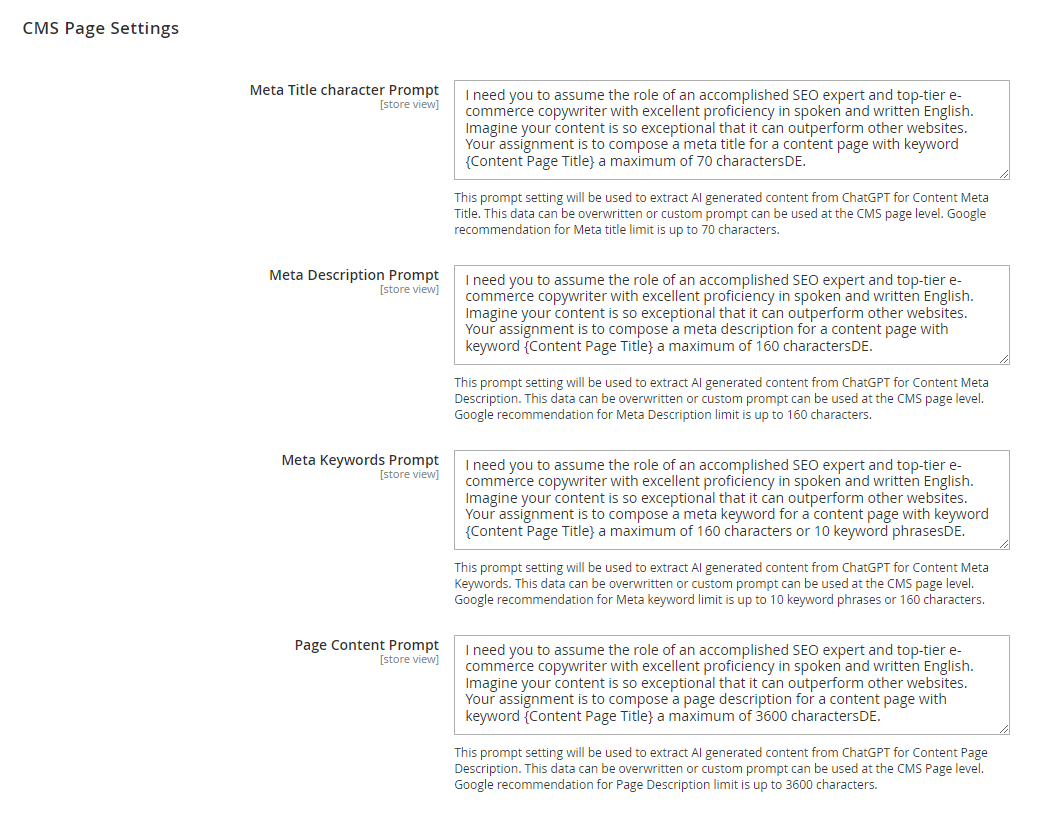
CMS Page Settings
- Meta Title Character Prompt– Add the prompt for Meta Title on CMS Pages. This prompt setting will be used to extract AI generated content from either ChatGPT or Google Gemini for Content Meta Title. This data can be overwritten or custom prompt can be used at the CMS page level. Google recommendation for Meta title limit is up to 70 characters.
- Meta Description Prompt – Add the prompt for Meta Description on CMS Pages. This prompt setting will be used to extract AI generated content from either ChatGPT or Google Gemini for Content Meta Description. This data can be overwritten or custom prompt can be used at the CMS page level. Google recommendation for Meta Description limit is up to 160 characters..
- Meta Keywords Prompt– Add the prompt for Meta Keywords on CMS Pages. This prompt setting will be used to extract AI generated content from either ChatGPT or Google Gemini for Content Meta Keywords. This data can be overwritten or custom prompt can be used at the CMS page level. Google recommendation for Meta keyword limit is up to 10 keyword phrases or 160 characters.
- Page Content Prompt – Add the prompt for CMS pages content. This prompt setting will be used to extract AI generated content from either ChatGPT or Google Gemini for Content Page Description. This data can be overwritten or custom prompt can be used at the CMS Page level. Google recommendation for Page Description limit is up to 3600 characters.
AI Content Generator Settings on Product Pages
AI content generator works with the following fields on the product pages. Go to Admin>Catalog>Product and then select any product.
Short Description
Click on Fetch Content and Based on the prompt set in the configuration the content is generated and populated automatically into this field.
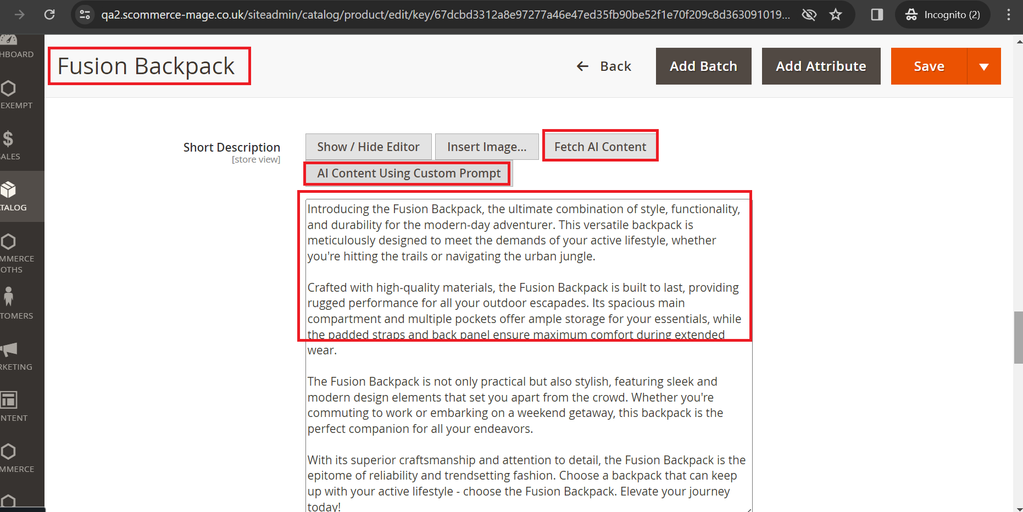
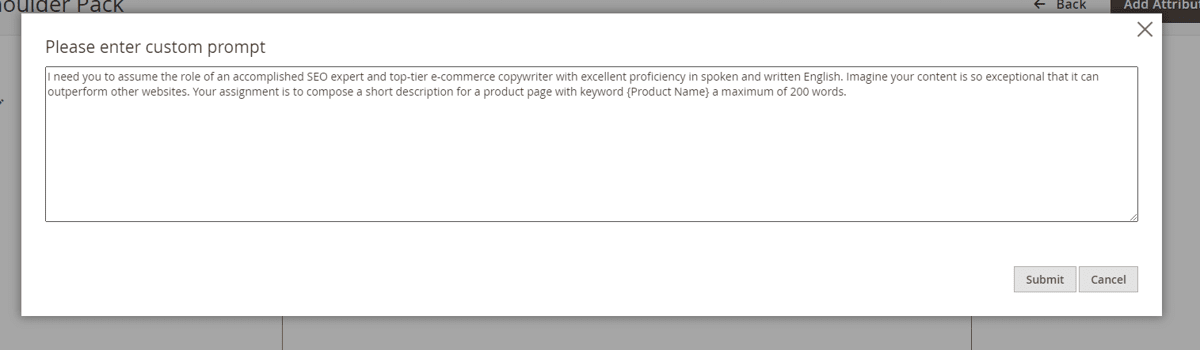
In case you want to add a custom prompt for this product simply click on AI Content Using Custom Prompt and add your prompt then when you click Fetch Content the content is generated based on your custom prompt.
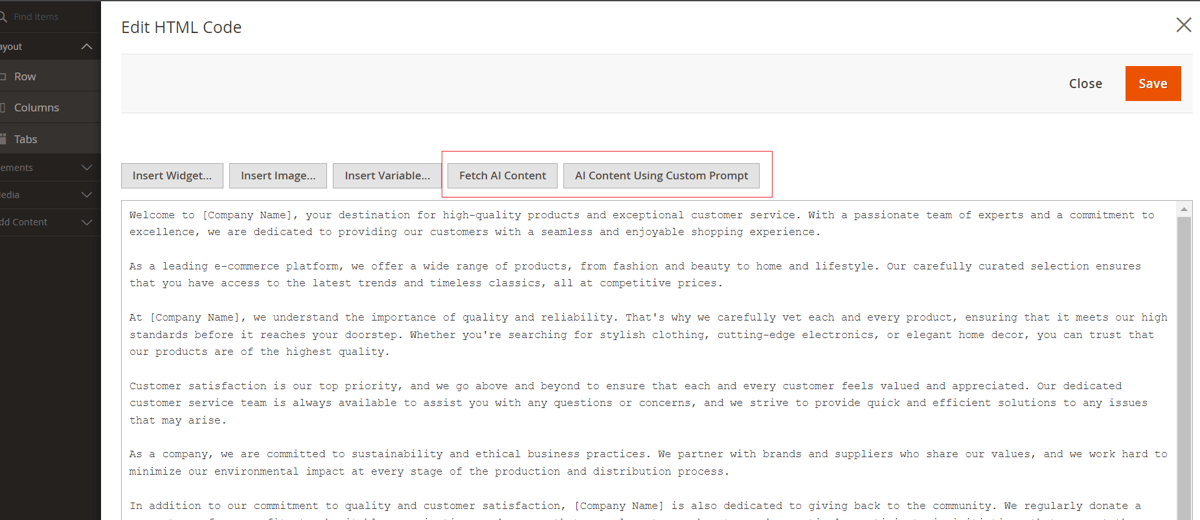
Description
Edit the description with page builder and when add a HTML element the AI Content Generator options are present. Click on Fetch Content and Based on the prompt set in the configuration the content is generated and populated automatically into this field. In case you want to add a custom prompt for this product simply click on AI Content Using Custom Prompt and add your prompt then when you click Fetch Content the content is generated based on your custom prompt.
Meta Title
Go to Product settings>Search Engine Optimization. Click on Fetch Content below Meta Title and based on the prompt set in the configuration the content is generated and populated automatically into this field. In case you want to add a custom prompt for this product simply click on AI Content Using Custom Prompt and add your prompt then when you click Fetch Content the content is generated based on your custom prompt.

Meta Description
Go to Product settings>Search Engine Optimization. Click on Fetch Content below Meta Description and based on the prompt set in the configuration the content is generated and populated automatically into this field. In case you want to add a custom prompt for this product simply click on AI Content Using Custom Prompt and add your prompt then when you click Fetch Content the content is generated based on your custom prompt.

Meta Keywords
Go to Product settings>Search Engine Optimization. Click on Fetch Content below Meta Keywords and based on the prompt set in the configuration the content is generated and populated automatically into this field. In case you want to add a custom prompt for this product simply click on AI Content Using Custom Prompt and add your prompt then when you click Fetch Content the content is generated based on your custom prompt.

AI Content Generator Settings on Category Pages
Description
Edit the description with page builder and when add a HTML element the AI Content Generator options are present. Click on Fetch Content and Based on the prompt set in the configuration the content is generated and populated automatically into this field. In case you want to add a custom prompt for this product simply click on AI Content Using Custom Prompt and add your prompt then when you click Fetch Content the content is generated based on your custom prompt.
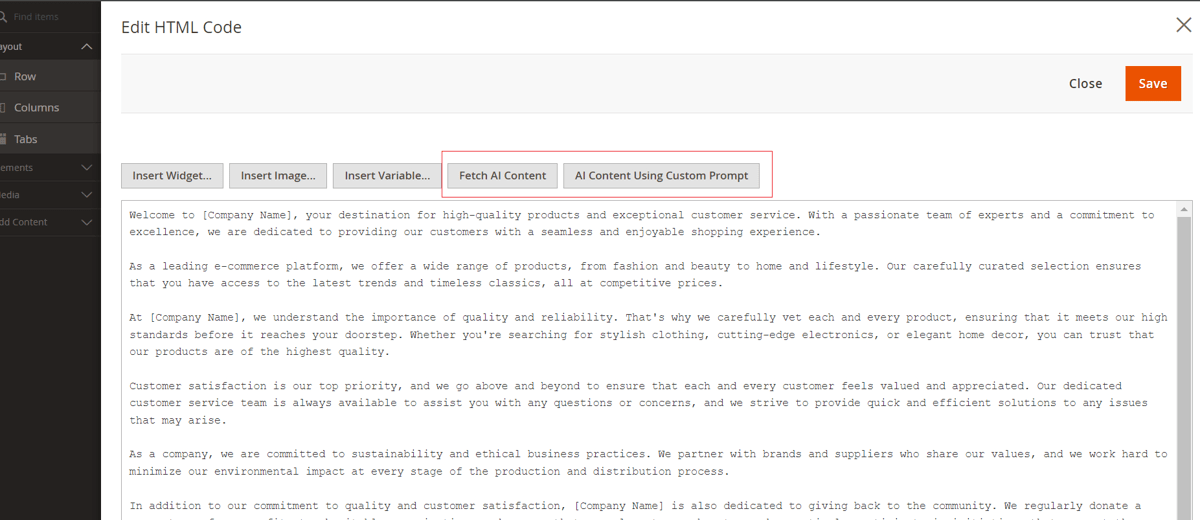
Meta Title
Go to Category settings>Search Engine Optimization. Click on Fetch Content below Meta Title and based on the prompt set in the configuration the content is generated and populated automatically into this field. In case you want to add a custom prompt for this product simply click on AI Content Using Custom Prompt and add your prompt then when you click Fetch Content the content is generated based on your custom prompt.

Meta Description
Go to Category settings>Search Engine Optimization. Click on Fetch Content below Meta Description and based on the prompt set in the configuration the content is generated and populated automatically into this field. In case you want to add a custom prompt for this product simply click on AI Content Using Custom Prompt and add your prompt then when you click Fetch Content the content is generated based on your custom prompt.

Meta Keywords
Go to Category settings>Search Engine Optimization. Click on Fetch Content below Meta Keywords and based on the prompt set in the configuration the content is generated and populated automatically into this field. In case you want to add a custom prompt for this product simply click on AI Content Using Custom Prompt and add your prompt then when you click Fetch Content the content is generated based on your custom prompt.

AI Content Generator Settings on CMS Pages
Page Content
Edit the content with page builder and when add a HTML element the AI Content Generator options are present. Click on Fetch Content and Based on the prompt set in the configuration the content is generated and populated automatically into this field. In case you want to add a custom prompt for this product simply click on AI Content Using Custom Prompt and add your prompt then when you click Fetch Content the content is generated based on your custom prompt.
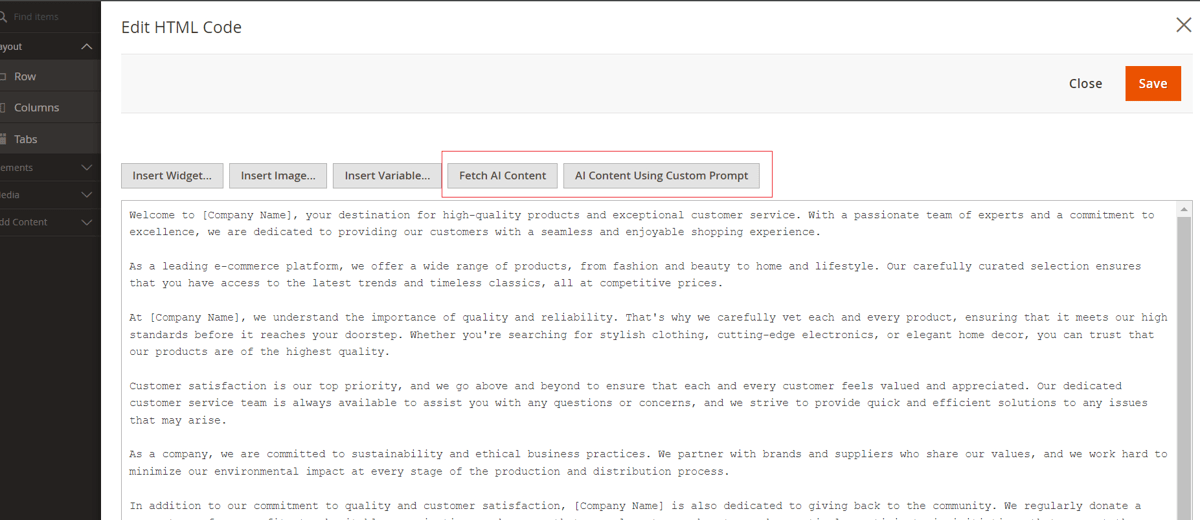
Meta Title
Go to Page settings>Search Engine Optimization. Click on Fetch Content below Meta Title and based on the prompt set in the configuration the content is generated and populated automatically into this field. In case you want to add a custom prompt for this product simply click on AI Content Using Custom Prompt and add your prompt then when you click Fetch Content the content is generated based on your custom prompt.

Meta Description
Go to Page settings>Search Engine Optimization. Click on Fetch Content below Meta Description and based on the prompt set in the configuration the content is generated and populated automatically into this field. In case you want to add a custom prompt for this product simply click on AI Content Using Custom Prompt and add your prompt then when you click Fetch Content the content is generated based on your custom prompt.

Meta Keywords
Go to Page settings>Search Engine Optimization. Click on Fetch Content below Meta Keywords and based on the prompt set in the configuration the content is generated and populated automatically into this field. In case you want to add a custom prompt for this product simply click on AI Content Using Custom Prompt and add your prompt then when you click Fetch Content the content is generated based on your custom prompt.

Frontend
AI content generator generates content on all Category, Product, CMS Pages. Please check some of the frontend screengrabs of the generated content:-
Product Pages
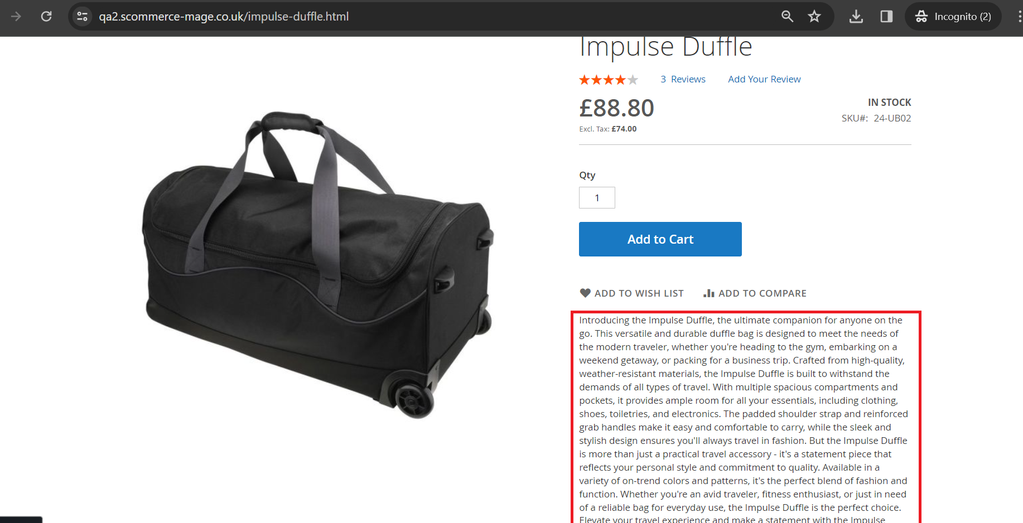
Category Pages
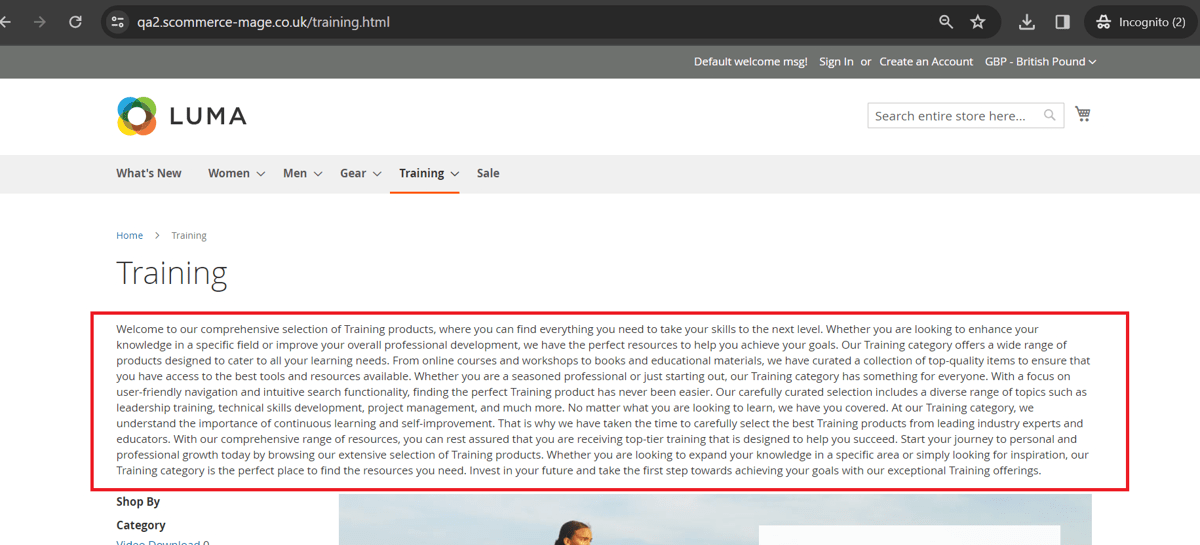
CMS Pages
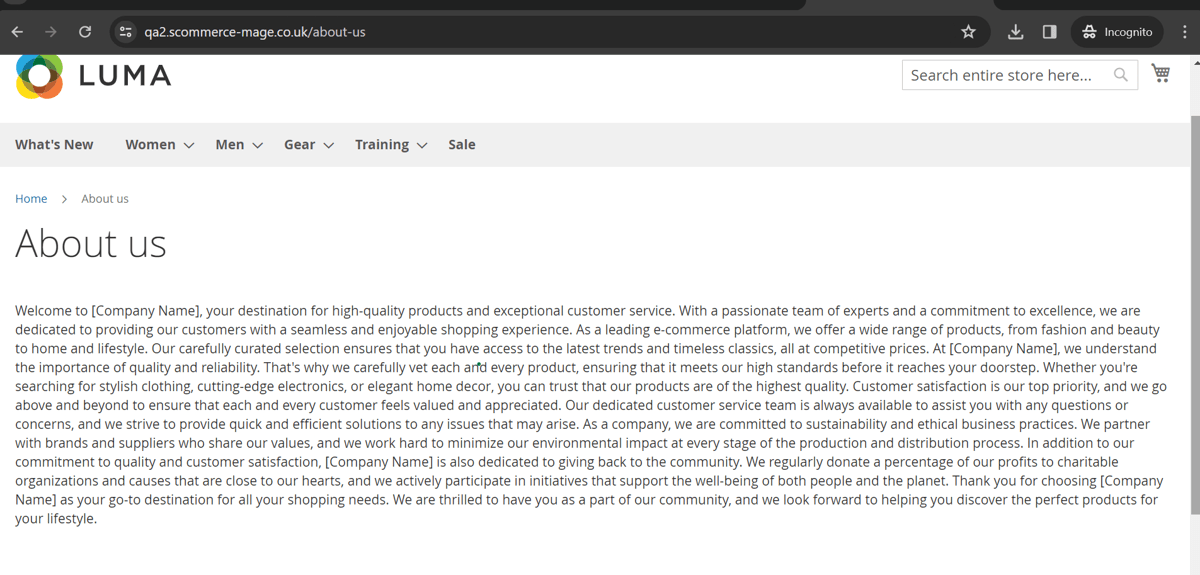
Meta Keywords
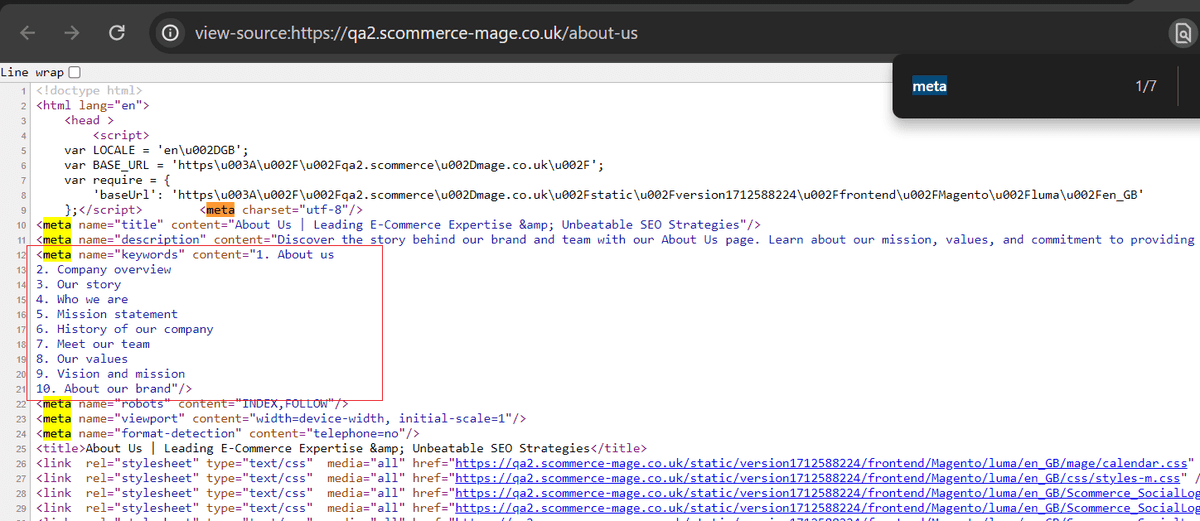
AI Content Generator API Logs
Go to Scommerce AI Content Generator>API Logs to view logs of each API request used by AI content Generator.
The grid contains request response and the AI engine used:-
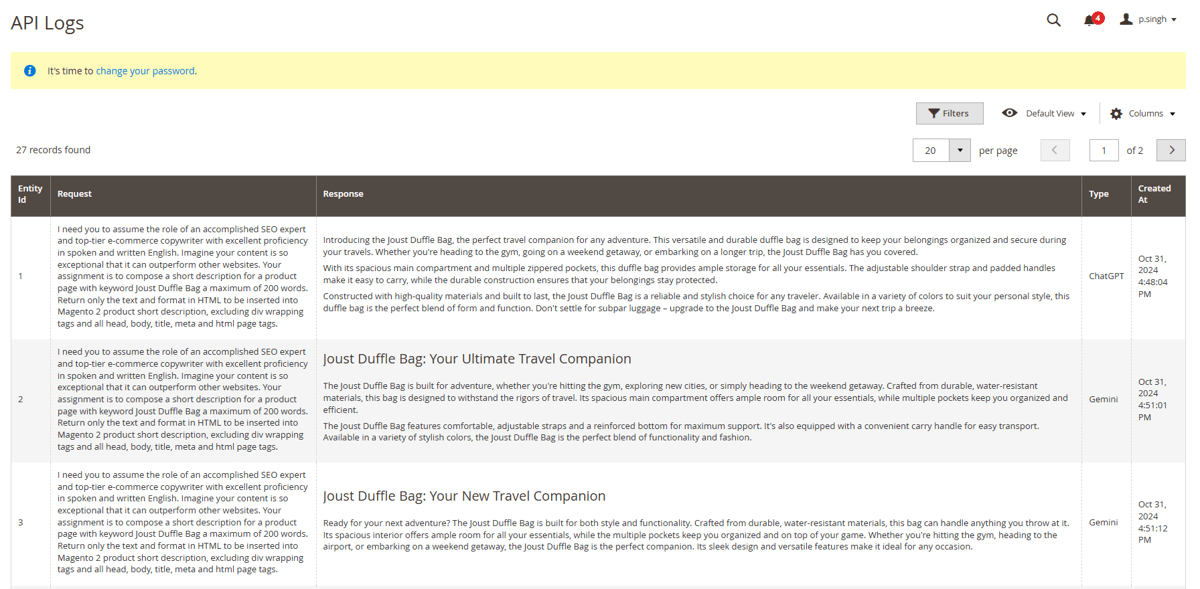
If you have a question related to this extension please check out our FAQ Section first. If you can't find the answer you are looking for then please contact support@scommerce-mage.com.
Magento 2 Admin Account Switcher
Installation and User Guide for Magento 2 Admin Account Switcher
Table of Contents
- Installation
- Installation via app/code
- Installation via Composer
- Configuration Settings for Admin Account Switcher
- General Settings
- Admin Account Switcher Workflow
- Admin Account Switcher Role
Installation
-
Installation via app/code: Upload the content of the module to your root folder. This will not overwrite the existing Magento folder or files, only the new contents will be added. After the successful upload of the package, run below commands on Magento 2 root directory.
php bin/magento setup:upgrade php bin/magento setup:di:compile php bin/magento setup:static-content:deploy -
Installation via Composer: Please follow the guide provided in the below link to complete the installation via composer.
Configuration Settings for Admin Account Switcher
Go to Admin > Stores > Configuration > Scommerce Configuration > Admin Account Switcher
General Settings
- Enabled - Select "Yes" or "No" to enable or disable the module.
- License Key - Please add the license for the extension which is provided in the order confirmation email. Please note license keys are site URL specific. Please go to Admin > Stores > Configuration > Scommerce Configuration > Core and click on "Verify" to verify the license key.
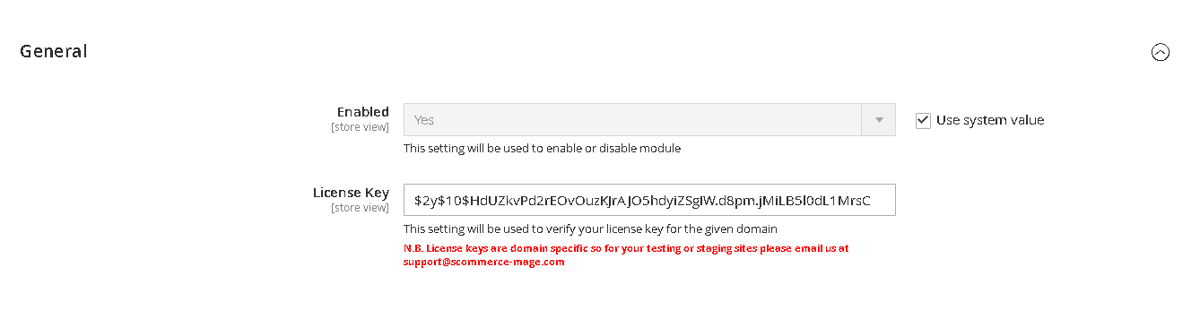
Admin Account Switcher Workflow
Using this extension an admin can login into another admin's account directly from admin edit form section without requiring a password which allows them to debug easily without having to reset the other admin's password.
The admin can only use this functionality if they have the "Scommerce Switch Admin Account" (Admin>System>Permissions>User Roles>Select Role>Role Resources)selected under role resources for their user role.
Go to Admin>System>Permissions>All Users, here select(click edit) the admins account in which you want to login.
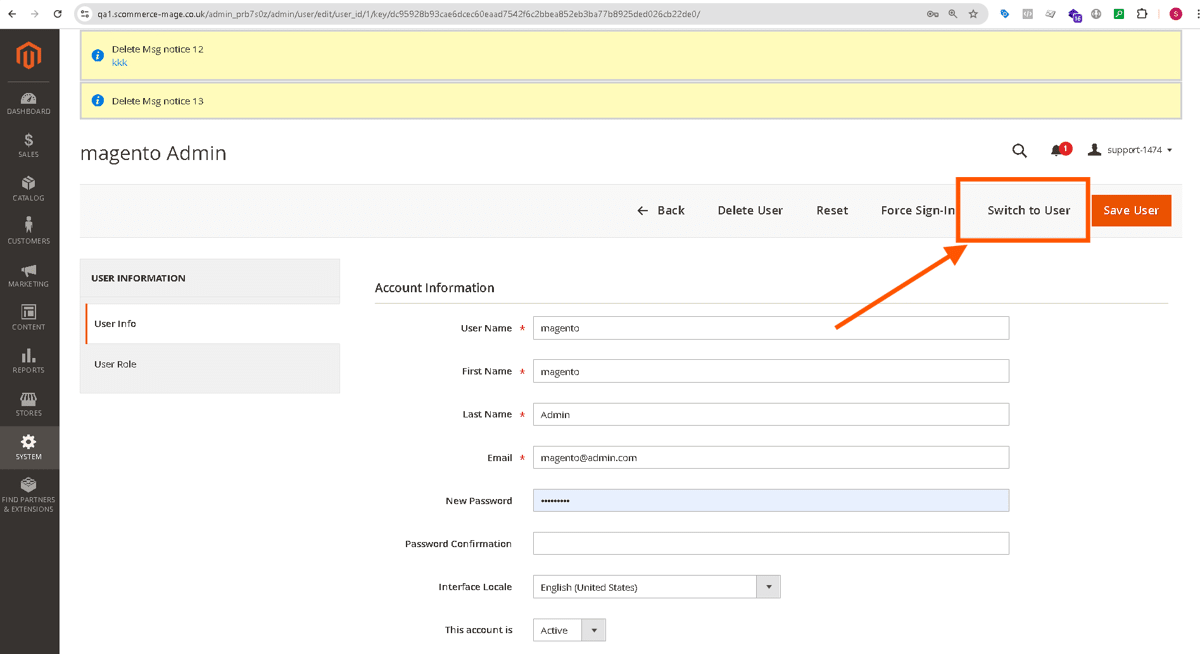
Admin Account Switcher Role
The "Switch to User" button is displayed only if the current admin user has the "Scommerce Switch Admin Account" permissions in their user role.
To check this, you can go to Admin>System>Permissions>User Roles>Role Resources and check whether the user role has "Scommerce Switch Admin Account Role" selected.
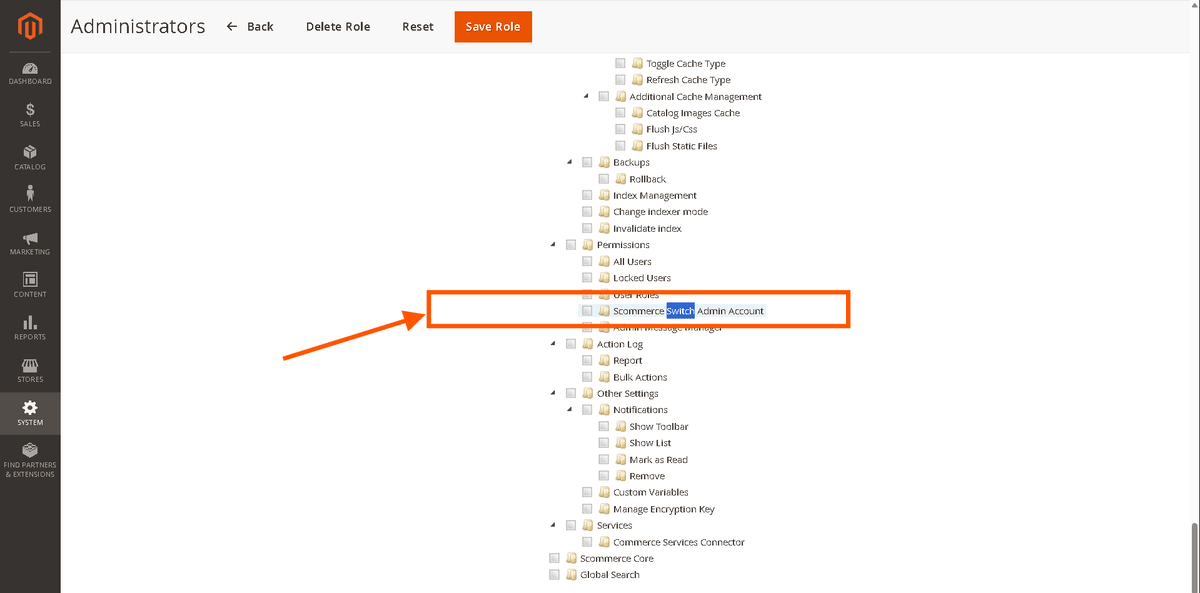
If you have a question related to this extension please check out our FAQ Section first. If you can't find the answer you are looking for then please contact support@scommerce-mage.com.
Magento 2 Admin Message Manager
Installation and User Guide for Magento 2 Admin Message Manager
Table of Contents
- Installation
- Installation via app/code
- Installation via Composer
- Configuration Settings for Admin Message Manager
- General Settings
- Admin Message Manager Workflow
- Step 1: Access the Admin Message Grid
- Step 2: Create a New Message
- Step 3: Edit or Delete Messages
- Display logic for Admin Messages
- Why do messages appear?
- How do messages appear?
- HTML Support
- View Messages in Admin Panel
- Notice Message
- Warning Message
- Success Message
- Error Message
Installation
-
Installation via app/code: Upload the content of the module to your root folder. This will not overwrite the existing Magento folder or files, only the new contents will be added. After the successful upload of the package, run below commands on Magento 2 root directory.
php bin/magento setup:upgrade php bin/magento setup:di:compile php bin/magento setup:static-content:deploy -
Installation via Composer: Please follow the guide provided in the below link to complete the installation via composer.
Configuration Settings for Admin Message Manager
Go to Admin > Stores > Configuration > Scommerce Configuration > Admin Message Manager
General Settings
- Enabled - Select "Yes" or "No" to enable or disable the module.
- License Key - Please add the license for the extension which is provided in the order confirmation email. Please note license keys are site URL specific. Please go to Admin > Stores > Configuration > Scommerce Configuration > Core and click on "Verify" to verify the license key.
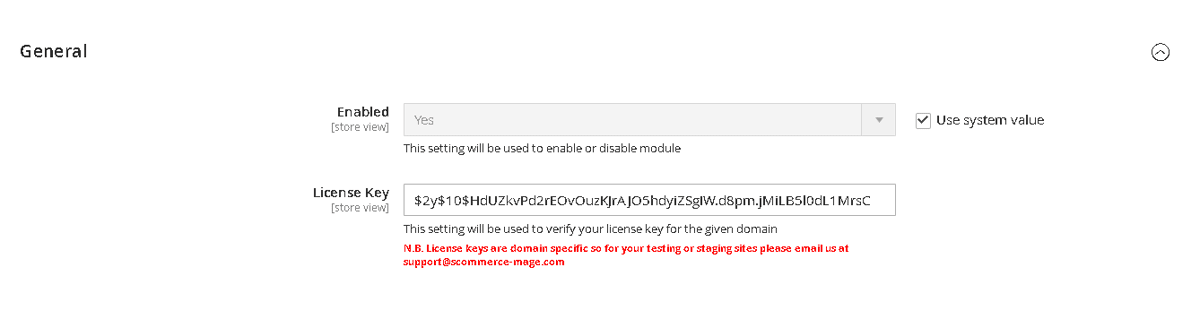
Admin Message Manager Workflow
Using this extension an admin create custom messages for the other admins and pass on critical updates based on user roles.
The admin can only use this functionality if the have the "Scommerce Admin Message Manager Section" selected under role resources for their user role.
Step 1: Access the Admin Message Grid
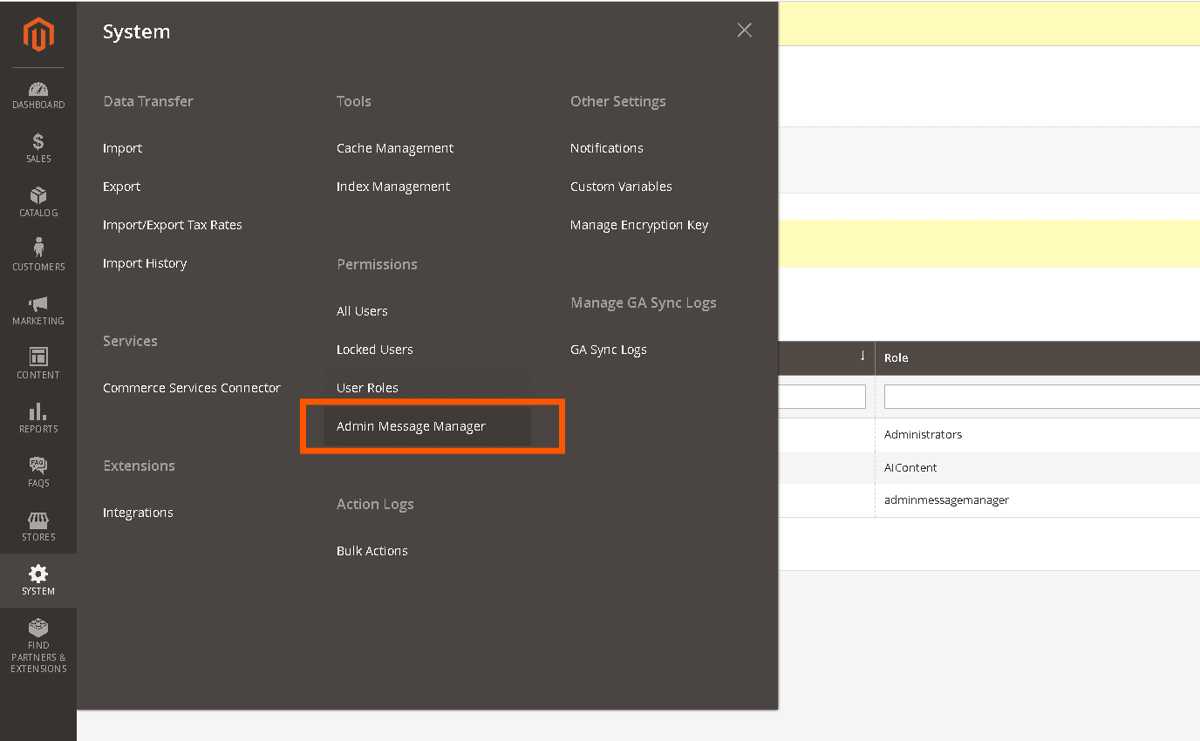
Step 2: Create a New Message
- Go to Admin>System>Admin Message Manager
- Click "Add New Message".
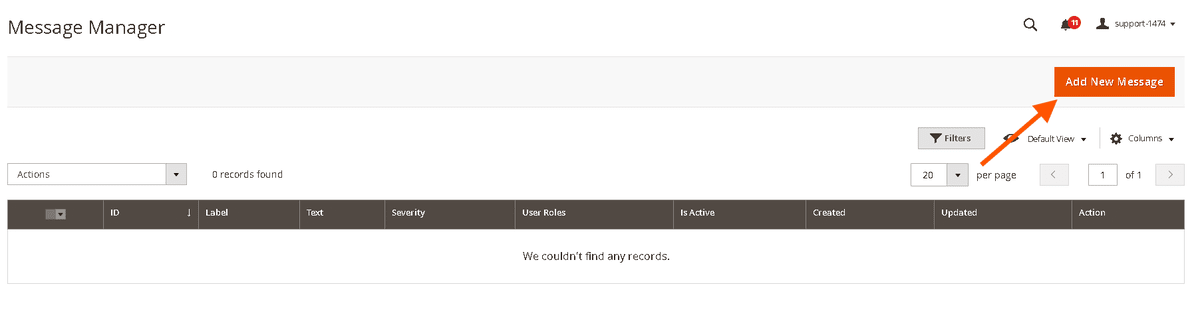
- Fill in the form:
- Enabled :- Turn it on to enable the message (Active/Inactive toggle)
- Message Label (Optional identifier)
- Severity Type (Notice, Warning, Success, Error)
- User Roles (Multi-select roles that should see the message)
- Message Text (Supports HTML links, bold, italics via WYSIWYG editor)
- Click "Save".
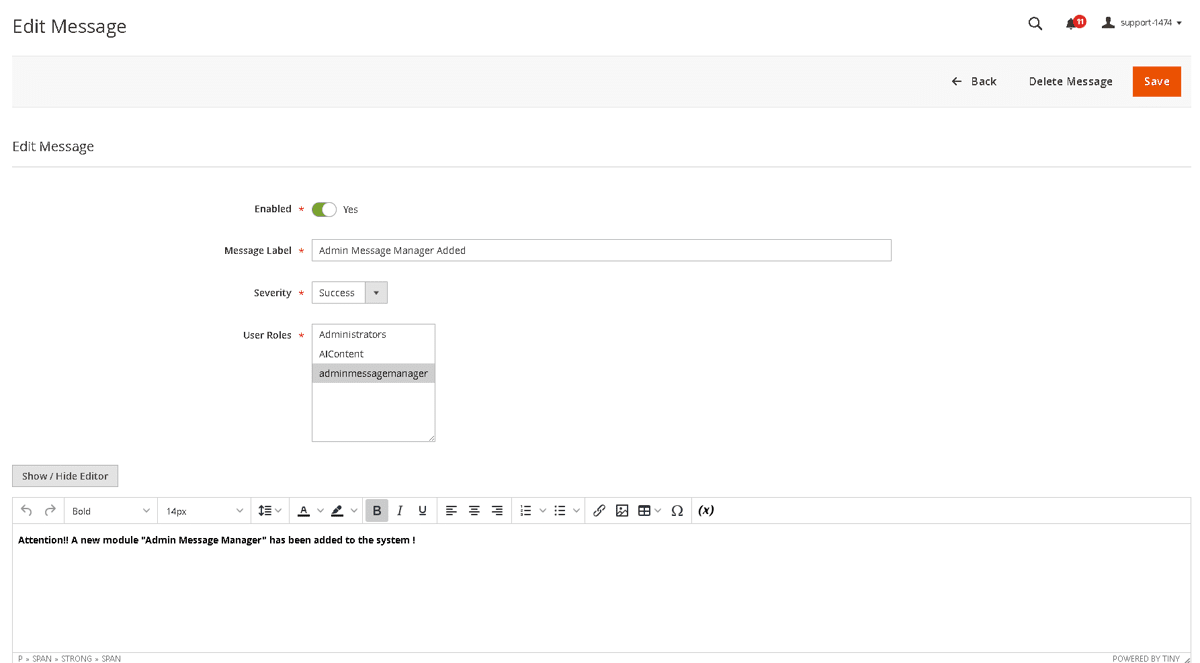
Note:
- Required fields: Enabled, Message Label, Severity, at least one User Role, Message Text.
- HTML is sanitized for security (only
<a>,<strong>,<em>allowed).
Step 3: Edit or Delete Messages
Edit A Message
- In the grid, click "Edit" on the desired message.
- Modify any field (Label, Text, Severity, User Roles, Enabled).
- Click "Save" or "Delete" (if removing the message).
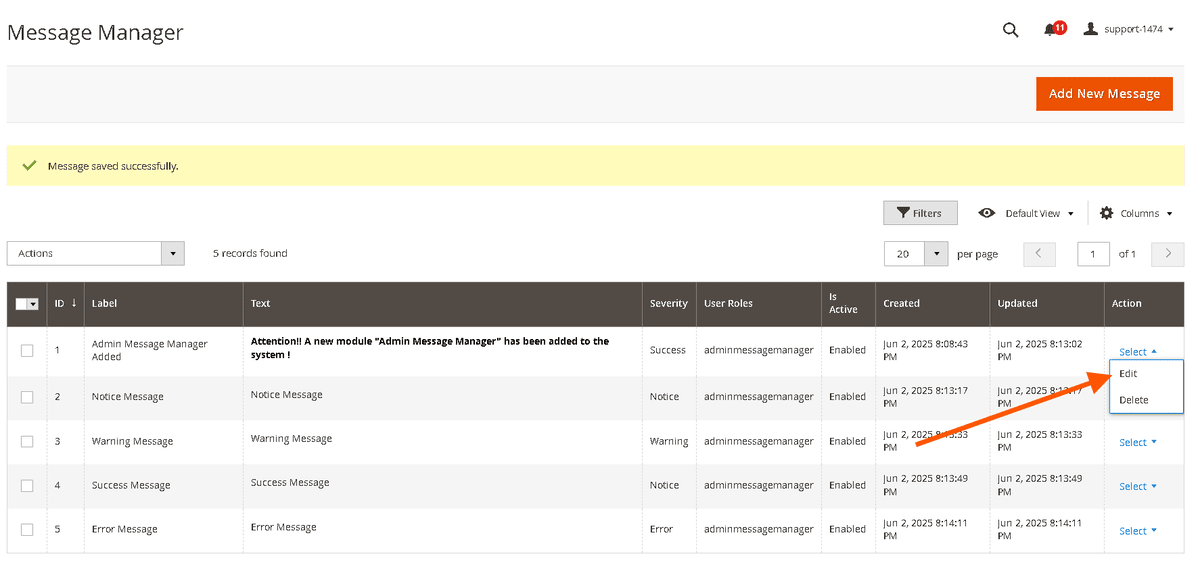
Delete A Message
Option 1: Single Deletion (From Grid)
- Click "Delete" on the Edit row then confirm deletion
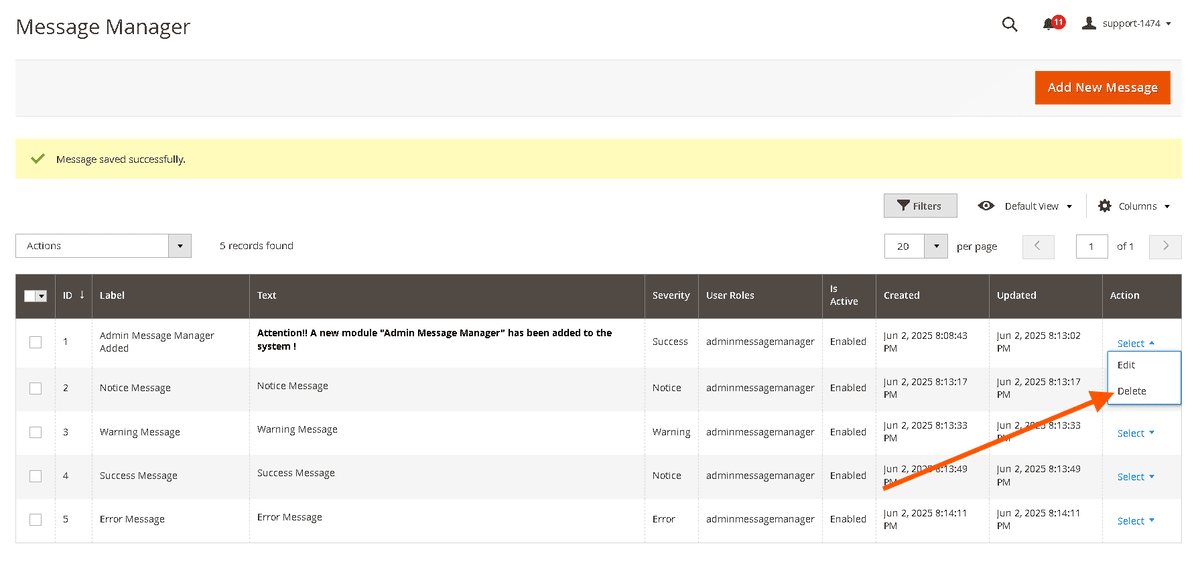
Option 2: Single Deletion (From Edit Form)
- Open the message>Click "Delete Message">Confirm.
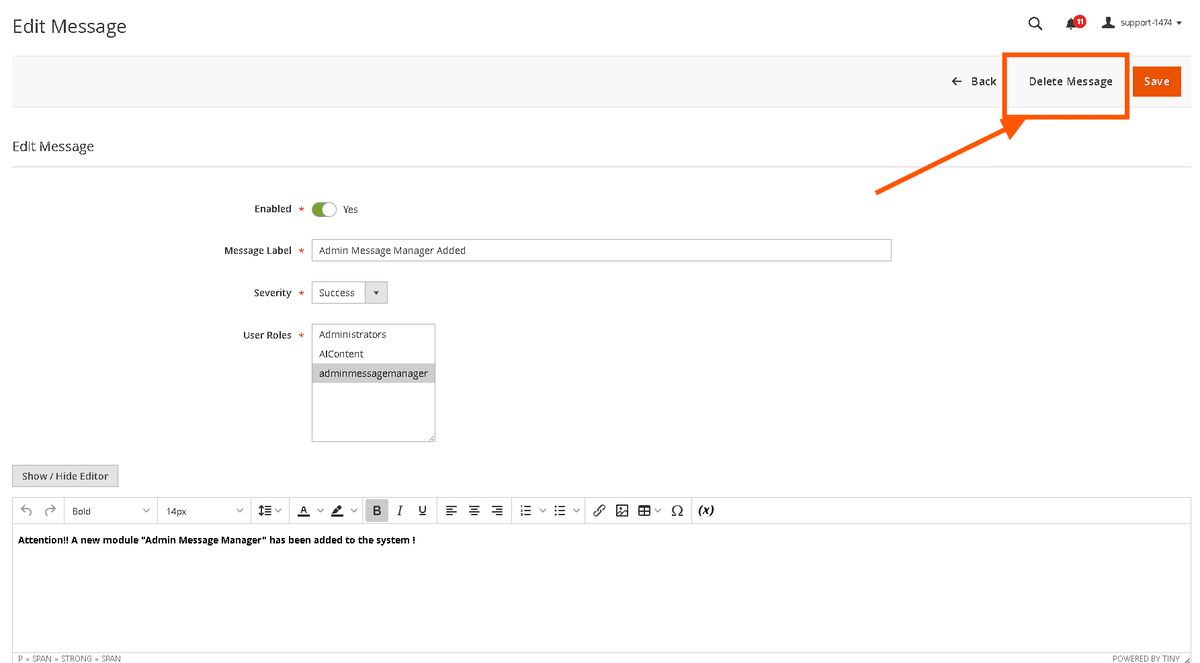
Option 3: Mass Delete (Bulk Action)
- Select checkboxes next to messages.
- From the Actions dropdown, choose "Delete".
- Confirm by clicking "OK" in the popup.
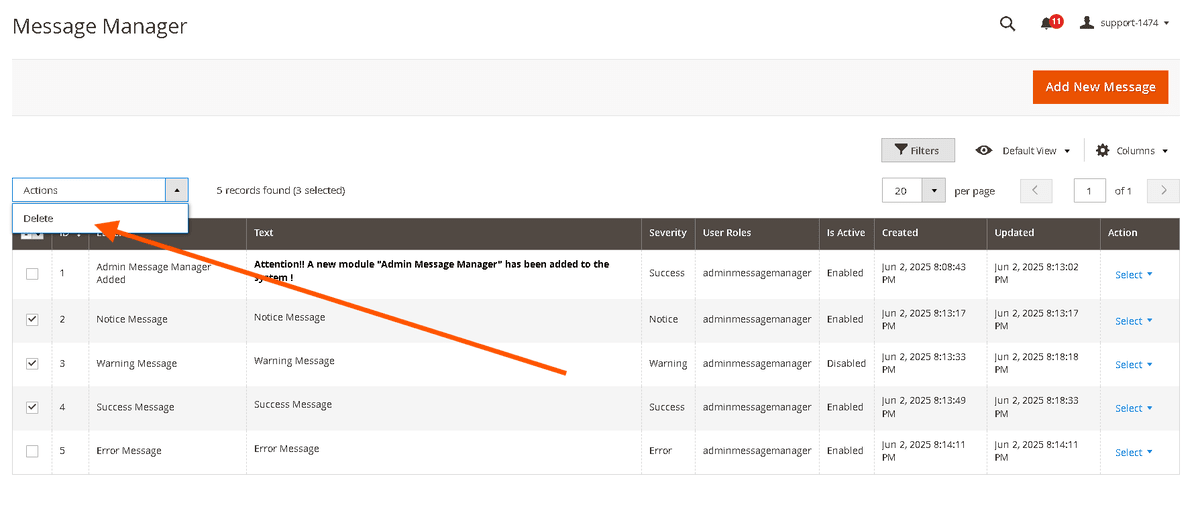
Display Logic for Admin Messages
When Do Messages Appear?
A message is displayed in the admin panel if:
- Status = Active
- Admin user's role matches at least one selected role in the message.
How Do Messages Appear?
HTML Support
View Messages in Admin Panel
- Messages appear as sticky banners at the top of the admin panel.
- Only active messages matching the user's role are displayed.
Notice Message
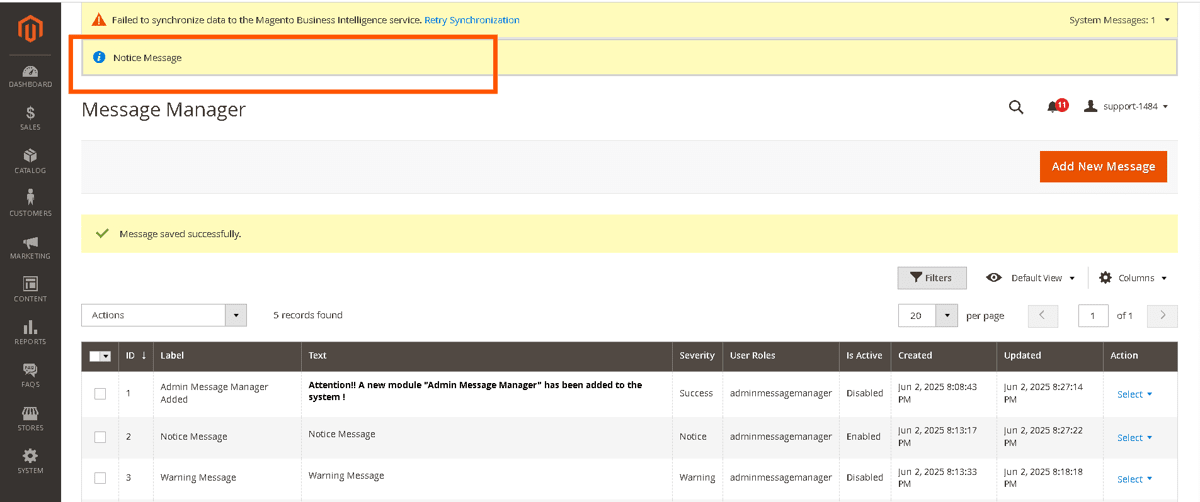
Warning Message
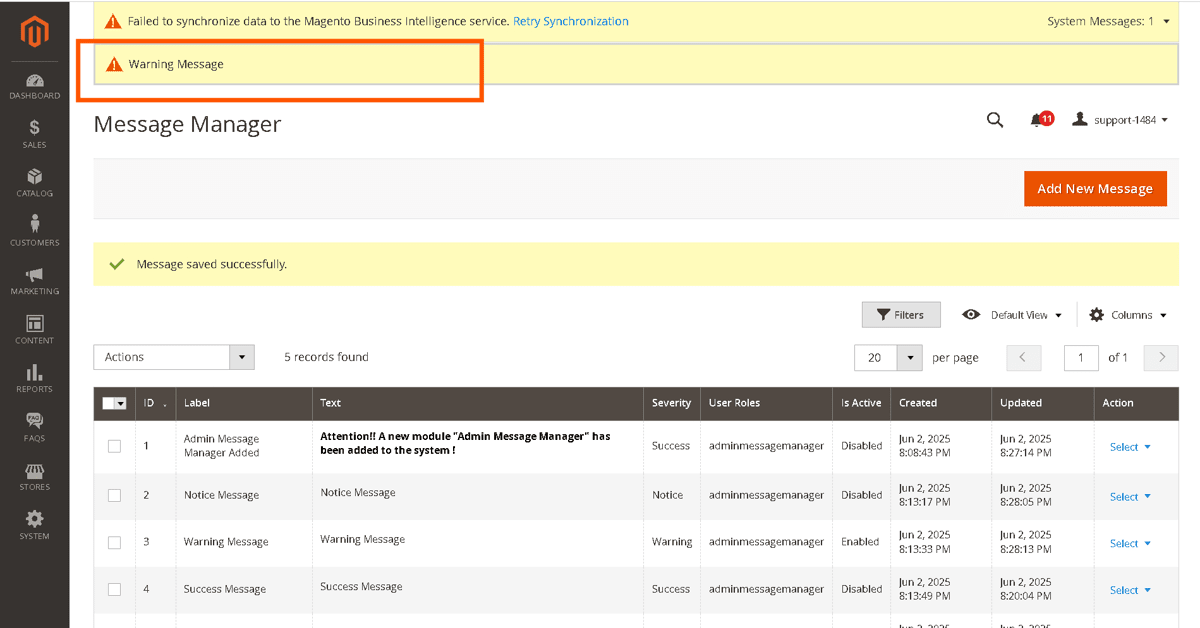
Success Message
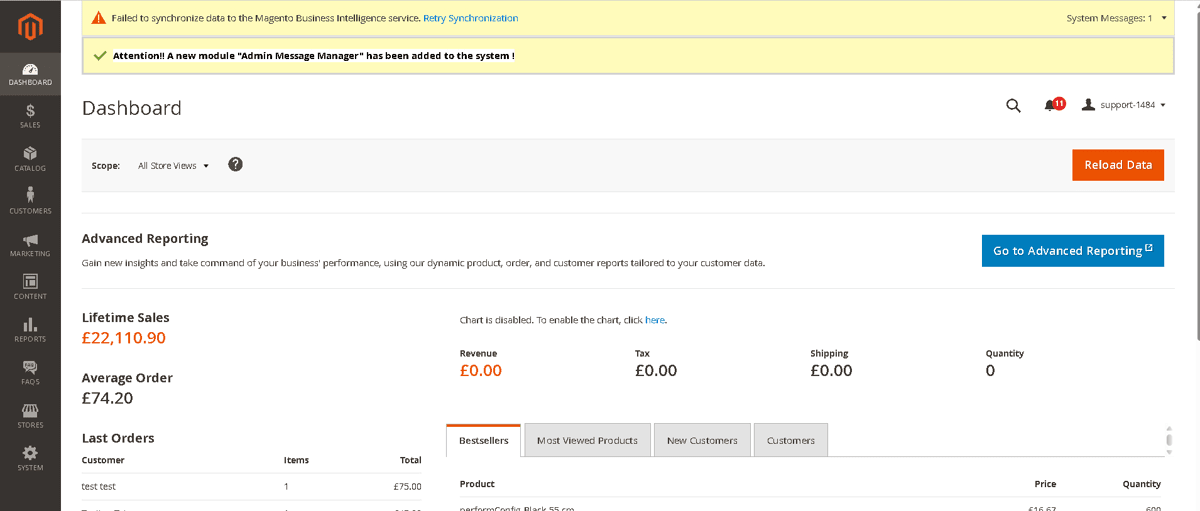
Error Message
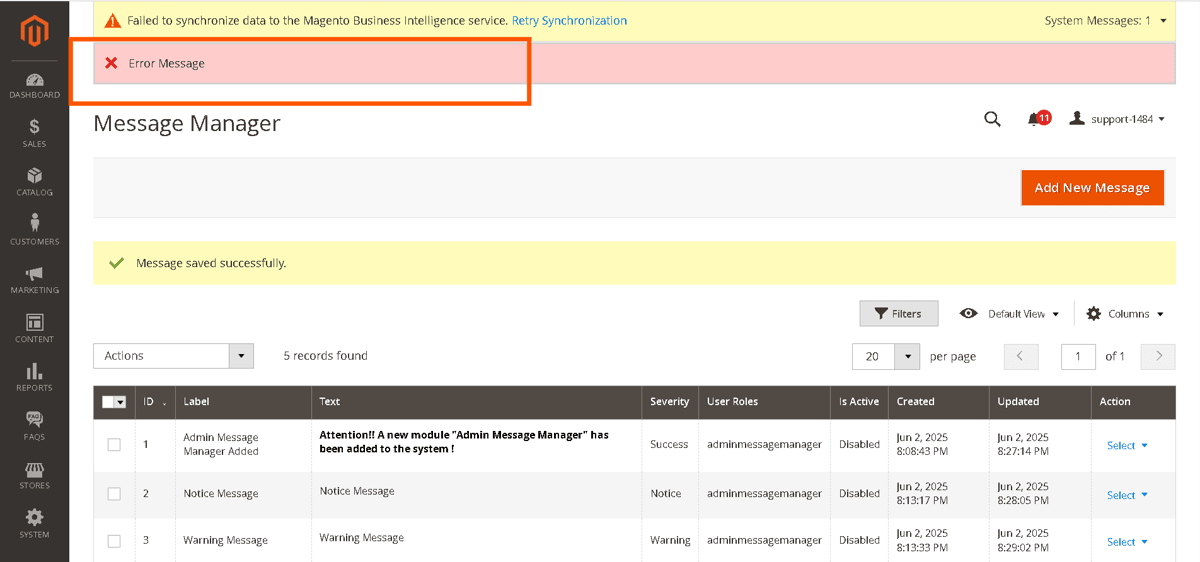
If you have a question related to this extension please check out our FAQ Section first. If you can't find the answer you are looking for then please contact support@scommerce-mage.com.
Magento 2 Advanced Admin Login Security
Installation and User Guide for Magento 2 Advanced Admin Login Security Extension
Table of Contents
- Installation
- Download Extension
- Installation via app/code
- Installation via Composer
- Configuration Settings for Security Base
- General Settings
- Configuration Settings for Advanced Login Security
- Scommerce Admin Login Security
- Admin Login Attempts
- Blacklist
- Whitelist
Installation
-
Download Extension: Once you have placed the order from our site then go to the Account section, click on My Downloadable Products, and download the extension package.
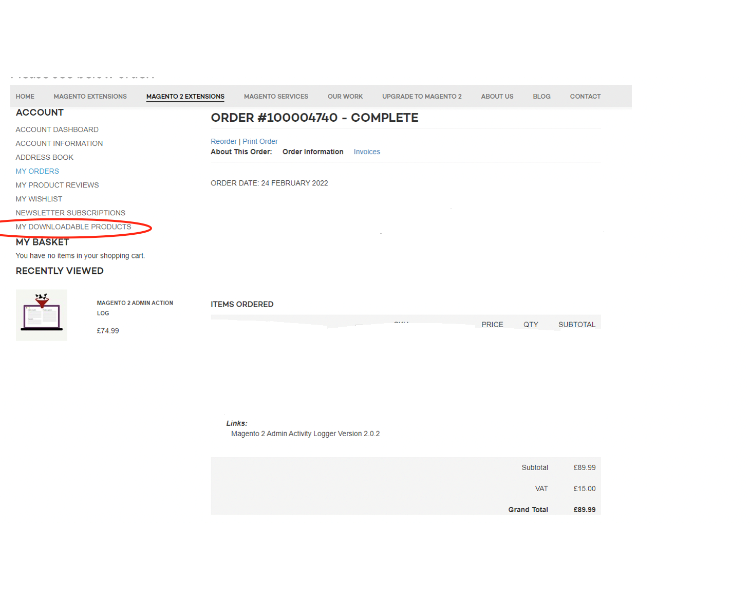
-
Installation via app/code: Upload the content of the module to your root folder. This will not overwrite the existing Magento folder or files, only the new contents will be added. After the successful upload of the package, run the below commands on the Magento 2 root directory.
php bin/magento setup:upgrade php bin/magento setup:di:compile php bin/magento setup:static-content:deploy - Installation via Composer: Please follow the guide provided in the below link to complete the installation via composer.
Configuration Settings for Security Base
Go to Admin > Stores > Configuration > Scommerce Configuration > Security Base
General Settings
- Enabled – Select "Yes" or "No" to enable or disable the module.
- License Key – Please add the license for the extension which is provided in the order confirmation email. Please note license keys are site URL specific. If you require license keys for dev/staging sites then please email us at support@scommerce-mage.com.
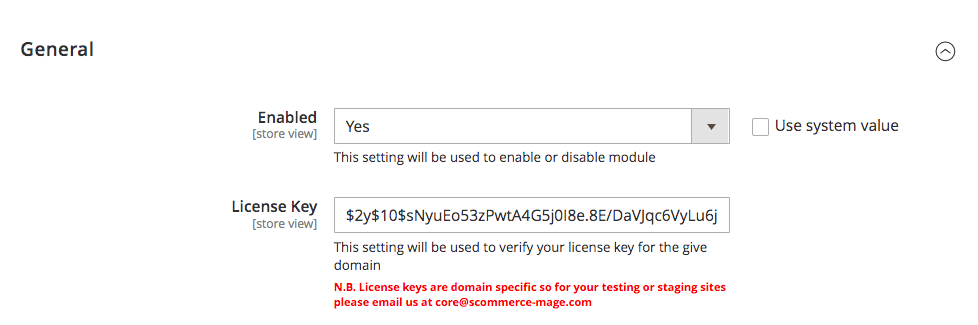
Configuration Settings for Admin Login Security
Go to Admin > Stores > Configuration > Scommerce Configuration > Admin Login Security
General Settings
-
Enabled Admin Login Security – Select "Yes" or "No" to enable or disable the module.
-
Failed Attempts Limit :- Set the attempt limit for admin login. Once exceeded the account will be locked out or blacklisted as per further configuration. Make sure this limit is less than default Magento configuration.
-
Apply Action On Exceed Limit:- Choose the penalty for exceeding the failed attempt limit, between "Lockout" or "Blacklist. Lockout - When the number of failed attempts exceeds, the IP will remain blacklisted until the 'Valid till' time limit. The 'Valid till' limit can be defined by the configuration 'Locked out period (in hours)'
Blacklist - This action will be applied when the 'Failed Attempts Limit' is exceeded and the IP will be blacklisted until it is manually removed. -
Locked out period (in hours):- Set the "Valid Till" limit for the Lockout feature. The accounts will be locked out for period entered in this configuration.
-
Block Email Enabled:- Enable Emails when any lockout or blacklist occurs. The email is sent to the Store Owner as well as the blacklisted/locked-out user.
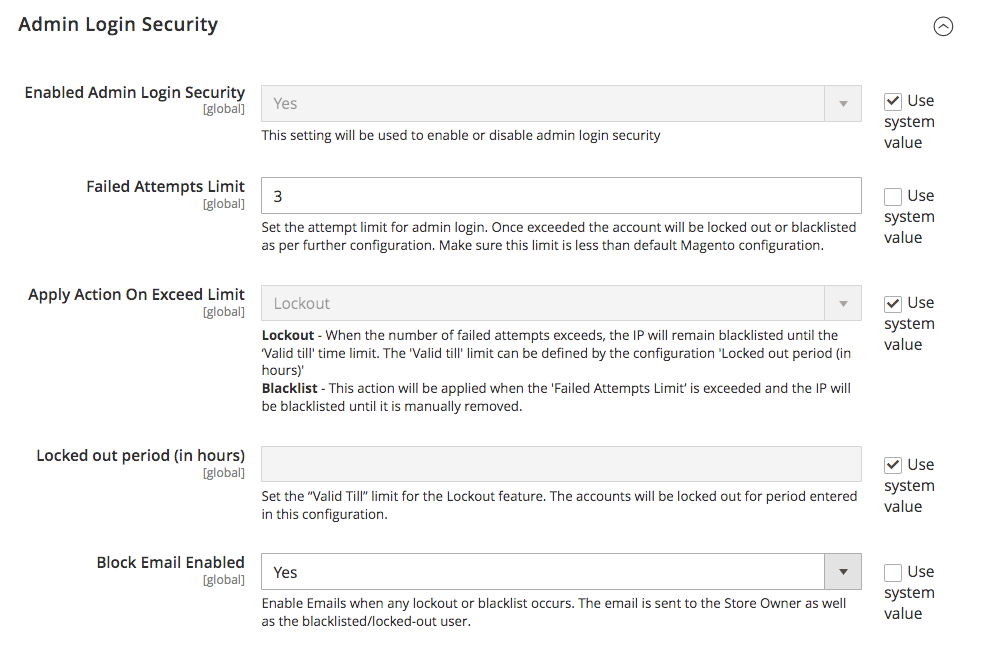
-
IP Block Email Template:- Select the email template to be used to send the email when a lockout/blacklist occurs.
-
Block And Lock Event Email Sender:- Select the sender email from your Default Magento configuration in case of lockout or blacklist.
-
Recipient Block Email:- Add the email (store owner) which will get emails about each and every lockout/blacklist. Whenever a lockout/blacklist happens the email will be sent to this address as well as the user.
-
Enabled Clear Login Attempts Logs Cron Job:- Set "Yes" or "No" to enable or disable clear logs cron job.
-
Clear Login Attempts Logs Cron Schedule:- Set the cron job to define how often you want to clear Login Attempts logs
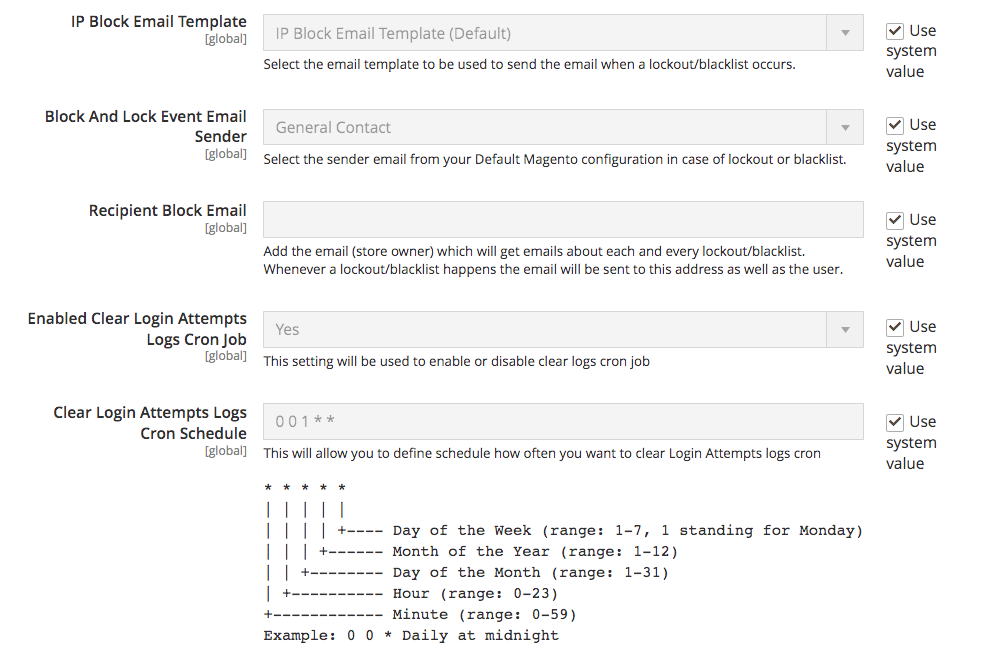
-
Clear Login Attempts Logs Older Than X Days:- Set the number of days based on which the Login attempts Logs will be cleared based which are older than the set days. For eg:- if set 2, any login attempts logs older than 2 days will be cleared.
-
Enabled Clear Lockouts Cron Job:- Set "Yes" or "No" to enable or disable clear of not active lockouts by cron job
-
Clear Lockouts Cron Schedule:- Set the cron job to define schedule how often you want to clear logs
-
Allowed Countries:- Block users from one or multiple countries. If no country is selected, all countries are allowed.
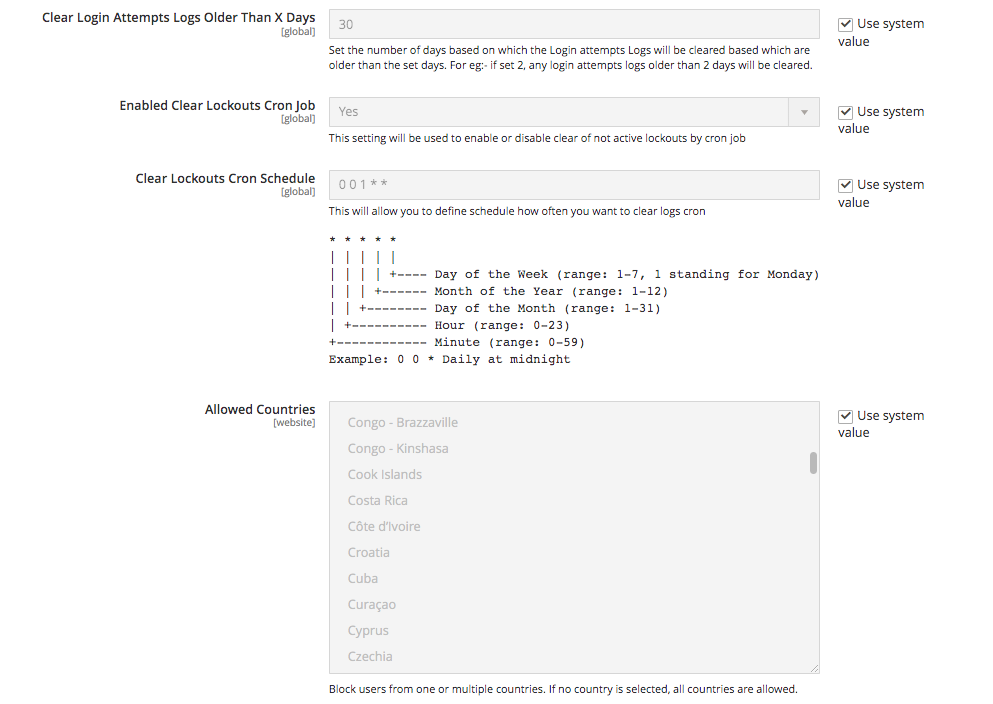
-
Enabled Whitelist:- Set "Yes" or "No" to enable or disable whitelisting for an IP. If enabled, the user won't be allowed to log in until the IP is whitelisted.
-
Whitelist Email Enabled:- Set "Yes" or "No" to enable or disable whitelist Email. If this is enabled, the user will be sent an email with a link that allows them to either approve or deny the login.
Approve - By approving, the IP will be added to the whitelist.
Deny - The IP will be added to the blacklist if denied. -
Whitelist request lifetime:- Set the request lifetime to define how long whitelist request will be valid in hours By default 1 hour.
-
IP Whitelist Email Template:- Select the email template for the login approval email that is sent to the user, based on the approval the user is whitelisted or blacklisted.
-
Whitelist Event Email Sender:- Select the sender email to be used to send out the User approval/whitelist email to the user.
-
Recipient Email:- Add the email (store owner) which will get emails about User approval/Whitelist emails. Whenever a user-approval/whitelist happens the email will be sent to this address as well as the user so store owner can also approve or deny the user from the email.
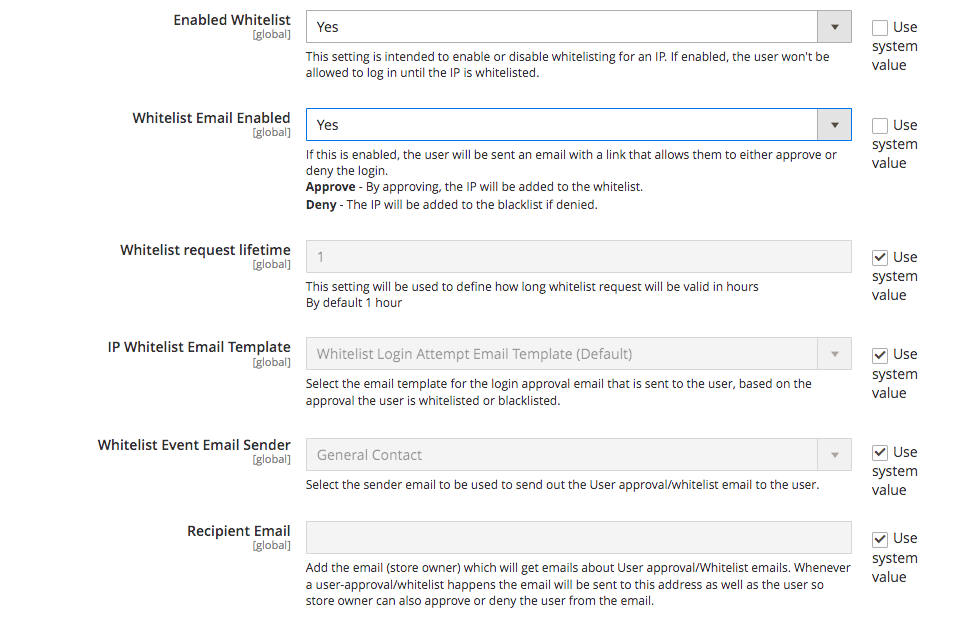
Scommerce Admin Login Security
Go to Admin > System > Scommerce Admin Login Security>
Admin Login Attempts
The Admin Login Attempts grid keeps a record of every login attempt made to the admin panel with various key details such as:-
- ID
- IP Address
- Success
- Admin Username
- Created At
The grid is completely filterable with various columns such as ID, IP Address, Admin Username, Created At etc.
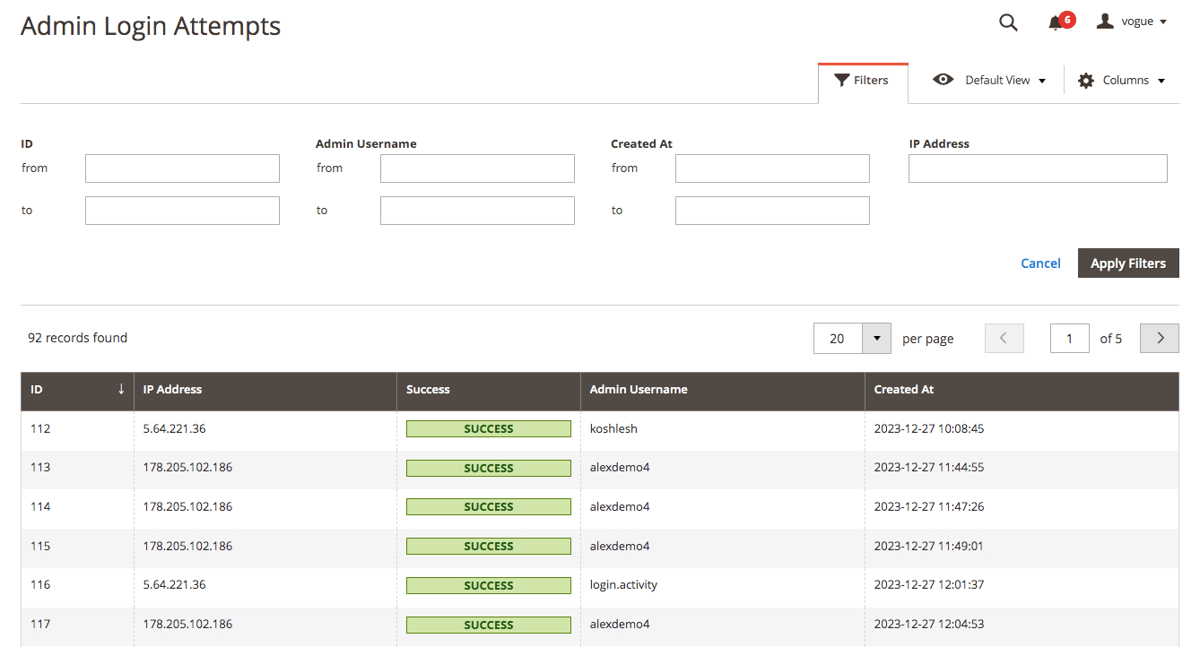
Blacklist
The blacklist records grid contains information about all the blacklist users with several details such as ID, IP Address, Admin Username, Valid till, Created At, and Action. This grid is completely filterable. Each of the record can be deleted or edited from the Action column.
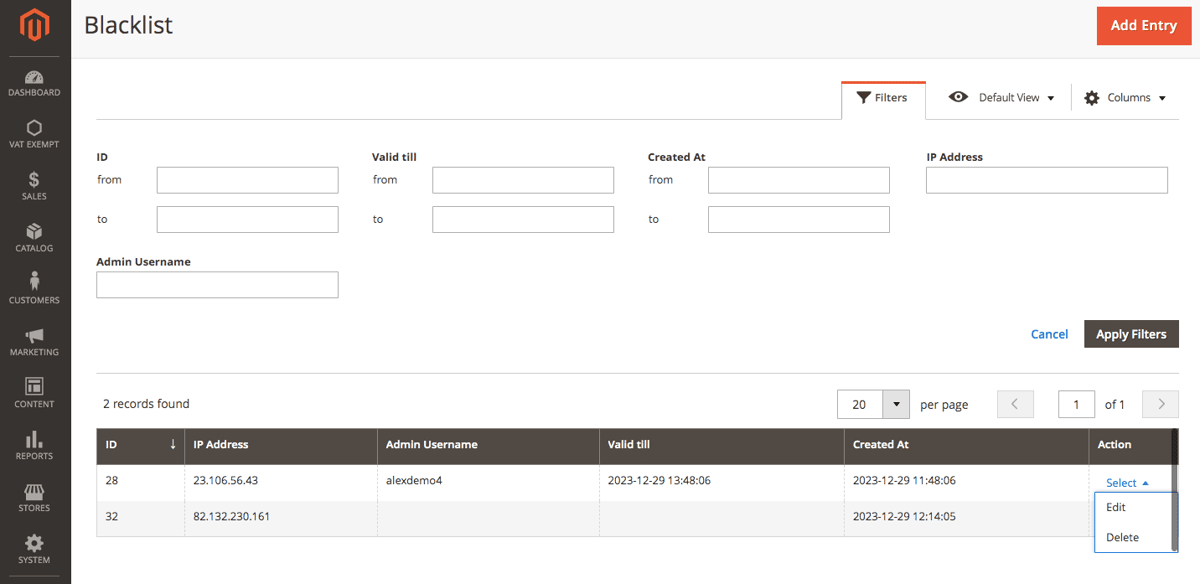
Go to Action>Edit and you can change various details for each of the records such as IP Address, Username, and Valid till date.
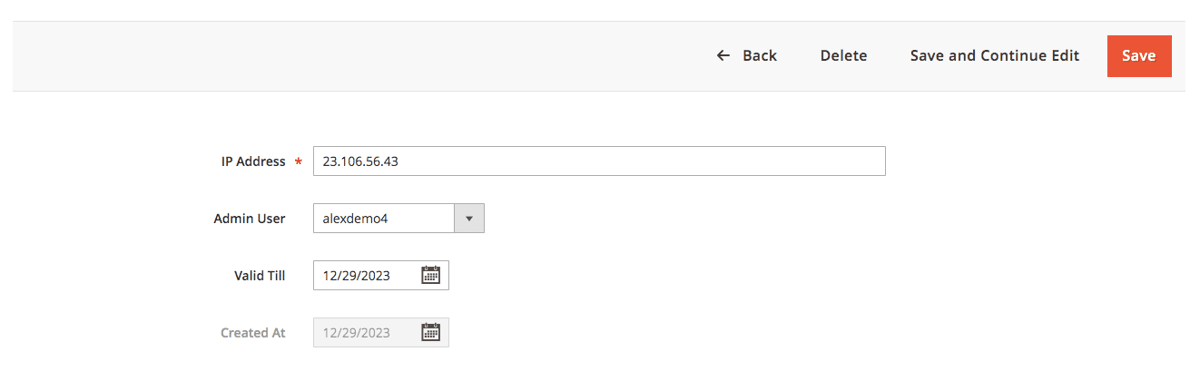
Whitelist
The Whitelist records grid contains information about all the blacklist users with several details such as ID, IP Address, Admin Username, Created At, and Action. This grid is completely filterable. Each of the records can be deleted or edited from the Action column.
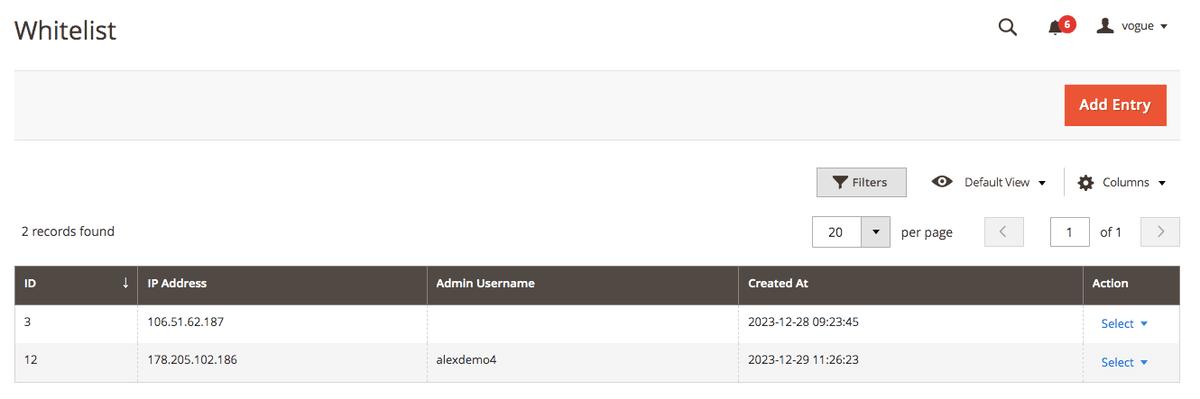
Go to Action>Edit and you can change various details for each of the records such as IP Address, and Username.
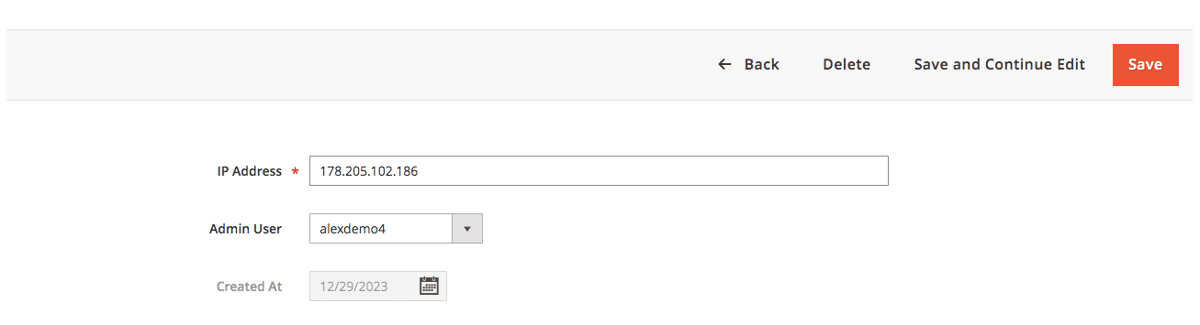
If you have a question related to this extension please check out our FAQ Section first. If you can't find the answer you are looking for then please contact support@scommerce-mage.com.
Magento 2 Admin Security Checklist
Installation and User Guide for Magento 2 Security Checklist Extension
Table of Contents
- Installation
- Download Extension
- Installation via app/code
- Installation via Composer
- Configuration Settings for Security Base
- General Settings
- Configuration Settings for Security Checklist
- General Settings
- Security Checklist Report
- Security Checklist Report
Installation
-
Download Extension: Once you have placed the order from our site then go to the Account section, click on My Downloadable Products, and download the extension package.
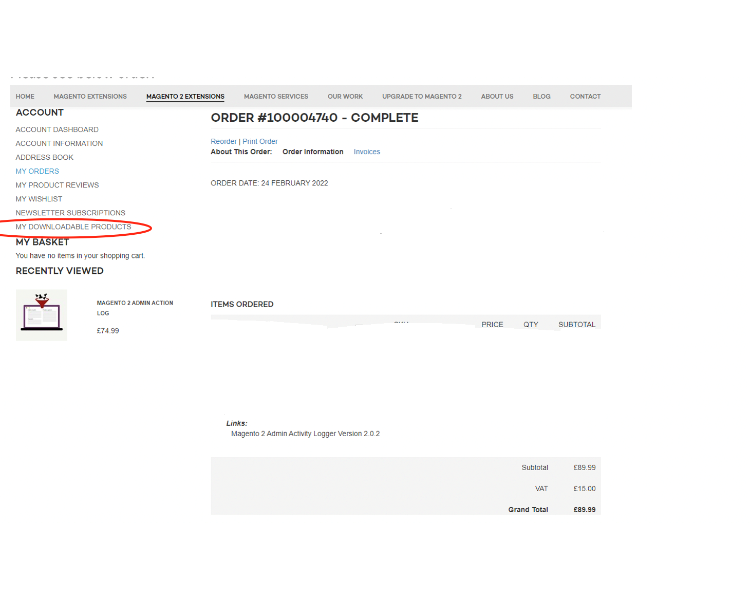
-
Installation via app/code: Upload the content of the module to your root folder. This will not overwrite the existing Magento folder or files, only the new contents will be added. After the successful upload of the package, run the below commands on the Magento 2 root directory.
php bin/magento setup:upgrade php bin/magento setup:di:compile php bin/magento setup:static-content:deploy - Installation via Composer: Please follow the guide provided in the below link to complete the installation via composer.
Configuration Settings for Security Base
Go to Admin > Stores > Configuration > Scommerce Configuration > Security Base
General Settings
- Enabled – Select "Yes" or "No" to enable or disable the module.
- License Key – Please add the license for the extension which is provided in the order confirmation email. Please note license keys are site URL specific. If you require license keys for dev/staging sites then please email us at support@scommerce-mage.com.
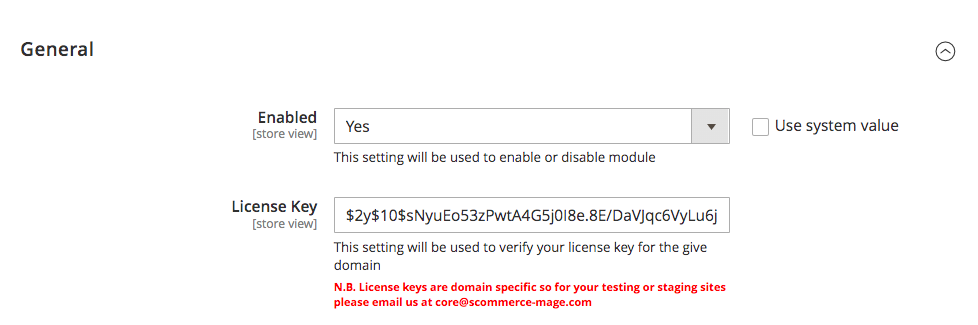
Configuration Settings for Security Checklist
Go to Admin > Stores > Configuration > Scommerce Configuration > Security Checklist
General Settings
-
Enabled Security Checklist – This setting will be used to enable or disable admin security checklist
-
Enable Database prefix check :- This setting will be used to enable or disable check for DB prefix. Database prefix added in file, to make it work you also need to make changes in database.
-
Enable FE Captcha check:- This setting will be used to enable or disable checks for Frontend Captcha. Go to Stores > Configuration > Security > Google reCAPTCHA Storefront in order to verify it.
-
Enable BE Captcha check:- This setting will be used to enable or disable checks for Backend Captcha. Go to Stores > Configuration > Security > Google reCAPTCHA Admin Panel and Stores > Configuration > Admin > CAPTCHA Storefront in order to verify it.
-
Enable Magento version check- This setting will be used to enable or disable check for Magento Version and latest security patches.
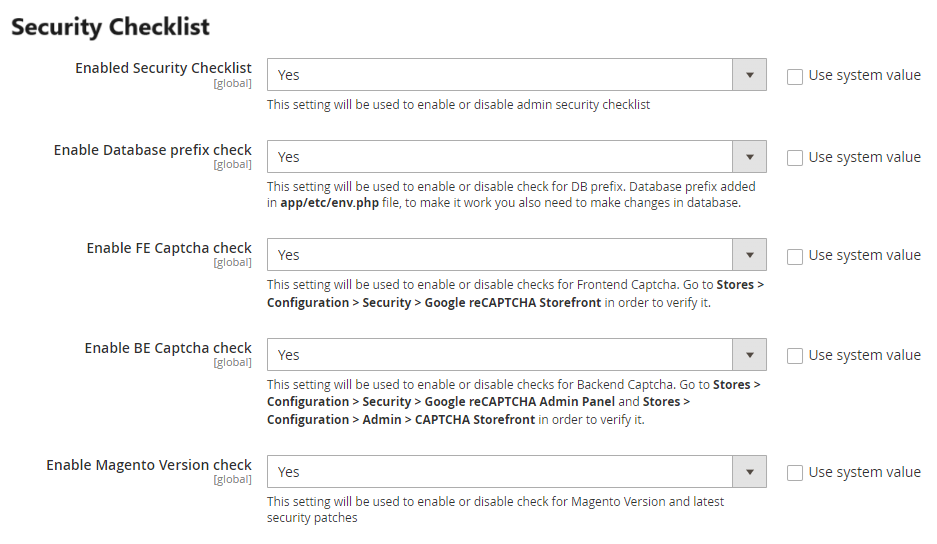
-
Enable Admin Users check-:- This setting will be used to enable or disable check for Admin Users Security. Especially usernames, password lifetime policy and login activity. Go to Stores > Configuration > Advanced > Admin > Security Or Go to System > Permission > All users to manage admin users
-
Admin Usernames Stop List:- You can add list of usernames that shouldn't be used for admin accounts. Comma separated.
-
Enabled Admin Path Check:- This setting will be used to enable or disable check for Admin Path Security. Admin Path is configured in file or go to Advanced > Admin > Admin Base URL > Use Custom Admin Path to change it
-
Admin Path Stop List:- You can add list of paths that shouldn't be used for admin. Comma separated.
-
Enable Content Script Check:- This setting will be used to enable or disable check for scripts added in your content or configuration
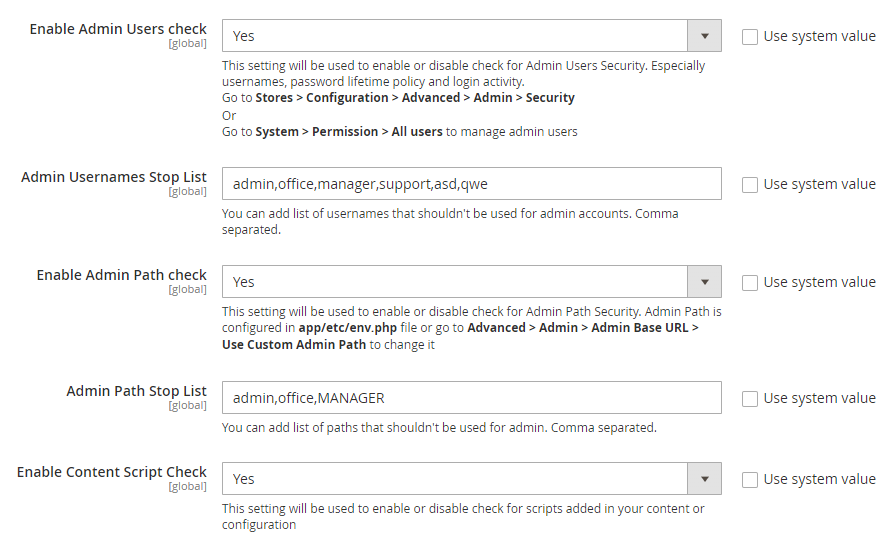
-
Enabled Checklist Check Cron Job:- If enabled the security checklist also checks whether admin 2FA is enabled or not.
-
Enabled Checklist Check Cron Job:- This setting will be used to enable or disable checklist cron job
-
Checklist Cron Schedule:- This will allow you to define schedule how often you want to clear Login Attempts logs cron.
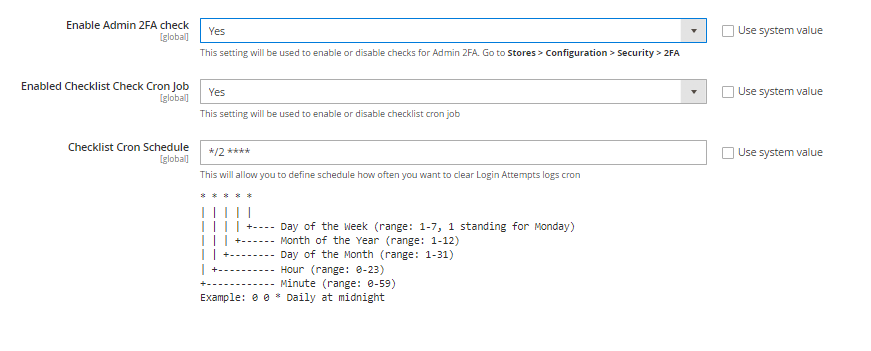
Security Checklist Report
Go to Admin > System > Scommerce Security> Security Checklist
Security Checklist Report
The Security checklist grid has several distinctions for various checks: Warning, Error and Success
- Admin password Protection: - For Admin password protection, if a password change is not forced, the user will see an error. If the lifetime is more than 90 days, the user will see a warning. If a password change is forced and the lifetime is less than 90 days, then the user will see success.
- Magento version check: - For a Magento version check, if the version is outdated, the user will see an error. Otherwise, the user will see success.
- Database Prefix check: - For the Database prefix check, if the table prefix is not set in the configuration file, the user will see an error. Otherwise, the user will see success.
- Frontend ReCaptcha Protection - For Frontend ReCaptchaProtection, if all frontend forms are protected with recaptcha, the user will see a success. When some forms are protected, the user will see a warning. If none of the forms are protected, the user will see an error.
- Admin Captcha Protection:- For Admin Captcha protection, if all backend forms are protected with Captcha, the user will see a success. When some forms are protected, the user will see a warning. If none of the forms are protected, the user will see an error.
- Admin path protection: - For Admin path protection, if the user's admin path doesn't contain words from the stop list, doesn't contain numbers or capital letters, and is at least 15 characters long, the user will see a success. If any of the criteria mentioned are not fulfilled, the user will see a warning.
- Admin usernames check:- For Admin usernames check, if the username contains words from the stop list or if the username contains numbers, the user will see a warning. Otherwise, success.
- Admin users activity check: - For Admin admin user activity check, if the account is unused, the user will see a warning. Otherwise, success.
- Check for static scripts inserted from Config and CMS Pages: - For Static scripts in Configuarion, CMS Blocks, and CMS Pages, if a text field has a static script, the user will see a warning. Otherwise, success.
- Check for static scripts inserted from Product Attributes: - For Static scripts inserted by any product attributes the user will see a warning with the name of the attribute otherwise, success.
- Check for Admin 2FA: - It also checks whether admin 2FA is enabled or not.
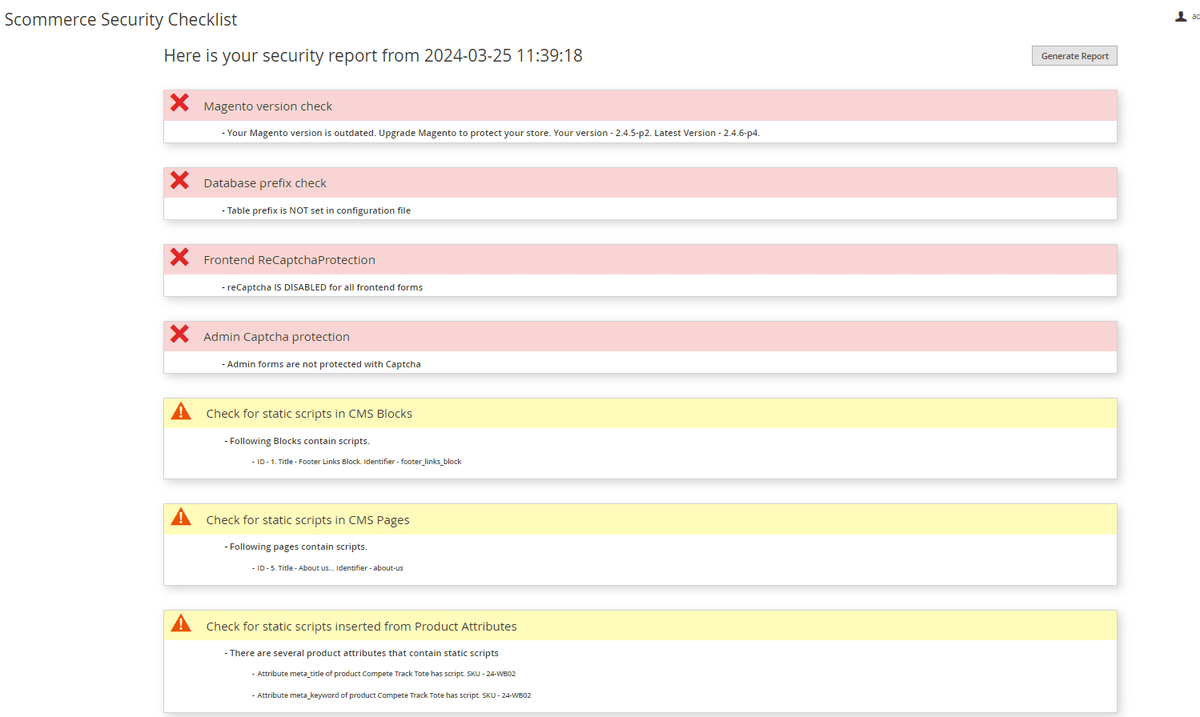
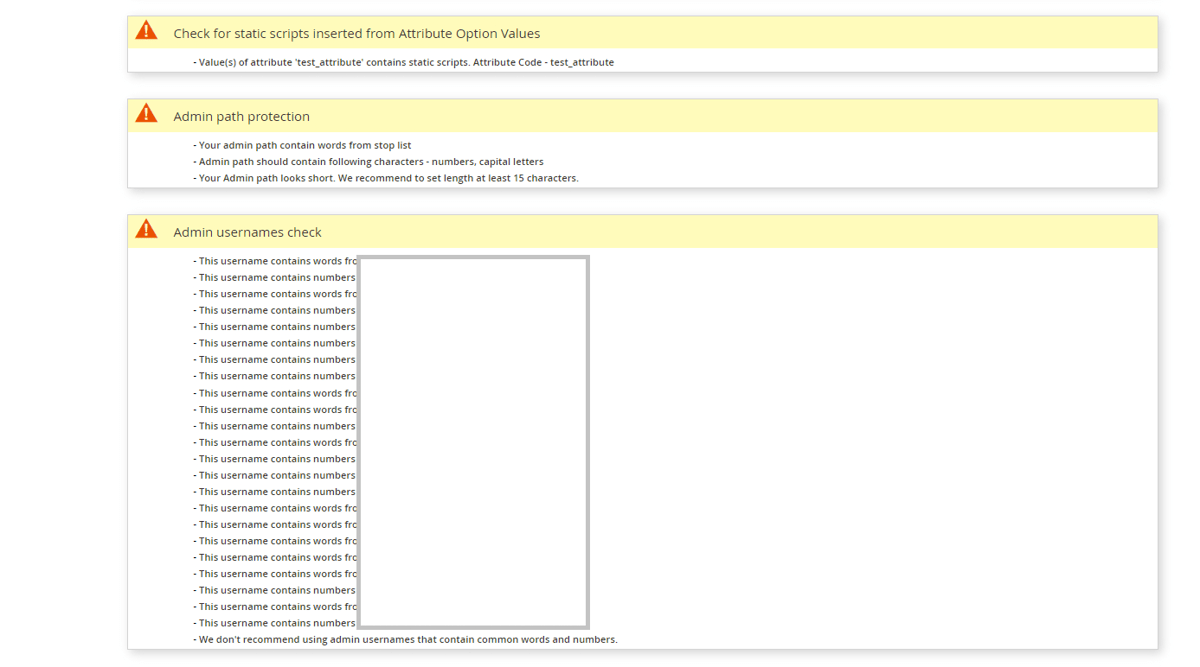
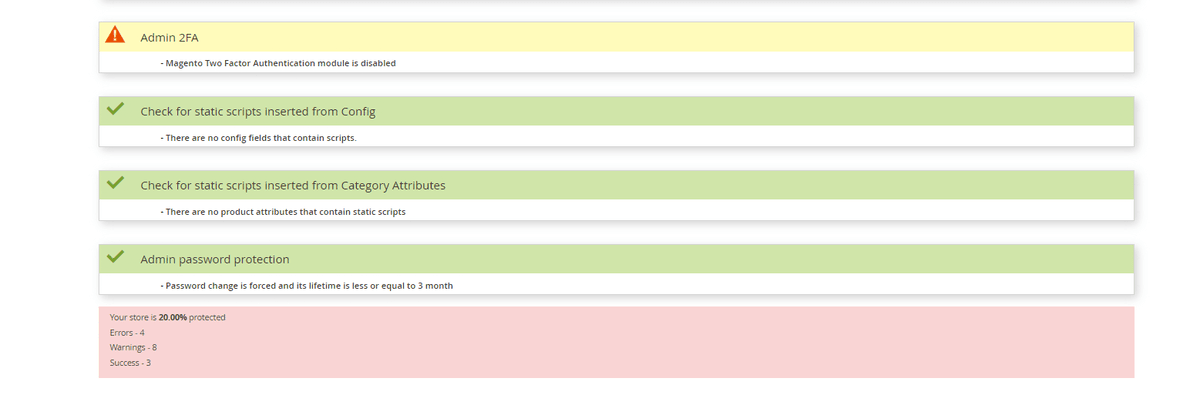
If you have a question related to this extension please check out our FAQ Section first. If you can't find the answer you are looking for then please contact support@scommerce-mage.com.
Magento 2 Security Suite
Installation and User Guide for Magento 2 Security Suite Extension
Table of Contents
- Installation
- Download Extension
- Installation via app/code
- Installation via Composer
- Configuration Settings for Security Base
- General Settings
- Configuration Settings for Security Checklist
- General Settings
- Configuration Settings for Admin Activity Logger
- General Settings
- Modules Activity Logger
- Admin Activity Logger
- Admin Activity Grid
- Admin Logger Detailed View for Admin Activities
- Admin Logger Detailed View for Item Info
- Login Activity Grid
- Active Sessions Grid
- Configuration Settings for Advanced Login Security
- Scommerce Admin Login Security
- Admin Login Attempts
- Blacklist
- Whitelist
- Security Checklist Report
- Security Checklist Report
Installation
-
Download Extension: Once you have placed the order from our site then go to the Account section, click on My Downloadable Products, and download the extension package.
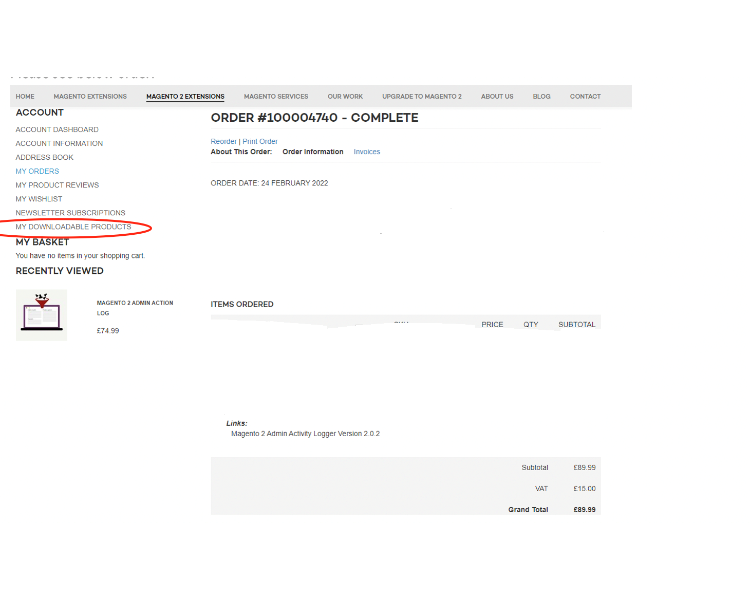
-
Installation via app/code: Upload the content of the module to your root folder. This will not overwrite the existing Magento folder or files, only the new contents will be added. After the successful upload of the package, run the below commands on the Magento 2 root directory.
php bin/magento setup:upgrade php bin/magento setup:di:compile php bin/magento setup:static-content:deploy - Installation via Composer: Please follow the guide provided in the below link to complete the installation via Composer.
Configuration Settings for Security Base
Go to Admin > Stores > Configuration > Scommerce Configuration > Security Base
General Settings
- Enabled – Select "Yes" or "No" to enable or disable the module.
- License Key – Please add the license for the extension which is provided in the order confirmation email. Please note license keys are site URL specific. If you require license keys for dev/staging sites then please email us at support@scommerce-mage.com.
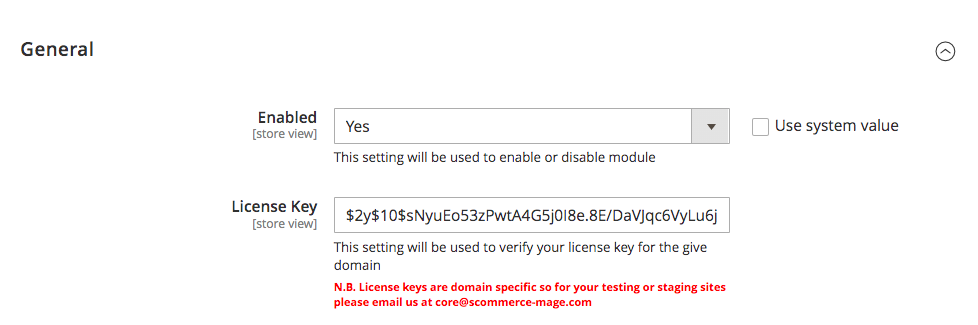
Configuration Settings for Security Checklist
Go to Admin > Stores > Configuration > Scommerce Configuration > Security Checklist
General Settings
-
Enabled Security Checklist – This setting will be used to enable or disable admin security checklist
-
Enable Database prefix check :- This setting will be used to enable or disable check for DB prefix. Database prefix added to make it work you also need to make changes in database.
-
Enable FE Captcha check:- This setting will be used to enable or disable checks for Frontend Captcha. Go to Stores > Configuration > Security > Google reCAPTCHA Storefront in order to verify it.
-
Enable BE Captcha check:- This setting will be used to enable or disable checks for Backend Captcha. Go to Stores > Configuration > Security > Google reCAPTCHA Admin Panel and Stores > Configuration > Admin > CAPTCHA Storefront in order to verify it.
-
Enable Magento version check- This setting will be used to enable or disable check for Magento Version and latest security patches.
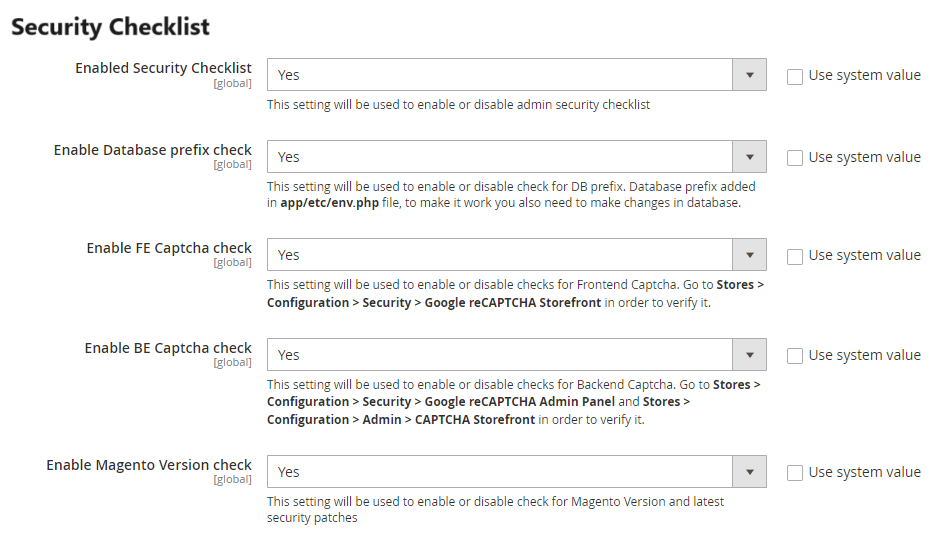
-
Enable Admin Users check-:- This setting will be used to enable or disable check for Admin Users Security. Especially usernames, password lifetime policy and login activity. Go to Stores > Configuration > Advanced > Admin > Security Or Go to System > Permission > All users to manage admin users
-
Admin Usernames Stop List:- You can add list of usernames that shouldn't be used for admin accounts. Comma separated.
-
Enabled Admin Path Check:- This setting will be used to enable or disable check for Admin Path Security. Admin Path is configured and go to Advanced > Admin > Admin Base URL > Use Custom Admin Path to change it
-
Admin Path Stop List:- You can add list of paths that shouldn't be used for admin. Comma separated.
-
Enable Content Script Check:- This setting will be used to enable or disable check for scripts added in your content or configuration
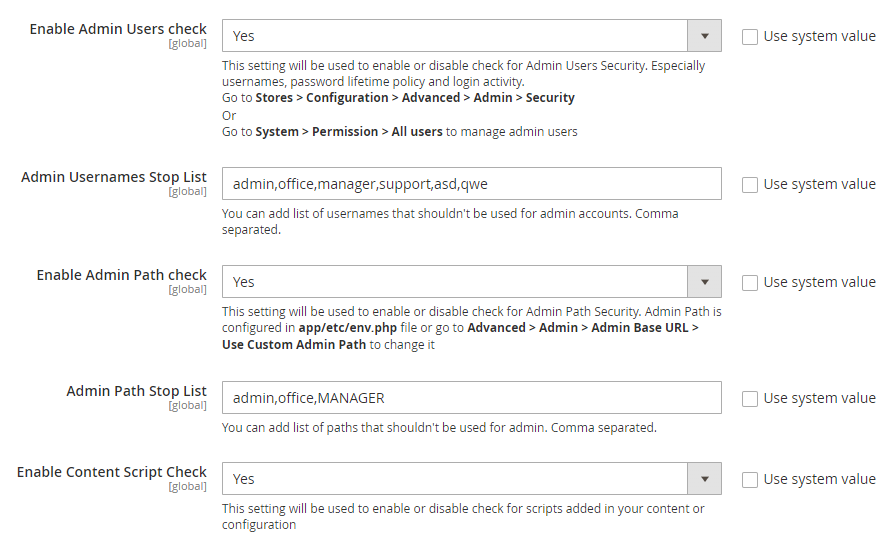
-
Enabled Checklist Check Cron Job:- This setting will be used to enable or disable checklist cron job
-
Checklist Cron Schedule:- This will allow you to define schedule how often you want to clear Login Attempts logs cron.
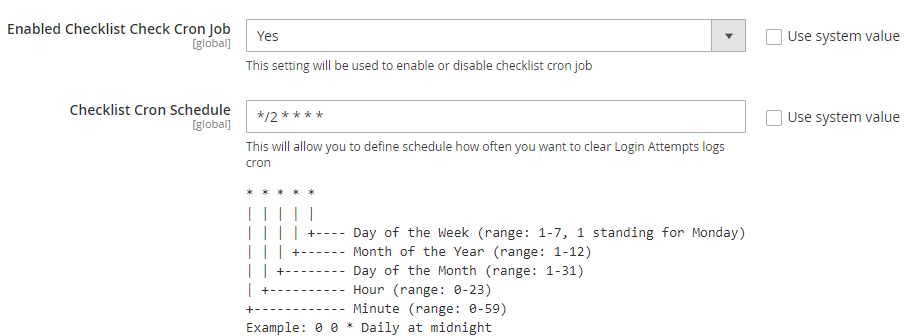
Configuration Settings for Admin Activity Logger
Go to Admin > Stores > Configuration > Scommerce Configuration > Admin Activity Logger
General Settings
- Enabled - Select "Yes" or "No" to enable or disable the module.
- License Key - Please add the license for the extension which is provided in the order confirmation email. Please note license keys are site URL specific. If you require license keys for dev/staging sites then please email us at core@scommerce-mage.com
- Admin Users Login Activity Enabled - Enable / Disable activity. It will log login activity of the admin users.
- Page visit History Enabled - Enable / Disable page history visiting log.
- Clear Admin Activity Logs After - Enter value. Clear all admin activity logs will be cleared after X days.
- Enabled Profiler - Enable / Disable time profiler. Duration of the operations will be logged.
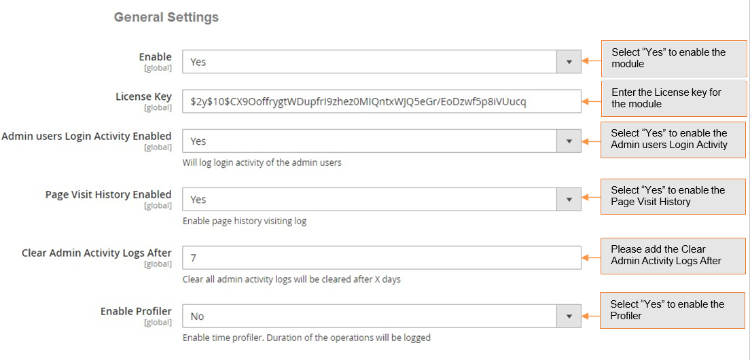
Modules Activity Logger
-
Order - Select "Yes" to enable. It will log order related activities.
-
Product - Select "Yes" to enable. It will log product related activities.
-
Category - Select "Yes" to enable. It will log category related activities.
-
Customer - Select "Yes" to enable. It will log customer related activities.
-
Email Template - Select "Yes" to enable.
-
Page - Select "Yes" or "No" to Enable / Disable.
-
Block - Select "Yes" or "No" to Enable / Disable.
-
Widget - Select "Yes" or "No" to Enable / Disable.
-
Theme - Select "Yes or "No" to Enable / Disable.
-
System Configuration - Select "Yes" or "No" to Enable / Disable.
-
Product Attributes - Select "Yes" or "No" to Enable / Disable.
-
Admin User - Select "Yes" to enable. It will log all users activities.
-
SEO - Select "Yes" or "No" to Enable / Disable.
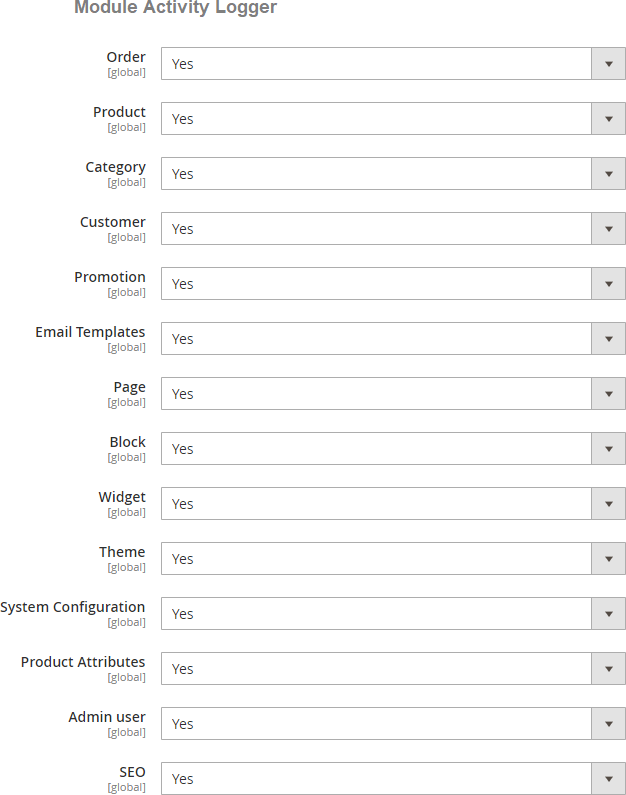
-
Admin Activity Logger - You can view admin activity logger from, Admin > System > Scommerce Admin Activity Logger > Admin Activity / Login Activity.
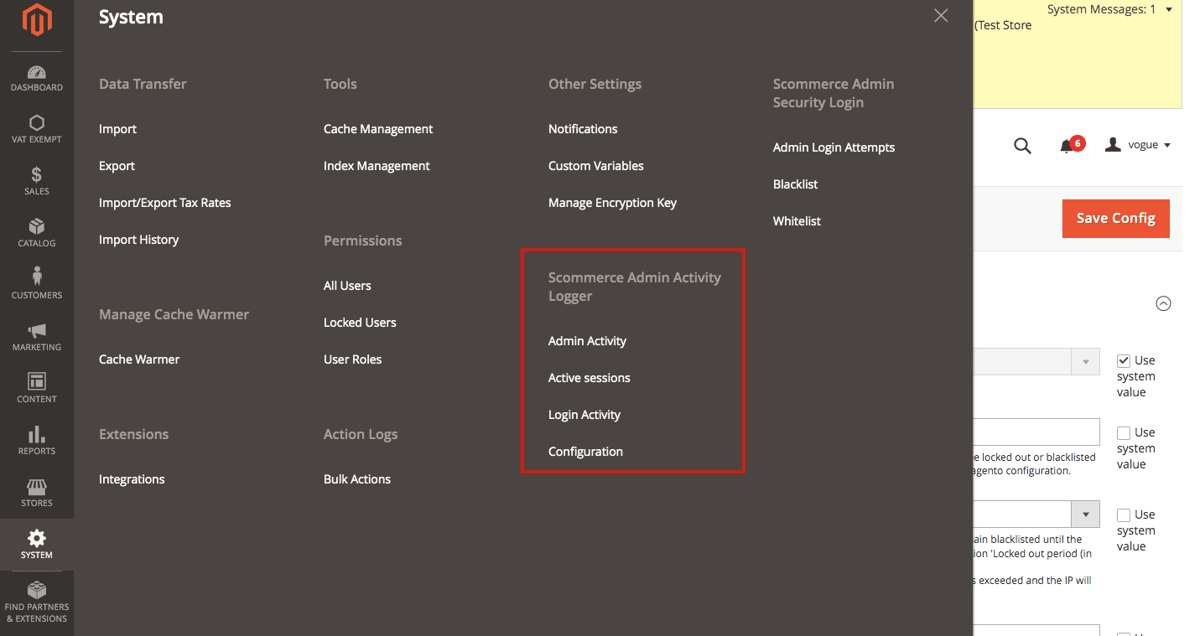
-
Admin Activity Grid - In the back-end under Admin Activity Logger grid you can view all the admin activities details from Admin > System > Admin Activity Logger. This grid will have, Admin Username, Name, Activity Type, Store View, Module, Full Action, IP, Item, Revert and Action columns.
- Date: - The exact date and time of the activity performed.
- Admin Username: - user name of the admin.
- Name: - The name of the admin.
- Activity Type: - Type of activity performed
- Store view: - Name of the store view
- Module: - The name of the module used in the activity.
- Full Action: - It contains the URL path of the activity performed.
- IP Address: - The IP address of the user.
- Item: - Activity related item such as a product or system configuration changes.
- Revert: - If the action is not complete then the REVERT column will have the notification.
- Action: - It contains view where you can see the key details of the activity such as general and item info.
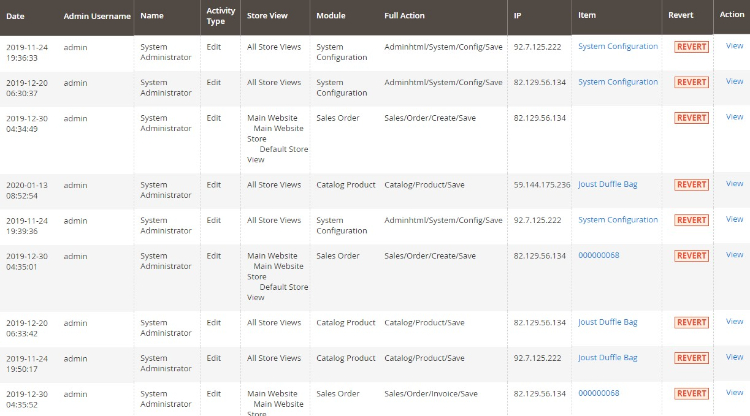
Admin Activity Logger
-
Admin Logger Detailed View for Admin Activities - To get more details about each particular action simply click on the 'View' link from Admin > System > Admin Activity Logger > Select Log > Click on 'View' > General, to view all the detailed data.
- You can view all the general details of the user's activity in the general tab.
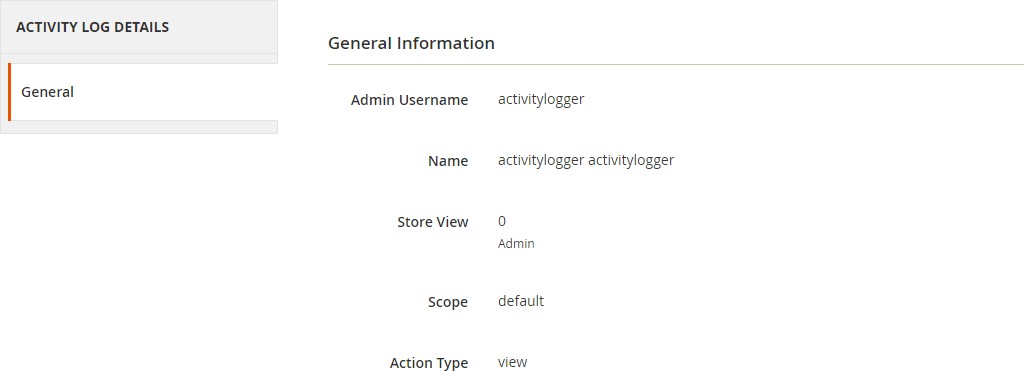
-
Admin Logger Detailed View for Item Info - You can view the item details from Admin > System > Admin Activity Logger > Select Log > Click on 'View' > Items info.
- This section contains all granular information. For instance if you place an order from the admin panel then all the details of the order such as price, store, etc. Are visible in this section.
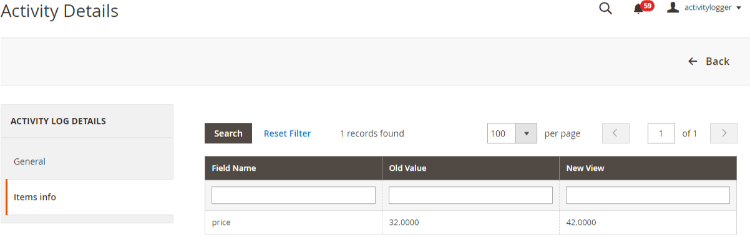
-
Login Activity Grid - You can view login activities from Admin > System > Scommerce Admin Activity Logger > Active Sessions. It logs details of each and every single activity along with what value being changed by who and when. This section contains following information: -
- Date: - The precise date and time of the log.
- Type: - whether logged in or logged out.
- Username: - Username of the person is stored here.
- Name: - Name of the user
- Ip Address: - You can see the IP address here.
- User Agent: - The browser and device details of the user are shown here.
- Status: - If the login fails then the status will show FAILED and if the login or logout is successful then it shows SUCCESS
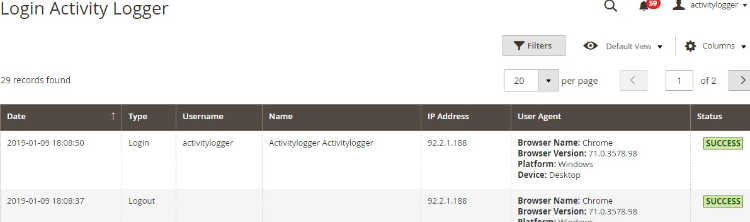
-
Active Sessions Grid- You can view Active Sessions from Admin > System > Login Activity > Login Acti. It logs details of every active admin session on the store. The active session is listed with various useful details. Also, it gives the admin the option to terminate any active admin session through the "Terminate" button under the action column. Once terminated that admin will be logged out of the account automatically. Furthermore, the grid is completely filterable using various columns. This section contains the following information: -
- Id: - A Unique ID for each active session.
- Admin Username: - Username of the admin of that particular active session.
- IP: - IP address of the admin of that session.
- Last Action: - Last action performed by the admin of this session.
- User Agent: - Various platform, device, and browser information of the admin of this session.
- Action: - Contains the option to terminate this particular session.
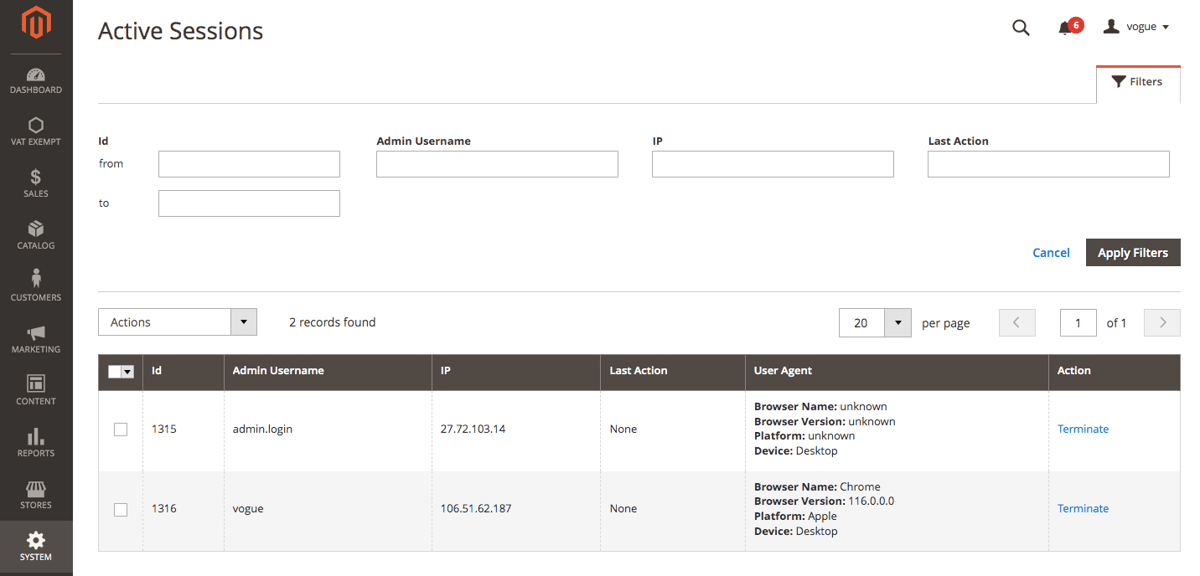
Configuration Settings for Admin Login Security
Go to Admin > Stores > Configuration > Scommerce Configuration > Admin Login Security
General Settings
-
Enabled Admin Login Security – Select "Yes" or "No" to enable or disable the module.
-
Failed Attempts Limit :- Set the attempt limit for admin login. Once exceeded the account will be locked out or blacklisted as per further configuration. Make sure this limit is less than default Magento configuration.
-
Apply Action On Exceed Limit:- Choose the penalty for exceeding the failed attempt limit, between "Lockout" or "Blacklist. Lockout - When the number of failed attempts exceeds, the IP will remain blacklisted until the 'Valid till' time limit. The 'Valid till' limit can be defined by the configuration 'Locked out period (in hours)'
Blacklist - This action will be applied when the 'Failed Attempts Limit' is exceeded and the IP will be blacklisted until it is manually removed. -
Locked out period (in hours):- Set the "Valid Till" limit for the Lockout feature. The accounts will be locked out for period entered in this configuration.
-
Block Email Enabled:- Enable Emails when any lockout or blacklist occurs. The email is sent to the Store Owner as well as the blacklisted/locked-out user.
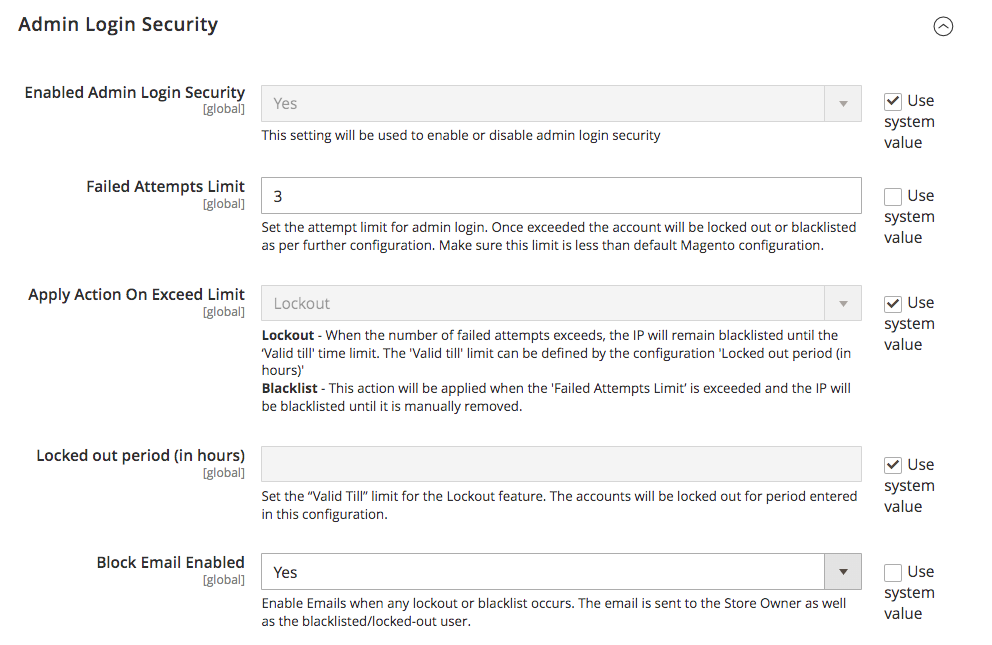
-
IP Block Email Template:- Select the email template to be used to send the email when a lockout/blacklist occurs.
-
Block And Lock Event Email Sender:- Select the sender email from your Default Magento configuration in case of lockout or blacklist.
-
Recipient Block Email:- Add the email (store owner) which will get emails about each and every lockout/blacklist. Whenever a lockout/blacklist happens the email will be sent to this address as well as the user.
-
Enabled Clear Login Attempts Logs Cron Job:- Set "Yes" or "No" to enable or disable clear logs cron job.
-
Clear Login Attempts Logs Cron Schedule:- Set the cron job to define how often you want to clear Login Attempts logs
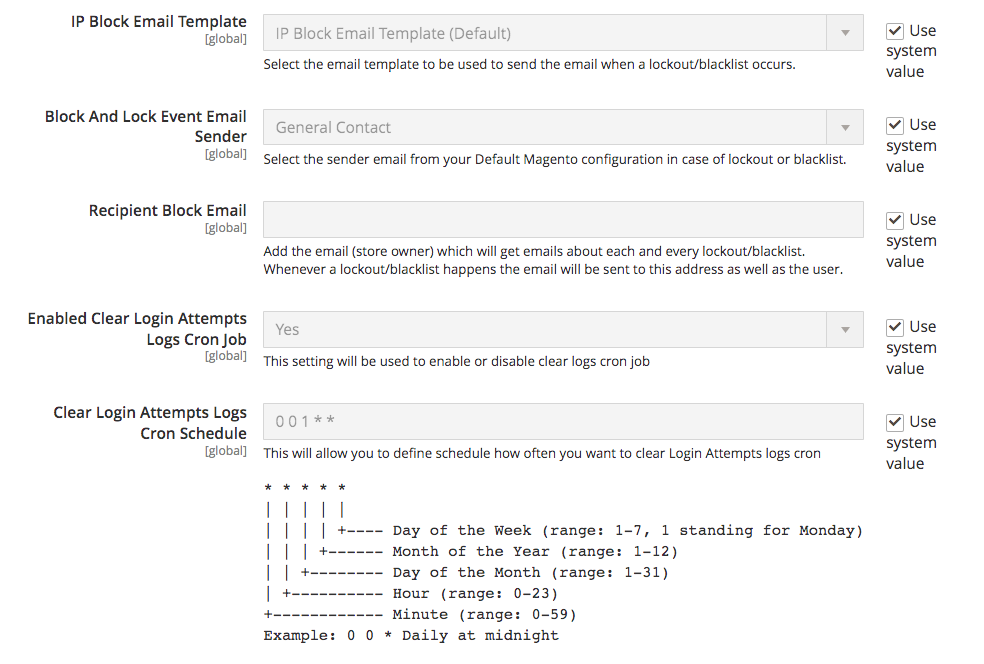
-
Clear Login Attempts Logs Older Than X Days:- Set the number of days based on which the Login attempts Logs will be cleared based which are older than the set days. For eg:- if set 2, any login attempts logs older than 2 days will be cleared.
-
Enabled Clear Lockouts Cron Job:- Set "Yes" or "No" to enable or disable clear of not active lockouts by cron job
-
Clear Lockouts Cron Schedule:- Set the cron job to define schedule how often you want to clear logs
-
Allowed Countries:- Block users from one or multiple countries. If no country is selected, all countries are allowed.
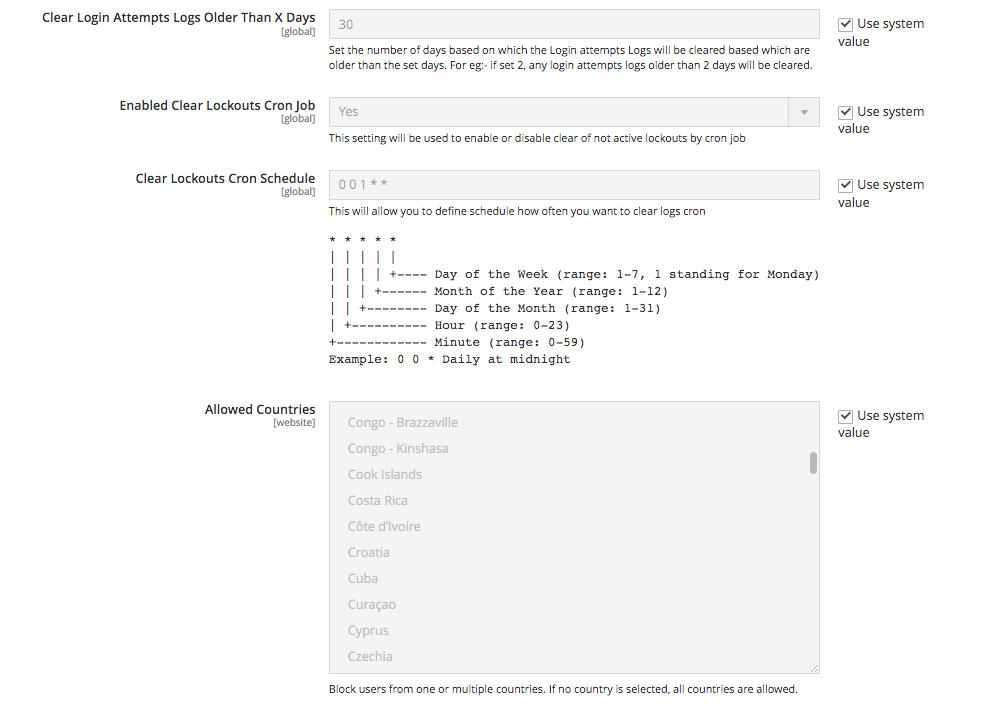
-
Enabled Whitelist:- Set "Yes" or "No" to enable or disable whitelisting for an IP. If enabled, the user won't be allowed to log in until the IP is whitelisted.
-
Whitelist Email Enabled:- Set "Yes" or "No" to enable or disable whitelist Email. If this is enabled, the user will be sent an email with a link that allows them to either approve or deny the login.
Approve - By approving, the IP will be added to the whitelist.
Deny - The IP will be added to the blacklist if denied. -
Whitelist request lifetime:- Set the request lifetime to define how long whitelist request will be valid in hours By default 1 hour.
-
IP Whitelist Email Template:- Select the email template for the login approval email that is sent to the user, based on the approval the user is whitelisted or blacklisted.
-
Whitelist Event Email Sender:- Select the sender email to be used to send out the User approval/whitelist email to the user.
-
Recipient Email:- Add the email (store owner) which will get emails about User approval/Whitelist emails. Whenever a user-approval/whitelist happens the email will be sent to this address as well as the user so store owner can also approve or deny the user from the email.
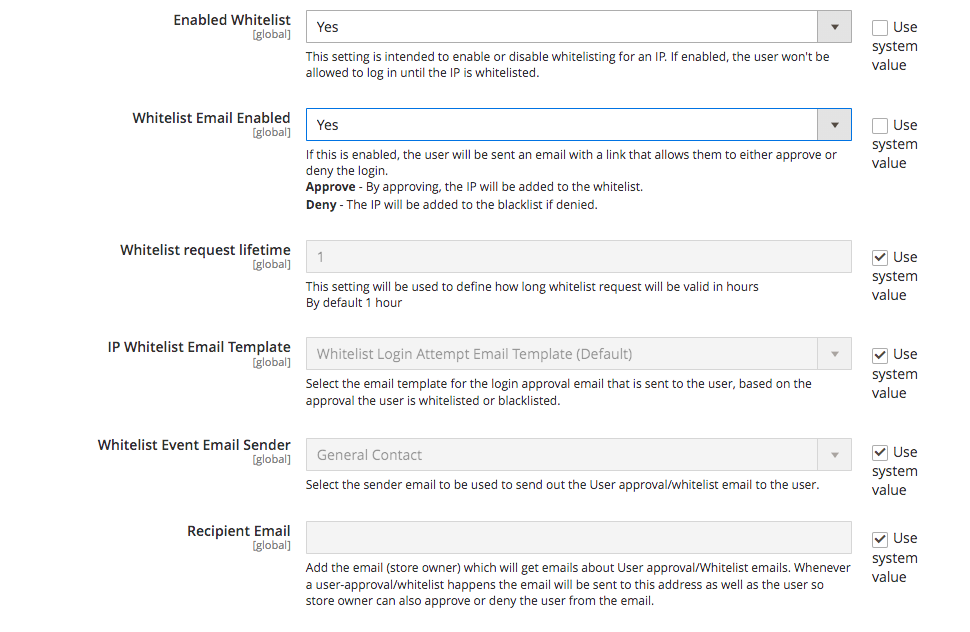
Scommerce Admin Login Security
Go to Admin > System > Scommerce Admin Login Security>
Admin Login Attempts
The Admin Login Attempts grid keeps a record of every login attempt made to the admin panel with various key details such as:-
- ID
- IP Address
- Success
- Admin Username
- Created At
The grid is completely filterable with various columns such as ID, IP Address, Admin Username, Created At, etc.
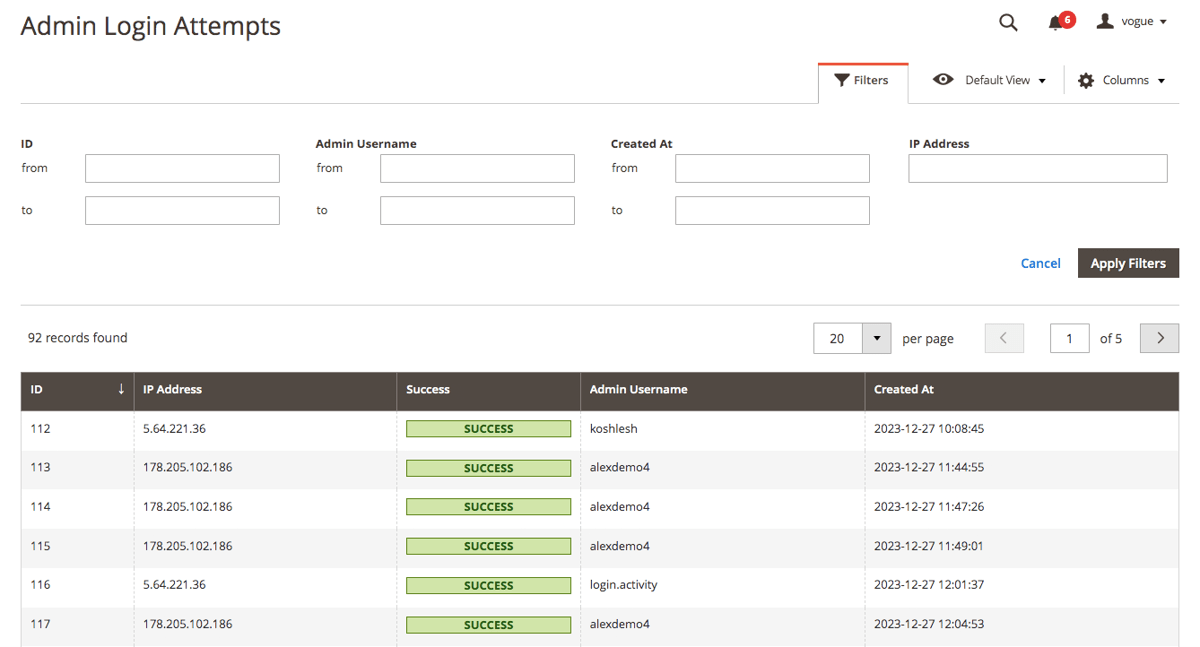
Blacklist
The blacklist records grid contains information about all the blacklist users with several details such as ID, IP Address, Admin Username, Valid till, Created At, and Action. This grid is completely filterable. Each of the record can be deleted or edited from the Action column.
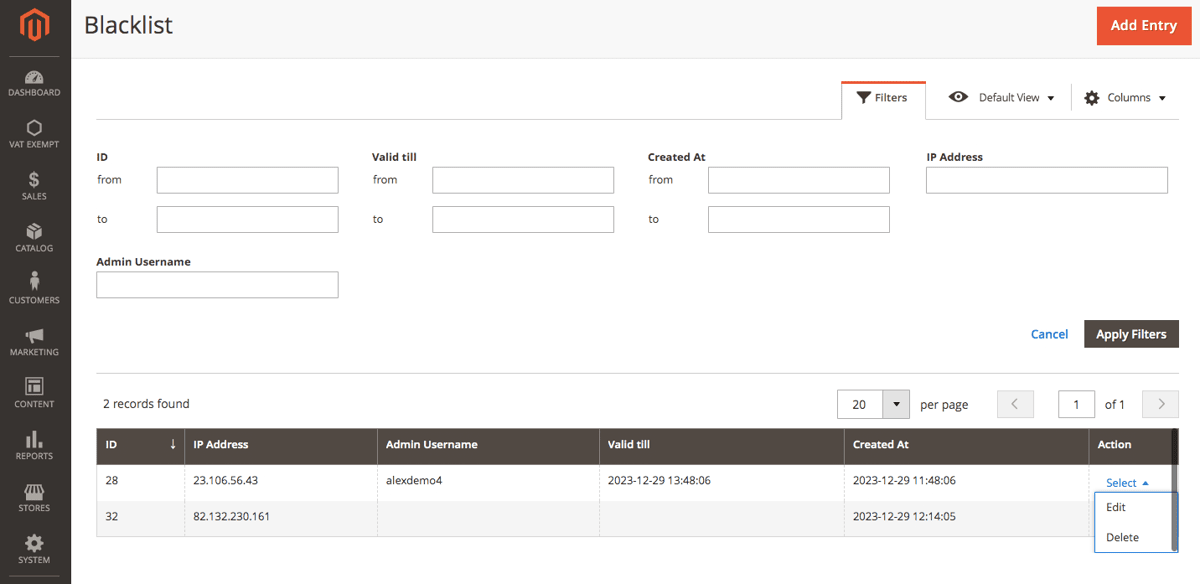
Go to Action>Edit and you can change various details for each of the records such as IP Address, Username, and Valid till date.
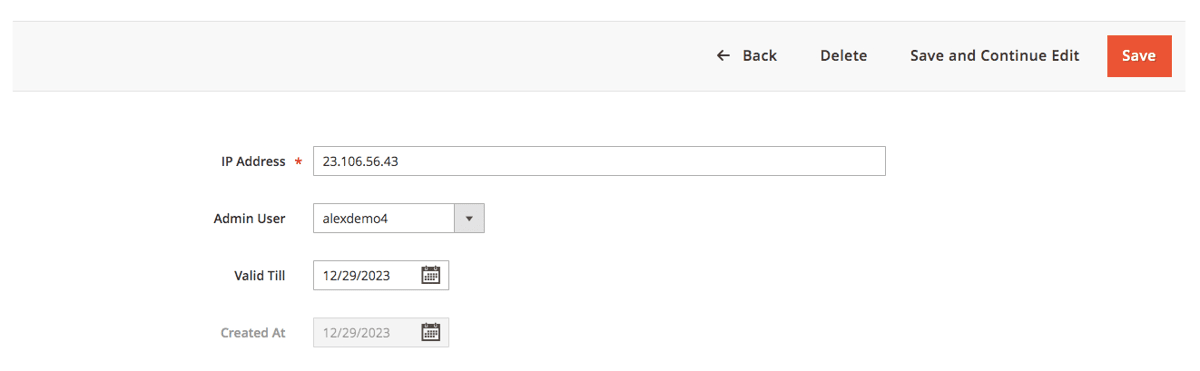
Whitelist
The Whitelist records grid contains information about all the blacklist users with several details such as ID, IP Address, Admin Username, Created At, and Action. This grid is completely filterable. Each of the records can be deleted or edited from the Action column.
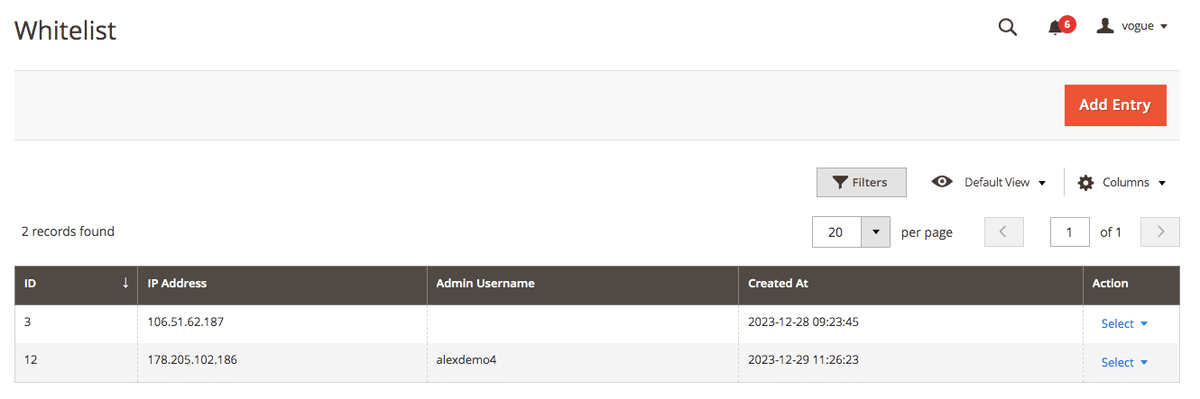
Go to Action>Edit and you can change various details for each of the records such as IP Address, and Username.
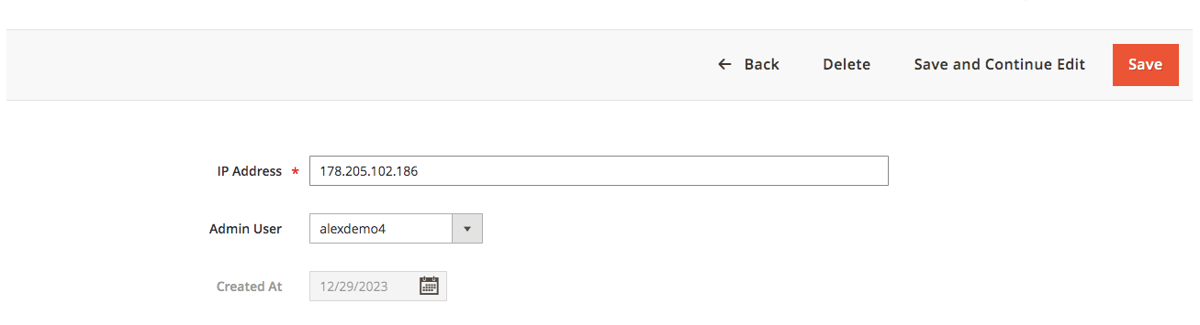
Security Checklist Report
Go to Admin > System > Scommerce Security> Security Checklist
Security Checklist Report
The Security checklist grid has several distinctions for various checks: Warning, Error, and Success
- Admin password Protection: - For Admin password protection, if a password change is not forced, the user will see an error. If the lifetime is more than 90 days, the user will see a warning. If a password change is forced and the lifetime is less than 90 days, then the user will see success.
- Magento version check: - For a Magento version check, if the version is outdated, the user will see an error. Otherwise, the user will see success.
- Database Prefix check: - For the Database prefix check, if the table prefix is not set in the configuration file, the user will see an error. Otherwise, the user will see success.
- Frontend ReCaptcha Protection - For Frontend ReCaptchaProtection, if all frontend forms are protected with Recaptcha, the user will see success. When some forms are protected, the user will see a warning. If none of the forms are protected, the user will see an error.
- Admin Captcha Protection:- For Admin Captcha protection, if all backend forms are protected with Captcha, the user will see a success. When some forms are protected, the user will see a warning. If none of the forms are protected, the user will see an error.
- Admin path protection: - For Admin path protection, if the user's admin path doesn't contain words from the stop list, doesn't contain numbers or capital letters, and is at least 15 characters long, the user will see a success. If any of the criteria mentioned are not fulfilled, the user will see a warning.
- Admin usernames check:- For Admin usernames check if the username contains words from the stop list or if the username contains numbers, the user will see a warning. Otherwise, success.
- Admin users activity check: - For Admin admin user activity check if the account is unused, the user will see a warning. Otherwise, success.
- Check for static scripts inserted from Config and CMS Pages: - For Static scripts in Configuration, CMS Blocks, and CMS Pages, if a text field has a static script, the user will see a warning. Otherwise, success.
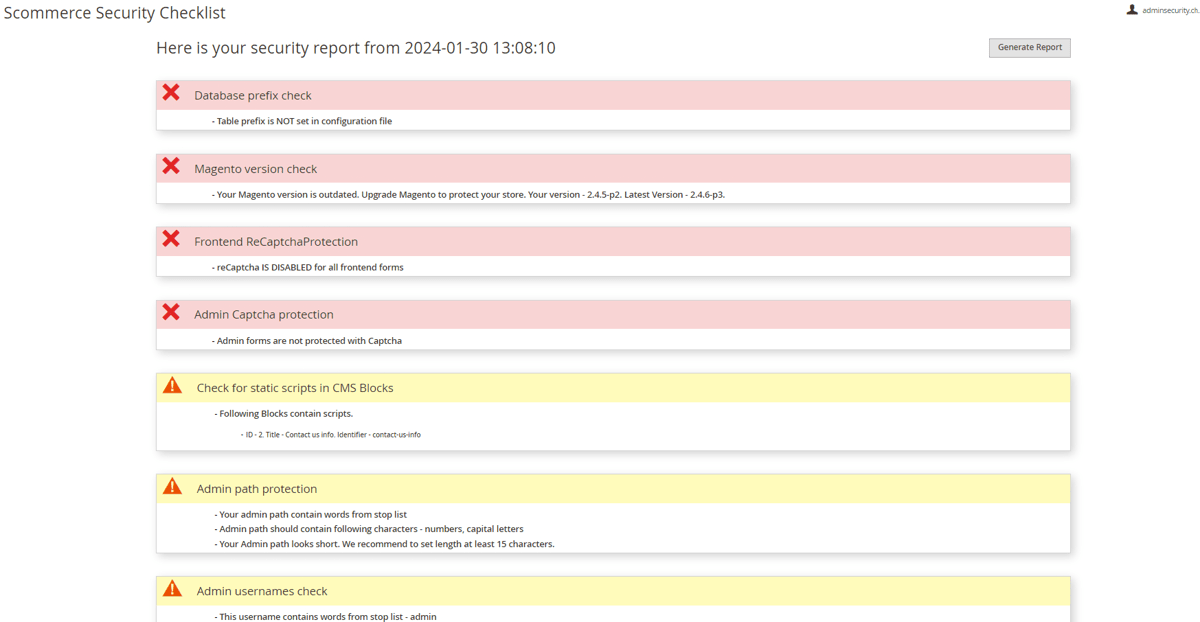
If you have a question related to this extension please check out our FAQ Section first. If you can't find the answer you are looking for then please contact support@scommerce-mage.com.
Magento 2 Advanced Reporting Extension
Installation and User Guide for Magento 2 Advanced Reporting Extension
Table of Contents
- Installation
- Upload Package
- Install Extension
- Configuration Settings for Advanced Reporting
- General Settings
- Reports of Advanced Reporting
- Sales Detailed Report
- Sales Item Detailed Report
- Sales Summary Report
Installation
- Installation via app/code: Upload the content of the module to your root folder. This will not overwrite the existing Magento folder or files, only the new contents will be added. After the successful upload of the package, run below commands on Magento 2 root directory.
php bin/magento setup:upgrade php bin/magento setup:di:compile php bin/magento setup:static-content:deploy - Installation via Composer: Please follow the guide provided in the below link to complete the installation via composer.
Configuration Settings for Advanced Reporting
Go to Admin > Stores > Configuration > Scommerce Configuration > Advanced Reporting
General Settings
- Enabled - Select "Yes" or "No" to enable or disable the module.
- License Key - Please add the license for the extension which is provided in the order confirmation email. Please note license keys are site URL specific. If you require license keys for dev/staging sites then please email us at support@scommerce-mage.com.
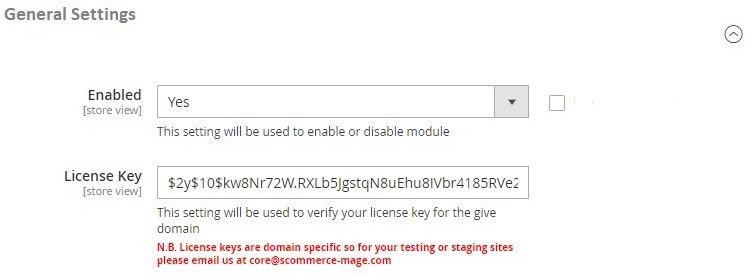
Reports of Advanced Reporting
Go to Admin > Scommerce Configuration > Reports > Advanced Reporting
Sales Detailed Report
You can see the sales detailed report at, Admin > Reports > Advanced Reports > Sales Detailed Report.
The grid will have following columns:
- Increment Id - Order number
- Store - Store name
- Status - Status of the order, pending/processing/complete/closed
- Order Date
- Customer Name
- Billing Country
- Billing Postcode
- Billing Currency
- Base Currency
- Payment Method
- Total Shipping Price (Excl. VAT)- Base Currency
- Total Shipping Price (Incl. VAT) - Base Currency
- Total Shipping Price (Excl. VAT) - Billing Currency
- Total Shipping Price (Incl. VAT) - Billing Currency
- Total Discount - Base Currency
- Total Discount - Billing Currency
- Total Shipping VAT - Base Currency
- Total Shipping VAT - Billing Currency
- Total VAT - Base Currency
- Total VAT - Billing Currency
- Grand Total (Excl. VAT) - Billing Currency
- Grand Total (Incl. VAT) - Billing Currency
- Grand Total (Excl. VAT) - Base Currency
- Grand Total (Incl. VAT) - Base Currency
- Total Cost
- Gross Profit Margin (%) = ((Grand Total (Excl. Vat) - (Total Cost + Total Shipping Price (Excl. VAT) + Total Discount (Excl. VAT))) / Grand Total (Excl. Vat)) * 100
- Gross Profit Margin (value) = (Grand Total (Excl. Vat) - (Total Cost + Total Shipping Price (Incl. VAT) + Total Discount (Incl. VAT))))
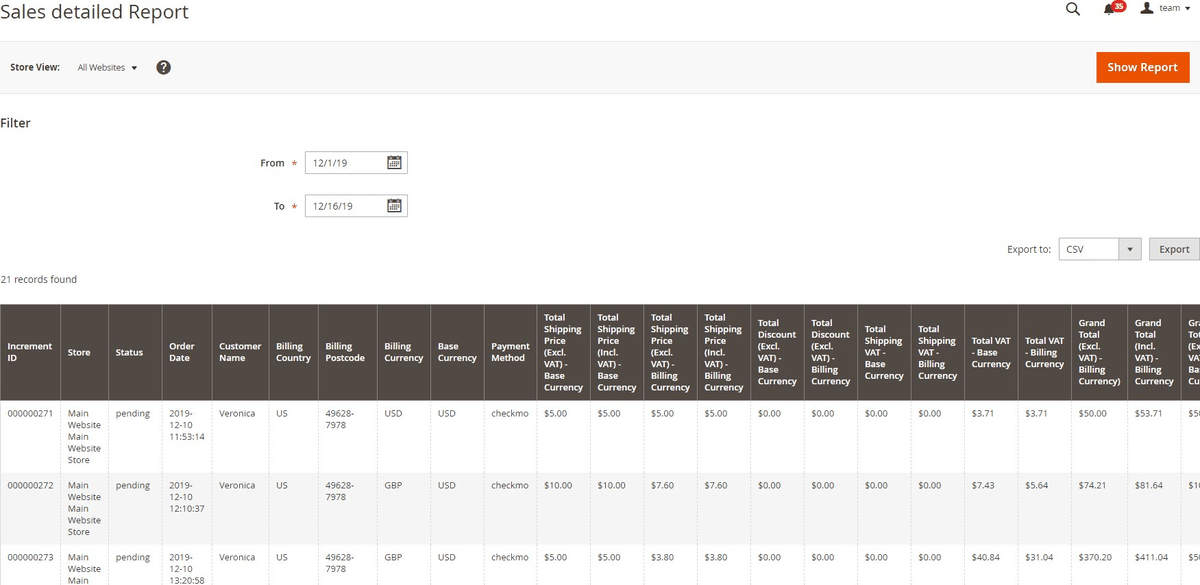
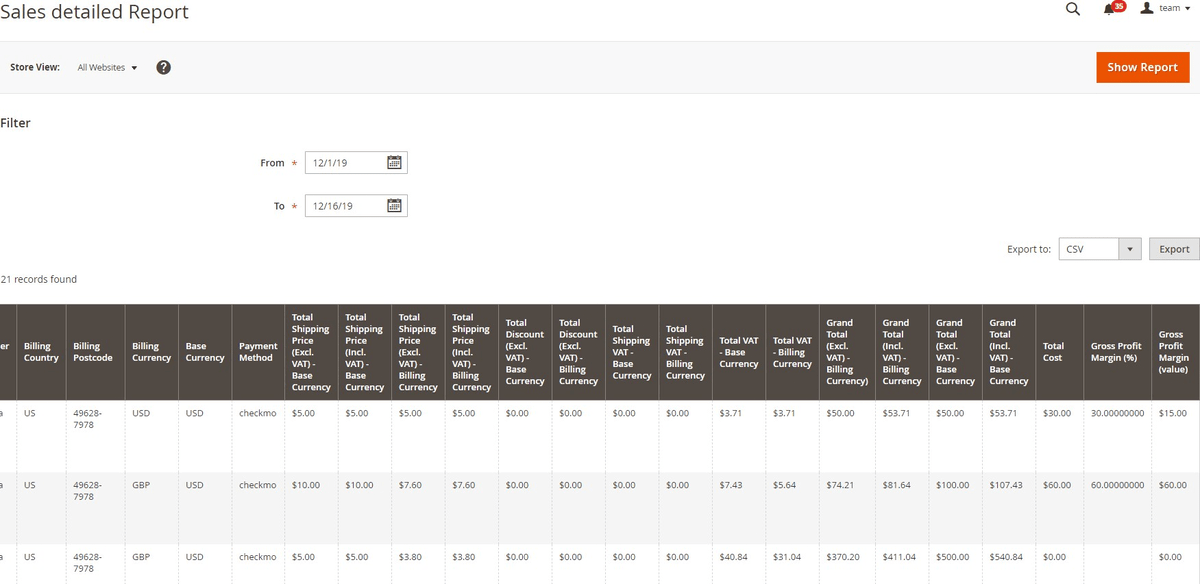
Sales Item Detailed Report
It shows you the item based report with Item Price, Item Cost, Item Discount and Gross Profit Margin (%, value) and with the arranged data, you can immediately change the strategies for the better sales. You can see the report at Admin > Reports > Advanced Reports > Sales Item Detailed Report.
The grid will have following columns:
- Increment Id - Order number
- Store - Store name
- Status - Status of the order, pending/processing/complete/closed
- Order date
- Customer Name
- Billing Country
- Billing Postcode
- Billing Currency
- Base Currency
- Payment Method
- Sku
- Item Name
- Item Qty
- Item Price (Excl. Vat) - Billing Currency
- Item Price (Incl. Vat) - Billing Currency
- Item Price (Excl. Vat) - Base Currency
- Item Price (Incl. Vat) - Base Currency
- Item Discount - Billing Currency
- Item Discount - Base Currency
- Item Total Cost - Base Currency
- Item VAT - Billing Currency
- Item VAT - Base Currency
- Item Total (Excl. Vat) - Billing Currency
- Item Total (Incl. Vat) - Billing Currency
- Item Total (Excl. Vat) - Base Currency
- Item Total (Incl. Vat) - Base Currency
- Gross Profit Margin (%) = )=((Item Price Excl. Vat) - (Item Cost + Item Discount (Incl. Vat))) * Item Qty / Item Price (Excl. Vat)*Item Qty) * 100
- Gross Profit Margin (value) = (Item Price (Excl. Vat) - (Item Cost + Item Discount (Incl. Vat))) * Item Qty
Sales Summary Report
You can see the summary report at Admin > Reports>Advanced Reports > Sales Summary Report. Based on date selection you can see the overall order based report with Grand Total and Gross Profit Margin (%, value).
The grid will have following columns:
- Period - It will be Day/Month/Year as a period based on "From" and "To" date selection.
- Store - Store name
- Number of orders - Total number of orders based on filter and date selection
- Ordered Items - Total number of ordered items during the selected period
- Total VAT - Total VAT of all orders
- Total Shipping Price (Incl. VAT) - Billing Currency
- Total Shipping Price (Excl. VAT) - Billing Currency
- Total Shipping Price (Incl. VAT) - Base Currency
- Total Shipping Price (Excl. VAT) - Base Currency
- Total Discount - Billing Currency
- Total Discount - Base Currency
- Total Cost
- Grand Total Ordered (Excl. VAT) - Billing Currency
- Grand Total Ordered (Incl. VAT) - Billing Currency
- Grand Total Ordered (Excl. VAT) - Base Currency
- Grand Total Ordered (Incl. VAT) - Base Currency
- Grand Total Invoiced (Excl. VAT) - Billing Currency
- Grand Total Invoiced (Incl. VAT) - Billing Currency
- Grand Total Invoiced (Incl. VAT) - Base Currency
- Grand Total Refunded (Excl. VAT) - Billing Currency
- Grand Total Refunded (Incl. VAT) - Billing Currency
- Grand Total Refunded (Excl. VAT) - Base Currency
- Grand Total Refunded (Incl. VAT) - Base Currency
- Gross Profit Margin (%) = (((Grand Total (Invoiced (Incl. VAT)) - Grand Total (Refunded (Incl. VAT))) - (Total Cost + Total Shipping Price (Incl. VAT) + Total Discount (Incl. VAT))) / (Grand Total (Invoiced (Incl. VAT))) * 100
- Gross Profit Margin (value) = (((Grand Total (Invoiced (Incl. VAT)) - Grand Total (Refunded (Incl. VAT))) - (Total Cost + Total Shipping Price (Incl. VAT) + Total Discount (Incl. VAT)))
If you have a question related to this extension please check out our FAQ Section first. If you can't find the answer you are looking for then please contact support@scommerce-mage.com.
Magento 2 Product Packs & Bulk Quantity Sync
Installation and User Guide for Magento 2 Product Packs & Bulk Quantity Sync
Table of Contents
- Installation
- Download Extension
- Installation via app/code
- Installation via Composer
- Configuration Settings for Bundle Items
- General Settings
- Workflow
- Setting Up Bundle Items Association
- Associating Bundle Items & Defining Quantities
- Updating or Removing Bundle Associations
- Inventory Automation
- On Purchase
- On Refund
- Out-of-Stock Handling
- What Customers See
- Bulk Import & Export
- Bulk Import
- Bulk Export
Installation
-
Download Extension: Once you have placed the order from our site then go to Account section and click on My Downloadable Products and download the extension package.
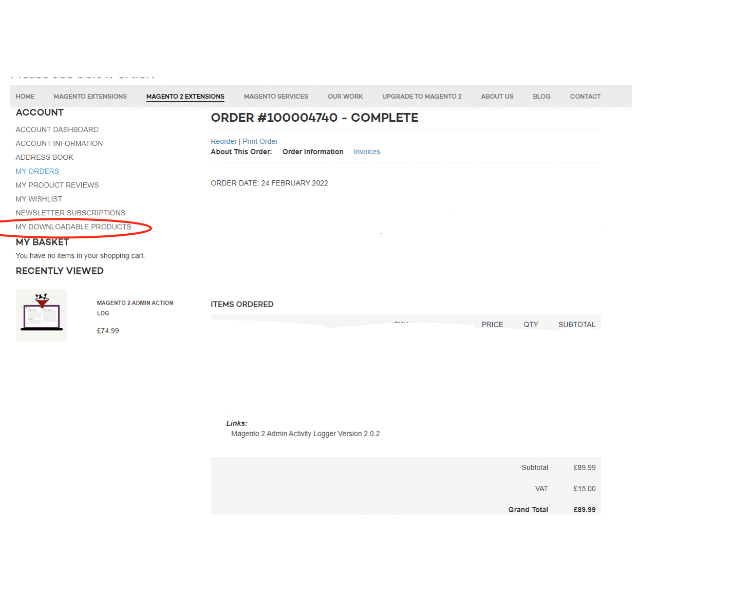
-
Installation via app/code: Upload the content of the module to your root folder. This will not overwrite the existing Magento folder or files, only the new contents will be added. After the successful upload of the package, run below commands on Magento 2 root directory.
php bin/magento setup:upgrade php bin/magento setup:di:compile php bin/magento setup:static-content:deploy - Installation via Composer: Please follow the guide provided in the below link to complete the installation via composer.
Configuration Settings for Magento 2 Product Packs & Bulk Quantity Sync
Go to Admin > Stores > Configuration > Scommerce Configuration > Bundle Items
General Settings
- Enabled – Select "Yes" or "No" to enable or disable the module.
- License Key – Please add the license for the extension which is provided in the order confirmation email. Please note license keys are site URL specific. If you require license keys for dev/staging sites then please email us at support@scommerce-mage.com.
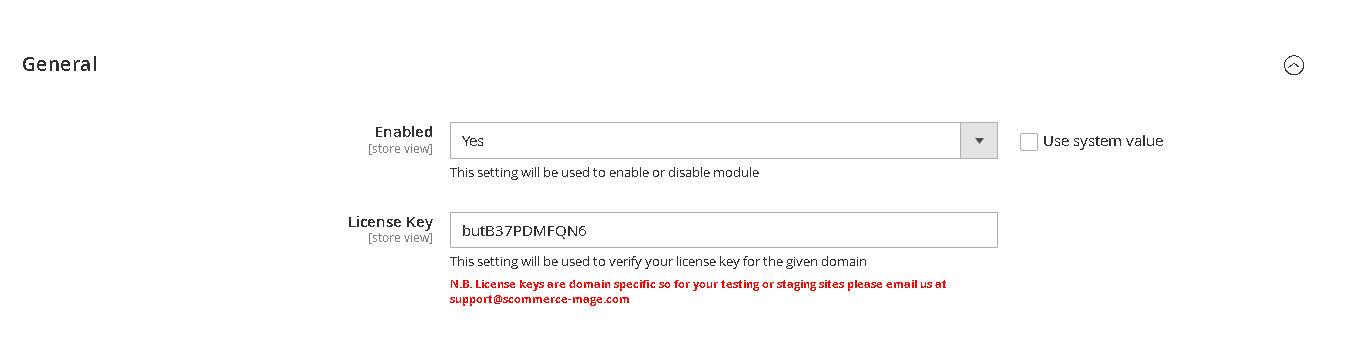
Workflow
The Magento 2 Bundle Items Inventory extension allows store administrators to associate any number of component products with simple items in their catalogue—each with a precise quantity. This setup enables inventory deduction and restoration for both main and associated (bundle) items during purchases and refunds, streamlining complex product management and keeping total inventory accurate.
Setting Up Bundle Item Associations
Associating Bundle Items & Defining Quantities
Example:
If "Family Baking Kit" requires 1 rolling pin, 2 spatulas, and 3 mixing bowls per kit, add each as a bundle item and specify quantities accordingly.
Updating or Removing Bundle Associations
- To change quantities: Edit the relevant field next to each bundle item.
- To remove an item: Use the remove/delete option within the grid.
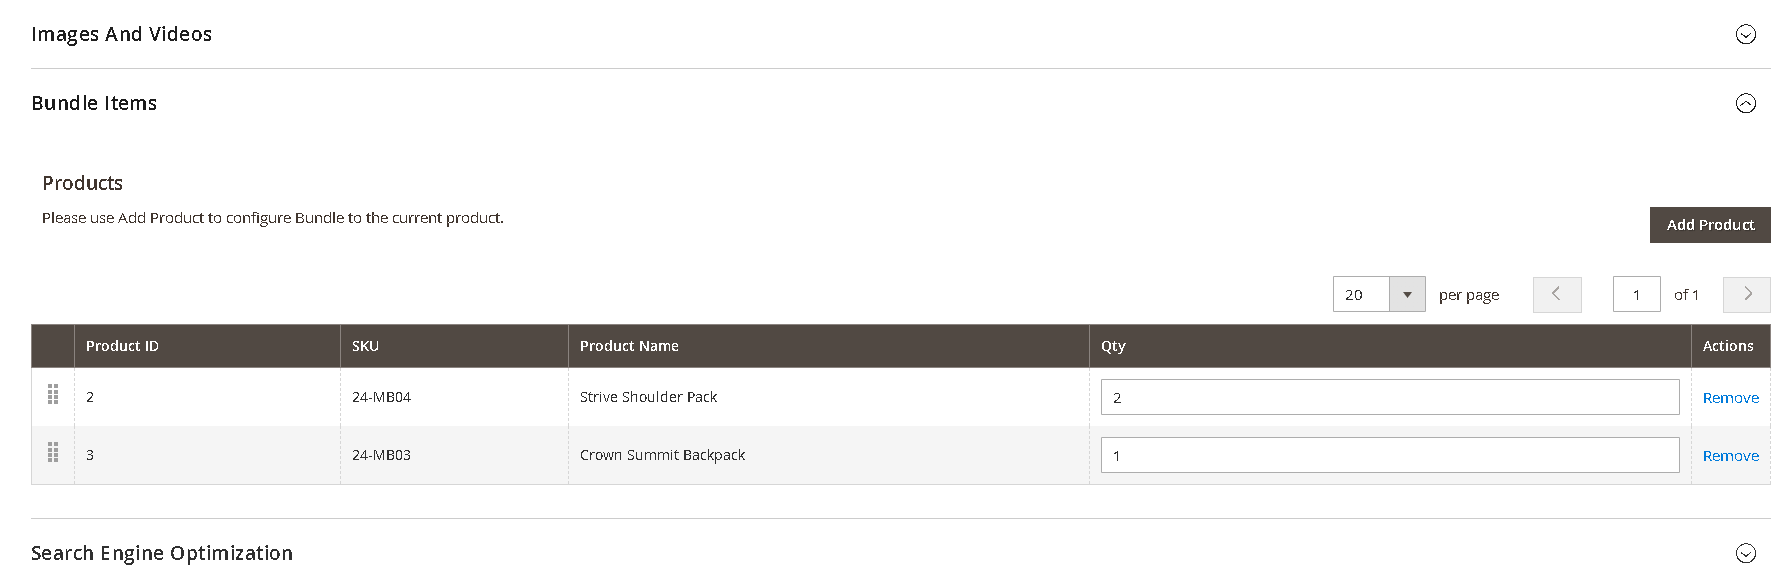
Inventory Automation
On Purchase
When an order containing the main product is placed:
- The main product stock decreases by the quantity purchased.
- Each bundle item's stock decreases based on the quantity defined per main product × number of mains sold.
Example:
Purchasing 4 "Spa Kits" (each requires 2 candles and 1 bottle of oil):
- Main product: 4 deducted
- Candles: 8 deducted (4 × 2)
- Oil bottles: 4 deducted (4 × 1)
On Refund
When an order for the main product is refunded:
- The main product stock increases by the quantity refunded.
- Each bundle item's stock increases based on the refund quantity and their association.
Example:
Refund 2 "Family Baking Kits":
- Main product: +2
- Rolling pins: +2
- Spatulas: +4 (2 × 2)
- Mixing bowls: +6 (2 × 3)
Out-of-Stock Handling
By default, the main product can be purchased even if bundle items are out of stock.
(Future versions will allow configuration to prevent purchase if bundle items are unavailable.)
What Customers See
On the main product's page, your customers will see all associated bundle items and the quantities per unit (e.g. "Includes: 2 Candles, 1 Essential Oil Bottle per kit").
Bulk Import & Export
Bulk Import
- Prepare a CSV File: Each row should include:
- Main Product SKU
- Bundle Item SKU
- Quantity per main product
- Go to:
System > Data Transfer > Import - Choose Entity Type:
"Bundle Item Associations" - Upload and Import:
- The system validates:
- All SKUs exist
- Quantities are whole numbers
- No duplicate relationships are present
- Errors will appear with guidance to fix.
- The system validates:
Sample CSV Format
| main_product_sku | bundle_item_sku | quantity_per_unit |
|---|---|---|
| spa-kit | candle | 2 |
| spa-kit | oil-bottle | 1 |
| baking-kit | spatula | 2 |
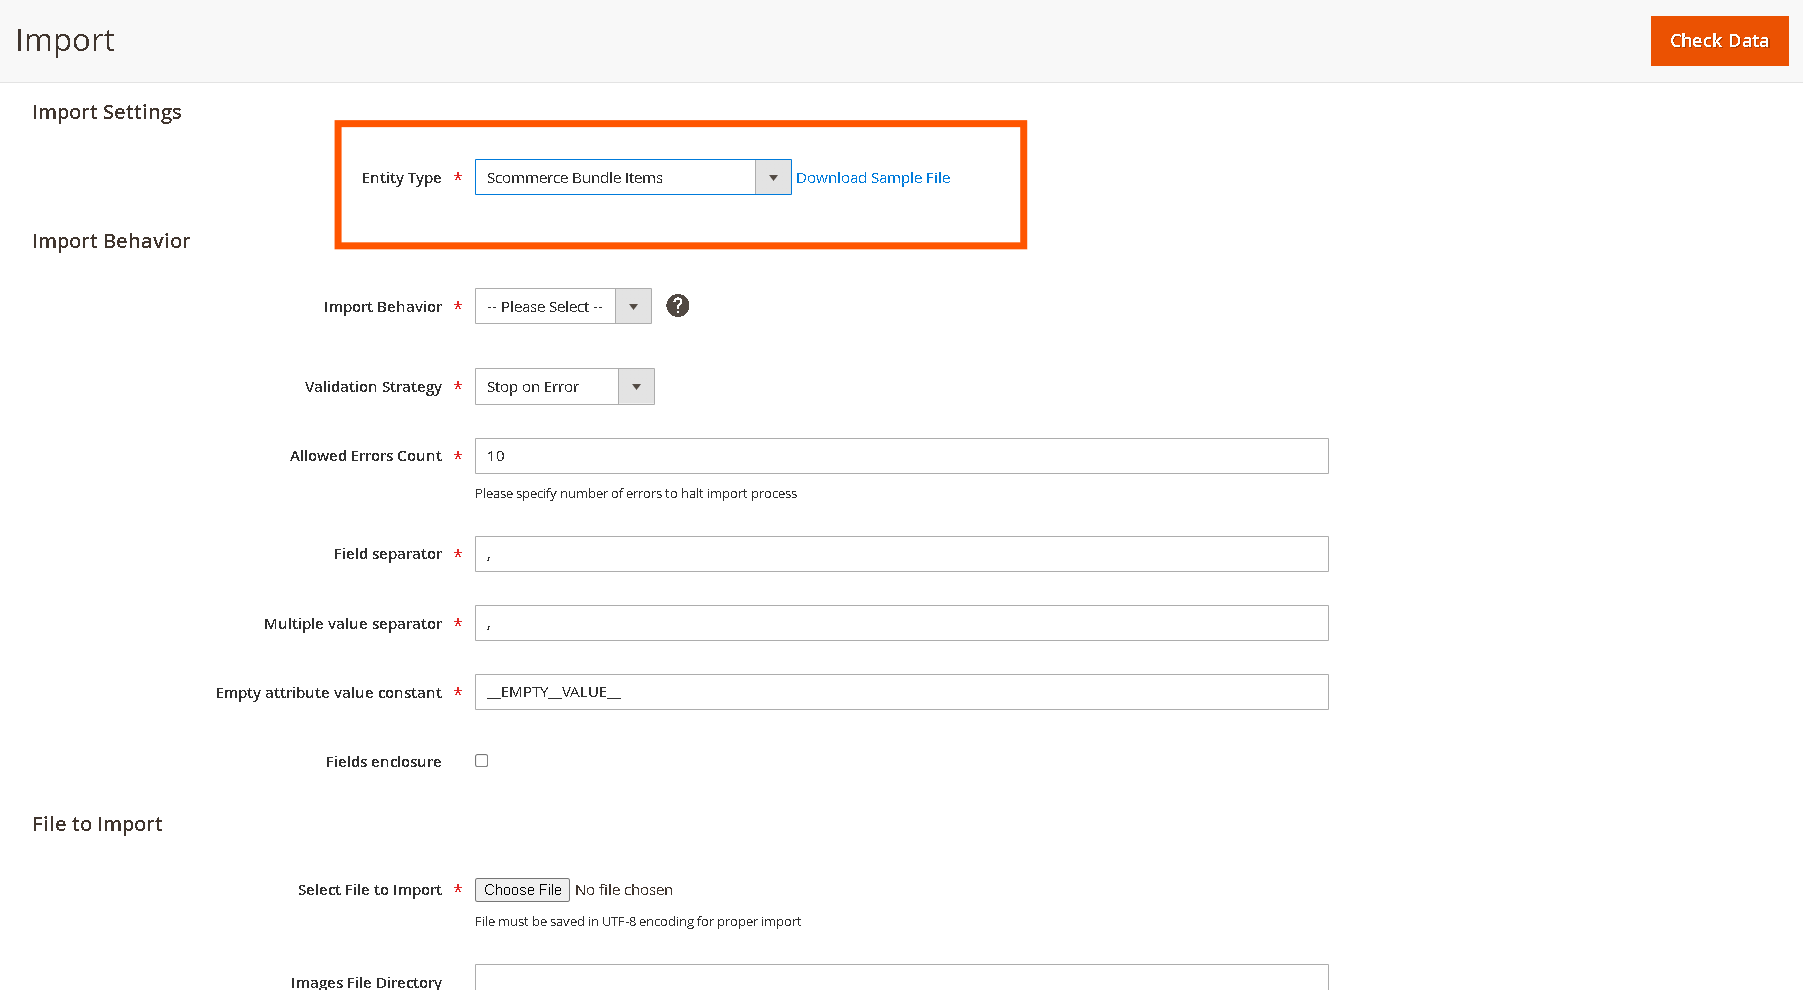
Bulk Export
- Go to:
System > Data Transfer > Export - Choose "Bundle Item Associations" as entity.
- Download the CSV:
The export will show:- Each main SKU
- Associated bundle SKUs
- Quantities for each link
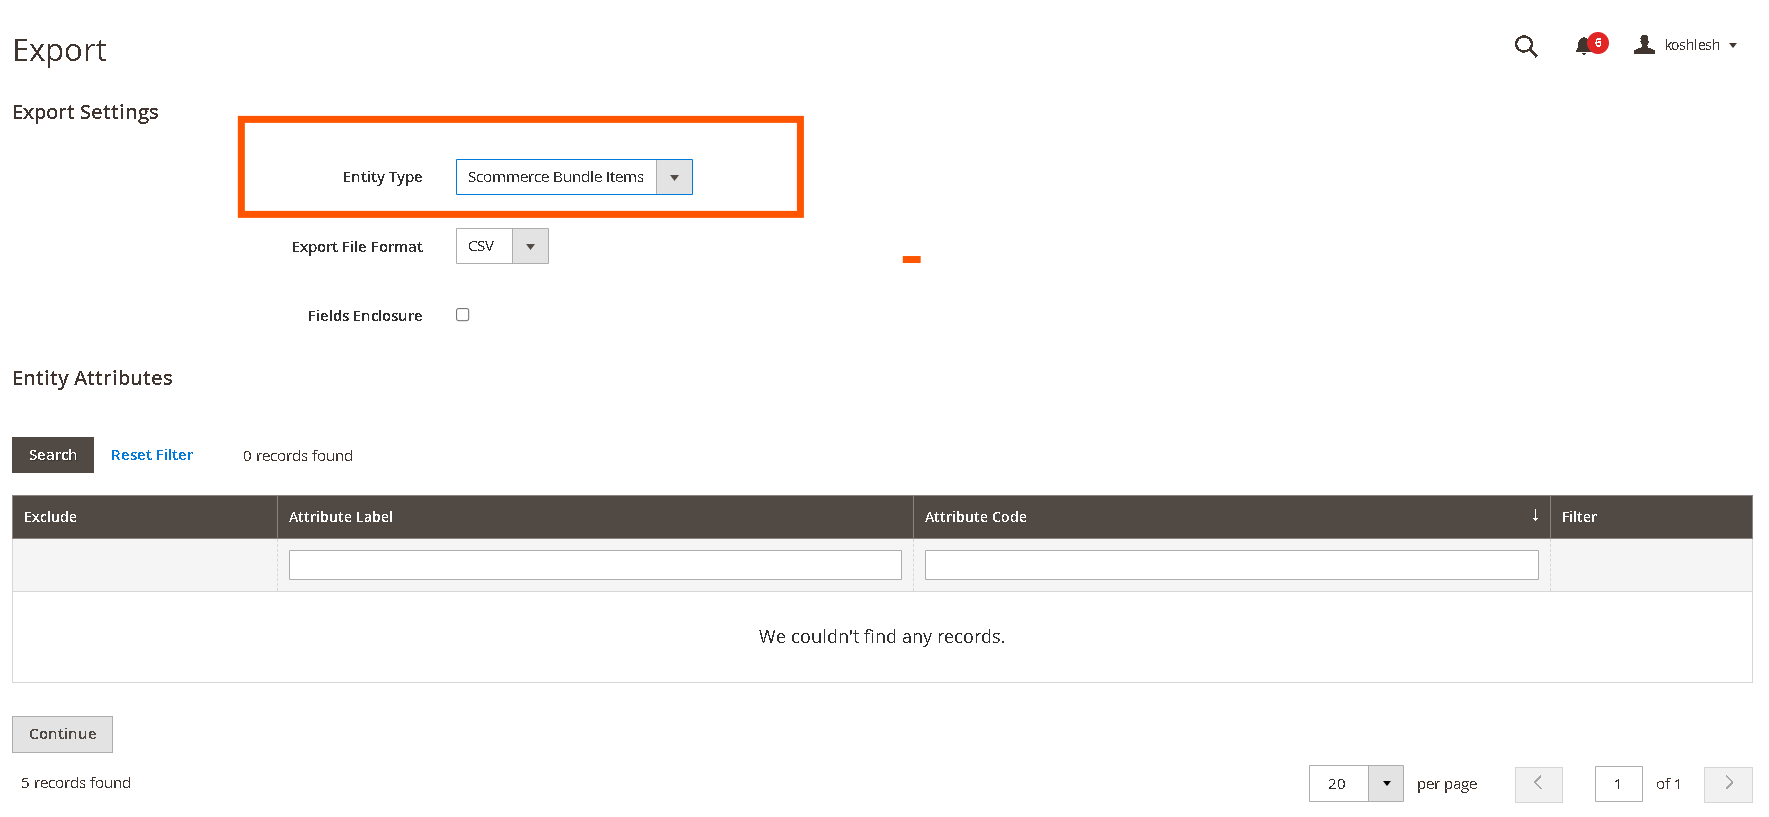
If you have a question related to this extension please check out our FAQ Section first. If you can't find the answer you are looking for then please contact support@scommerce-mage.com.
Magento 2 Affiliate Program
Installation and User Guide for Magento 2 Affiliate Program
Table of Contents
- Installation
- Download Extension
- Installation via app/code
- Installation via Composer
- Configuration Settings for Affiliate
- General Settings
- Workflow
- Setting Up Bundle Items Association
- Associating Bundle Items & Defining Quantities
- Updating or Removing Bundle Associations
- Inventory Automation
- On Purchase
- On Refund
- Out-of-Stock Handling
- What Customers See
- Bulk Import & Export
- Bulk Import
- Bulk Export
Installation
- Download Extension: Once you have placed the order from our site then go to Account section and click on My Downloadable Products and download the extension package.
- Installation via app/code: Upload the content of the module to your root folder. This will not overwrite the existing Magento folder or files, only the new contents will be added. After the successful upload of the package, run below commands on Magento 2 root directory.
php bin/magento setup:upgrade php bin/magento setup:di:compile php bin/magento setup:static-content:deploy
- Installation via Composer: Please follow the guide provided in the below link to complete the installation via composer.
Configuration Settings for Affiliate Program
Go to Admin > Stores > Configuration > Scommerce Configuration > Security Base
General Settings
- Enabled – Select "Yes" or "No" to enable or disable the module.
- License Key – Please add the license for the extension which is provided in the order confirmation email. Please note license keys are site URL specific. If you require license keys for dev/staging sites then please email us at support@scommerce-mage.com.
- Select Commission Rates – Select commission rate type Fixed/Tier
- Fixed – In case commission tier is "Fixed" then enter the commission percentage.
- Tier – Define different tiers and their commission percentage
- Min value of purchase
- Max value of purchase
- Commission (Percentage)
- Action:- Delete
- Terms and conditions – Set "Yes" to display Terms and Conditions on the affiliate program page on the frontend.
- Terms and conditions enabled by default – Set "Yes" to enable Terms and Conditions by default
- Checkbox text – Enter the text for Terms and Conditions Checkbox
- Terms and Conditions Title – Enter the title for Terms and Conditions
- Terms and Conditions Page – Select the page to be used to display Terms and Conditions
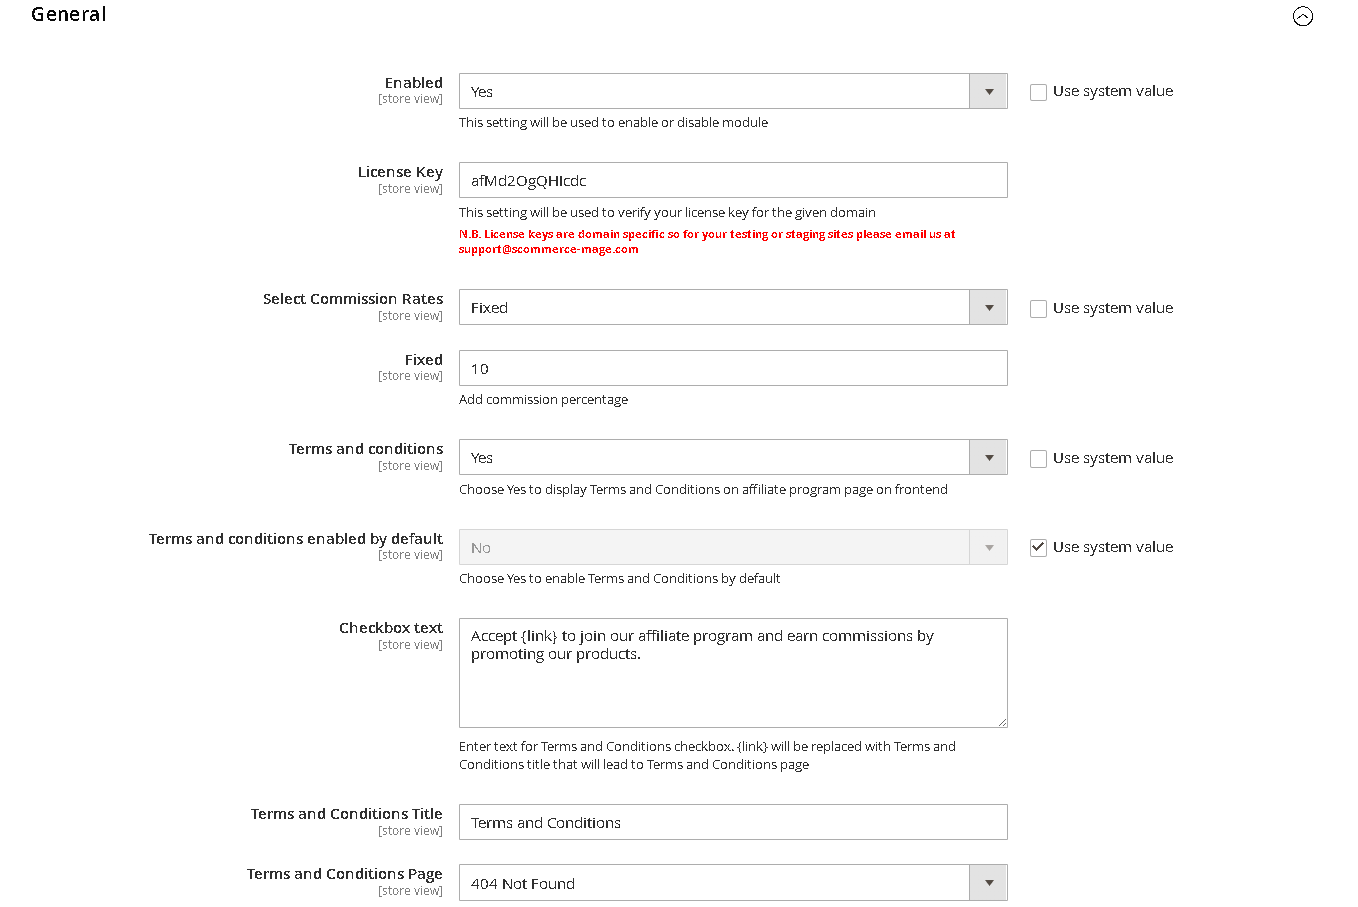
Payout Settings
- Methods – Select payment methods to be used for making payouts for affiliates
- Default Method – Select the payment method/payout method to make payout automatically via cron
- Threshold – Enter the minimum amount required to make payouts.
- Schedule – Select Manual/weekly/monthly, when "Manual" is selected payouts need to be done manually by admin and in case "weekly/monthly" is selected payout will be made automatically using CRON in 7 or 30 days.
- Email From – Enter the email address to send payout notification
- Email Template – Select the email template used to notify affiliates when a payout has been processed.
- Order Status – Select order statuses to qualify for payout.
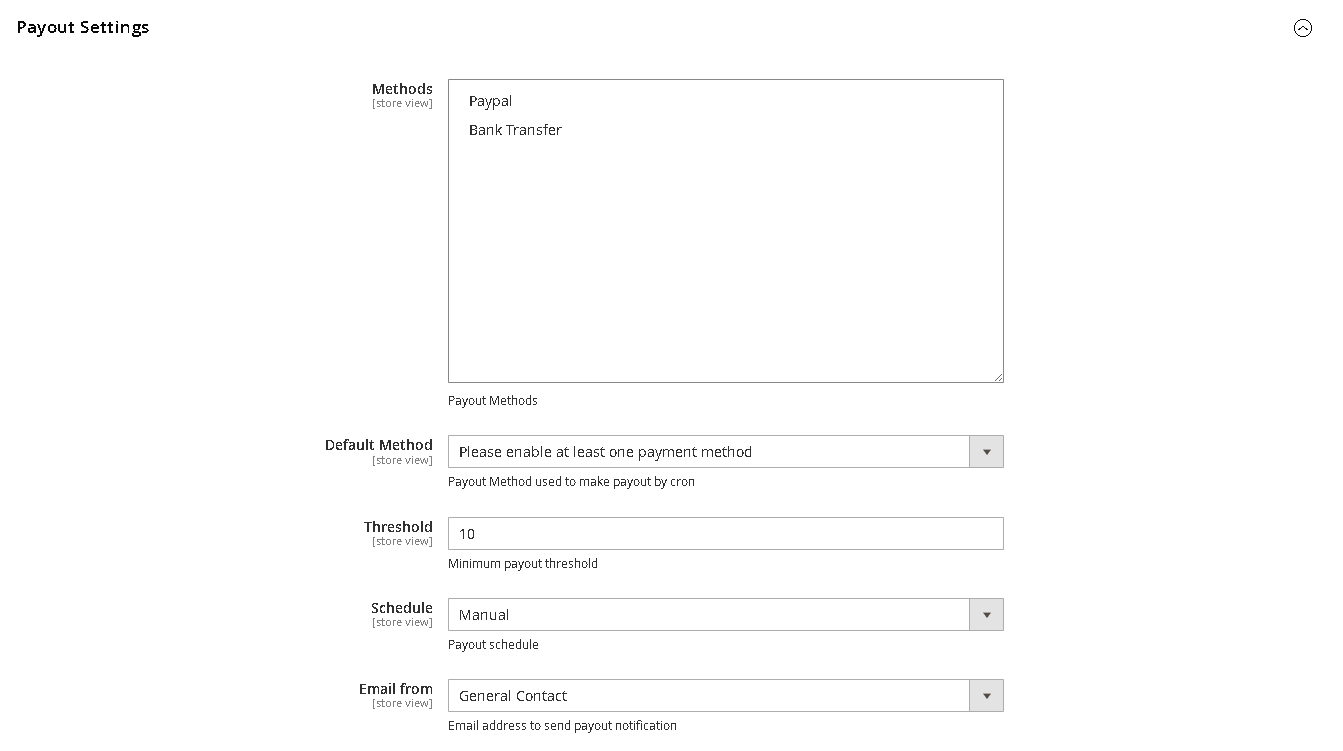
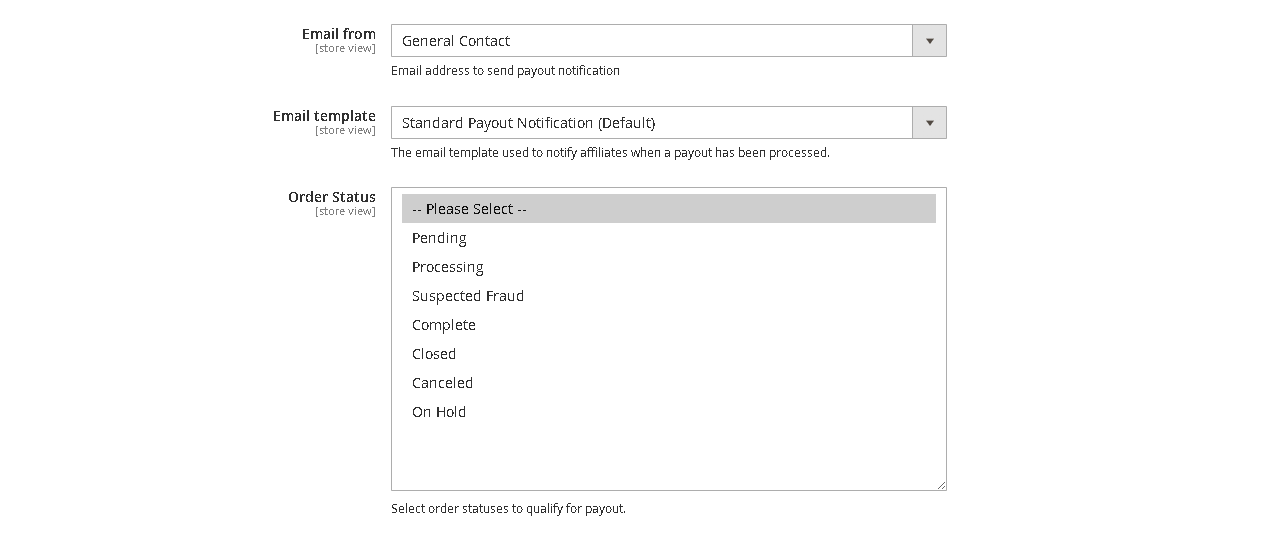
Share Settings
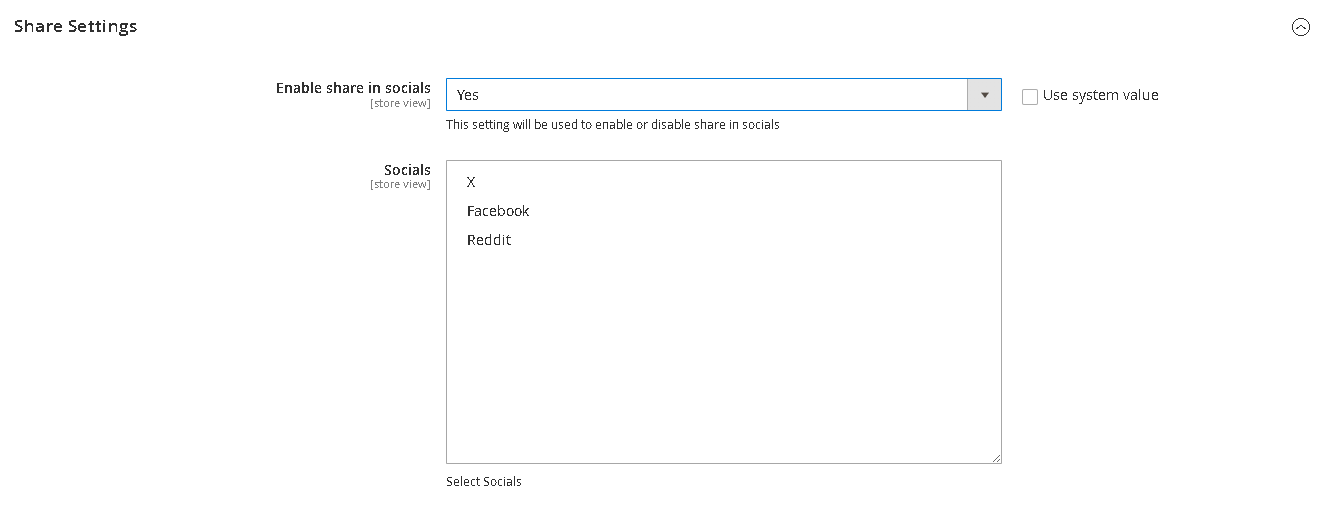
Workflow
The extension empowers Magento 2 stores with a robust affiliate program, enabling customers to promote your products in exchange for commissions and allowing admins to efficiently monitor, pay, and manage program performance.
For Customers: Join and Use the Affiliate Program
Affiliate Registration
- Go to My Account > Affiliate Program after logging in.
- Review the affiliate program description and Terms and Conditions.
- Accept the Terms by checking the box; the box text and content depend on admin configuration.
- Click "Join Program". Once enrolled, you’ll see your unique referral link.
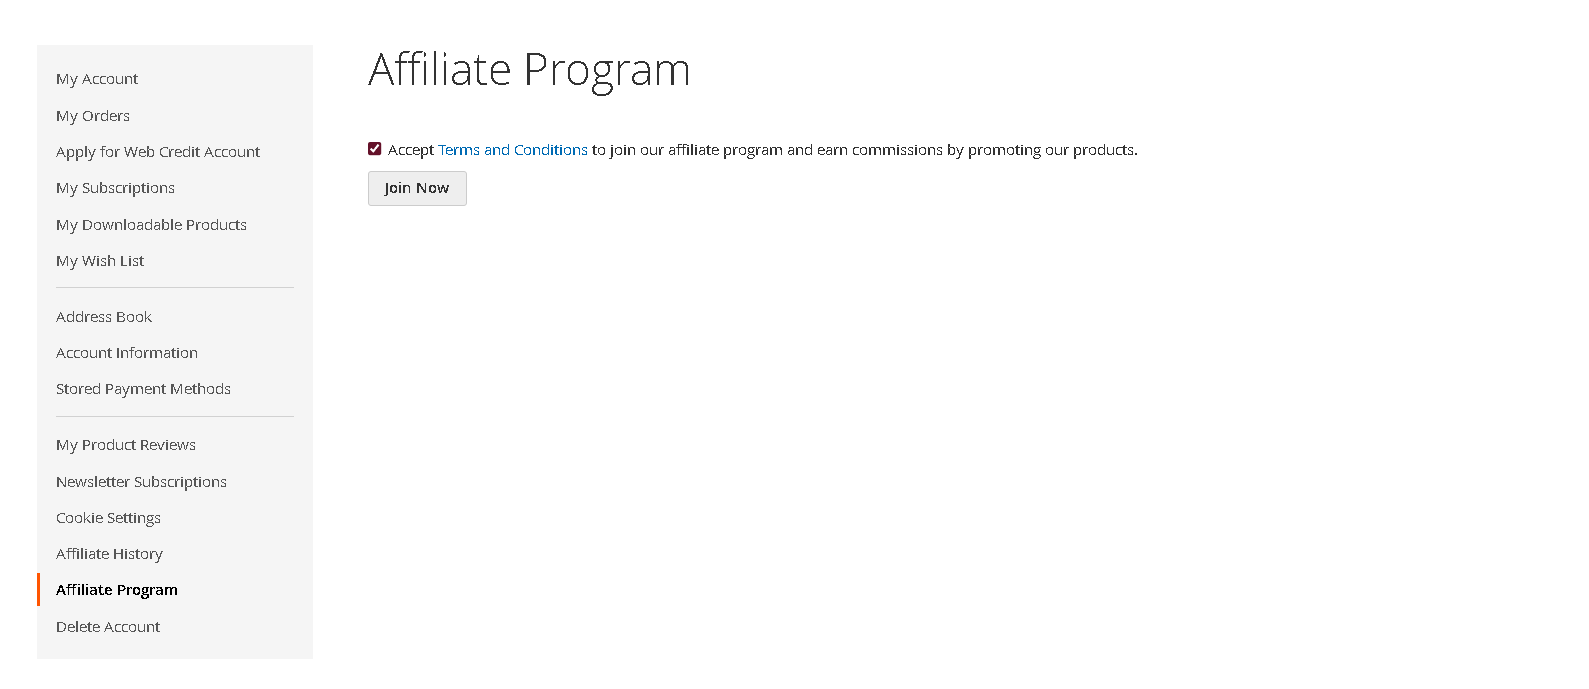
Referral Links
- Your referral link is displayed prominently.
- Use Copy to quickly copy it to your clipboard.
- Use Share to distribute via Facebook, Twitter, Reddit, or Instagram with one click.
- You can now share this link anywhere. Anyone using your link is tracked for commission.
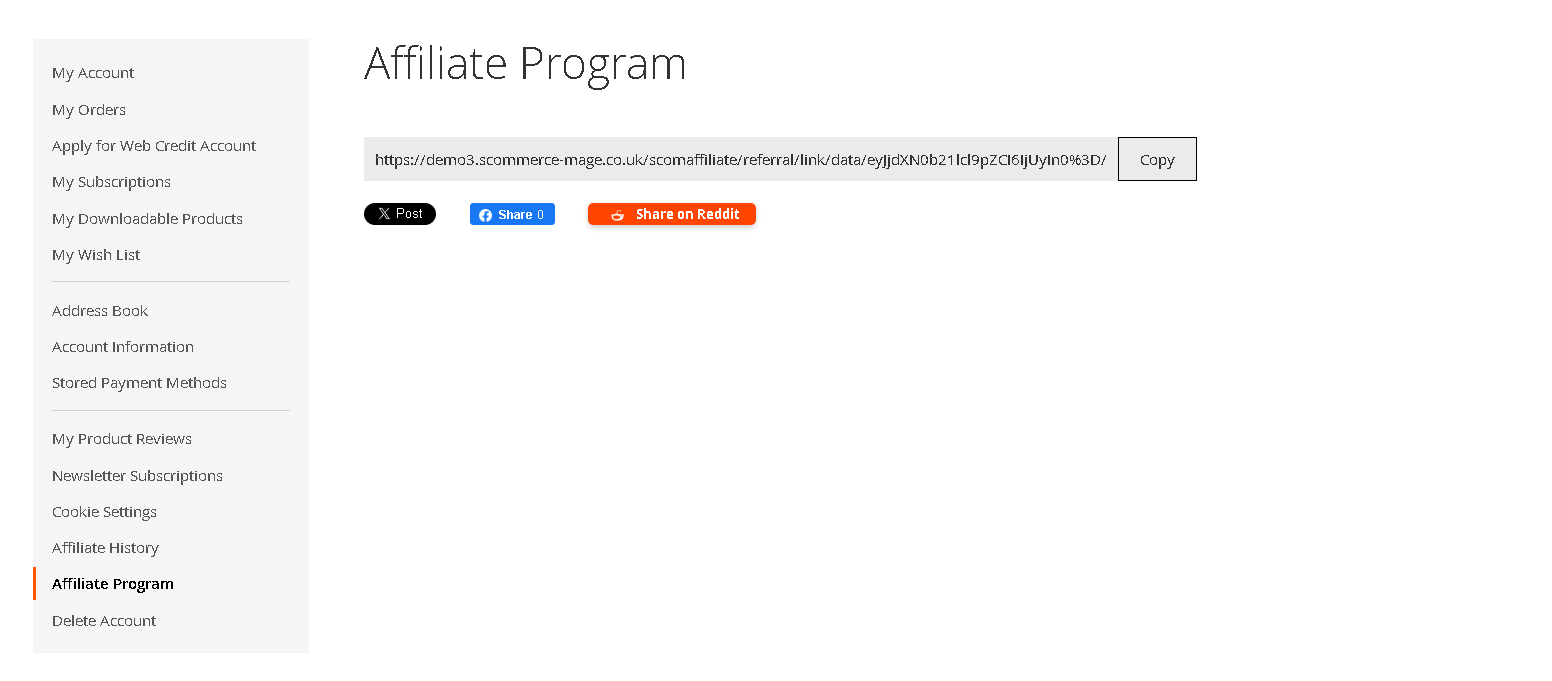
Affiliate Dashboard
- In My Account > Affiliate History, view:
- Increment ID
- Order Amount
- Expected Payout
- Payout Status
- Order Date
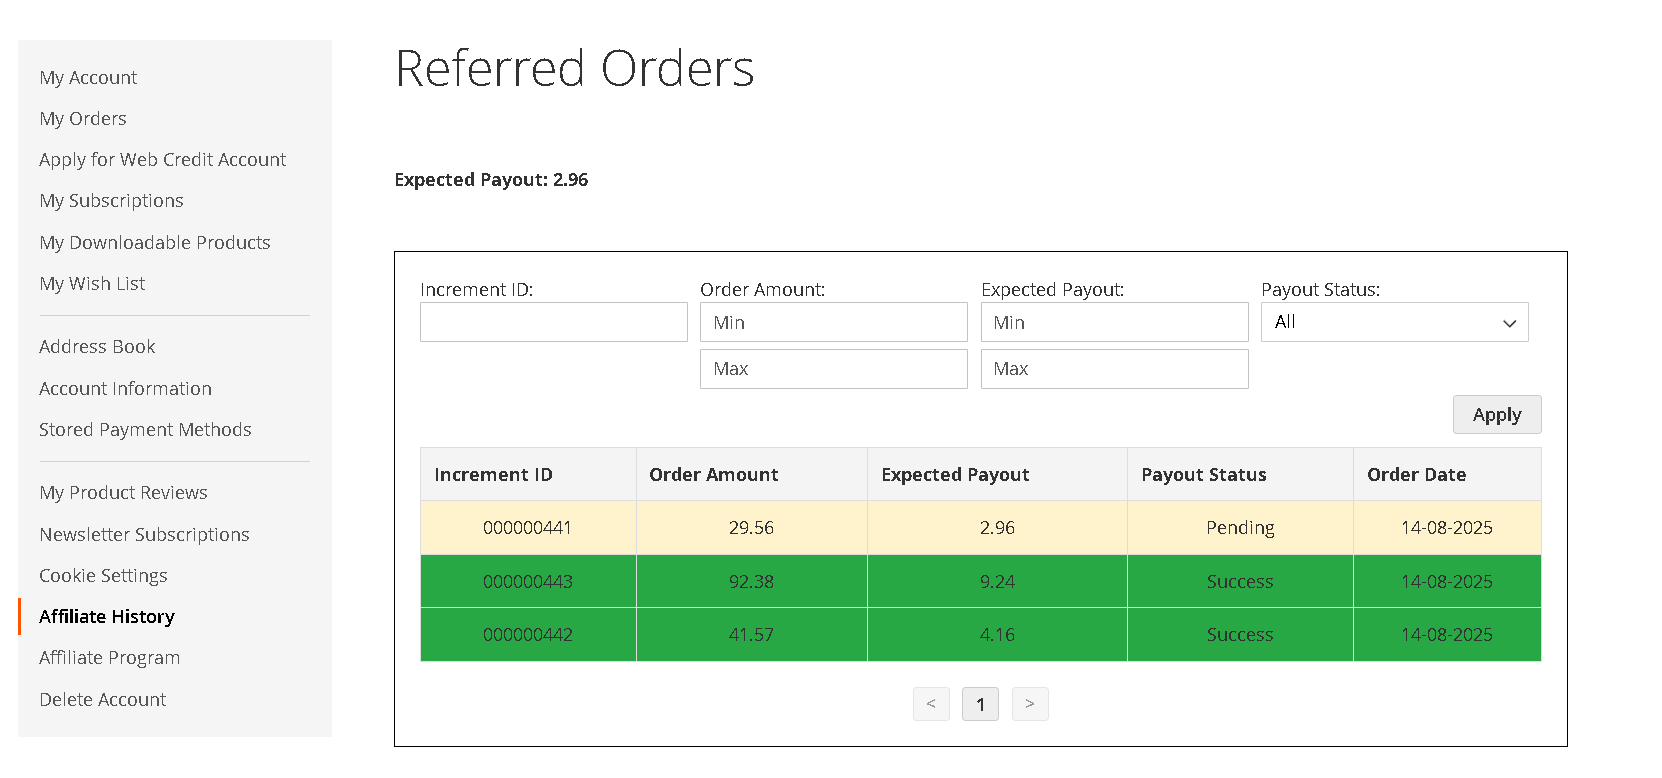
For Admins: Managing the Affiliate Program
Affiliate Dashboard
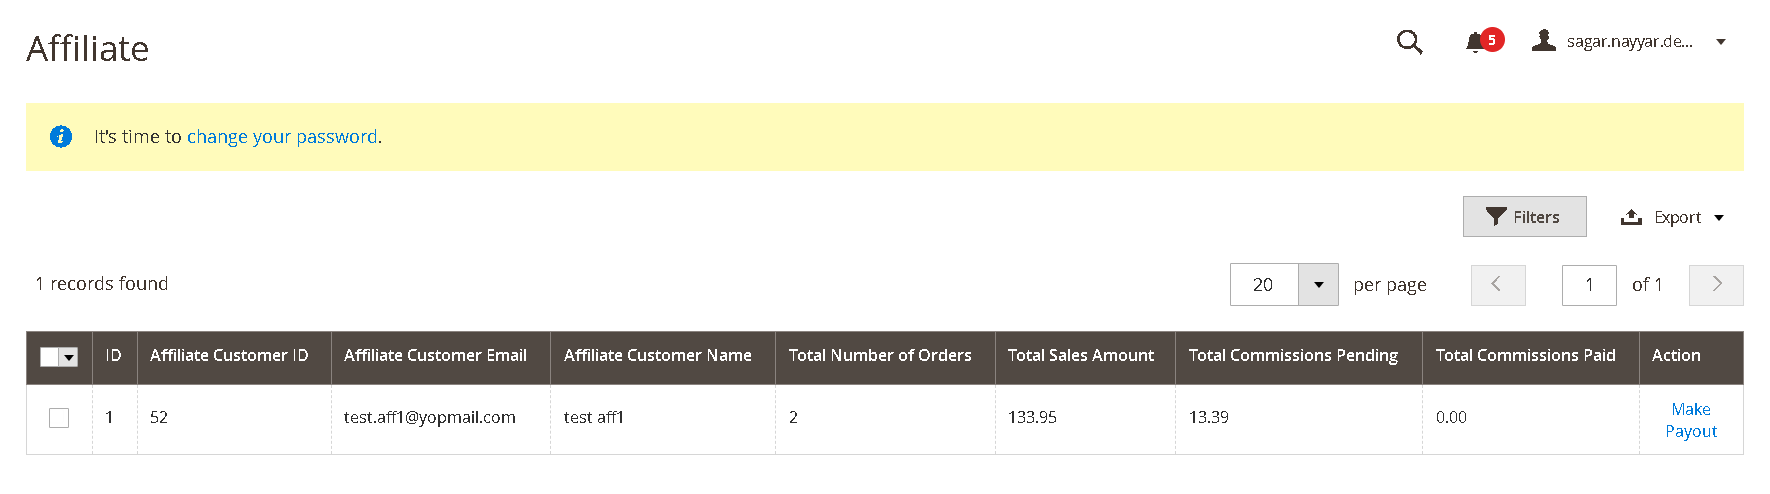
Referred Orders Overview (Admin)
- Examine which orders were generated by each affiliate from the dashboard.
- View and validate predicted commissions, manage disputes or issues.
Payout Management
- View a list of affiliates eligible for payouts:
- Payouts are only due for orders with approved statuses (e.g., Complete, Shipped).
- Set minimum payout threshold and payout schedule (weekly, monthly, manual).
- Payout Processing:
- Select payout method (Bank Transfer or PayPal).
- Mark payouts as “Paid”–affiliate’s balance resets to 0.
- All payouts and payment history are tracked for each affiliate.
- Affiliates receive email notification templates you configure.
- Refunds and Cancelations:
- If an order is refunded or canceled after commission has been paid, commission is deducted or reversed automatically.
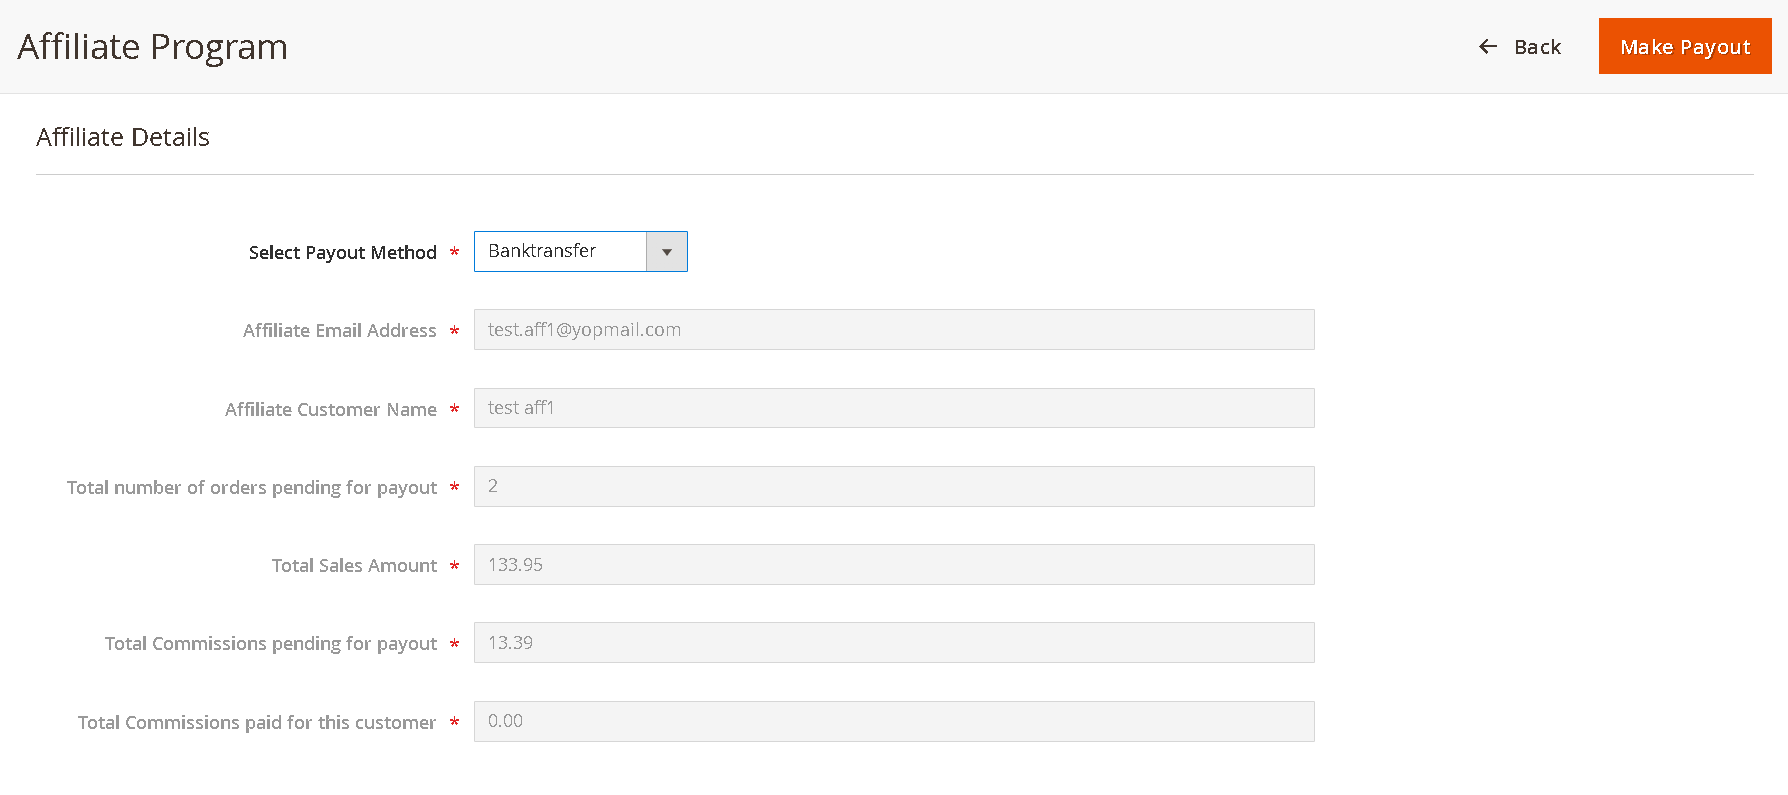
Multi-tier Commission Structure
- Enable/Disable tiered commission system from Affiliate Settings.
- Configure slabs and rates, e.g.:
- £1–£999.99: 10% commission
- £1,000–£1,999.99: 15% commission
- £2,000+: 20% commission
Order & Affiliate Tracking
How Order Attribution Works
- When a prospect clicks your referral link:
- A browser cookie stores your affiliate ID for 30 days.
- Any purchase in that period is attributed to you.
- After 30 days or if no link is used, no commission is awarded.
Cookie Lifecycle
- Creation: On link click.
- Active period: 30 days from last click.
- Expiry: After 30 days.
If you have a question related to this extension please check out our FAQ Section first. If you can't find the answer you are looking for then please contact support@scommerce-mage.com.
Magento 2 Distance Based Shipping
Installation and User Guide for Magento 2 Distance Based Shipping Extension
Table of Contents
- Installation
- Installation via app/code
- Installation via Composer
- Configuration Settings for Distance Based Shipping
- Order Tags Logs
- Order Tags Grid
- General Settings
- Shipping Cost
- Pick Store / Website Address from
Installation
-
Installation via app/code: Upload the content of the module to your root folder. This will not overwrite the existing Magento folder or files, only the new contents will be added. After the successful upload of the package, run below commands on Magento 2 root directory.
php bin/magento setup:upgrade php bin/magento setup:di:compile php bin/magento setup:static-content:deploy -
Installation via Composer: Please follow the guide provided in the below link to complete the installation via composer.
Configuration Settings for Distance Based Shipping
Go to Admin > Stores > Configuration > Sales> Delivery Methods > Distance Based Shipping
General Settings
-
Enabled Shipping Method – Select "Yes" or "No" to enable or disable the module.
-
License Key – Please add the license for the extension which is provided in the order confirmation email. Please note license keys are site URL specific. If you require license keys for dev/staging sites then please email us at support@scommerce-mage.com.
-
Title - Please enter the Title of Distance based Shipping.
-
Method Name - Please enter the Method name of Distance based Shipping.
-
Shipping Cost - The range is defined as: greater than or equal to "Distance From" and less than "Distance To".
-
Ship to Applicable Countries - Select the applicable shipping destination(s).
-
Show Method if Not Applicable - Select “Yes” or “No” to display the method when it is not applicable
-
Displayed Error Message - Please enter the error message to be displayed
-
Sort Order - Please enter the Sort order
-
Google Maps Api key - Use a secure API key provided by Google to authenticate distance calculation requests via the Distance Matrix API.
-
Distance Unit - Select whether to compare distances in miles or kilometers.
-
Pick Store / Website Address From - Select the method for sourcing the store address:
- Website Source: Uses the address defined in the MSI configuration. (Visible only when MSI is enabled.)
- General → Store Information: Pulls the address from the store’s configuration settings.
- Enter Address Manually: Allows the admin to input latitude and longitude directly.
-
Enabled Debug - Select “Yes” to enable debug mode, or “No” to disable it.
-
Filter Methods by Distance - Select “Yes” to enable distance-based filtering, or “No” to disable it
-
Distance Threshold - Please add the Distance Threshold.
-
Shipping Methods - Select the shipping methods to hide when the store-to-customer distance exceeds the defined threshold.
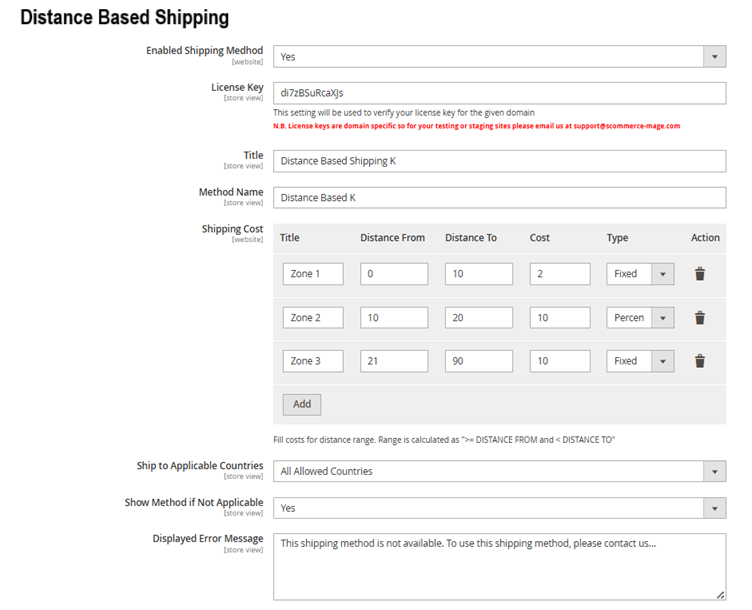
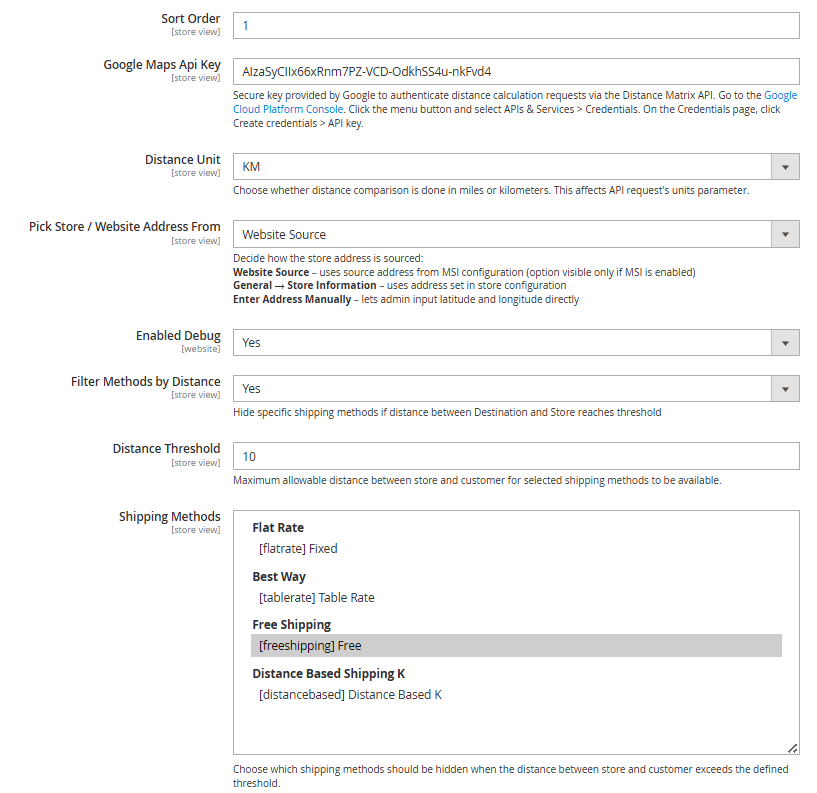
Shipping Cost
Go to Admin> Stores > Sales > Delivery Methods > Distance Based Shipping
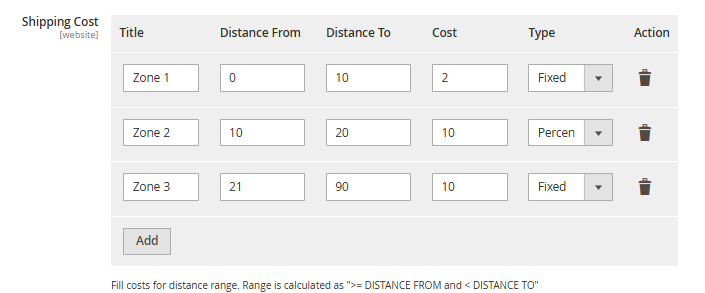
Shipping Method Configuration
-
Enable this Method (Yes / No)
-
Turns this specific shipping method on or off within the distance-based filter.
-
When set to Yes, the related configuration fields below become active.
-
-
Shipping Title
-
The user-friendly name shown to customers during checkout (e.g., "Standard Delivery").
-
Helps customers differentiate between multiple shipping options.
-
-
Shipping Method Name
-
An internal name used for programmatic reference, logging, and in the admin panel.
-
Not typically visible to customers.
-
-
Shipping Cost
-
The cost applied to this shipping method.
-
Its calculation depends on the Type field (see below):
-
Can be a fixed value (e.g.,
5.99). -
Or a percentage of the cart's subtotal (e.g.,
5for 5%).
-
-
-
Distance From
-
The minimum distance (in miles or kilometers) from the store for this method to be available.
-
Defines the start of the valid range.
-
-
Distance To
-
The maximum distance (in miles or kilometers) from the store for this method to be available.
-
Defines the end of the valid range.
-
-
Type
-
Determines how the Shipping Cost is calculated.
-
Fixed: Applies the cost as a flat fee.
-
Percentage: Calculates the cost as a percentage of the order's subtotal.
-
-
Show Method if Not Applicable (Yes / No)
-
Yes: The method will be displayed even if the customer is outside the distance range, but will show an error message.
-
No: The method will be completely hidden if the customer is outside the distance range.
-
-
Displayed Error Message
-
The custom message shown to customers when "Show Method if Not Applicable" is set to Yes and they are outside the valid distance range.
-
Example: "This shipping method is not available for your location."
-
-
Ship to Applicable Countries
-
Defines the geographical availability of the method:
-
All Allowed Countries: Available to all countries your store ships to.
-
Specific Countries: Limits the method to a selected list of countries.
-
-
-
Ship to Specific Countries
-
A multi-select list to choose which countries this shipping method is available to.
-
This field only appears if "Ship to Applicable Countries" is set to Specific Countries.
-
-
Sort Order
-
A number that determines the order in which this method appears in the checkout list compared to other methods.
-
Lower numbers (e.g., 0, 1) are displayed first.
-
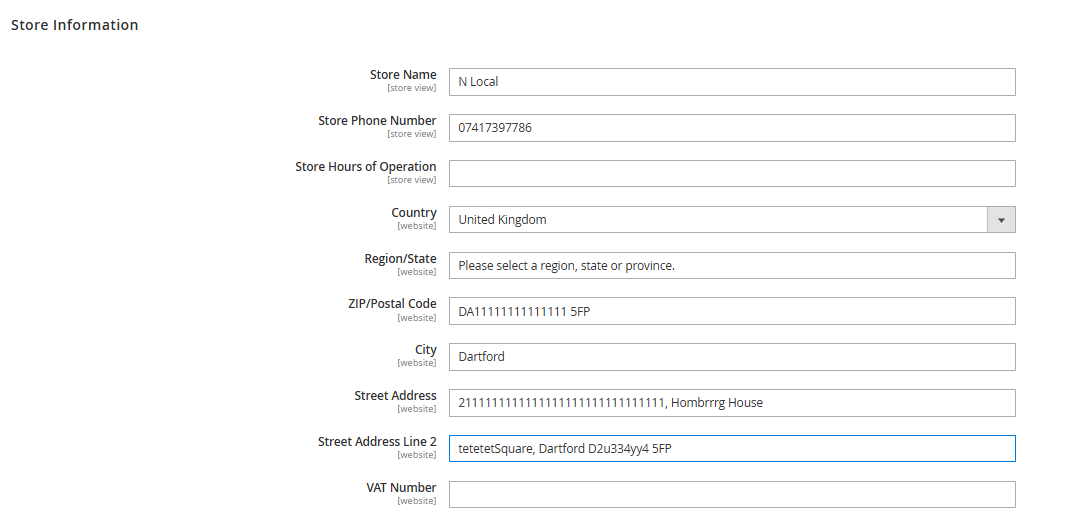
When a customer enters an address on the checkout page, the system calculates delivery cost based on the distance from the origin address and the distance ranges configured are as follows: -
- Zone 1: 0–10 km: Delivery cost is 2
- Zone 2: 11–20 km: Delivery cost is 10
- Zone 3: 21–90 km: Delivery cost is 10
Refer to the screenshot below to validate the shipping methods based on calculated distance fall under the above configured distance ranges: -
Frontend images based on above configured distance ranges:
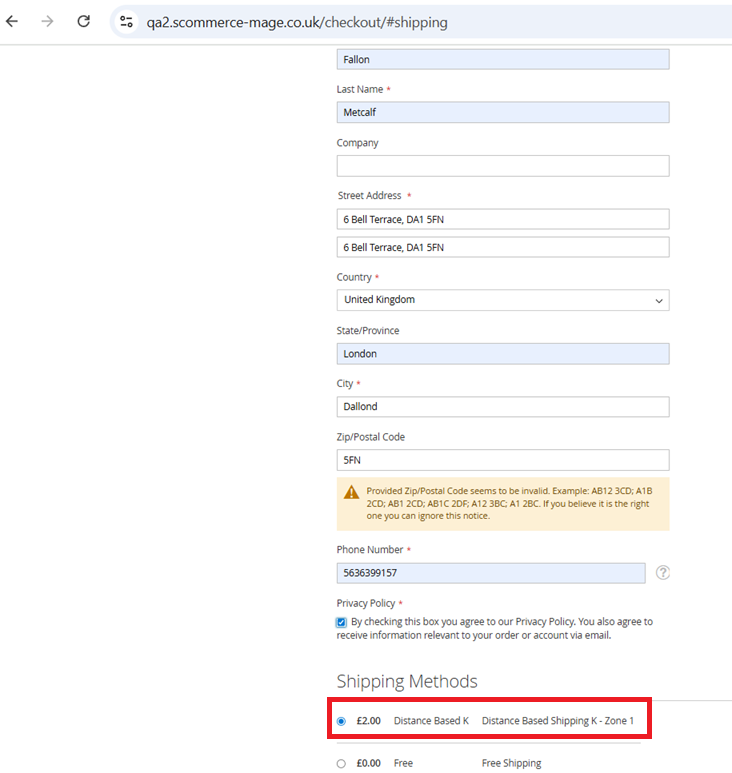
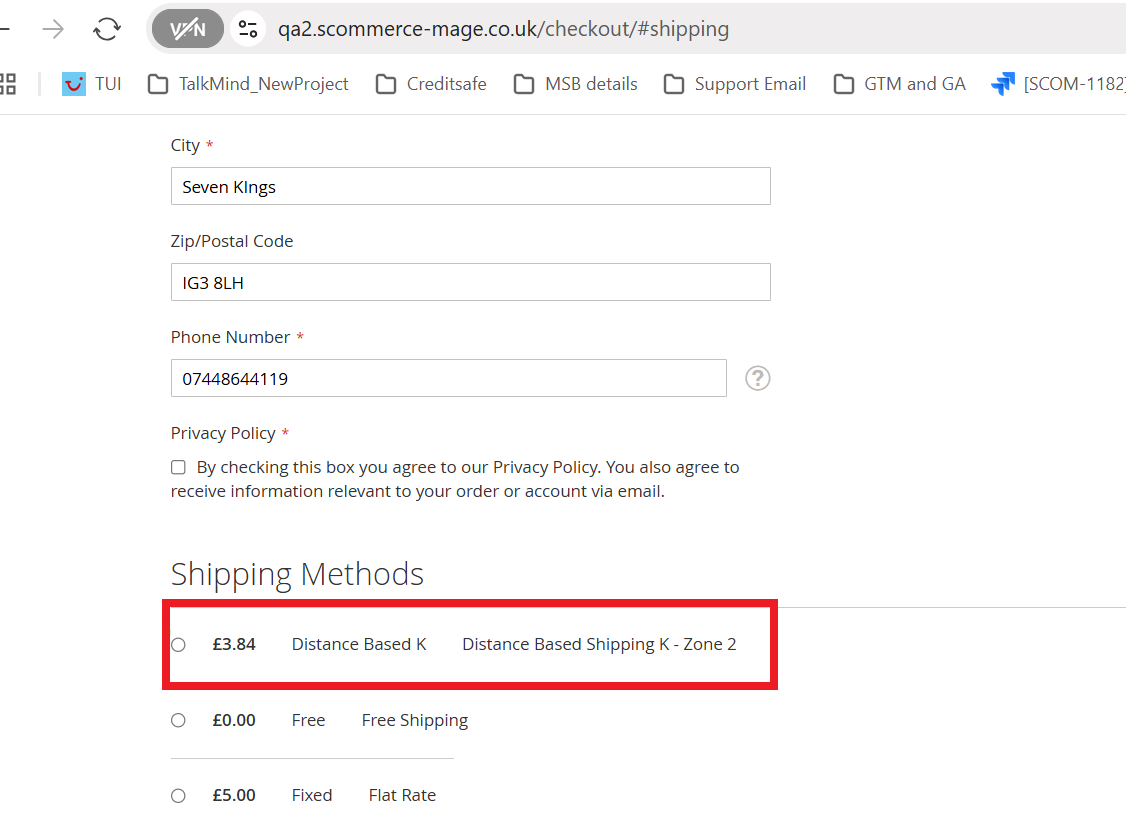
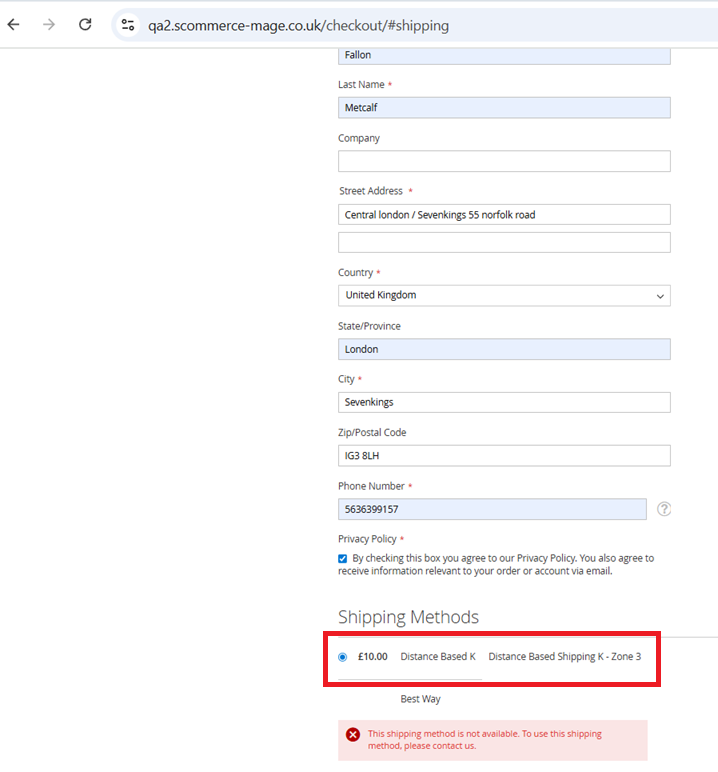
Pick Store / Website Address from

Website Source - To add a website source, navigate to: Admin > Stores > Configuration > Sources From there, you can enter the required source details.
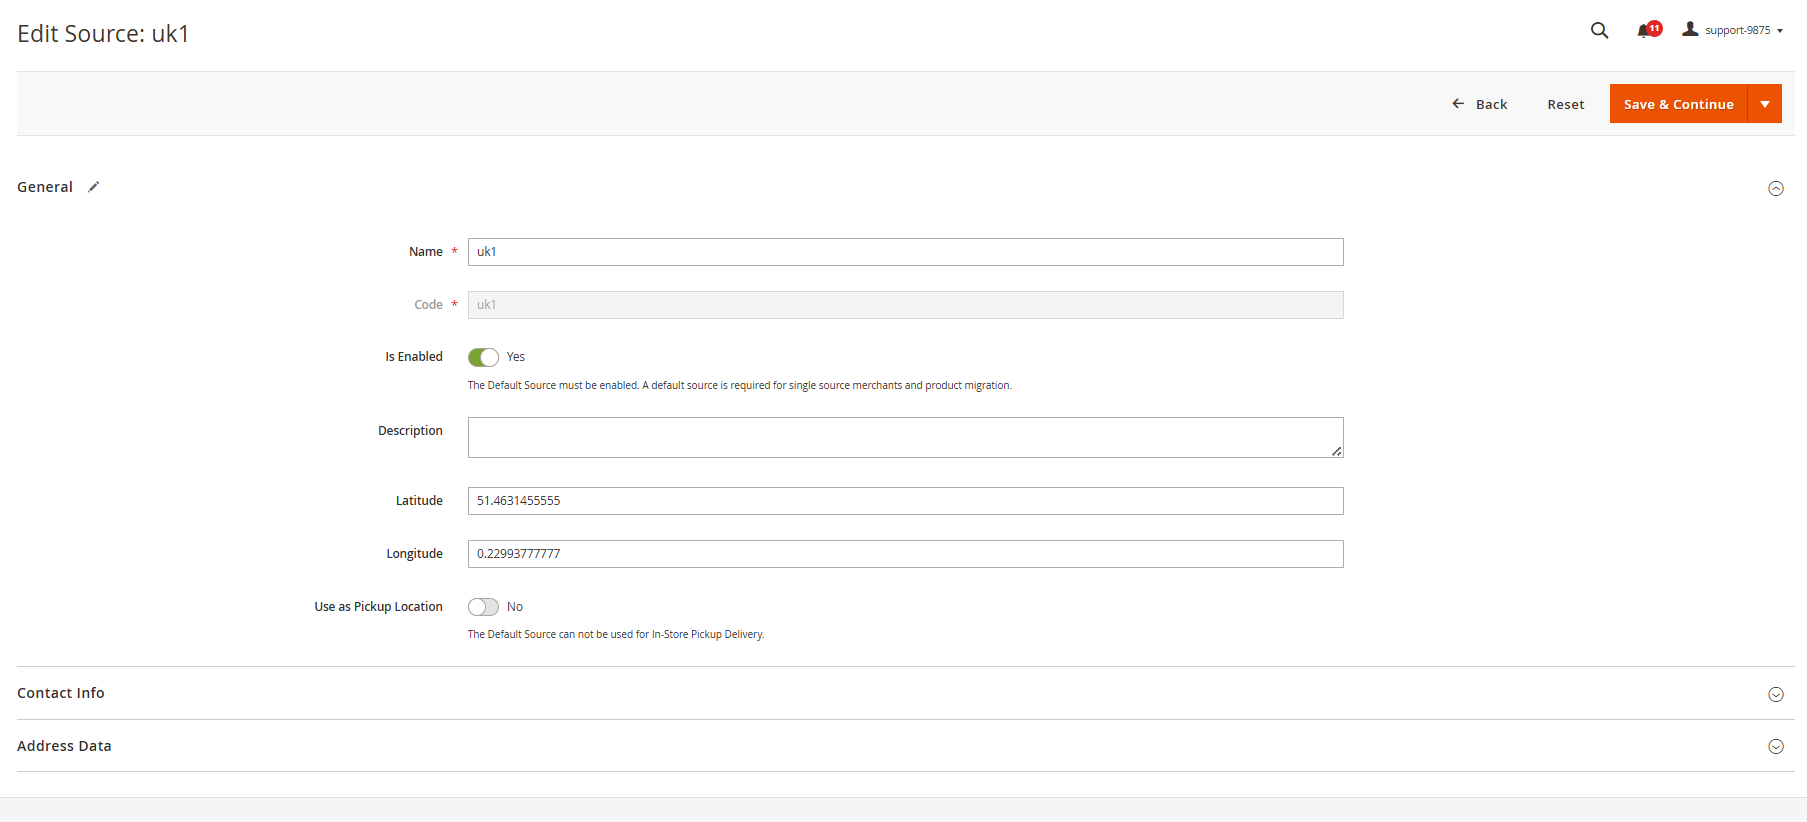
General - Store Information – Displays the store address as configured in the Store Settings section. This information is automatically pulled from the predefined store configuration. To configure, navigate to Admin > Stores > General > Store Information and enter the store address. This address will be used as the source (origin) for distance-based calculations.
Enter Address Manually – Enables administrators to input geographic coordinates—latitude and longitude—directly, bypassing automated location detection or map-based selection.
To configure this manually, navigate to: Admin > Stores > Sales > Delivery Methods > Distance-Based Shipping From there, enter the desired latitude and longitude values. These coordinates allow Google Maps to accurately detect and associate the location for distance-based calculations.
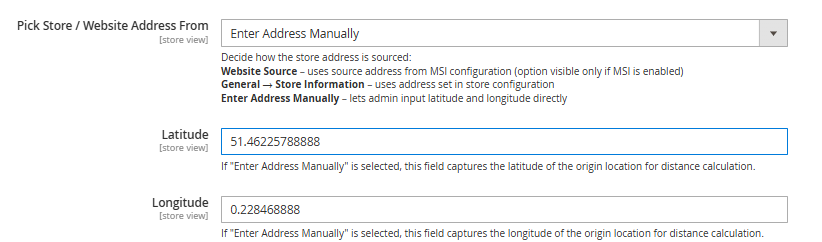
If you have a question related to this extension please check out our FAQ Section first. If you can't find the answer you are looking for then please contact support@scommerce-mage.com.
Magento 2 VAT Switcher
Installation and User Guide for Magento 2 VAT Switcher Extension
Table of Contents
- Installation
- Installation via app/code
- Installation via Composer
- Configuration Settings for VAT Switcher
- General Settings
- Show Price without VAT
- Show Price with VAT
Installation
-
Installation via app/code: Upload the content of the module to your root folder. This will not overwrite the existing Magento folder or files, only the new contents will be added. After the successful upload of the package, run below commands on Magento 2 root directory.
php bin/magento setup:upgrade php bin/magento setup:di:compile php bin/magento setup:static-content:deploy -
Installation via Composer: Please follow the guide provided in the below link to complete the installation via composer.
Configuration Settings for VAT Switcher
Go to Admin > Stores > Configuration > Scommerce Configuration > VAT Switcher
General Settings
- Enabled – Select "Yes" or "No" to enable or disable the module.
- License Key – Please add the license for the extension which is provided in the order confirmation email. Please note license keys are site URL specific. If you require license keys for dev/staging sites then please email us at support@scommerce-mage.com.
- Customer Groups - Select a customer group from the available options. The VAT Switcher is accessible only to users who belong to customer groups with explicitly granted access.
- Include VAT by Default - This setting determines whether product prices are shown inclusive or exclusive of VAT by default.
If set to "Yes", prices will be displayed with VAT included.
- Customer Groups Defaults - Please add the Per Customer group default for VAT Switcher. This configuration allows the Admin to define a default VAT display preference per Customer Group. A dynamic grid is provided where each row contains:
- A dropdown listing all Magento Customer Groups
- A dropdown to select the Default VAT (Included/Excluded)
When a customer logs in, the module checks their Customer Group ID and automatically applies the mapped VAT preference. If no mapping exists, the system falls back to the global default VAT setting. If the customer manually changes the VAT toggle, their manual choice overrides the default for the session.
-
Use Frontend Switcher - Select "Yes" to Switch prices on the frontend level. When this setting is enabled, the VAT toggle on the frontend becomes active and allows customers to switch between prices with VAT and prices without VAT. without refreshing or reloading the page.

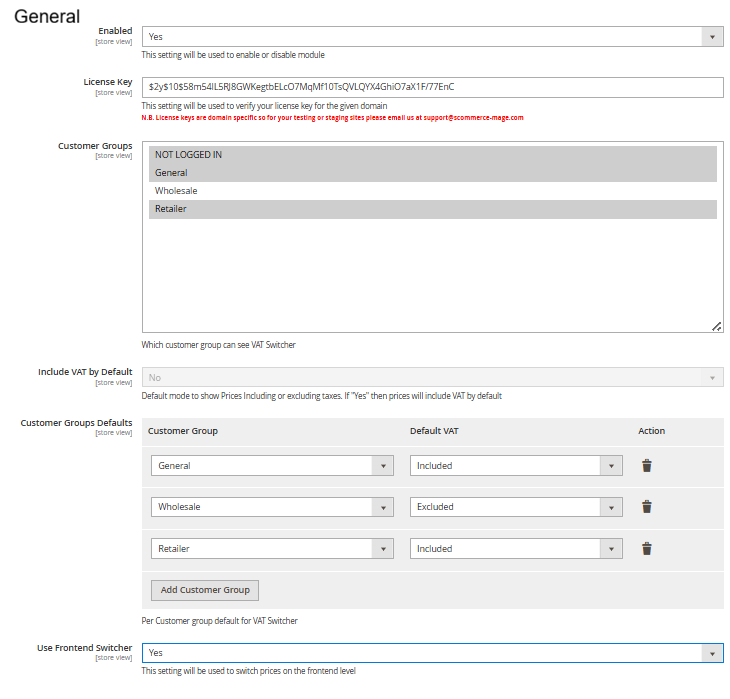
Show Price without VAT
The VAT switcher is prominently displayed on all product listing and product detail pages. It is positioned within the header.
When a user selects “Show prices without VAT”, all product prices are dynamically updated to exclude applicable VAT.
VAT rates are calculated based on the customer’s shipping address or the store’s default tax zone. Displayed prices accurately reflect tax inclusion or exclusion in accordance with Magento’s tax configuration settings.
From the backend, administrators can fully manage VAT switcher behavior, including:
-
Enabling or disabling the VAT switcher
-
Setting the default display mode (inclusive or exclusive) per store view
-
Defining which customer groups have access to the switcher
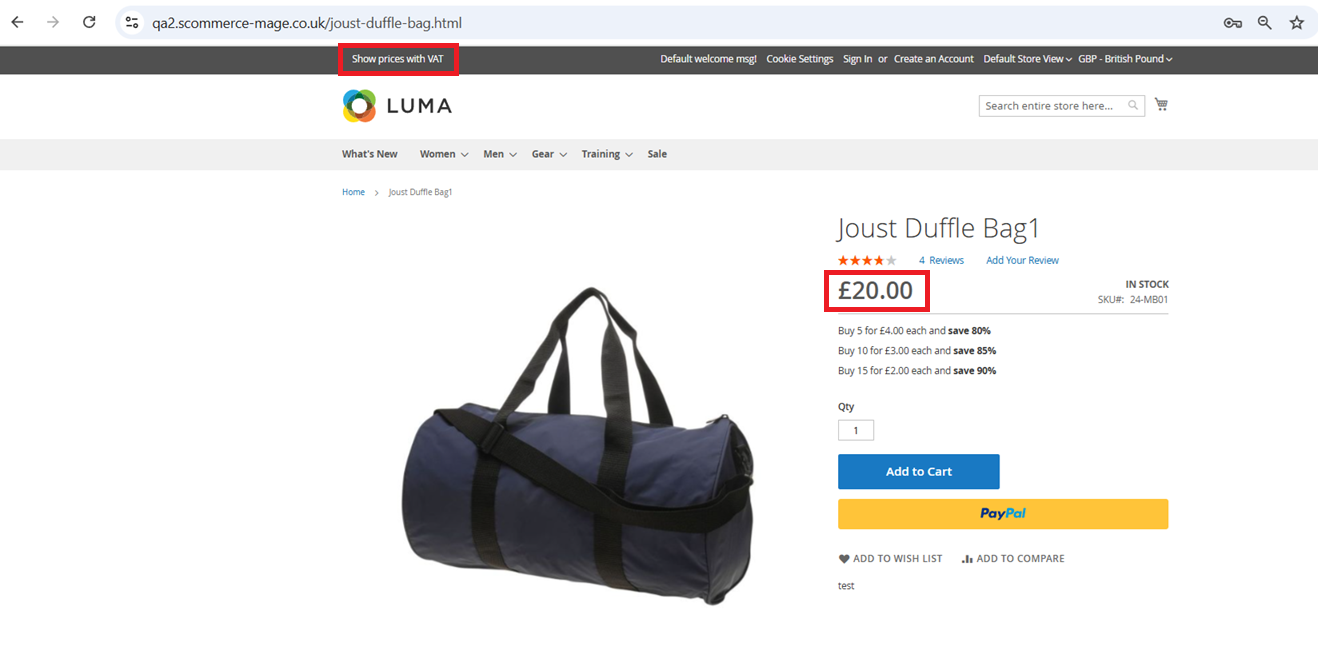
Show Price with VAT
When a user selects “Show prices with VAT”, all product prices are recalculated to include the applicable VAT.
Customer Groups
You can set a customer group by going to Admin > Customers, then choosing a customer and picking a group in the 'Group' field. The available groups include: Not Logged In, General, Wholesale, and Retailer.
Customer groups that are not selected in the configuration settings will not have access to the VAT switcher option on the front end.
If you have a question related to this extension please check out our FAQ Section first. If you can't find the answer you are looking for then please contact support@scommerce-mage.com.
Magento 2 Custom Currency Manager
Installation and User Guide for Magento 2 Custom Currency Manager Extension
Table of Contents
- Installation
- Installation via app/code
- Installation via Composer
- Configuration Settings for Custom Currency Manager
- General Settings
- Custom Currency Manager
- Error Message When Adding Duplicate currency in Configuration settings
- Error for Deleting Currency for Configuration settings
- Frontend Screenshots
Installation
-
Installation via app/code: Upload the content of the module to your root folder. This will not overwrite the existing Magento folder or files, only the new contents will be added. After the successful upload of the package, run below commands on Magento 2 root directory.
php bin/magento setup:upgrade php bin/magento setup:di:compile php bin/magento setup:static-content:deploy -
Installation via Composer: Please follow the guide provided in the below link to complete the installation via composer.
Configuration Settings for Custom Currency Manager
Go to Admin > Stores > Configuration > Scommerce Configuration > Custom Currency Manager
General Settings
- Enabled – Select "Yes" or "No" to enable or disable the module.
- License Key – Please add the license for the extension which is provided in the order confirmation email. Please note license keys are site URL specific. If you require license keys for dev/staging sites then please email us at support@scommerce-mage.com.
- Custom Currencies - Please add the defined list of custom currencies.
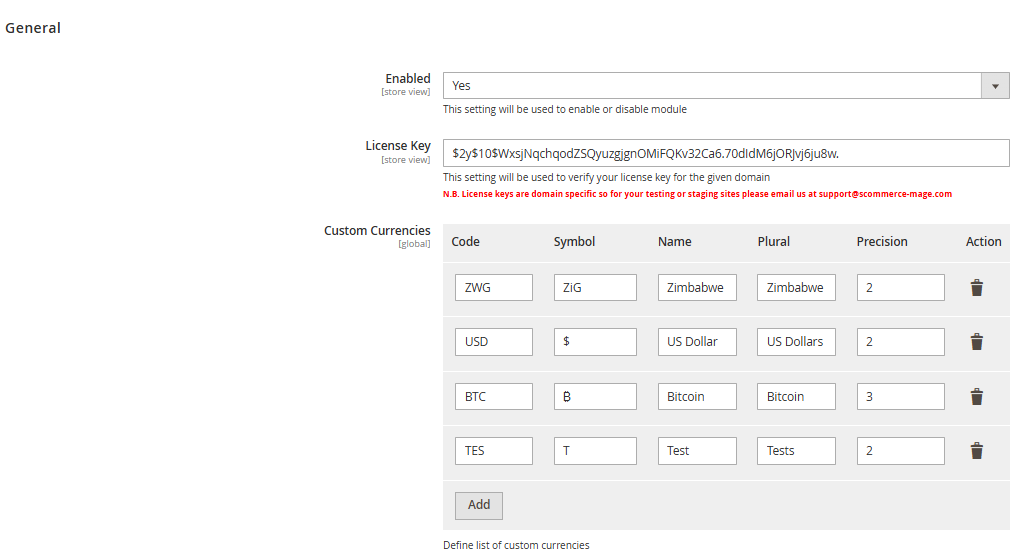
Custom Currency Manager
As a customer using the Custom Currency Manager extension, you can create and configure various custom currencies such as BTC, ZWG, and others to suit your store's needs.
To add a Custom Currency like BTC add from Configuration, path - Admin > Stores > Configuration > Custom Currency Manager
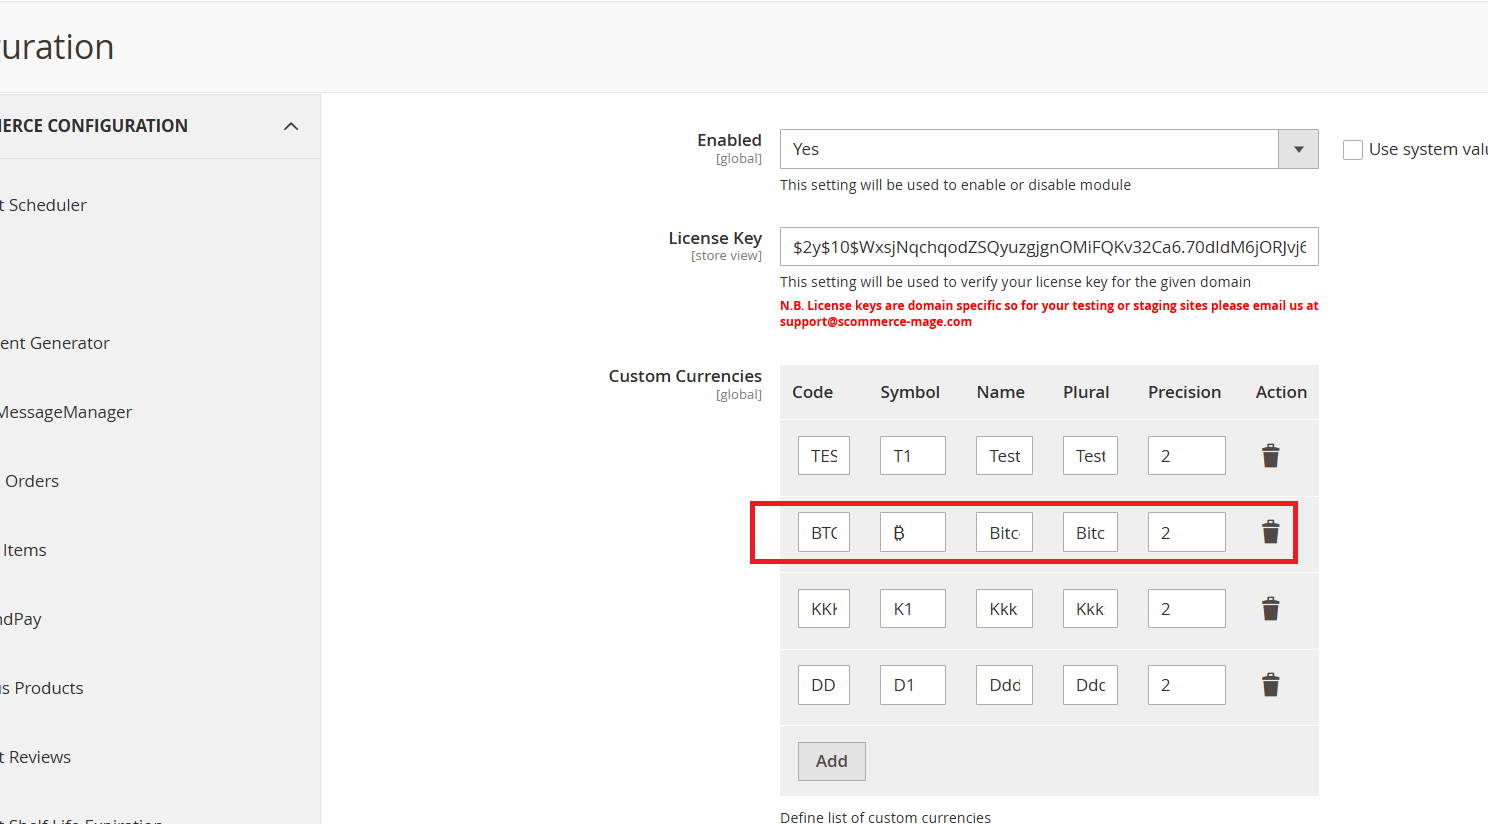
Once you configure custom currencies by adding the currency code, symbol, plural name, and precision in the configuration, the newly added currency appears in the "Allowed Currencies" dropdown under Magento’s default currency setup section.
To configure your store’s currency settings, go to Admin Panel > Stores > Configuration > General > Currency Setup, where you can choose the base currency, default display currency, and allowed currencies. Please refer to the screenshots below for visual guidance on setting up custom currencies.
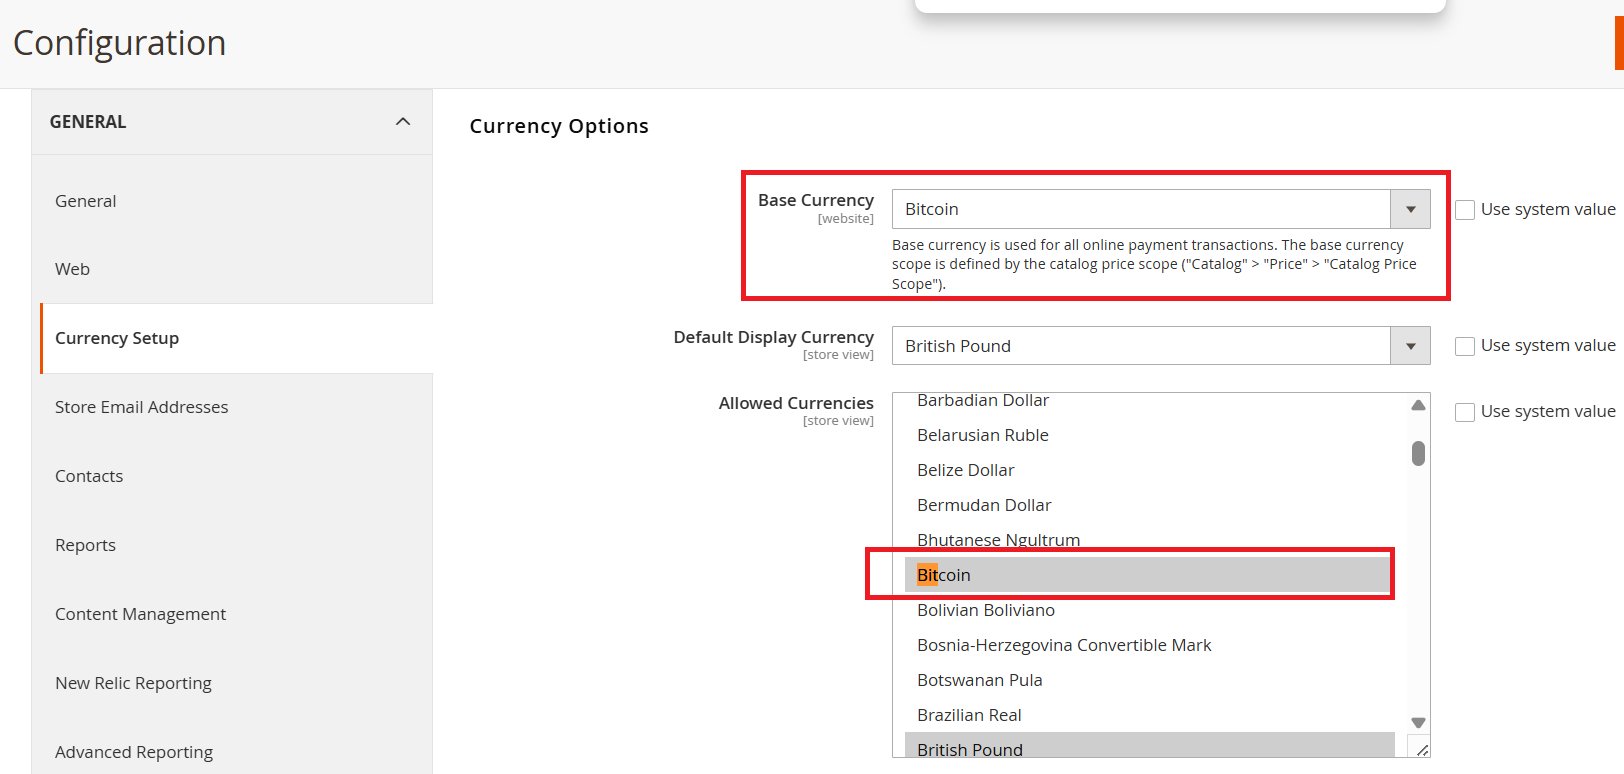
To configure currency rates for your store:
- Go to Admin Panel > Stores > Configuration > Currency Rates.
- From this section, you can manually set exchange rates or import them from supported services.
- Make sure to save your changes to apply the updated rates across your storefront.
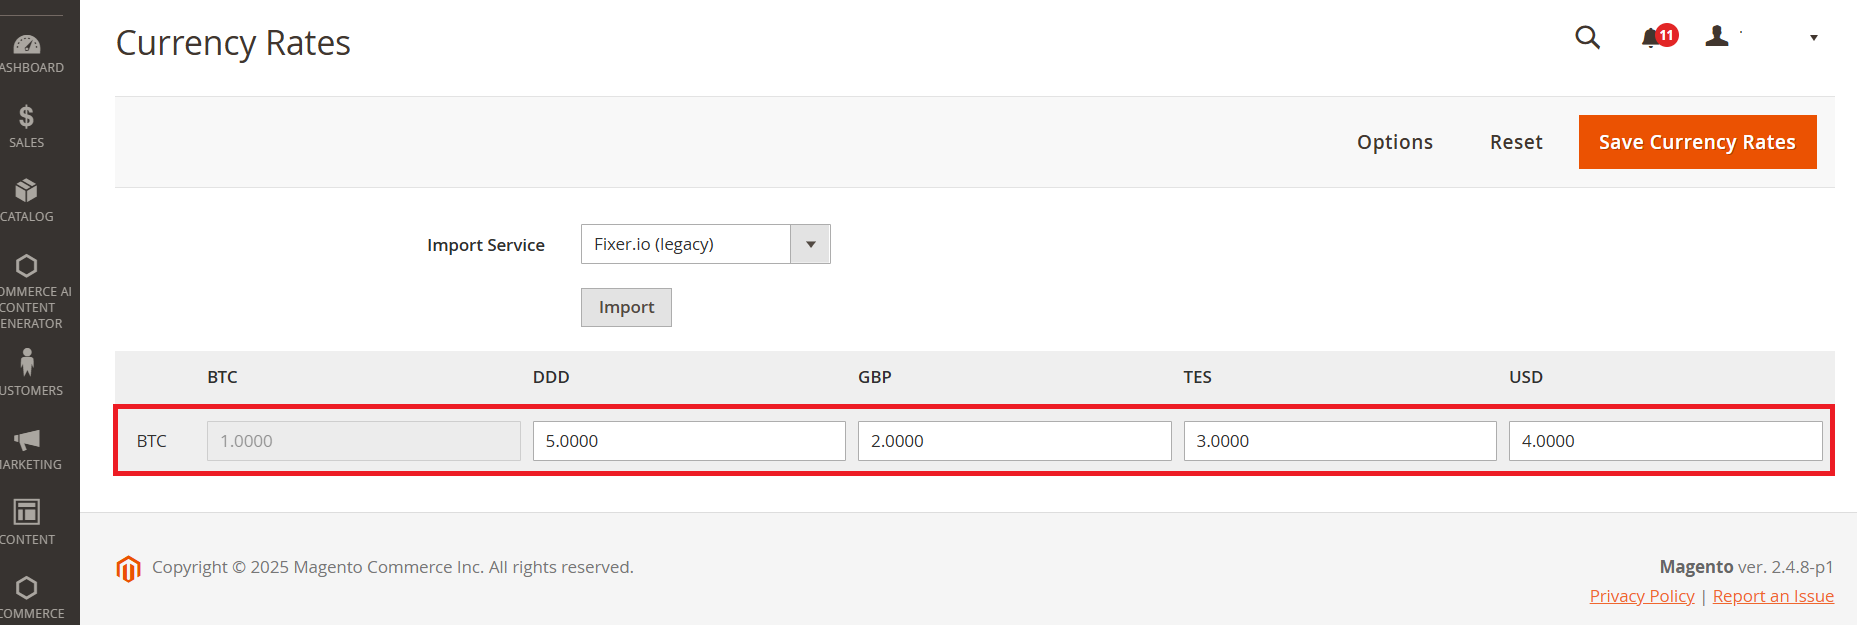
Error Message When Adding Duplicate Currency in Configuration Settings
Since GBP already exists in the default Magento, you cannot add it again. Attempting to do so will trigger a warning message.
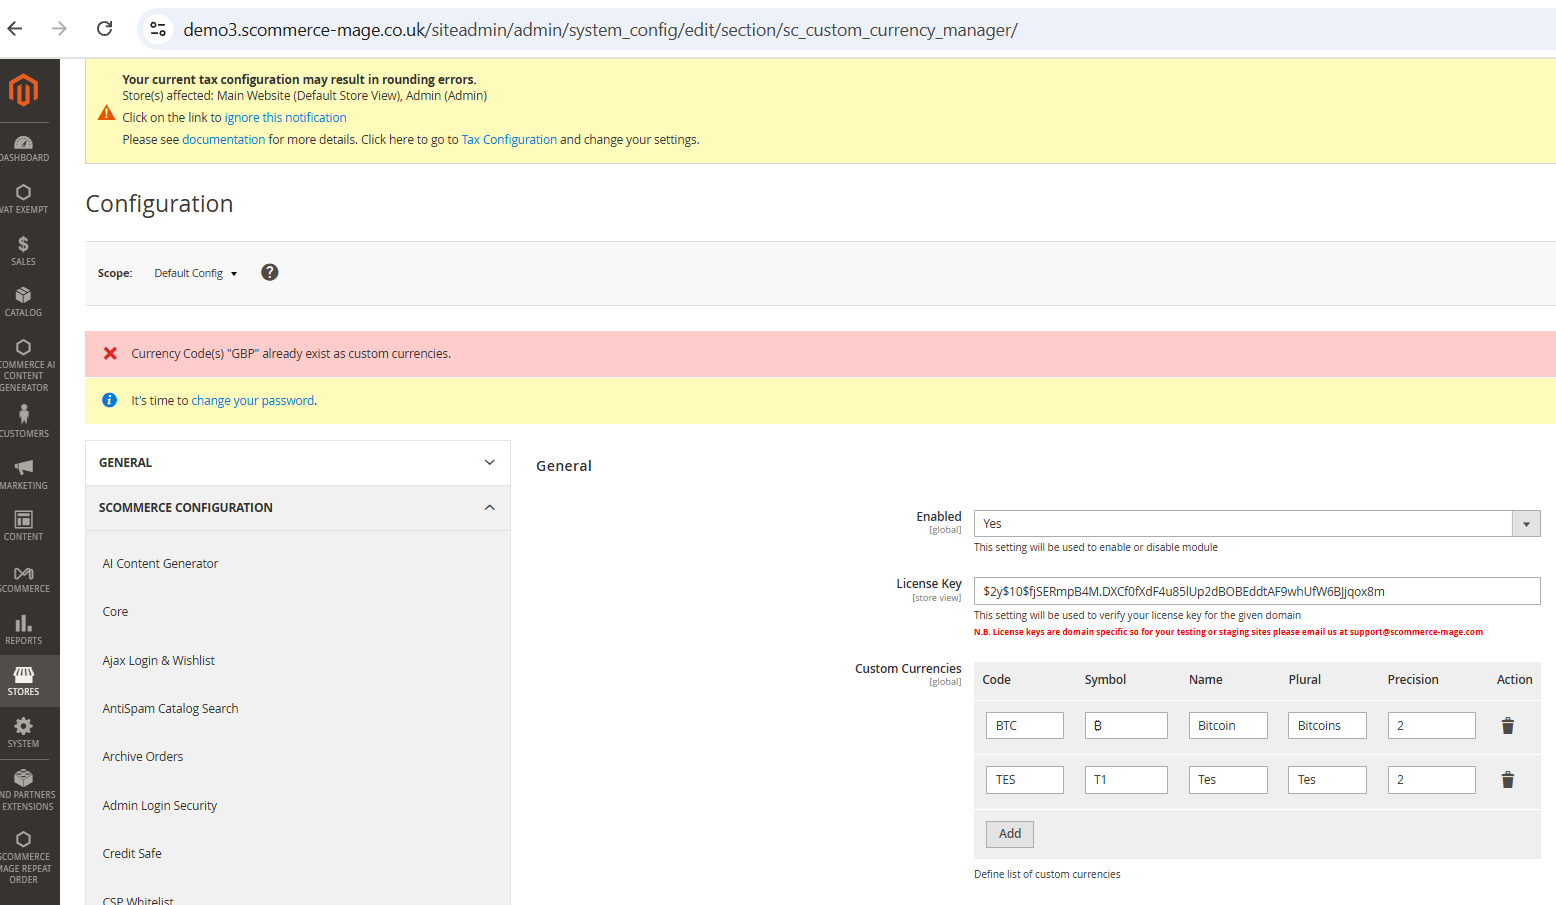
Error for Deleting Currency for configuration settings
The 'Test' currency has been selected in the Allowed Currency list for the UK site, Default Configuration, and Default Store View.
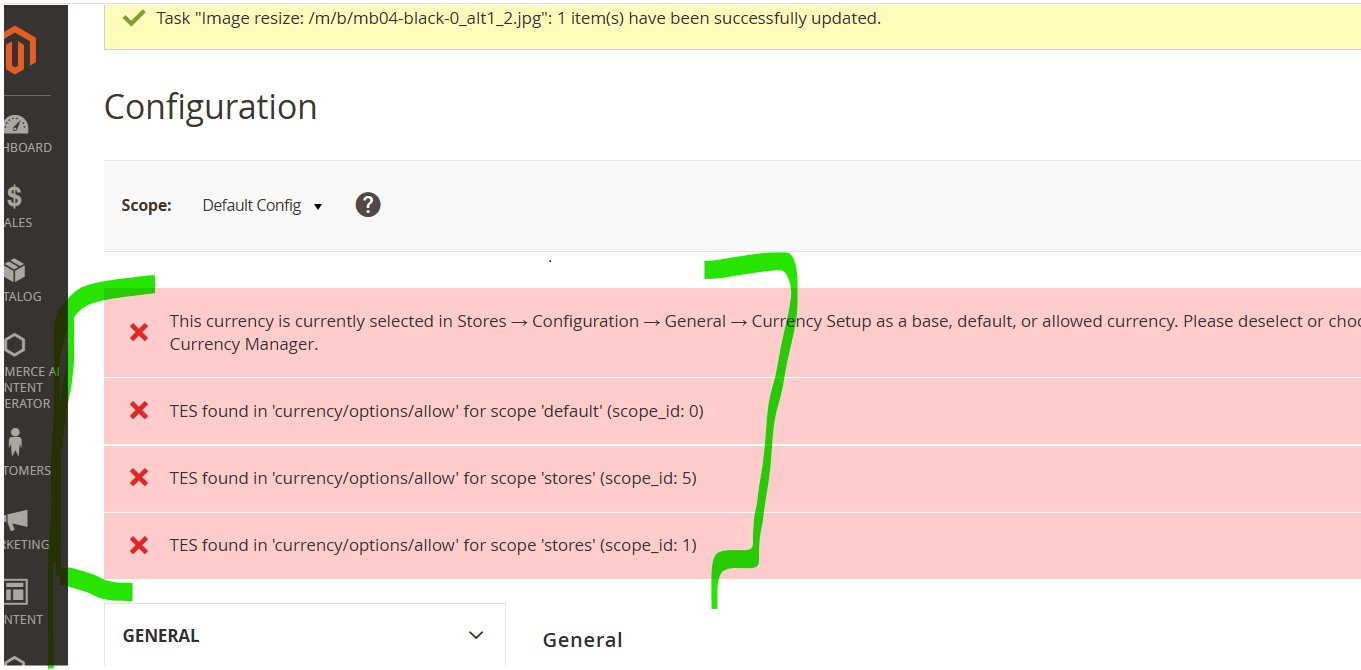
Frontend Screenhots
Currency Options available on the frontend - Default store view.
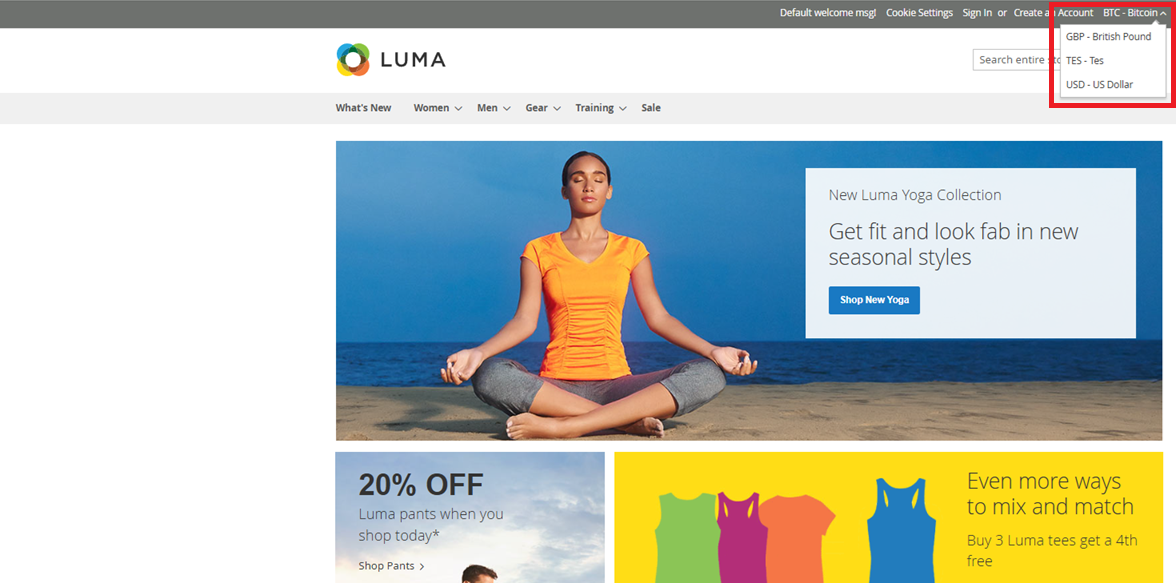
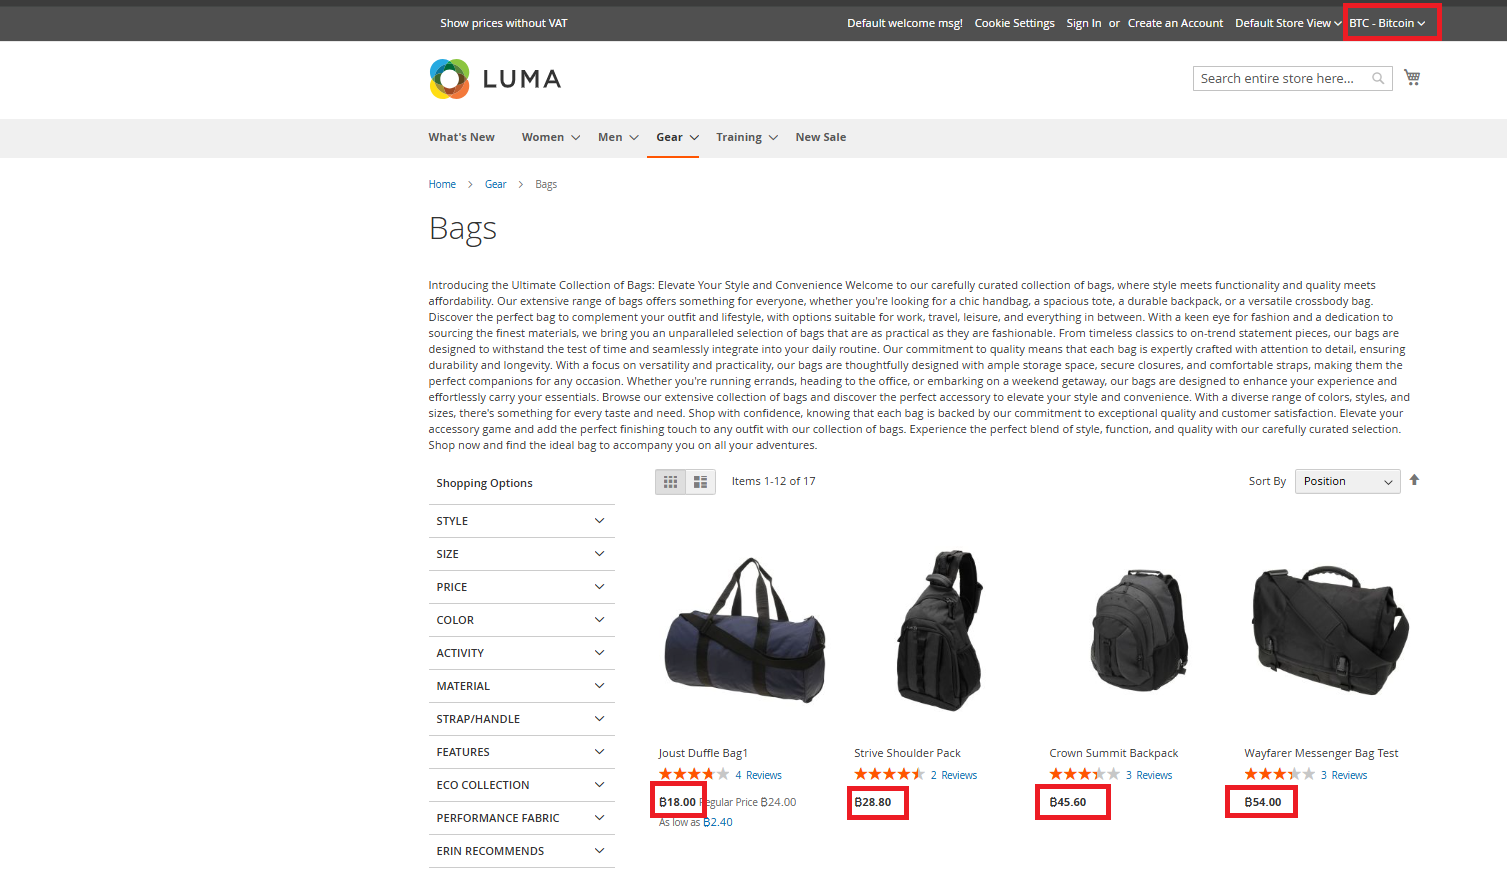
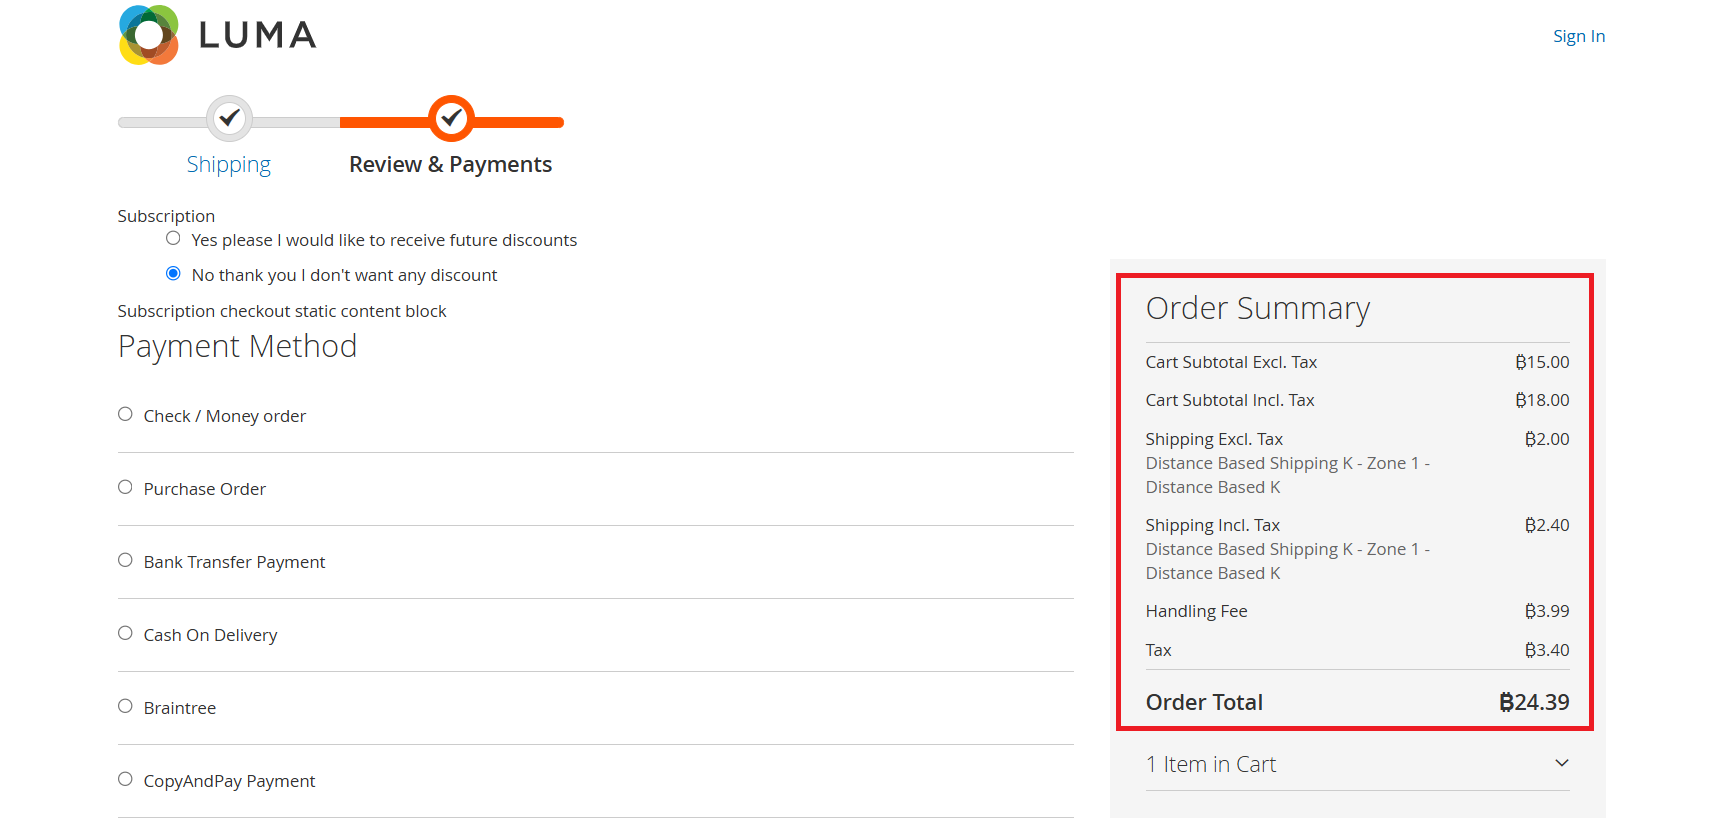
If you have a question related to this extension please check out our FAQ Section first. If you can't find the answer you are looking for then please contact support@scommerce-mage.com.
Magento 2 Sample Product
Installation and User Guide for Magento 2 Sample Product extension
Table of Contents
- Installation
- Installation via app/code
- Installation via Composer
- Configuration Settings for Sample Product
- General Settings
- Sample Product Settings
- Configure a Sample Product
- Free Sample
- Sample with Cost Associated
- Sample products are not Eligible for Coupon Discounts
- Coupon Code Validation for Free Sample Product
- Coupon Code Validation for Sample with Cost Associated product
- Email Received for a Sample Product
Installation
-
Installation via app/code: Upload the content of the module to your root folder. This will not overwrite the existing Magento folder or files, only the new contents will be added. After the successful upload of the package, run below commands on Magento 2 root directory.
php bin/magento setup:upgrade php bin/magento setup:di:compile php bin/magento setup:static-content:deploy -
Installation via Composer: Please follow the guide provided in the below link to complete the installation via composer.
Configuration Settings for Sample Product
Go to Admin > Stores > Configuration > Scommerce Configuration > Sample Product
General Settings
- Enabled – Select "Yes" or "No" to enable or disable the module.
- License Key – Please add the license for the extension which is provided in the order confirmation email. Please note license keys are site URL specific. If you require license keys for dev/staging sites then please email us at support@scommerce-mage.com.
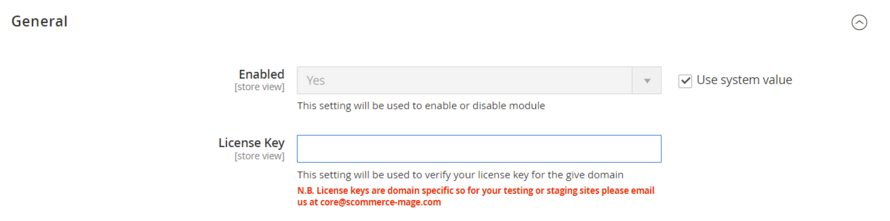
Sample Product Settings
- Enabled – Select "Yes" or "No" to enable or disable the module.
- License Key – Please add the license for the extension which is provided in the order confirmation email. Please note license keys are site URL specific. If you require license keys for dev/staging sites then please email us at support@scommerce-mage.com.
- Default Free Sample Text – Please add the Default Free Sample Text
- Default Sample with Cost Associated Text – Please add the Default Sample with Cost Associated Text
- Default Sample Price with Cost Associated - Please add the Default simple price with cost associated
- Default Max Qty to order samples - Please add the Default max qty to order samples
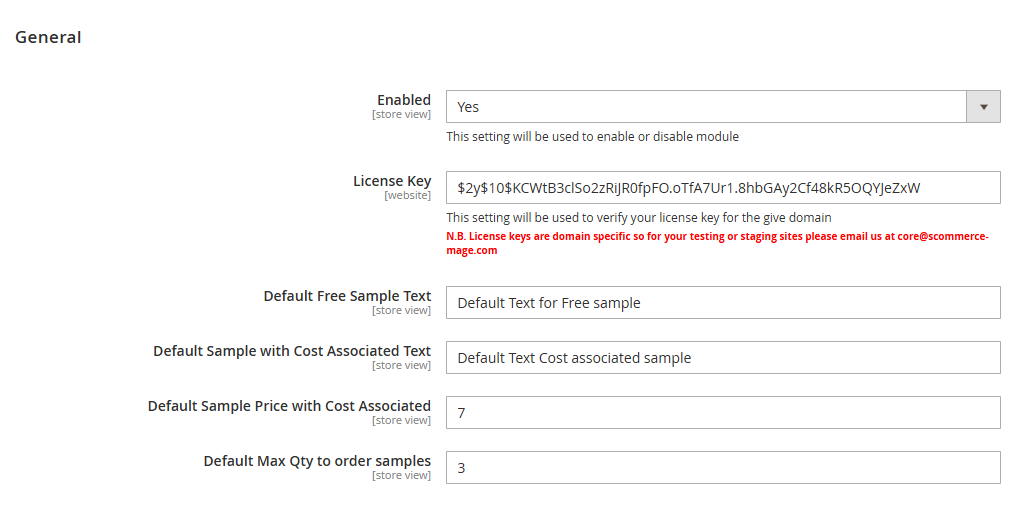
Configure a Sample product
-
Free Sample
Log in to the Admin Panel and navigate to Catalog → Products. Select the product you want to edit and click Edit. Scroll down to the Sample Product section and choose Free Sample from the Sample Type dropdown.
1. When the fields are empty
If all fields are left blank, the system will use the default configuration values.
On the frontend product page:
- The default quantity of 3 is applied, allowing the item to be added to the cart.
- The label Free Sample is displayed (e.g., for product 24‑WB07).
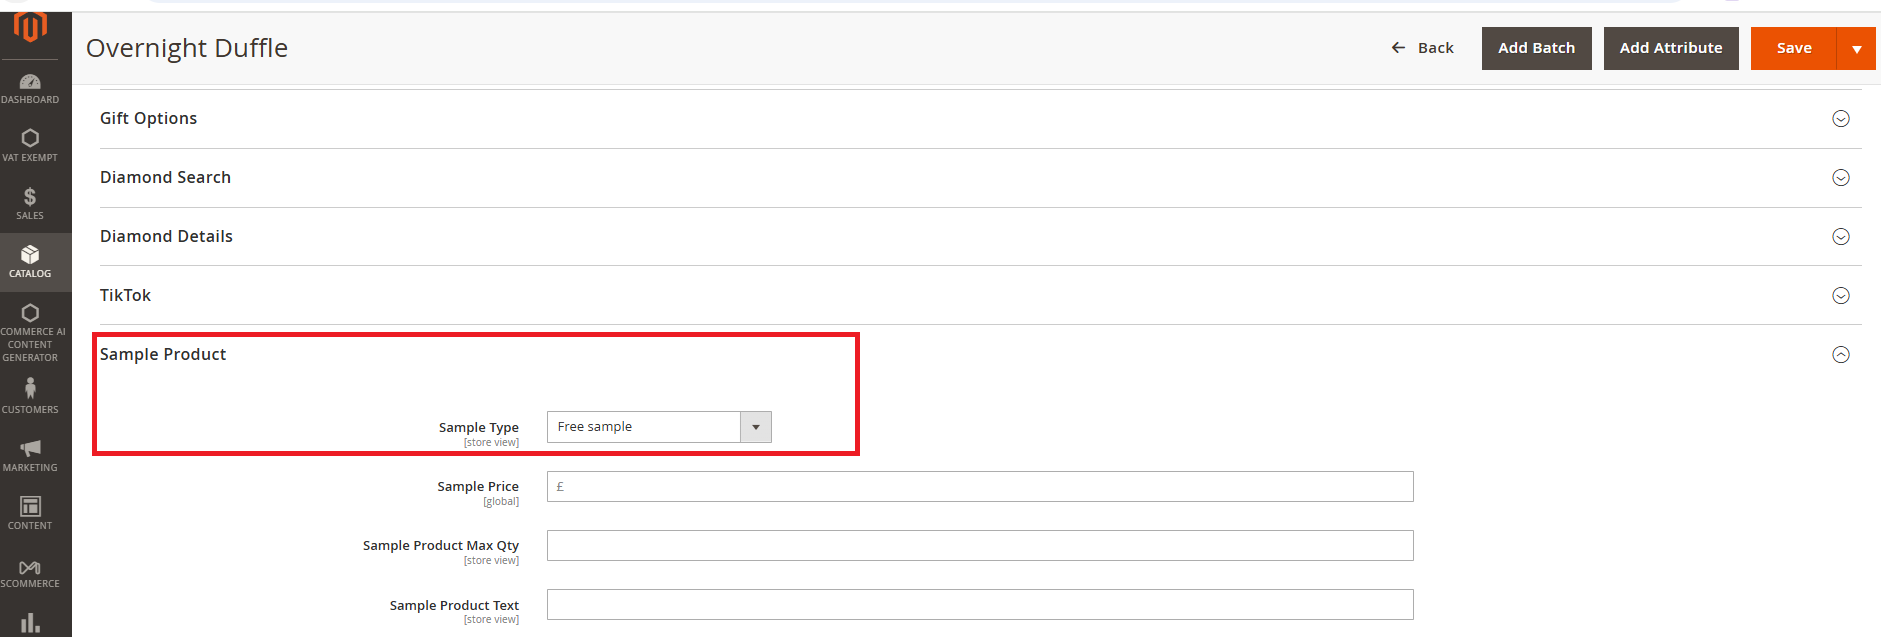
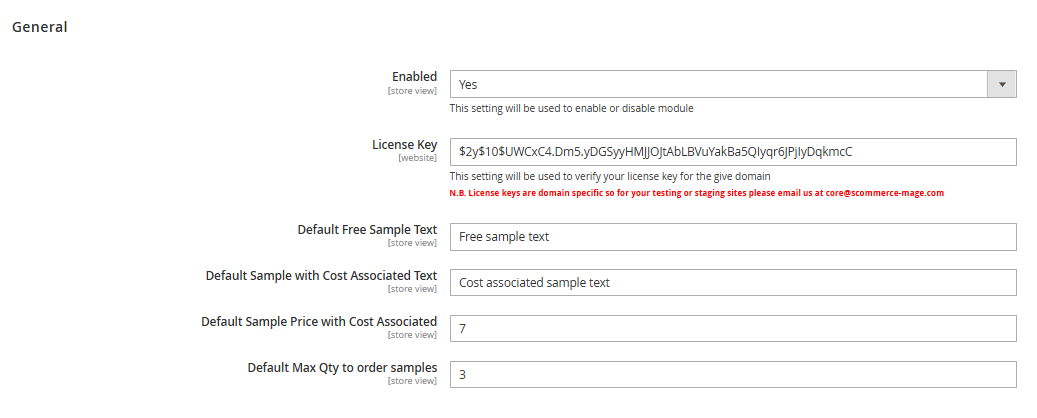
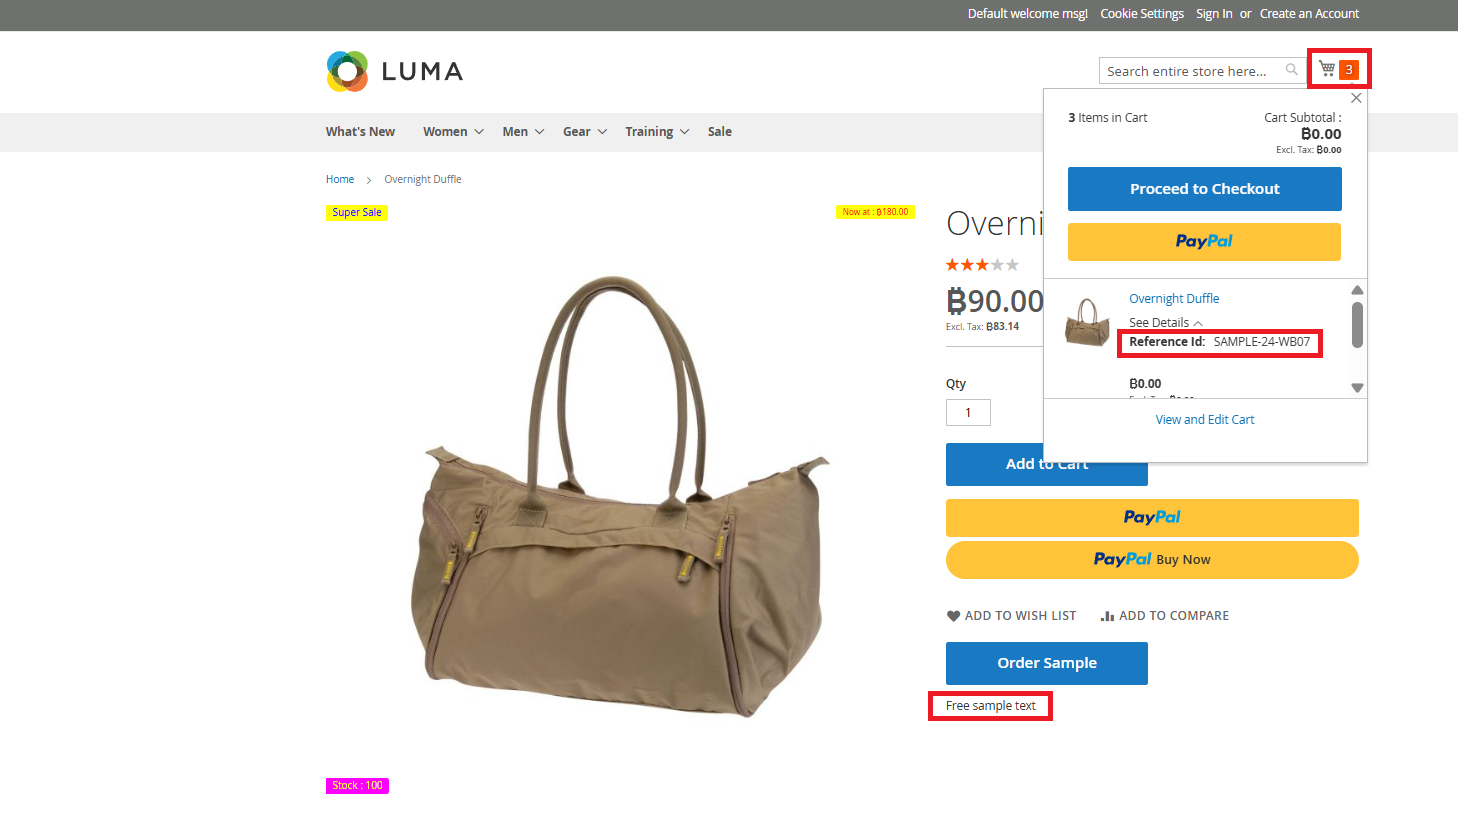
2. When the fields have values set
If any fields in the Sample Product section contain values, those product‑level values override the defaults and are used on the frontend.
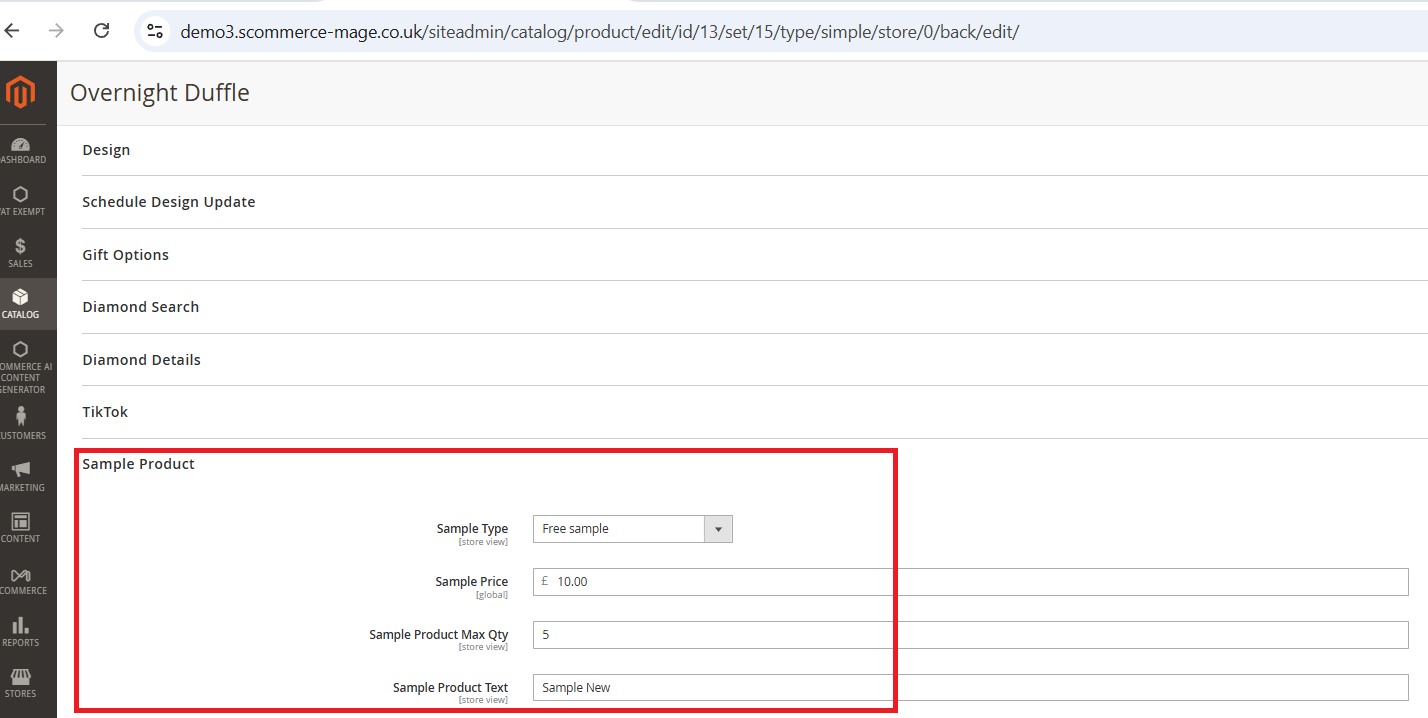
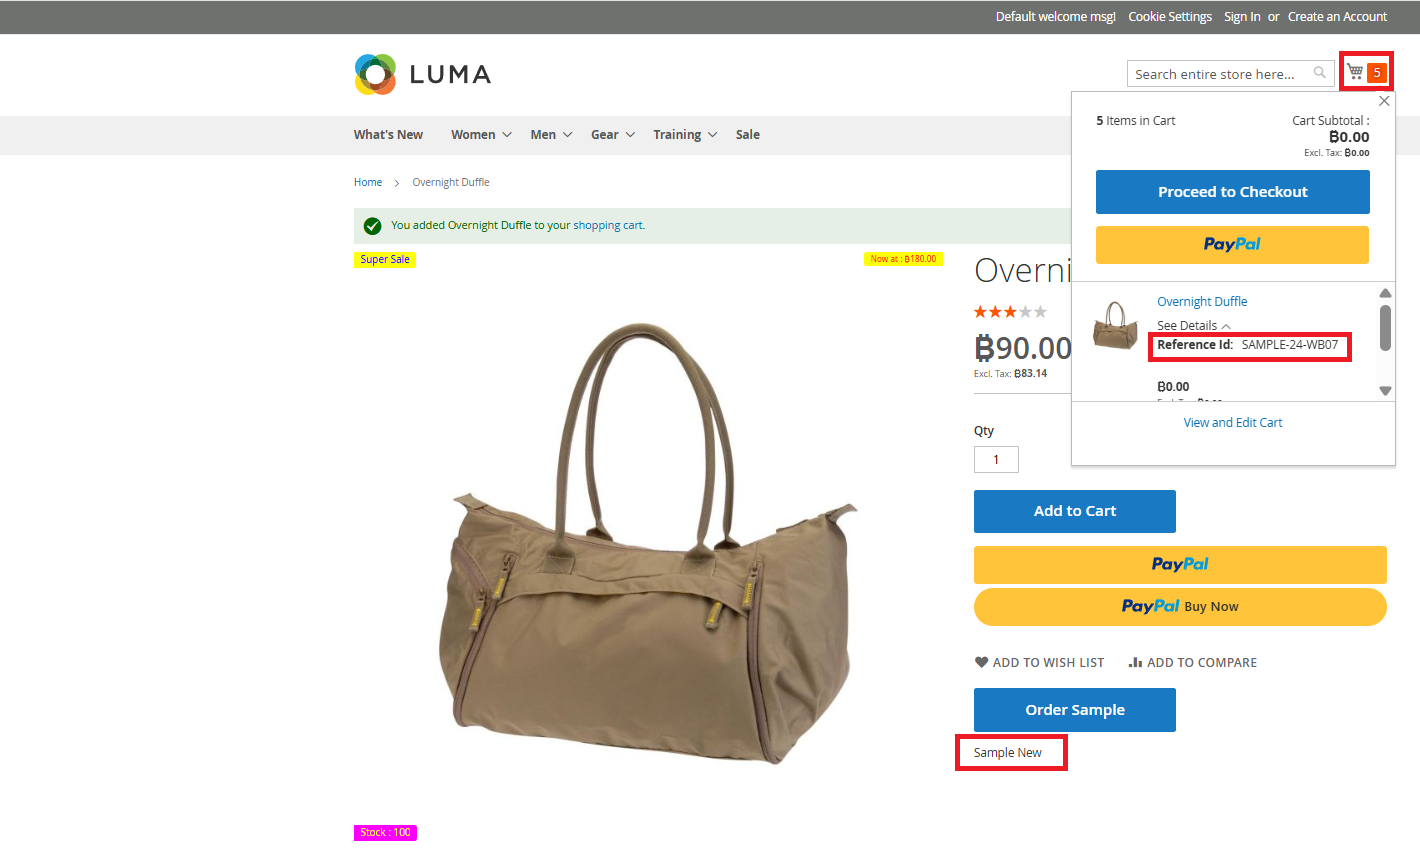
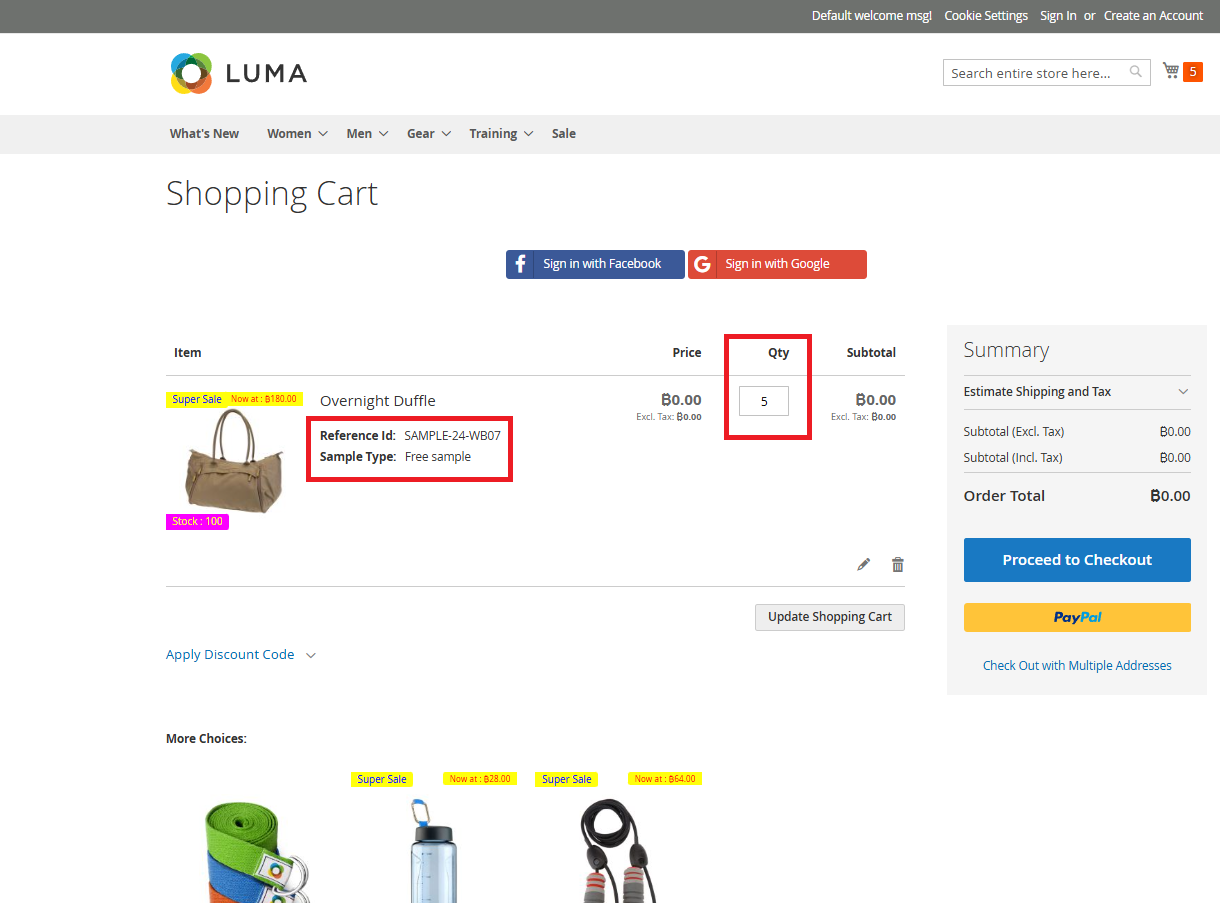
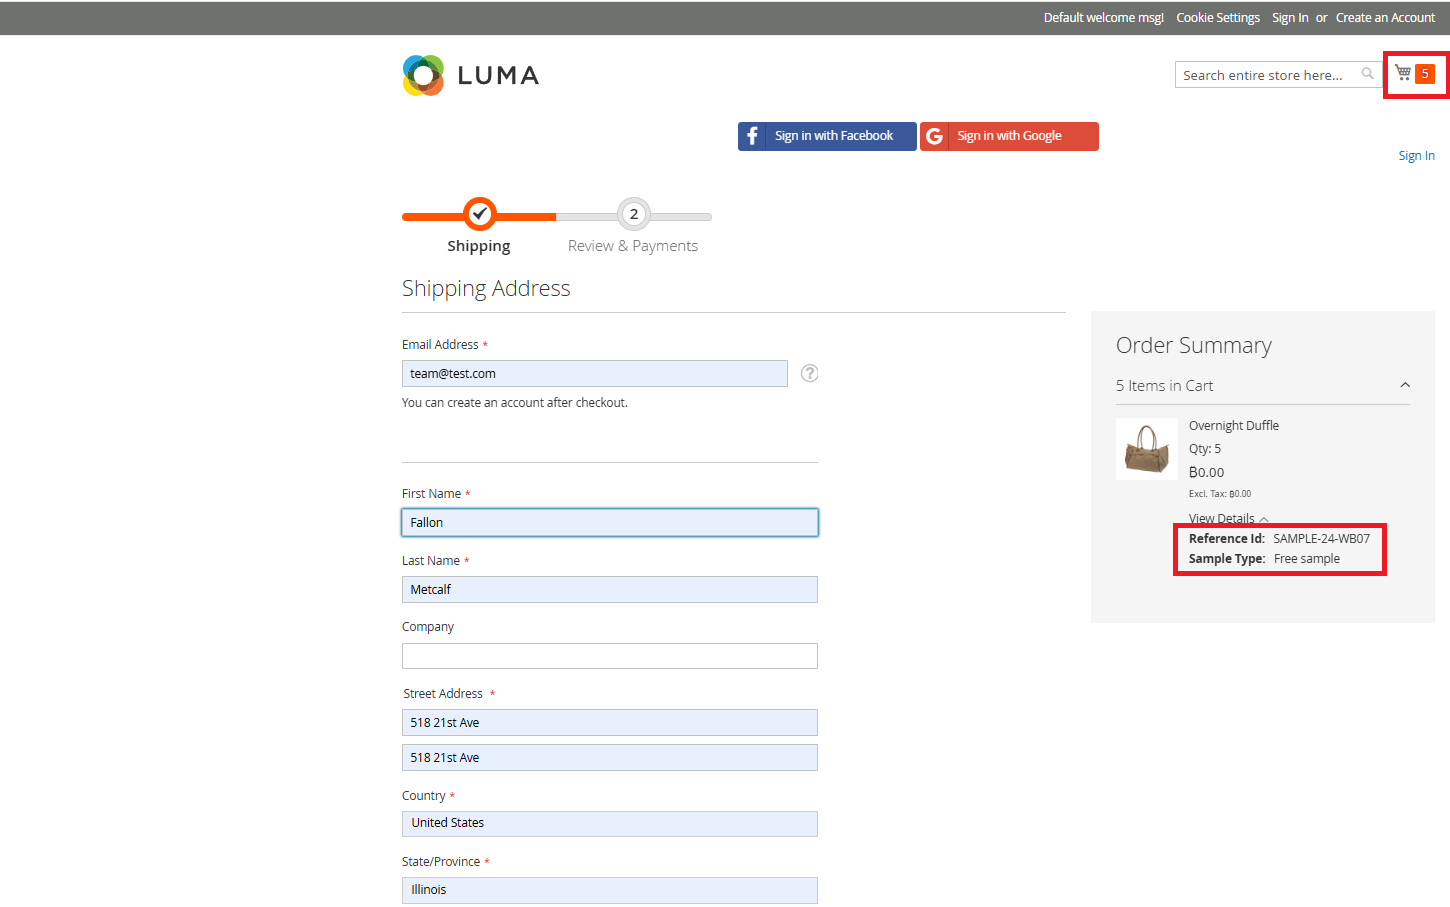
-
Sample with Cost Associated
Log in to the Admin Panel and go to Catalog → Products. Open the product you want to update by clicking Edit. Scroll down to the Sample Product section.
From the Sample Type dropdown, select Sample with Cost Associated.
- If you leave all fields empty, the system will automatically use the default price, title, and quantity from the configuration settings.
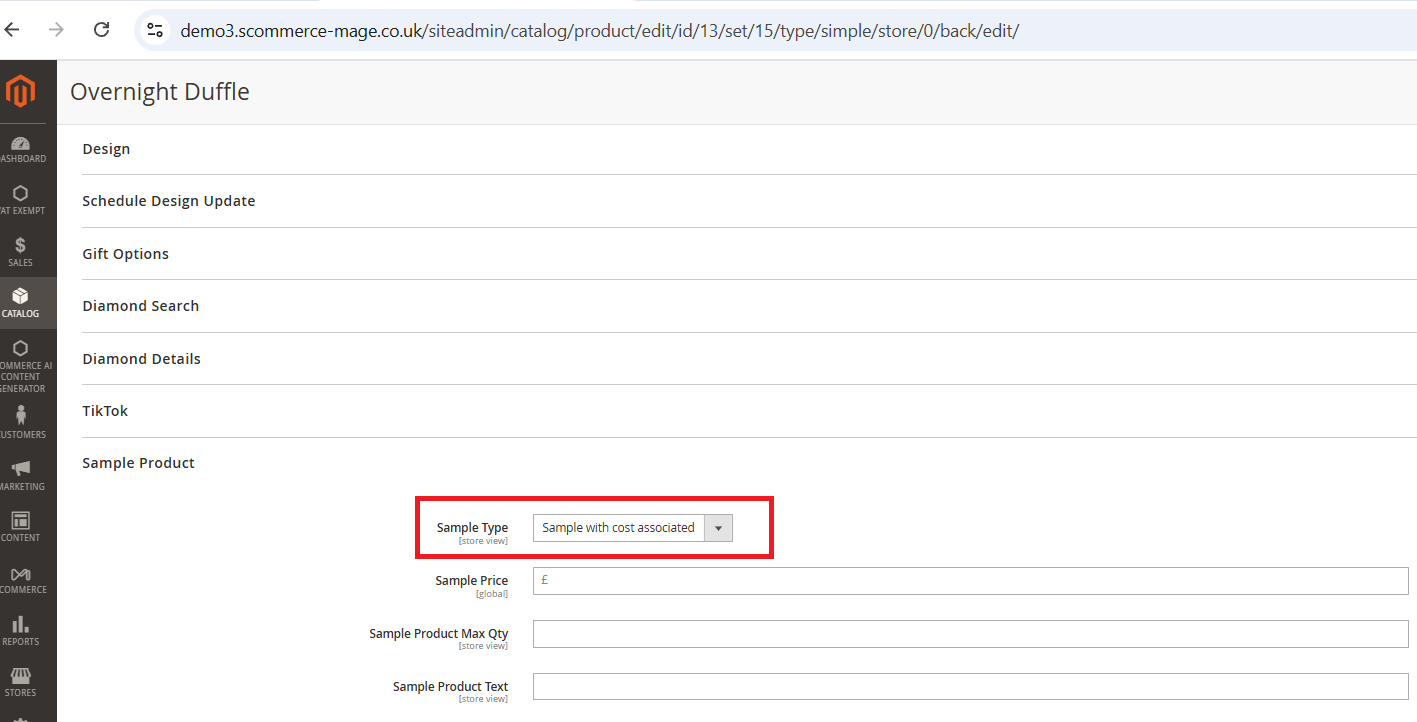
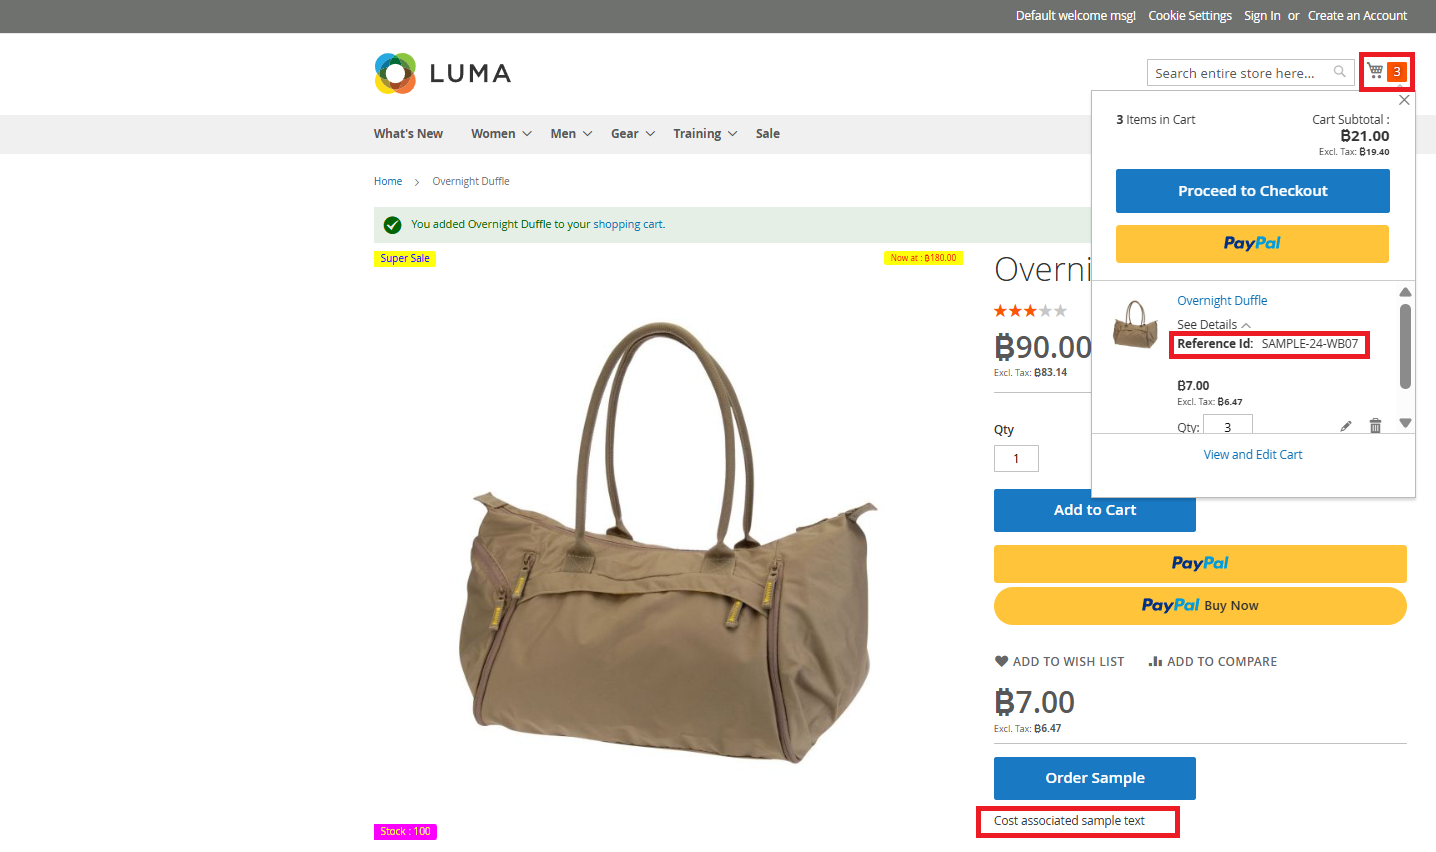
- If you enter values in these fields, the system will use the product‑level values set in the Sample Products section instead.
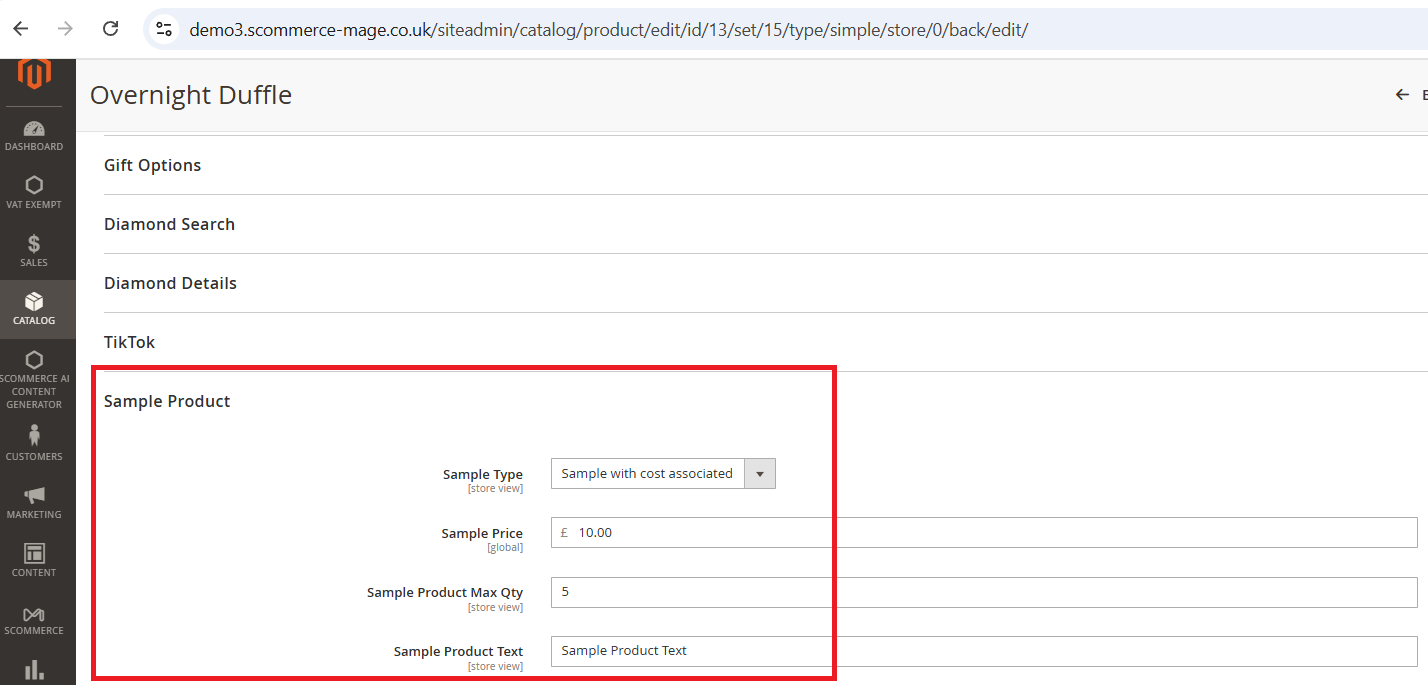
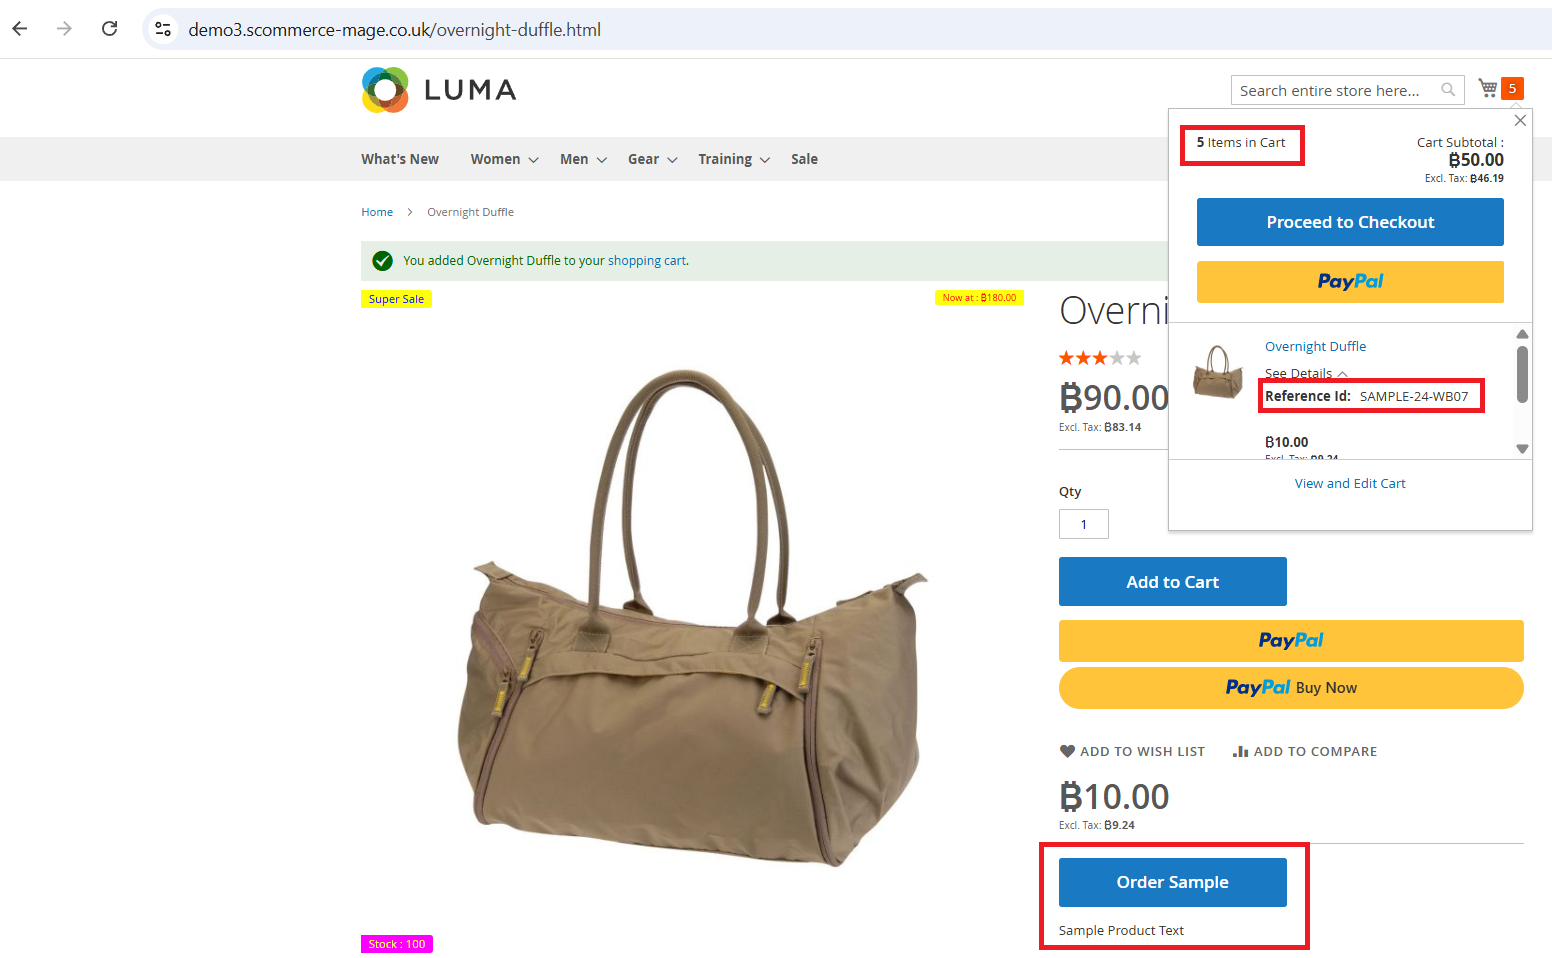
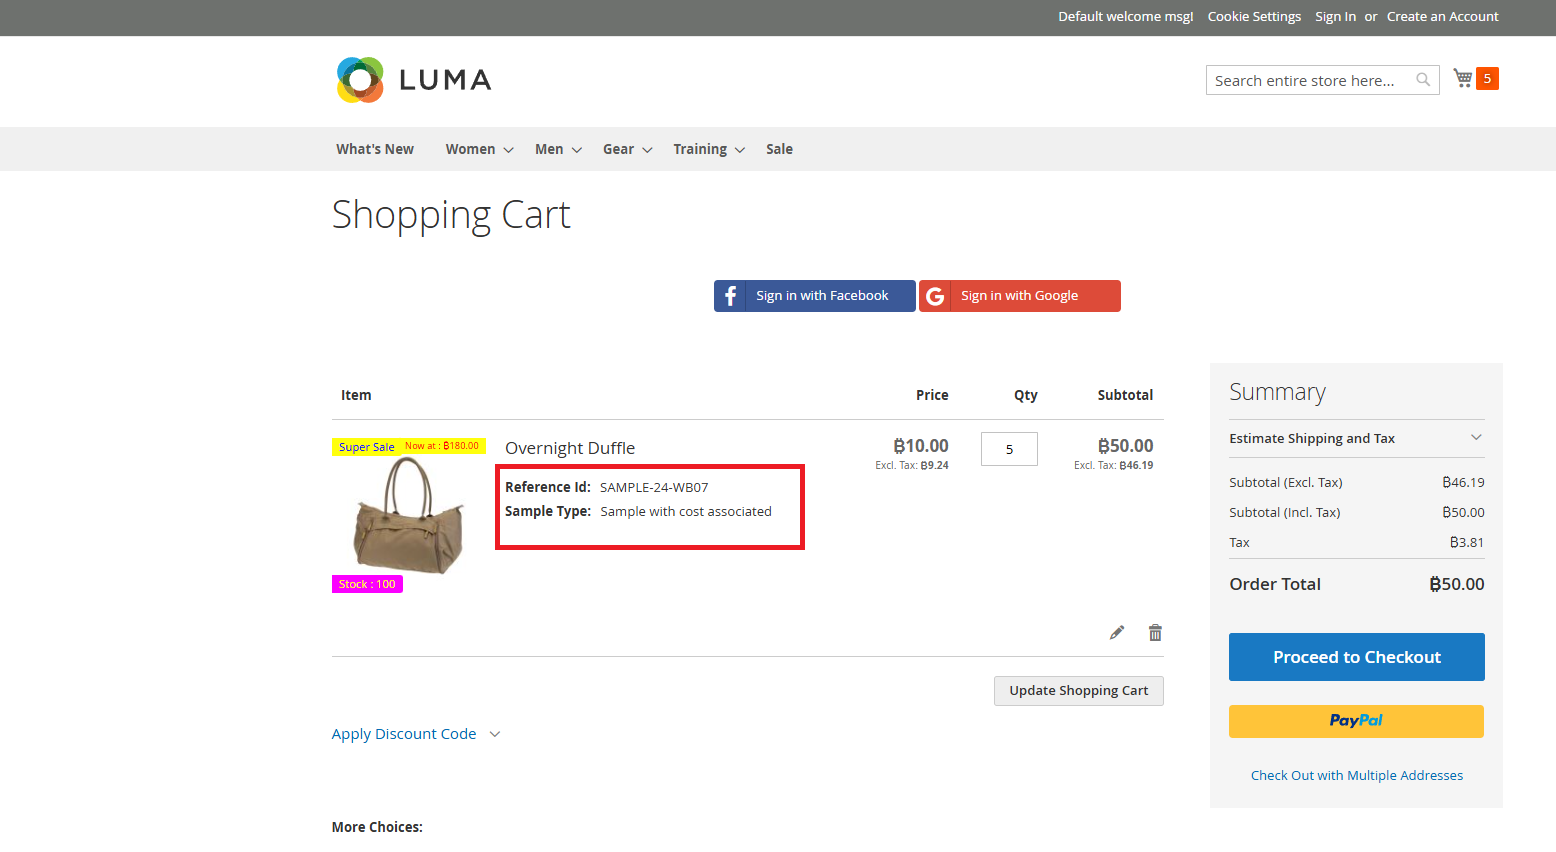
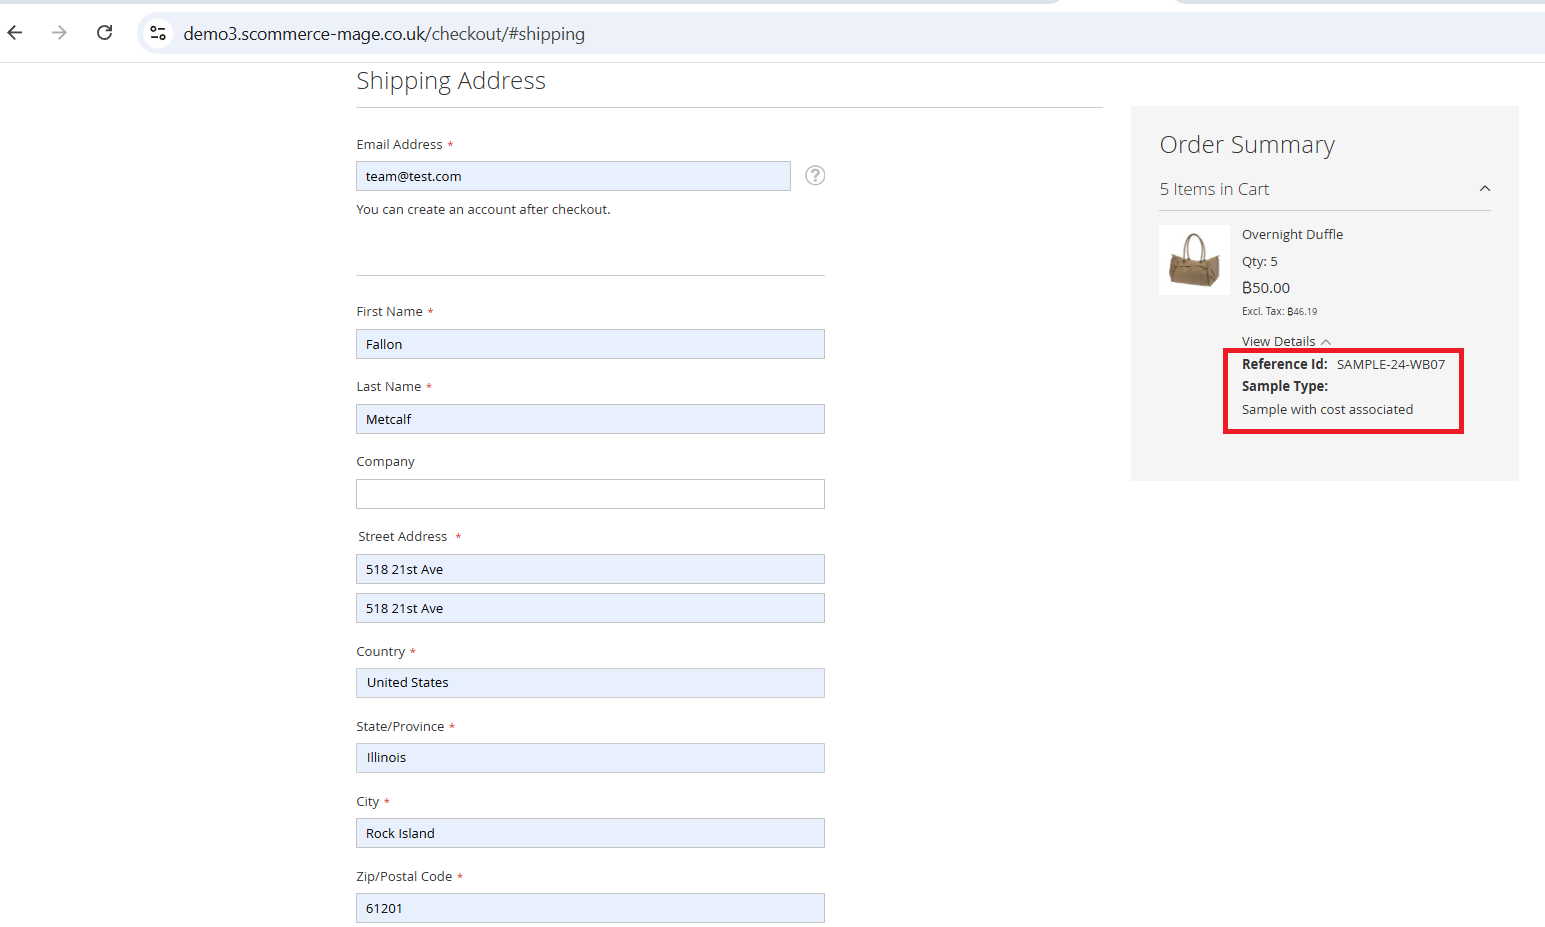
Sample Products are not Eligible for Coupon Discounts
-
Coupon Code Validation for Free Sample Product
Log in to the Admin Panel and go to Marketing → Cart Price Rules. Create a new coupon code, for example “testcode”. When you apply this coupon on the frontend for the sample products, it should display a validation error, even if the code itself is valid, because coupon codes are not meant to work for sample products
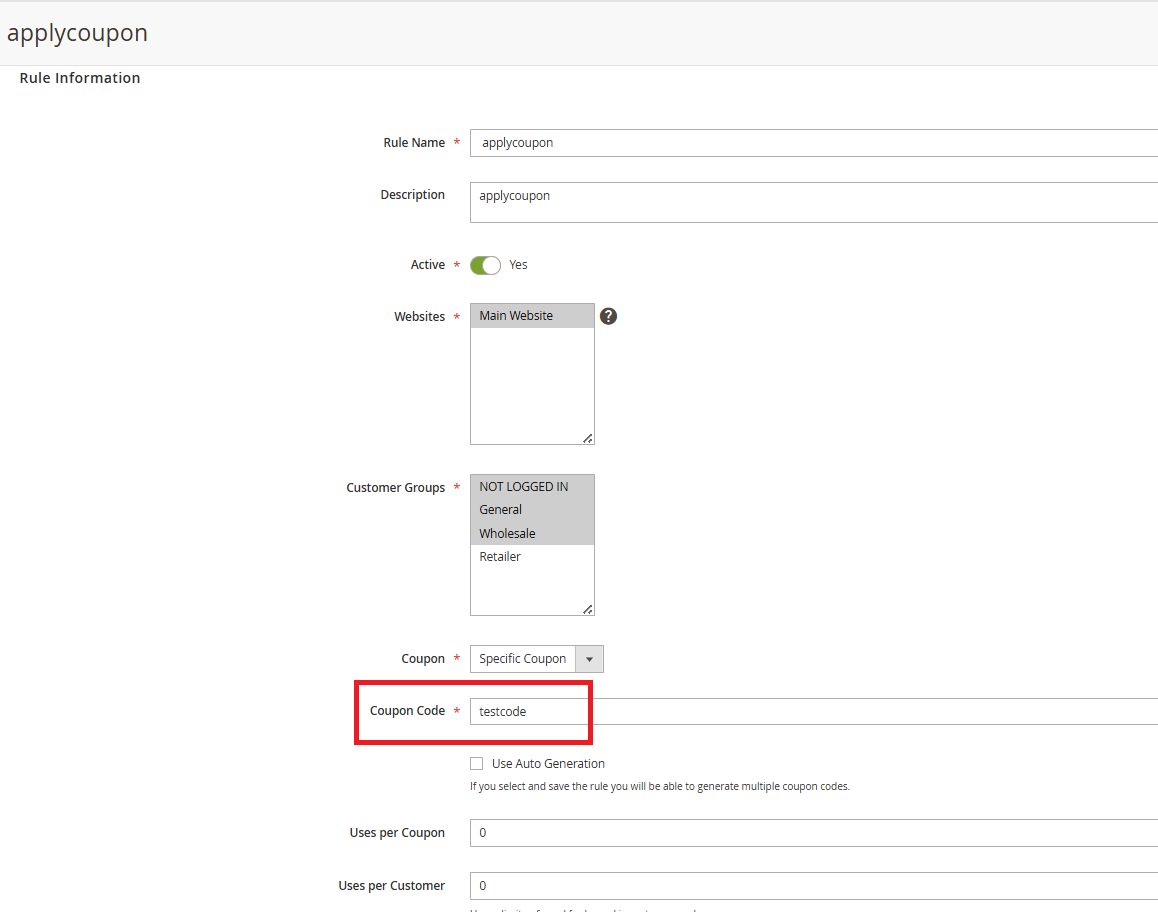
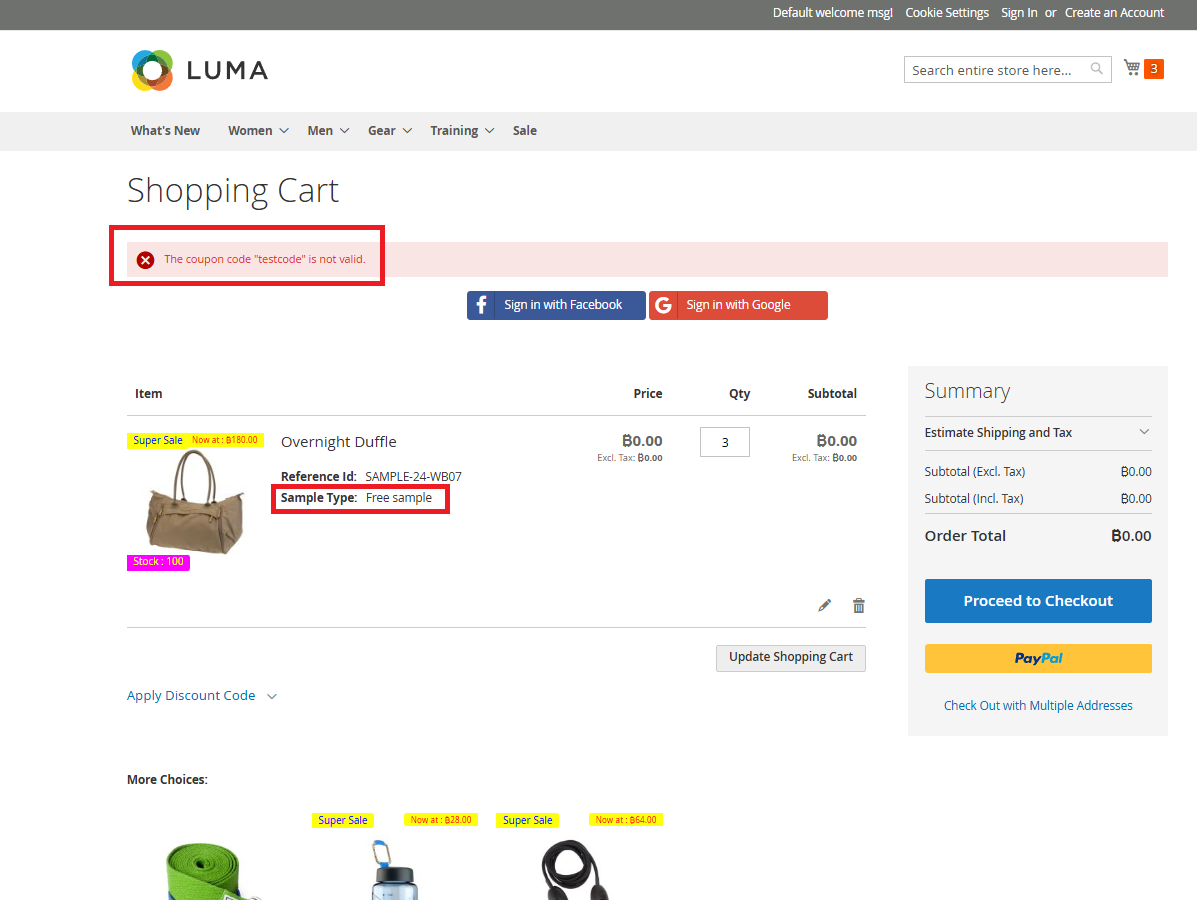
-
Coupon Code Validation for Sample with Cost Associated product
We’ve created a coupon code called “testcode” in the Admin Panel. This code works normally for regular products, but it won’t apply to the Sample product (e.g. 24‑WB07). When a customer tries to use the coupon code for the sample products, the system will show a validation message saying the code isn’t valid.
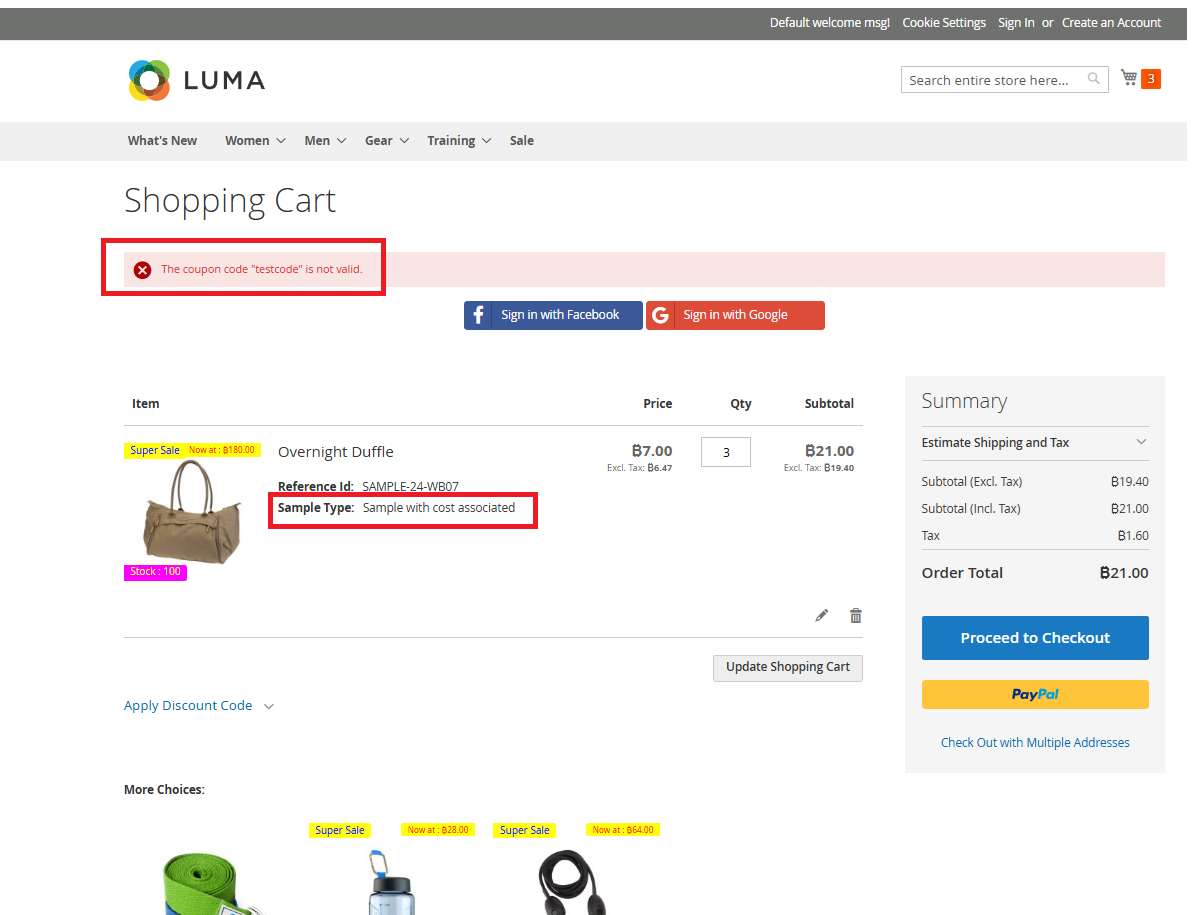
Email Received for a Sample Product
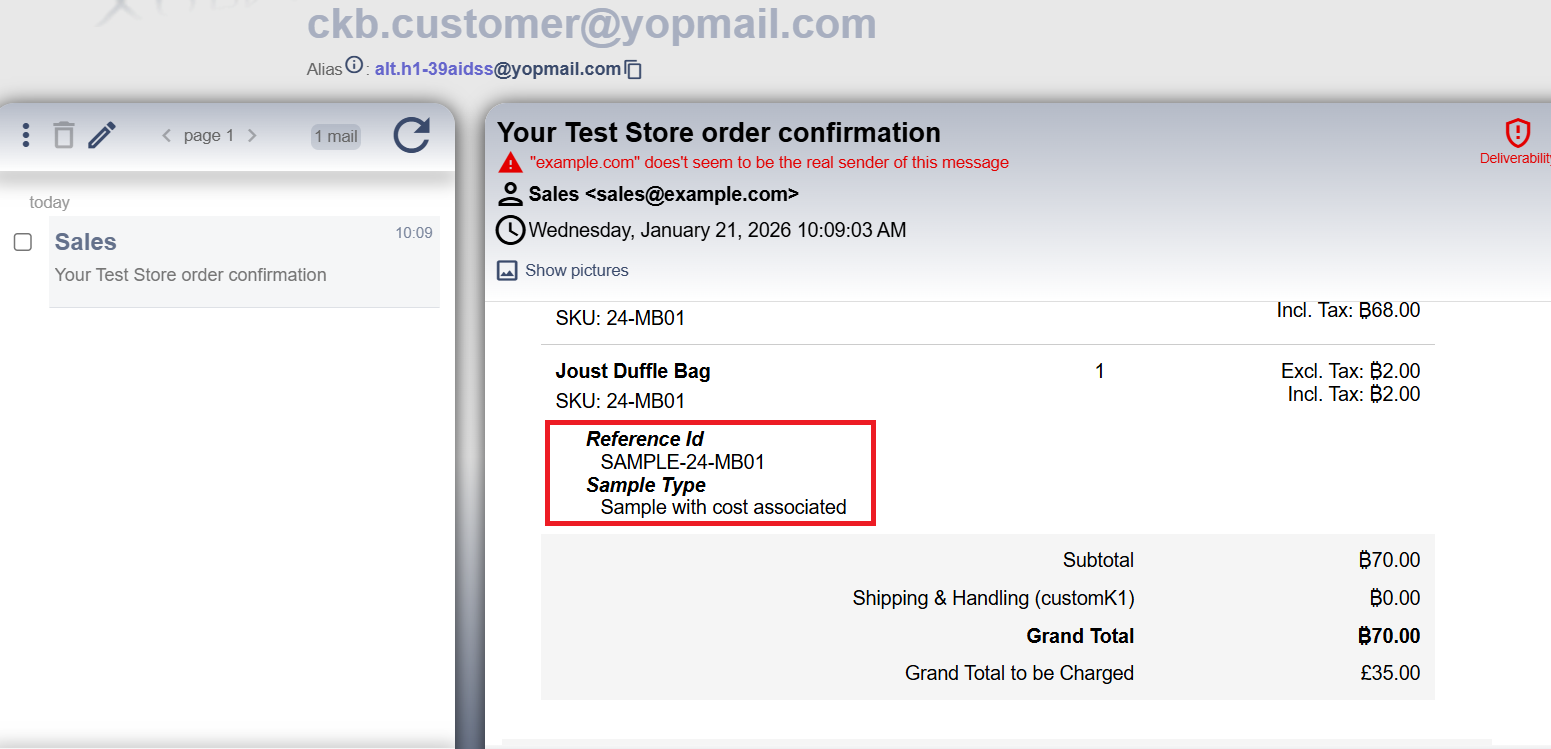
If you have a question related to this extension please check out our FAQ Section first. If you can't find the answer you are looking for then please contact support@scommerce-mage.com.
Magento 2 Barcode Scanner
Installation and User Guide for Magento 2 Barcode Scanner extension
Table of Contents
- Installation
- Installation via app/code
- Installation via Composer
- Configuration Settings for Barcode Scanner
- General Settings
- Sample Product Settings
- Configure a Sample Product
- Configure a Simple Product
- Coupon code doesn't work for a Sample product
Installation
-
Installation via app/code: Upload the content of the module to your root folder. This will not overwrite the existing Magento folder or files, only the new contents will be added. After the successful upload of the package, run below commands on Magento 2 root directory.
php php bin/magento setup:upgrade php bin/magento setup:di:compile php bin/magento setup:static-content:deploy -
Installation via Composer: Please follow the guide provided in the below link to complete the installation via composer.
https://docs.scommerce-mage.com/magento-2-extensions/installation-via-composer/installation-via-composer
Configuration Settings for Sample Product
Go to Admin > Stores > Configuration > Scommerce Configuration > Sample Product
General Settings
- Enabled – Select "Yes" or "No" to enable or disable the module.
- License Key – Please add the license for the extension which is provided in the order confirmation email. Please note license keys are site URL specific. If you require license keys for dev/staging sites then please email us at support@scommerce-mage.com.
Barcode Scanner Settings
- Enabled – Select "Yes" or "No" to enable or disable the module.
- License Key – Please add the license for the extension which is provided in the order confirmation email. Please note license keys are site URL specific. If you require license keys for dev/staging sites then please email us at support@scommerce-mage.com.
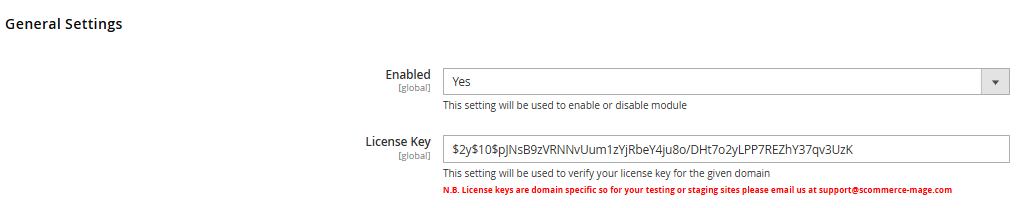
- Barcode Attribute – Please select the Barcode attribute from the options.

- Order Statuses to pick – Please select the Order Statuses from the options.
- Change Status on Pick - Select Yes or No to Change the status on pick.
- Pick Order Status - If you select Yes, then choose the Pick Order Status from the options.
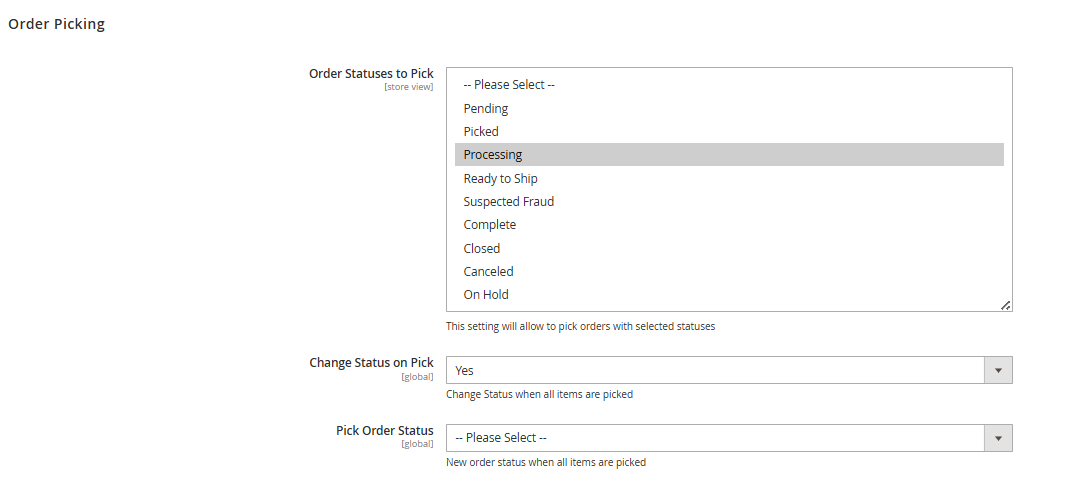
- Order Statuses to pack – Please select the Order Statuses from the options.
- Change Status on Pack - Select Yes or No to Change the status on pack.
- Allow Partially Picked Items - Select Yes or No to Allow Partially Picked Items.
- Pack Order Status - Please select the Pack Order Status from the options.
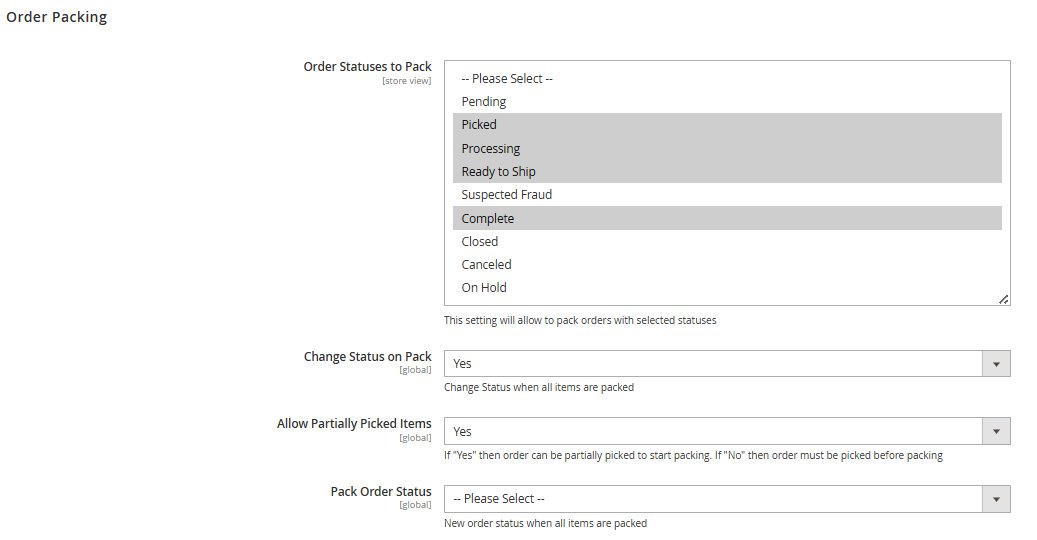
- Progressbar Color – Please select the Color code for Progressbar
- Progressbar Text Color – Please select the Color code for Progressbar Text Color
- Progress Status Color – Please select the Color code for Progress Status Color
- Complete Status Color – Please select the Color code for Picking and Packing Complete Status
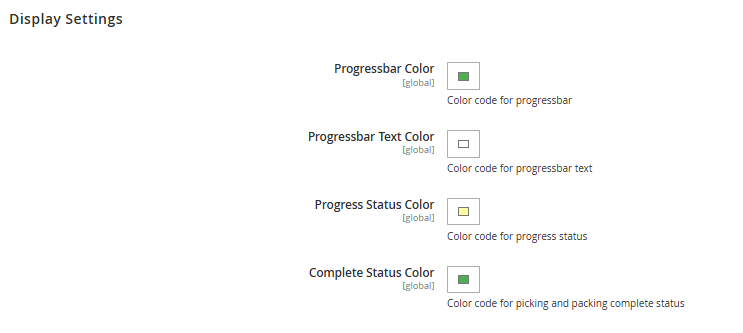
Add a Barcode Scanner to a Product
Log in to the Admin Panel, navigate to Admin >Catalog > Products, and select the product you want to edit. Click Edit, then scroll down to the Barcode field. Enter the value 12345678, save the changes, and create an order for the product to which you added the Barcode (24-MB01).
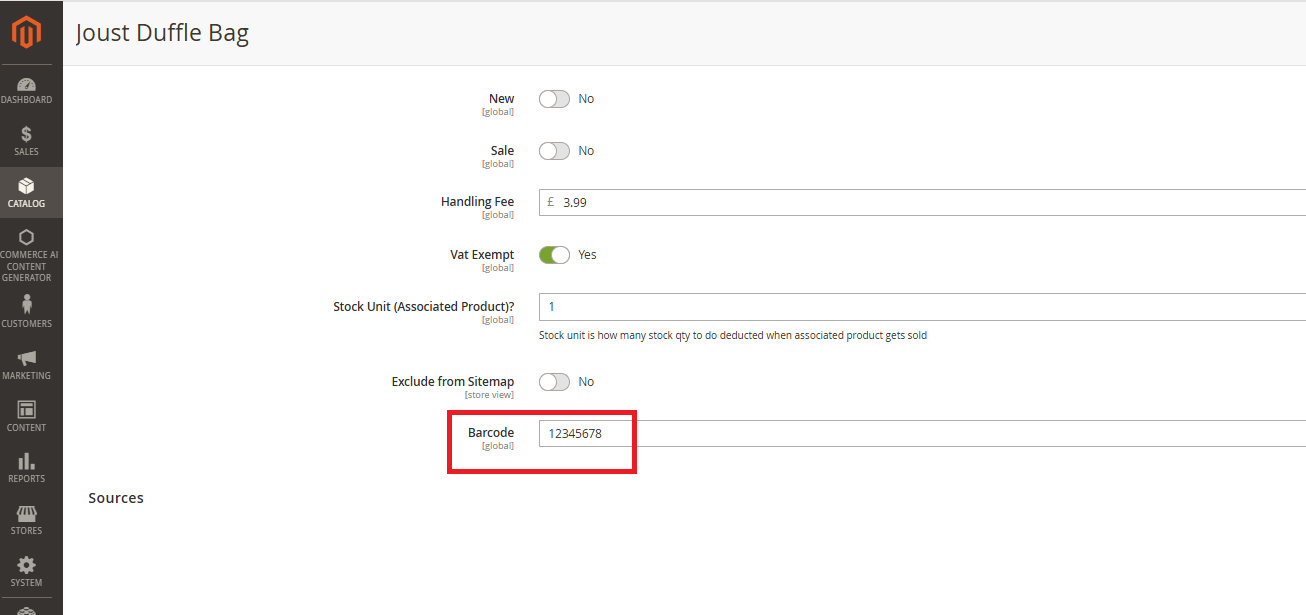
Scan Orders
Go to Admin > Sales > Scan Orders. Enter the order number in the Scan Order field. The system will then display the status as Pending under Order Status, Pick Status, and Pack Status.
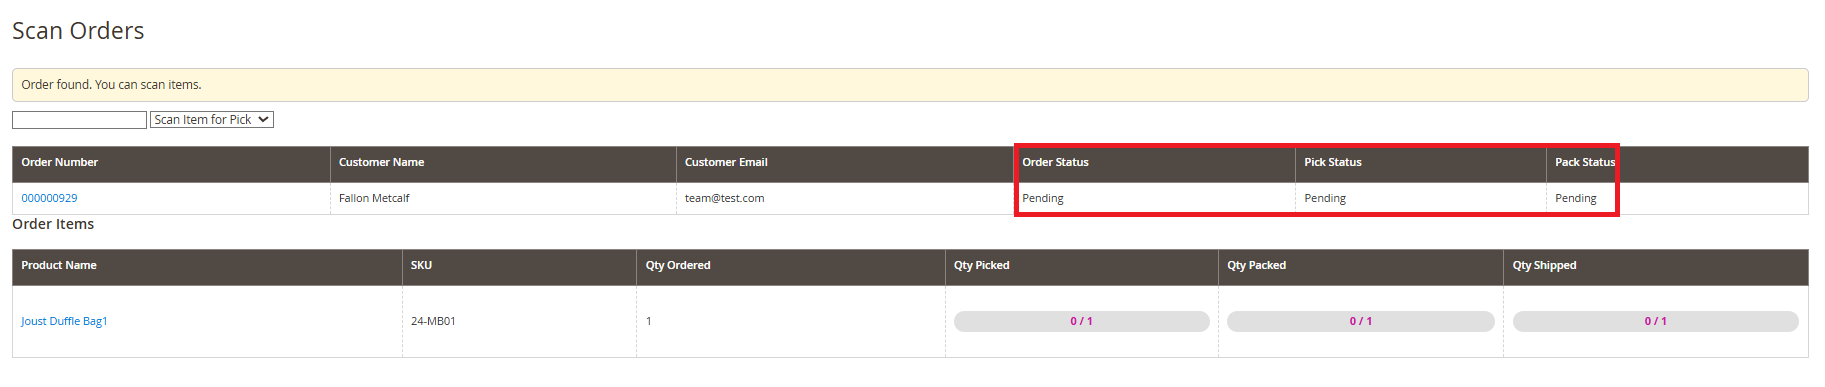
Then go to Admin > Sales > Orders. Create the invoice and ship the order. Once completed, the order status will display as Complete in Scan Orders.
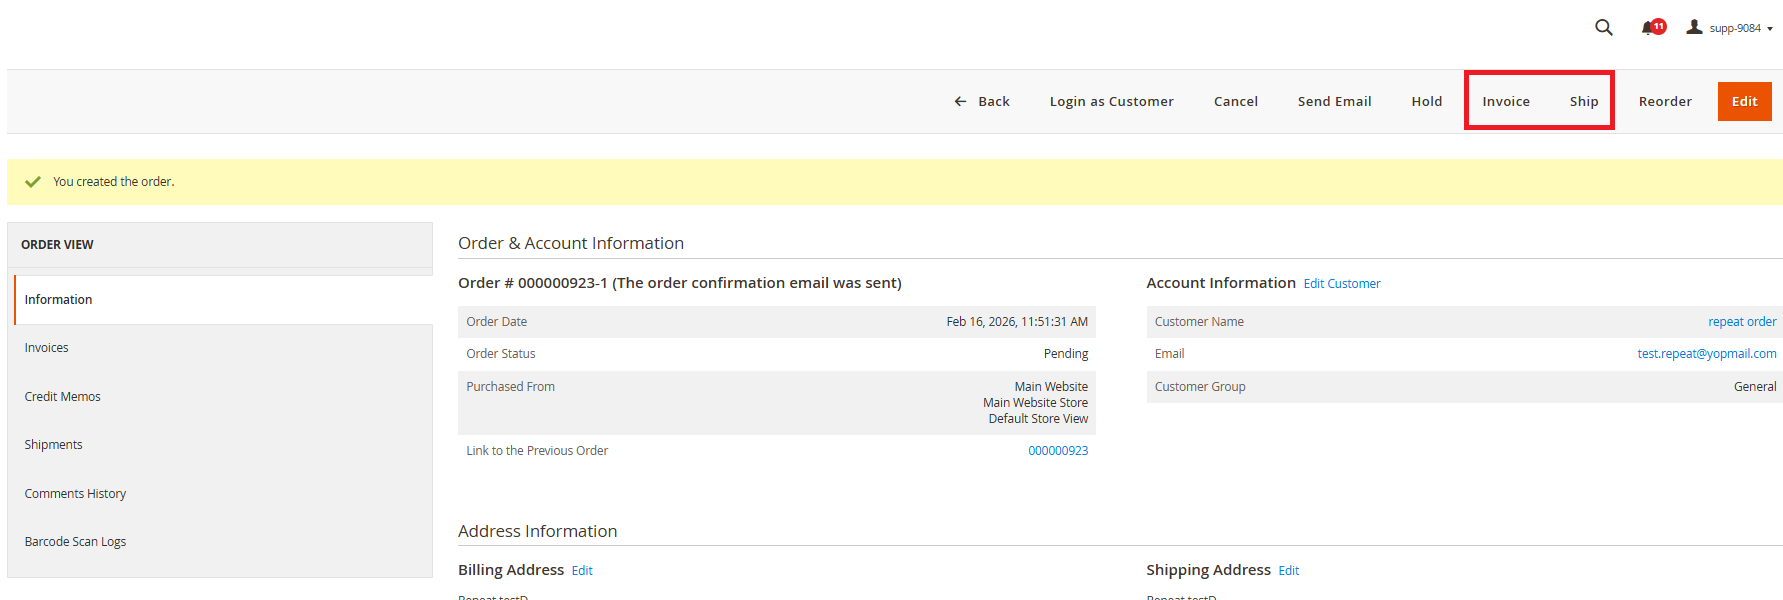
Next, enter the Barcode value 12345678 in the Scan Items field for Pick and again in the Scan Items field for Pack. Once completed, the status will update to Complete
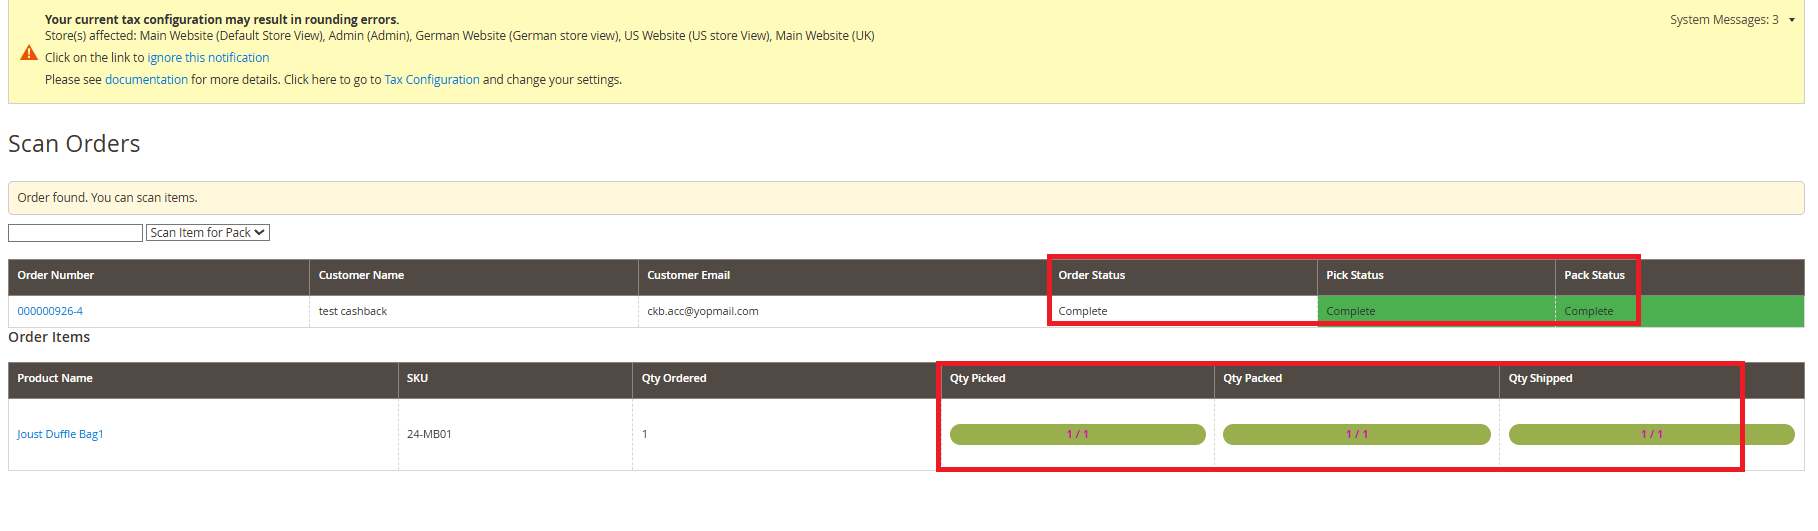
You can check the Barcode Scan Logs by navigating to Admin > Sales > Orders > Edit > Barcode Scan Logs. All order statuses will be shown as Success.
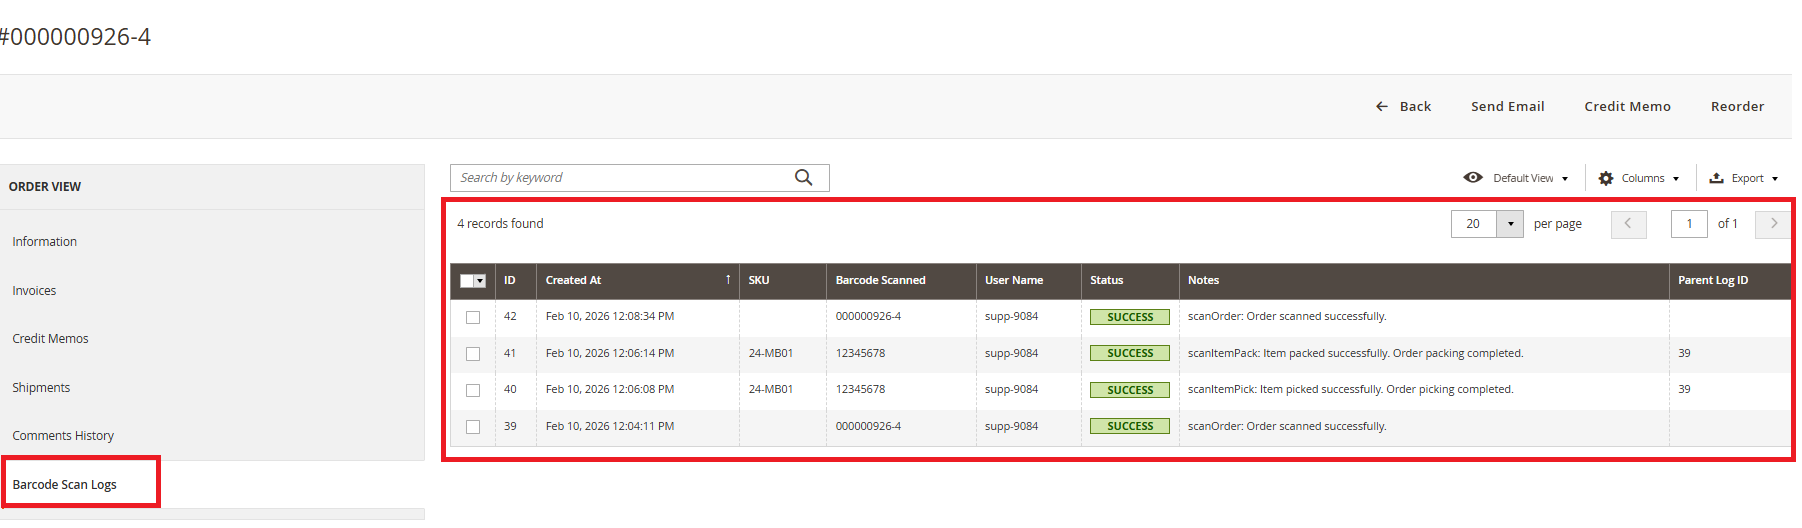
Configuring “Change Status on Pick” and Barcode Scanner Workflow
When you set “Change Status on Pick” to Yes and configure the Picked from Pick Order Status under Admin > Stores > Configuration > Barcode Scanner, then place an order and click on Scan Items for Pick, you can enter the barcode scanner value in front of the item. The status should then update to Picked and Complete. Please refer to the screenshot below for reference.
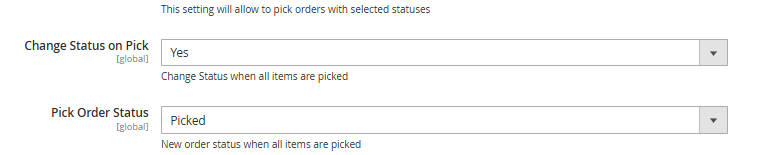
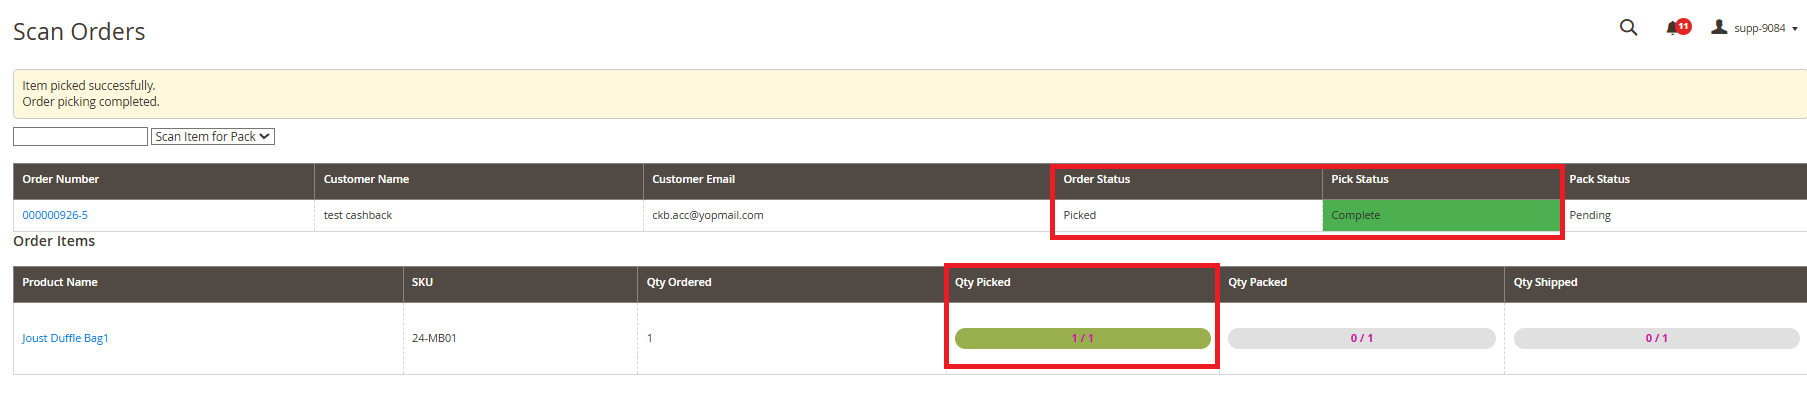
If you have a question related to this extension please check out our FAQ Section first. If you can't find the answer you are looking for then please contact support@scommerce-mage.com.
Magento 2 Content Protection
Installation and User Guide for Magento 2 Content Protection Extension
Table of Contents
- Installation
- Installation via app/code
- Installation via Composer
- Configuration Settings for Content Protection
- Protecting a CMS Page
- Protecting a Product Page
- Protecting a Category Page
- Frontend - The Gate Page
- Gate Page Layout
- Entering the Password
- Session Unlock Behaviour
- Disabling Protection
- Technical notes for Developers
- Module Structure
- Database Changes
- Plugin Interception
- Admin UI Component Injection
- Customising the Gate Page
- Hyva Theme Compatibility
- Full-page Cache Compatibility
Installation
-
Installation via app/code: Upload the content of the module to your root folder. This will not overwrite the existing Magento folder or files, only the new contents will be added. After the successful upload of the package, run below commands on Magento 2 root directory.
php bin/magento module:enable Scommerce_ContentProtect php bin/magento setup:upgrade php bin/magento setup:di:compile php bin/magento setup:static-content:deploy -f php bin/magento cache:flush -
Installation via Composer: Please follow the guide provided in the below link to complete the installation via composer.
(https://docs.scommerce-mage.com/magento-2-extensions/installation-via-composer/installation-via-composer)
Configuration Settings for Content Protection
Go to Admin > Stores > Configuration > Scommerce Configuration > Content Protection
General Settings
- Enabled – Select "Yes" or "No" to enable or disable the module.
- License Key – Please add the license for the extension which is provided in the order confirmation email. Please note license keys are site URL specific. If you require license keys for dev/staging sites then please email us at support@scommerce-mage.com.
Password Configuration
Go to Admin > Stores > Configuration > Scommerce Configuration > Content Protect > Password Configuration
- Global Access Password – Enter the password that visitors must provide to unlock access to any password-protected page. The password is stored using Magento's native encryption and will never appear in plain text in the database or configuration files.
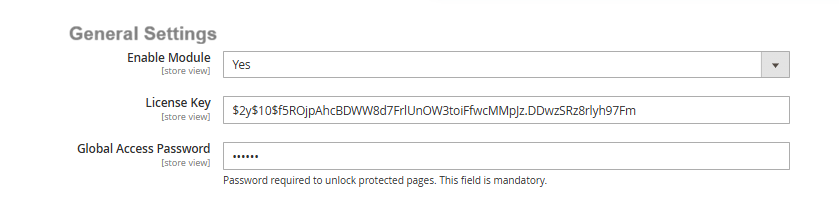
Note: If the Global Access Password field is left empty, the gate page will be displayed but no password will unlock it. Always ensure a password is set before enabling protection on any page.
Protecting a CMS Page
Go to Admin > Content > Pages
Open any existing CMS page or create a new one. Scroll down to find the Page Protection fieldset. Set the Password Protected toggle to Yes and save the page. The page is now gated any visitor attempting to access it without an unlocked session will be redirected to the password gate page.
- Password Protected – Select "Yes" to enable password protection on this CMS page. Select "No" (default) to leave the page publicly accessible.
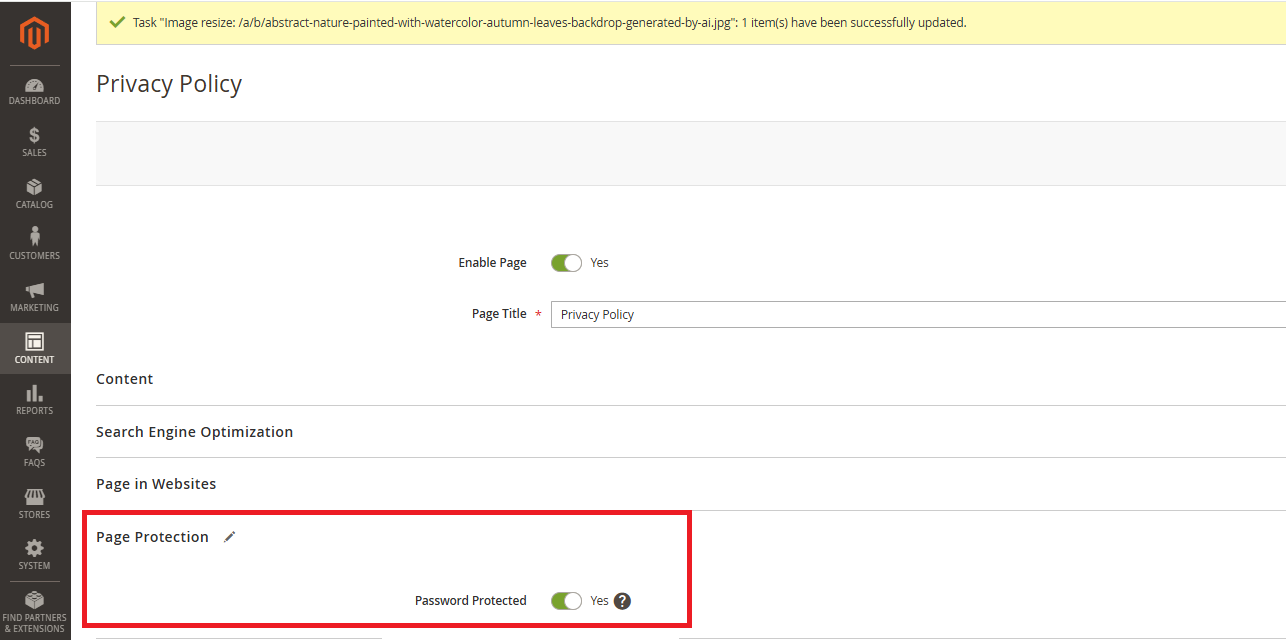
Protecting a Product Page
Go to Admin > Catalog > Products
Open any existing product or create a new one. Scroll down to find the Page Protection fieldset. Set the Password Protected toggle to Yes and save the product. Visitors attempting to access the product page without an unlocked session will be redirected to the gate page.
- Password Protected – Select "Yes" to enable password protection on this product page. Select "No" (default) to leave the product page publicly accessible.
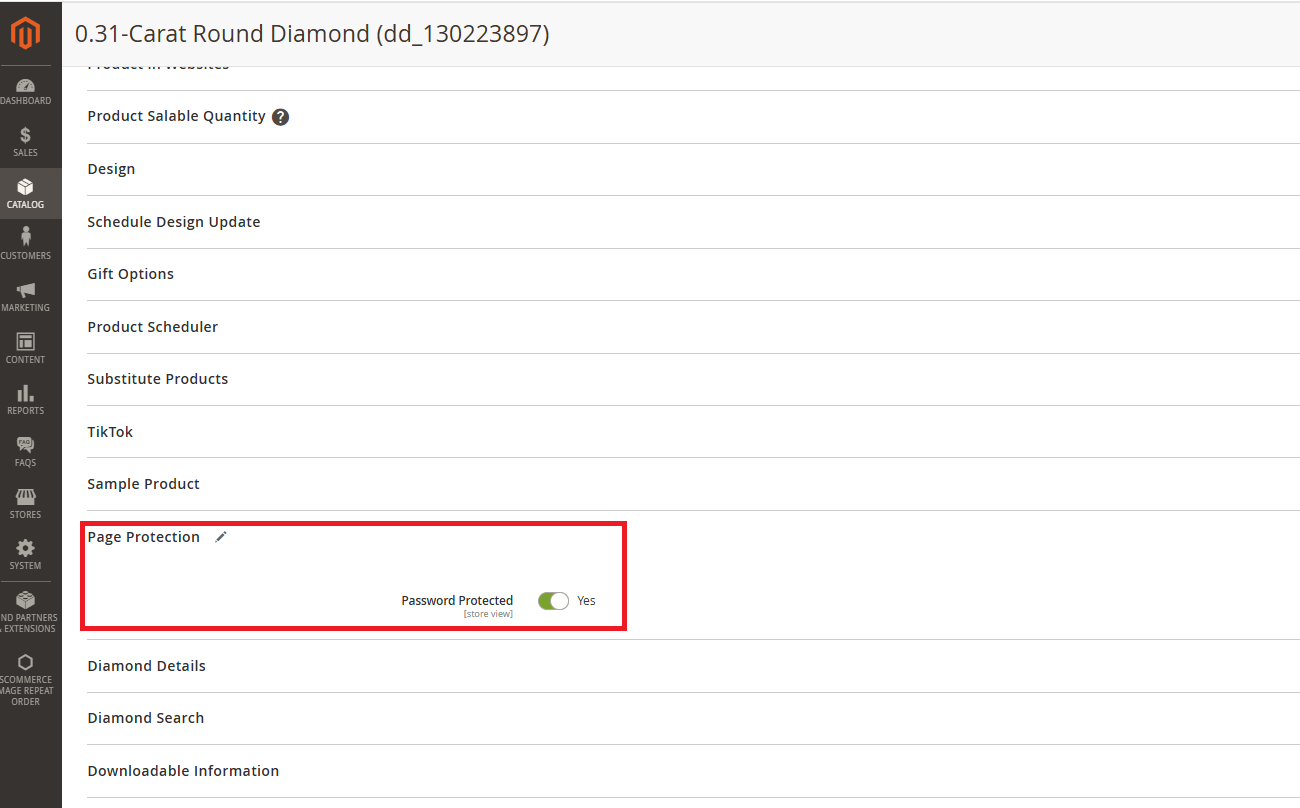
Note: The Password Protected attribute is scoped to store view level. This means you can enable protection on a product for one store view (e.g. your trade store) while leaving it accessible on another (e.g. your retail store). Make sure you are in the correct store view scope when editing the attribute.
Protecting a Category Page
Go to Admin > Catalog > Categories
Select any category from the category tree on the left. Scroll down to find the Page Protection fieldset in the category edit form. Set the Password Protected toggle to Yes and save the category. Visitors attempting to access the category page without an unlocked session will be redirected to the gate page.
- Password Protected – Select "Yes" to enable password protection on this category page. Select "No" (default) to leave the category publicly accessible.
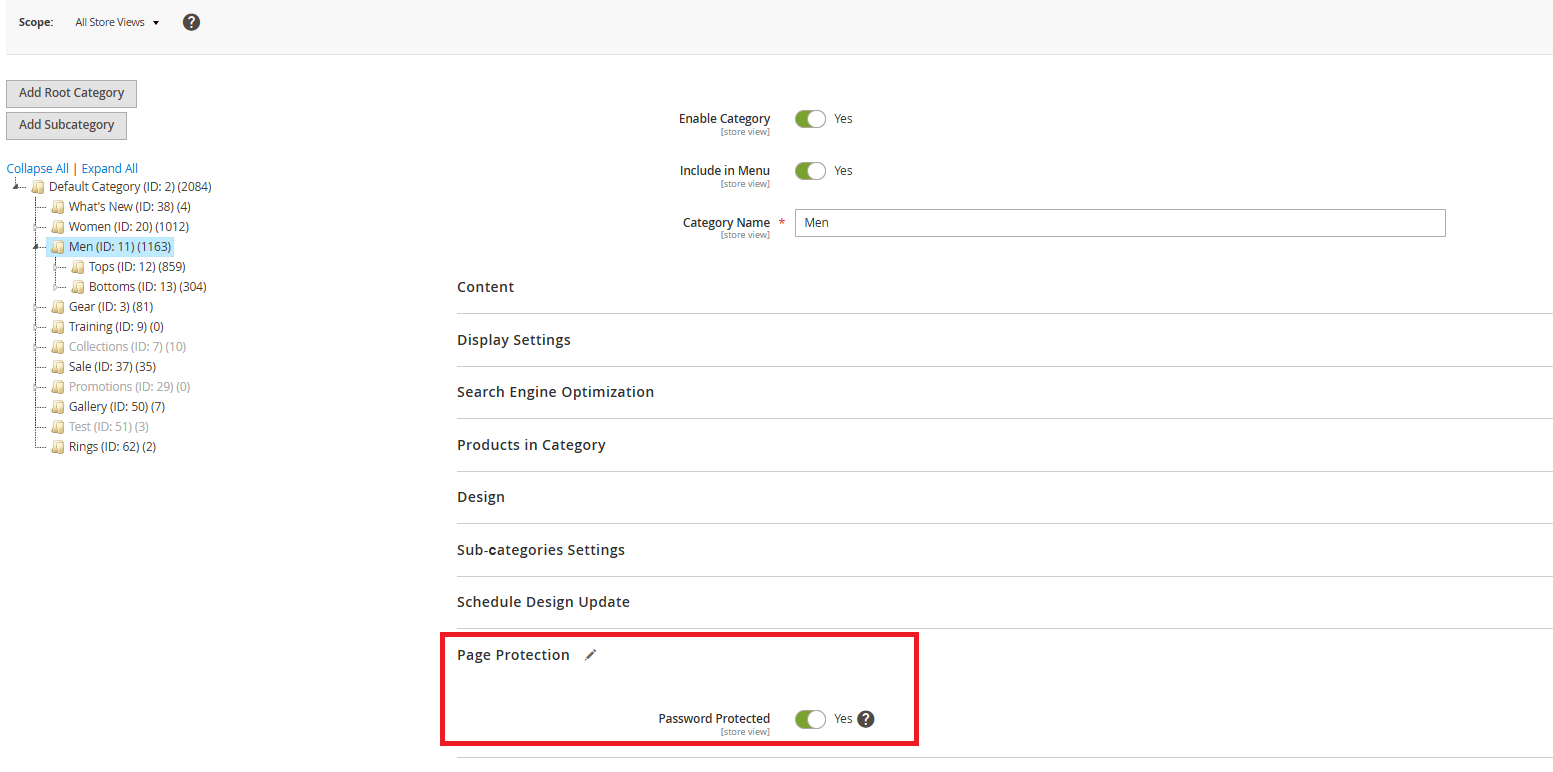
Note: Protecting a category gates the category listing page only. Individual product pages within the category are not automatically protected — you must enable protection on each product separately if required. The attribute is scoped to store view level.
Frontend - The Gate Page
/contentprotect/page/gate?return=<base64-encoded-return-path>Restricted Page (About Us)
https://demo4.scommerce-mage.co.uk/contentprotect/page/gate/return/L2Ntcy9wYWdlL3ZpZXcvcGFnZV9pZC81/Restricted Category Page (Women)
https://demo4.scommerce-mage.co.uk/contentprotect/page/gate/return/L2NhdGFsb2cvY2F0ZWdvcnkvdmlldy9pZC8yMA%3D%3D/Restricated Product Page (SKU: MH01)
https://demo4.scommerce-mage.co.uk/contentprotect/page/gate/return/L2NhdGFsb2cvcHJvZHVjdC92aWV3L2lkLzYy/
Gate Page Layout
The gate page uses your store's active theme layout (1-column, full width) and contains two sections:
- Restricted Area (info block) – Displayed at the top of the page. Contains a message informing the visitor that the content is restricted. The message text can be customised by editing view/frontend/templates/gate.phtml.
- Enter Password to Continue (form block) – Displayed below the info block. Contains a password input field, an Unlock button, and a Required Fields note.
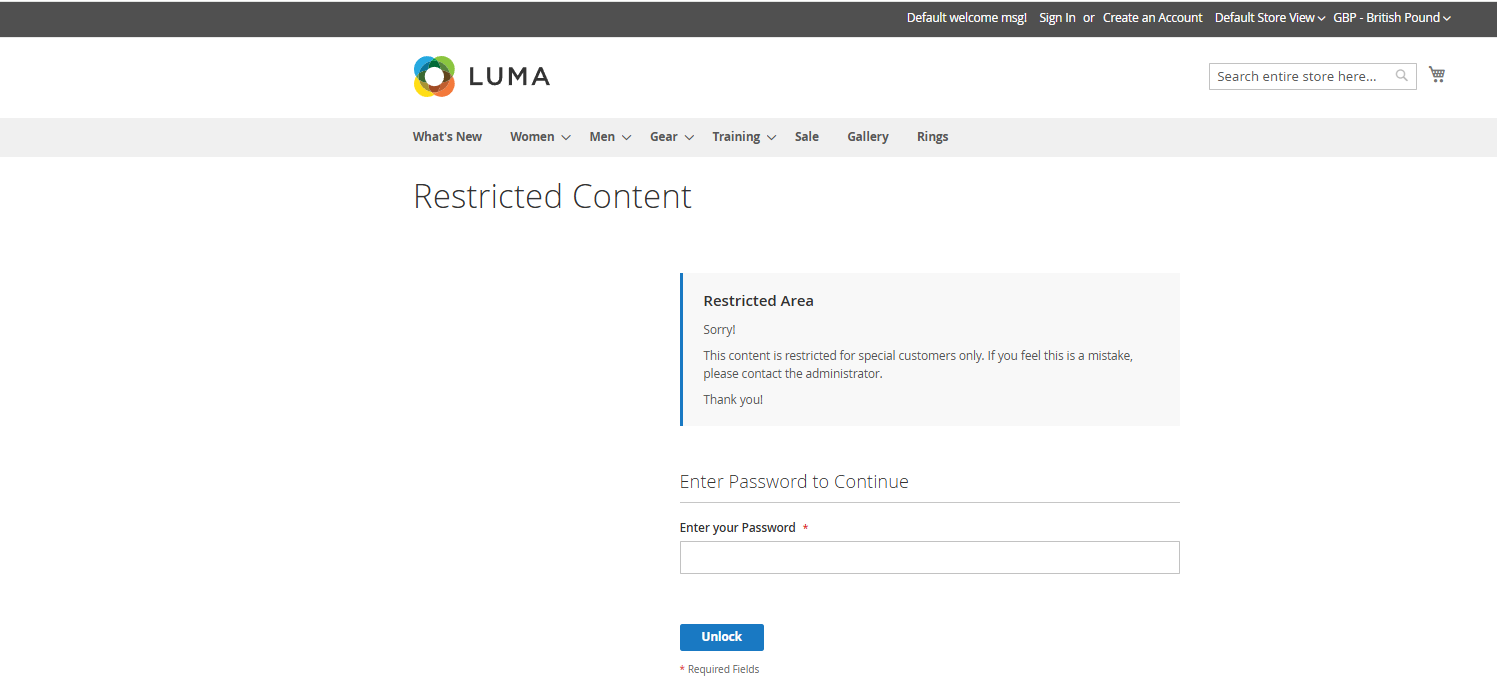
Entering the Password
- Correct password – The visitor is redirected directly to the page they originally requested not to the homepage. The return URL is preserved throughout the process.
- Incorrect password – The gate page is redisplayed with an error message: "Incorrect password. Please try again." The return URL parameter is retained so a correct entry on the next attempt still redirects to the original page.
- Empty password submission – Client-side validation prevents the form from being submitted with an empty password field.
Session Unlock Behaviour
- Session duration – The unlock flag persists for the duration of the browser session. Closing the browser or session expiry will require the visitor to enter the password again on their next visit.
- Guest and logged-in visitors – The session unlock works for both guest visitors and authenticated customer account holders.
- Multiple protected pages – A single password entry unlocks all protected pages across all page types (CMS, product, category) for that session.
Disabling Protection
Protection can be disabled at two levels:
- Per page – Open the CMS page, product, or category in the admin and set the Password Protected toggle to No. Save the record. The page immediately becomes publicly accessible no cache flush required.
- Globally (entire module) – Go to Stores Configuration Scommerce Configuration Content Protect and set Enabled to No. This immediately disables all gate redirects across every page on the store, regardless of individual page toggle states. Your per-page settings are preserved in the database and will be restored if you re-enable the module.
Tip: If you need to quickly make all protected pages public — for example, on public launch day after a pre-launch review — setting Enabled to No in the global configuration is the fastest method. No individual page changes are needed.
Technical notes for Developers
Module Structure
- Vendor / Module name – Scommerce_ContentProtect
- Module path – app/code/Scommerce/ContentProtect/
- Frontend route – /contentprotect/page/gate and /contentprotect/page/unlock
- Session key – content_protect_unlocked (stored in Magento customer session)
Database Changes
The module applies the following database changes via Magento's patch system on setup:upgrade:
- cms_page table – Adds is_password_protected column (SMALLINT, default 0) via SchemaPatchInterface DDL-safe, runs outside of a transaction.
- catalog_product_entity (EAV) – Adds is_password_protected attribute (int, store view scope, default 0) via DataPatchInterface.
- catalog_category_entity (EAV) – Adds is_password_protected attribute (int, store view scope, default 0) via DataPatchInterface.
Plugin Interception
Content Protect uses Magento's around plugin system to intercept the execute() method on three controllers:
- Magento\Cms\Controller\Page\View – Handles CMS page protection loads the page by identifier or ID and checks the is_password_protected flag.
- Magento\Catalog\Controller\Product\View – Handles product page protection loads the product by ID via ProductRepositoryInterface.
- Magento\Catalog\Controller\Category\View – Handles category page protection loads the category by ID via CategoryRepositoryInterface.
All three plugins are registered in etc/frontend/di.xml and apply on the frontend area only. No core files are modified.
Admin UI Component Injection
The Page Protection fieldset and Password Protected toggle are injected into the three admin forms via Magento's UI component merge system:
- view/adminhtml/ui_component/cms_page_form.xml – Injects the fieldset into the CMS page edit form
- view/adminhtml/ui_component/product_form.xml – Injects the fieldset into the product edit form.
- view/adminhtml/ui_component/category_form.xml – Injects the fieldset into the category edit form.
Customising the Gate Page
The gate page template is located at:
app/code/Scommerce/ContentProtect/view/frontend/templates/gate.phtmlEdit this file to customise the info message text, the password form labels, or the page layout. To customise styles, edit:
app/code/Scommerce/ContentProtect/view/frontend/web/css/content-protect.css Note: If you customise the template or CSS, copy the files to your active theme's directory structure rather than editing the module files directly. This ensures your customisations are not overwritten by future module updates.
Hyva Theme Compatibility
The backend logic plugins, session handling, configuration, and redirect is fully themeagnostic and works with any Magento 2 theme including Hyva. The gate page template (gate.phtml) uses standard Magento HTML and the module's own CSS file. For Hyva, we recommend copying gate.phtml to your Hyva theme and adapting the markup to use Tailwind utility classes to match your storefront styling. The CSS file can then be omitted as Tailwind will handle all styling.
Full-page Cache Compatability
ContentProtect intercepts requests at the controller plugin level, which fires before Magento's full-page cache (Varnish or built-in FPC) would serve a cached response. Protected pages that redirect to the gate page are not cached. Once a visitor's session is unlocked, the page proceeds to render normally and may be served from FPC on subsequent requests within that session.
If you have a question related to this extension please check out our FAQ Section first. If you can't find the answer you are looking for then please contact support@scommerce-mage.com.