# Magento 2 Google Page Speed Optimizer
### Installation and User Guide for Magento 2 Google Page Speed Optimizer
**Table of Contents**
1. [*Installation*](#bkmrk-installation)
- *Installation via app/code*
- *Installation via Composer*
2. [*Configuration Settings for Optimiser Base* ](#bkmrk-configuration-settin)
- *General Settings*
3. [*Configuration Settings for Speed Optimiser* ](#bkmrk-configuration-settin-1)
- *General Settings*
- *Minify HTML*
- *Javascript Settings*
- *CSS Settings*
4. [*Configuration Settings for Lazy Loading* ](#bkmrk-configuration-settin-1)
- *General Settings*
- *Lazy Loading on the Homepage*
- *Home Page Excluded from Lazy Loading*
- *Lazy Loading on the Category Page*
- *Lazy Loading on the Search Page*
- *Lazy Loading on the Cart Page*
5. [*Configuration Settings for Image Optimizer* ](#bkmrk-configuration-settin-3)
- *General Settings*
- *Compress/Optimize Product Image*
- *Compress/Optimize Category Image.*
- *Compress/Optimize CMS Image*
6. [*Configuration Settings for Cache Warmer* ](#bkmrk-configuration-settin-4)
- *General Settings*
- *Cron Settings*
7. [*Cache Warmer Grid* ](#bkmrk-cache-warmer-grid)
- *Regenerate*
8. [*Console Commands* ](#bkmrk-console-commands)
- *Category Page*
- *Product Page*
- *CMS Page*
9. [*Front-end Screenshots* ](#bkmrk-front-end-screenshot)
- *Cache Hit for the category page after the execution of category page c ommand*
- *Cache Miss for the Category Page*
10. [*Google Page Speed Tests* ](#bkmrk-google-page-speed-te)
- *Home Page Mobile*
- *Home Page Desktop*
- *Category Page Mobile*
- *Category Page Desktop*
- *Product Page Mobile*
- *Product Page Desktop*
### Installation [](#bkmrk-)
- **Installation via app/code:** Upload the content of the module to your root folder. This will not overwrite the existing Magento folder or files, only the new contents will be added. After the successful upload of the package, run below commands on Magento 2 root directory.
```php
php bin/magento setup:upgrade
php bin/magento setup:di:compile
php bin/magento setup:static-content:deploy
```
- **Installation via Composer:** Please follow the guide provided in the below link to complete the installation via composer.
[https://docs.scommerce-mage.com/magento-2-extensions/installation-via-composer/installation-via-composer](https://docs.scommerce-mage.com/magento-2-extensions/installation-via-composer/installation-via-composer)
### Configuration Settings for Optimiser Base [](#bkmrk--1)
Go to *Admin > Stores > Configuration > Scommerce Configuration > Optimiser Base*
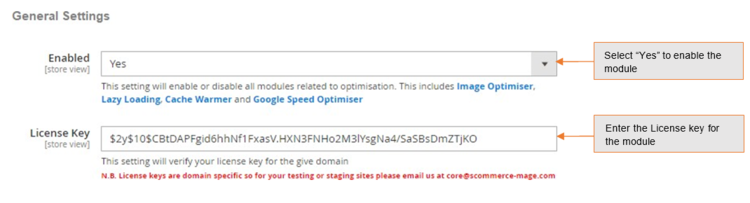
#### General Settings [](#bkmrk--2)
- **Enabled –** Select "Yes" or "No" to enable or disable the module.
- **License Key –** Please add the license for the extension which is provided in the order confirmation email. Please note license keys are site URL specific. If you require license keys for dev/staging sites then please email us at .
[](https://docs.scommerce-mage.com/uploads/images/gallery/2025-06/image-2025-06-04t192408-855.png)
### Configuration Settings for Speed Optimiser [](#bkmrk--3)
Go to *Admin > Stores > Configuration > Scommerce Configuration > Speed Optimiser*
#### General Settings [](#bkmrk--4)
- **Enabled -** Select "Yes" or "No" to enable or disable the module.
[](https://docs.scommerce-mage.com/uploads/images/gallery/2025-06/image-2025-06-04t192514-900.png)
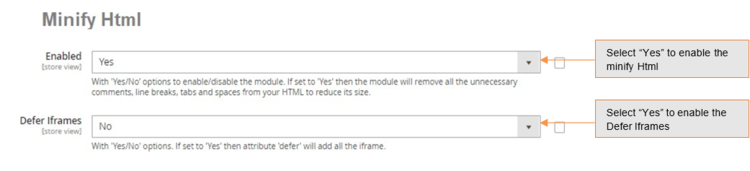
#### Minify HTML [](#bkmrk--5)
- **Enabled -** Select "Yes" or "No" to enable or disable the module. If set to "Yes" then the module will remove all the unnecessary comments, line breaks, tabs and spaces from your HTML to reduce its size.
- **Defer Iframes –** Select "Yes" or "No". If set to "Yes" then attribute defer will be added to the iframe.
[](https://docs.scommerce-mage.com/uploads/images/gallery/2025-06/image-2025-06-04t192622-109.png)
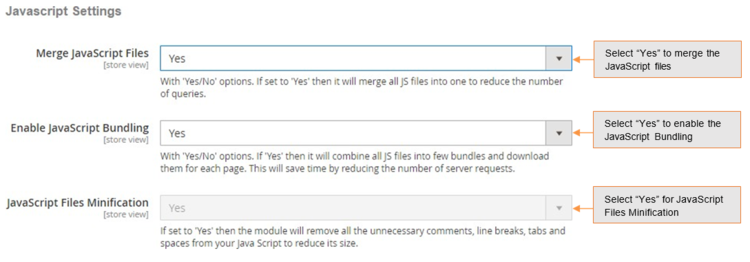
#### Javascript Settings [](#bkmrk--6)
Select "Yes" to enable the Defer Iframes
- **Merge Javascript Files –** Select "Yes" or "No". If set to "Yes" then it will merge all JS files into one to reduce the number of queries.
- **Enable Javascript Bundling –** Select "Yes" or "No". If set to "Yes" then it will combine all JS files into few bundles and download them for each page. This will save time by reducing the number of server requests.
- **Javascript Files Minification –** Please select "Yes" or "No". If set to "Yes" then the module will remove all the unnecessary comments, line breaks, tabs and spaces from your Java Script to reduce its size.
[](https://docs.scommerce-mage.com/uploads/images/gallery/2025-06/image-2025-06-04t192719-180.png)
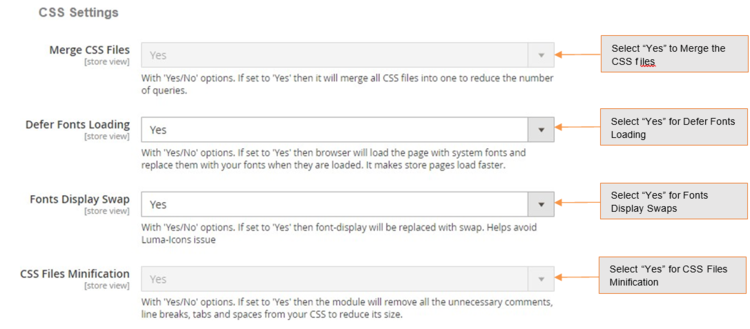
#### CSS Settings [](#bkmrk--7)
- **Merge CSS Files –** Select "Yes/No". If set to "Yes" then it will merge all CSS files into one to reduce the number of queries.
- **Defer Fonts Loading –** Select "Yes/No". If set to "Yes" then browser will load the page with system fonts and replace them with your fonts when they are loaded. It makes store pages load faster.
- **Fonts Display Swap –** Select "Yes/No". If set to "Yes" then font-display will be replaced with swap. Helps avoid Luma-Icons issue.
- **CSS Files Minification –** Select "Yes" or "No". If set to "Yes" then the module will remove all the unnecessary comments, line breaks, tabs and spaces from your CSS to reduce its size.
[](https://docs.scommerce-mage.com/uploads/images/gallery/2025-06/988888.png)
### Configuration Settings for Lazy Loading [](#bkmrk--8)
Go to *Admin > Stores > Configuration > Scommerce Configuration > Lazy Loading*
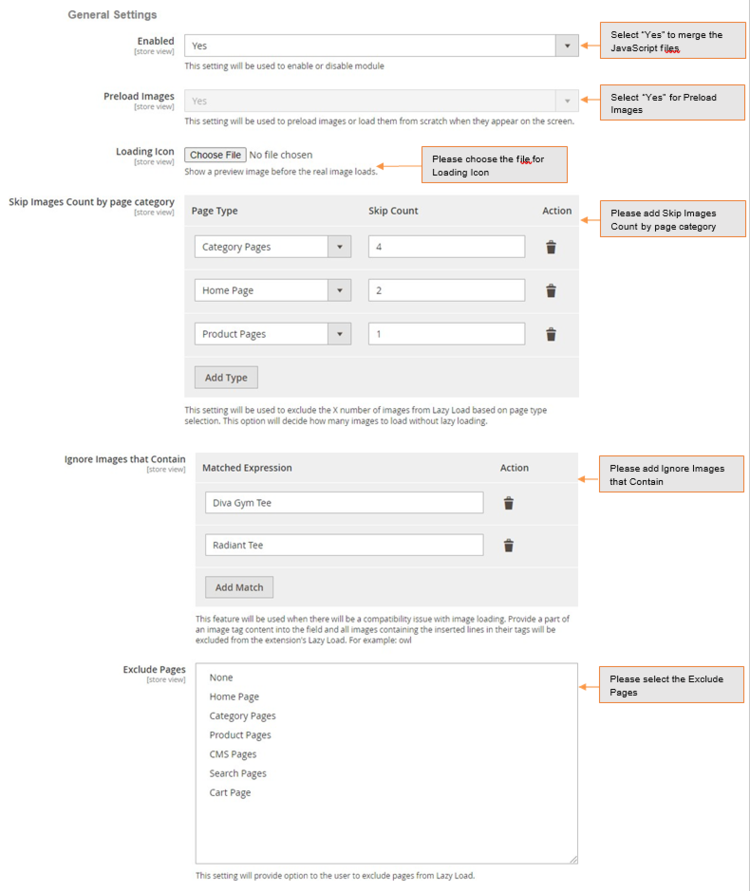
#### General Settings [](#bkmrk--9)
- **Enabled -** Select "Yes" or "No" to enable or disable the module.
- **Preload Images –** Select "Yes" to preload the images.
- **Loading Icon –** Show a preview image before the real image loads.
- **Skip Images Count by page category –** Enter a valid image count to skip the images from lazy load. Based on the count this option will decide how many images to load without lazy loading.
- **Ignore Images that Contain –** Provide a part of an image tag content into the field to exclude the image from the lazy load.
- **Exclude Pages –** Select the page(s) from multi-select options to exclude from the lazy load.
[](https://docs.scommerce-mage.com/uploads/images/gallery/2025-06/image-2025-06-04t193048-312.png)
- **Lazy Loading on the Homepage –** Enable the module to implement lazy loading on the homepage, here is the configuration path *Admin > Stores > Configuration > Lazy Loading- Enable "Yes".*
*[](https://docs.scommerce-mage.com/uploads/images/gallery/2025-06/image-90.jpg)*
- **Home Page Excluded from Lazy Loading –** There is an option " Exclude Pages" available in the backend, from where you can select the page to exclude from the lazy loading.
[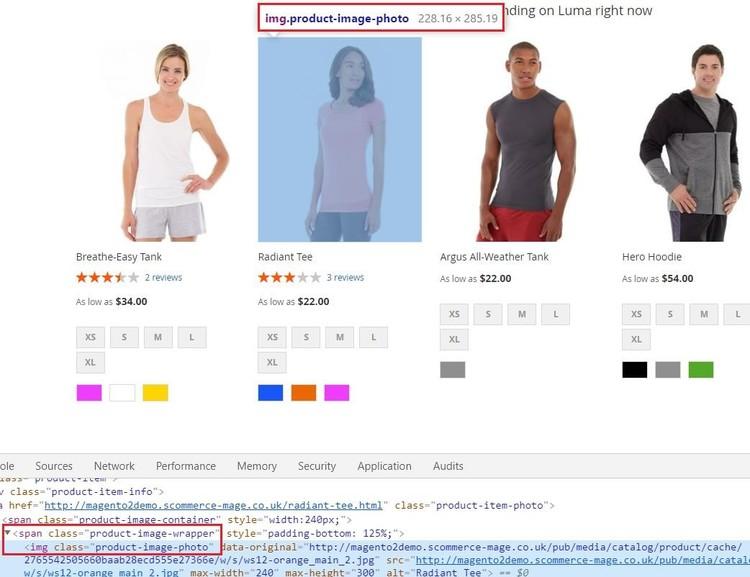](https://docs.scommerce-mage.com/uploads/images/gallery/2025-06/image-91.jpg)
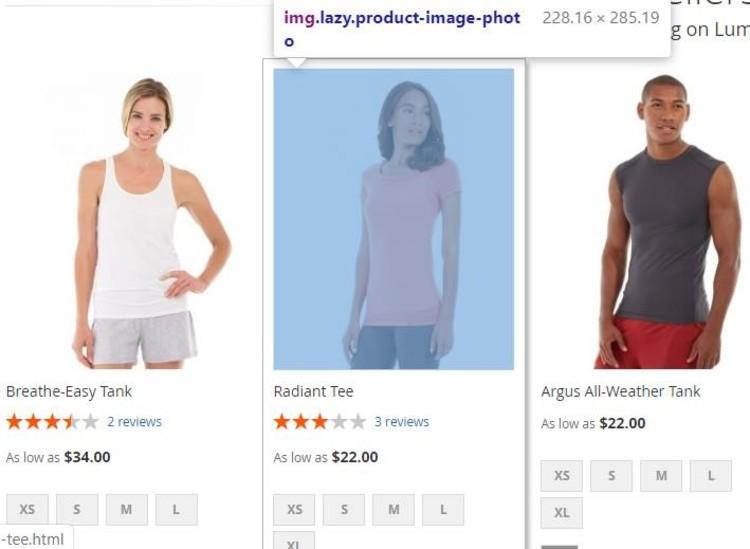
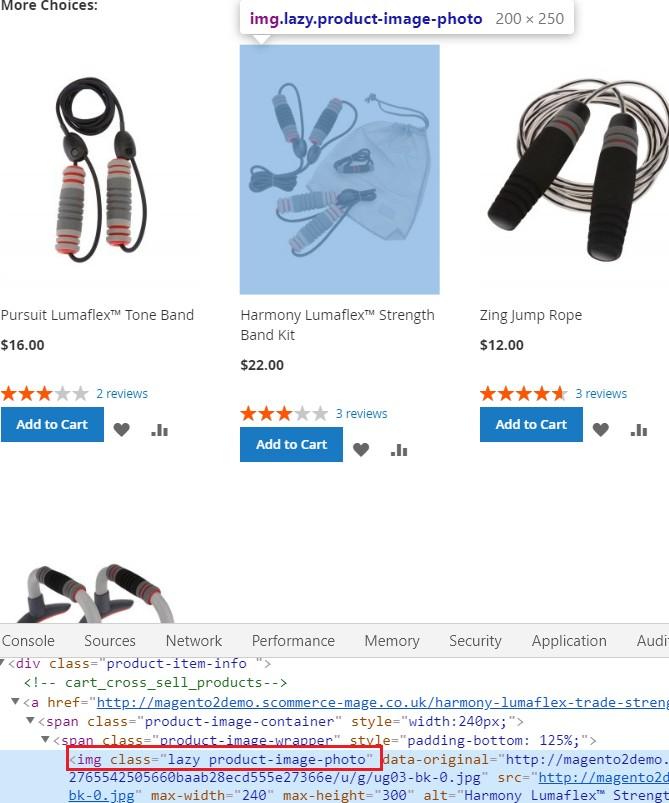
- **Lazy Loading on the Category Page –** Enable the module to implement the lazy loading on the category page *Admin > Stores > Configuration > Lazy Loading - Enable "Yes".*
*[](https://docs.scommerce-mage.com/uploads/images/gallery/2025-06/image-93.jpg)*
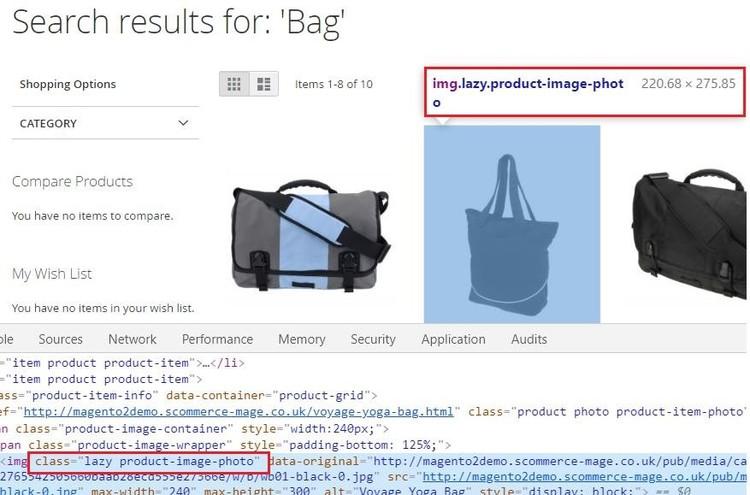
- **Lazy Loading on the Search Page –** There is an option available in the configuration settings at *Admin > Stores > Configuration > Lazy Loading- Enable* and by selecting "Yes" or "No" you can enable or disable the lazy loading on the search page.
[](https://docs.scommerce-mage.com/uploads/images/gallery/2025-06/image-94.jpg)
- **Lazy Loading on the Cart Page –** You can implement lazy loading on the cart page by by enabling the module from the back-end configuration *Admin > Stores > Configuration > Lazy Loading- Enable "Yes".*
*[](https://docs.scommerce-mage.com/uploads/images/gallery/2025-06/image-95.jpg)*
### Configuration Settings for Image Optimizer [](#bkmrk--10)
Go to *Admin > Stores > Configuration > Scommerce Configuration > Image Optimizer*
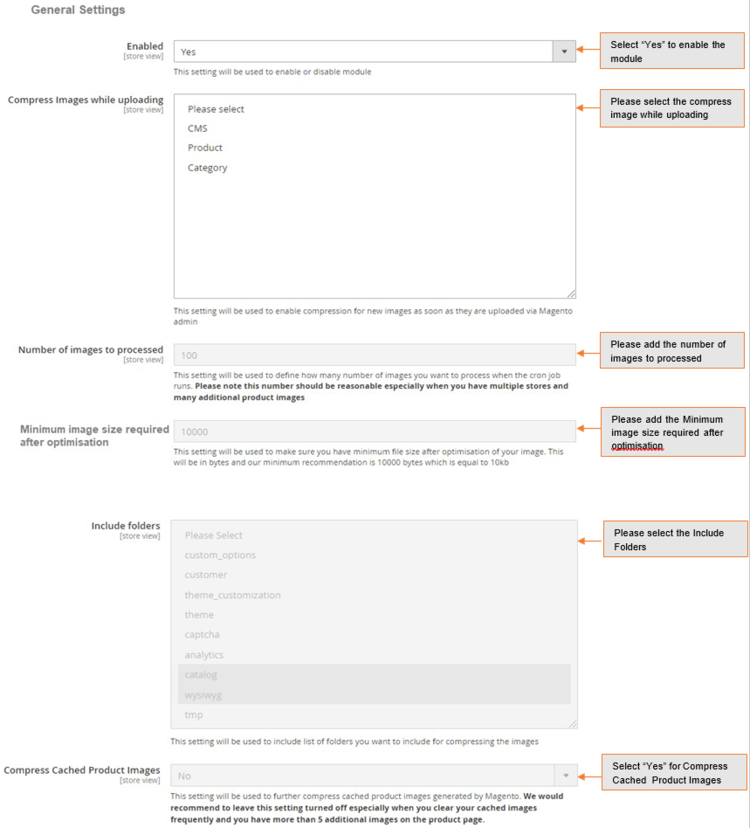
#### General Settings [](#bkmrk--11)
- **Enabled -** Select "Yes" or "No" to enable or disable the module.
- **Compress Images while uploading -** Select available options to enable compression for new images uploaded via Magento admin. We recommend this to be enabled because all the new things will be compressed straight away.
- **Number of images to processed –** Define how many number of images you want to process when the cron job runs. Please note this number should be reasonable especially when you have multiple stores and many additional product images.
- **Minimum image size required after optimisation -**
- **Include folders –** Please select list of folders you want to include for compressing the image.
- **Compress Cached Product Images (Yes/No) –** Select "Yes" to compress cached product images generated by Magento. We could recommend to leave this setting turned off especially when you clear your cached images frequently and you have more than 5 additional images on the product page.
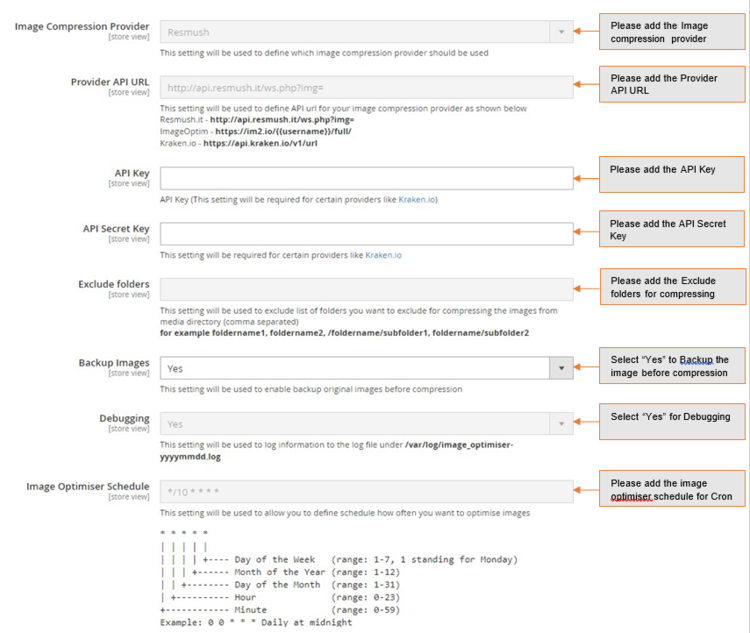
- **Image Compression Provider –** Please select image compression provider. **Provider API URL: Provider API URL. smush it –** [**http://api.resmush.it/ws.php?img=**](http://api.resmush.it/ws.php?img) **imageoptim –** [**https://im2.io/{ {username} }/full/**](https://im2.io/%7B%20%7Busername%7D%20%7D/full/) **kraken.io –** [**https://api.kraken.io./v1/url**](https://api.kraken.io/v1)
- **API Key –** Please enter API Key (if provider is kraken.io).
- **API Secret Key –** This will be required for certain providers like kraken.io
- **Exclude folders –** Please enter the list of folders you want to exclude from media directory (comma separated) for example foldername1, foldername2, /foldername /subfolder1, foldername/subfolder2
- **Backup Images (Yes/No) –** Select "Yes" to enable this feature to backup original images before compressing original file.
- **Debugging (Yes/No) –** Select "Yes" to enable debugging. This will write logs in var – log – imageoptimize.log
- **Image Optimiser Schedule –** Please define the Cron frequency to optimize images.
[](https://docs.scommerce-mage.com/uploads/images/gallery/2025-06/image-2025-06-05t140548-184.png)
[](https://docs.scommerce-mage.com/uploads/images/gallery/2025-06/image-2025-06-05t140637-713.png)
- **Compress/Optimize Product Image -** You can compress product images by enabling module from *Admin > Stores > Configuration > Scommerce Configuration > Image Optimiser > Enabled - "Yes" > Compress Images while uploading - Select "Product ".*
*[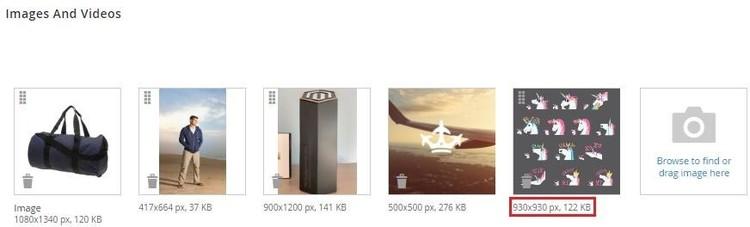](https://docs.scommerce-mage.com/uploads/images/gallery/2025-06/image-96.jpg)*
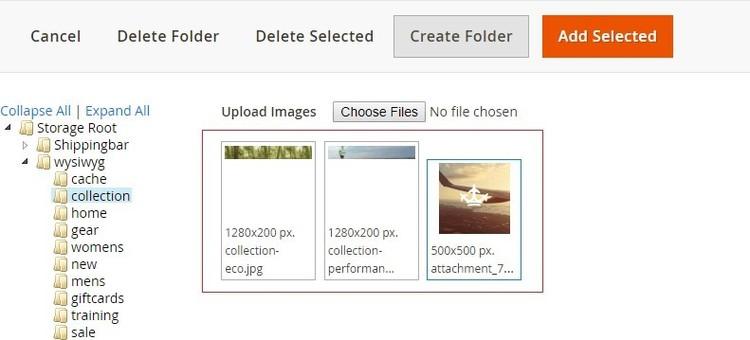
- **Compress/Optimize Category Image -** You can compress category images by enabling module from *Admin > Stores > Configuration > Scommerce Configuration > Image Optimiser > Enabled - "Yes" > Compress Images while uploading - Select "Category ".*
*[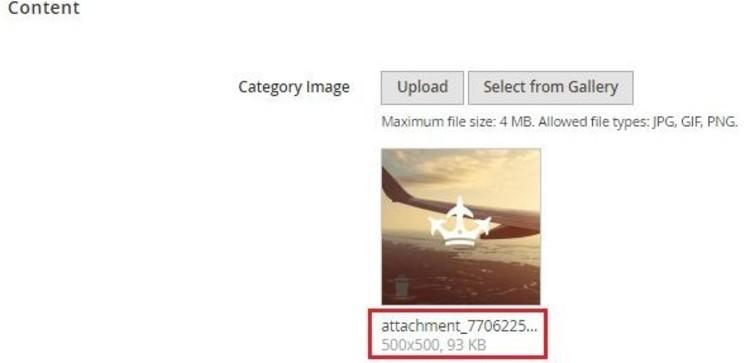](https://docs.scommerce-mage.com/uploads/images/gallery/2025-06/image-97.jpg)*
- **Compress/Optimize CMS Image -** You can compress CMS images by enabling module from *Admin > Stores > Configuration > Scommerce Configuration > Image Optimiser > Enabled - "Yes" > Compress Images while uploading - Select "CMS ".*
*[](https://docs.scommerce-mage.com/uploads/images/gallery/2025-06/image-98.jpg)*
### Configuration Settings for Cache Warmer [](#bkmrk--12)
Go to *Admin > Stores > Configuration > Scommerce Configuration > Cache Warmer*
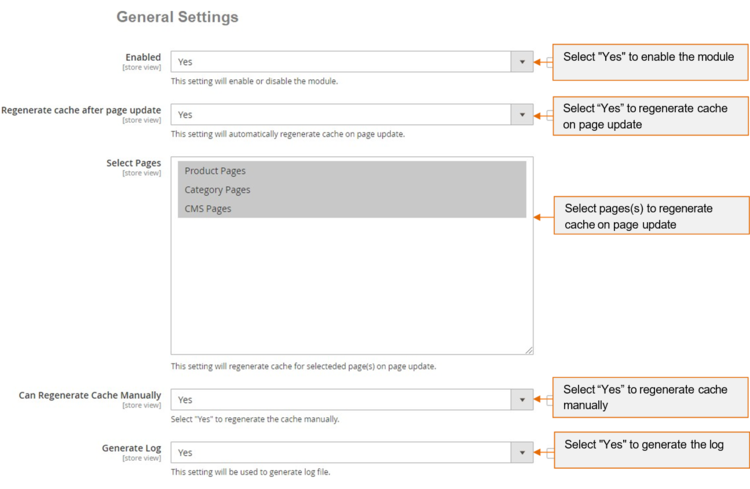
#### General Settings [](#bkmrk--13)
- **Enabled -** Select "Yes" or "No" to enable or disable the module
- **Regenerate cache after page update -** Please select "Yes" or "No" to regenerate cache for updated page.
- **Select Page -** Please select the page(s) from the multi-select option. This will regenerate the cache selected page(s) on page update.
- **Can Regenerate Cache Manually -** Please select " Yes" or "No". If set to "Yes" then you can regenerate cache manually from cache warmer grid.
- **Generate Log -** Select "Yes" to generate the log.
[](https://docs.scommerce-mage.com/uploads/images/gallery/2025-06/image-2025-06-05t141001-711.png)
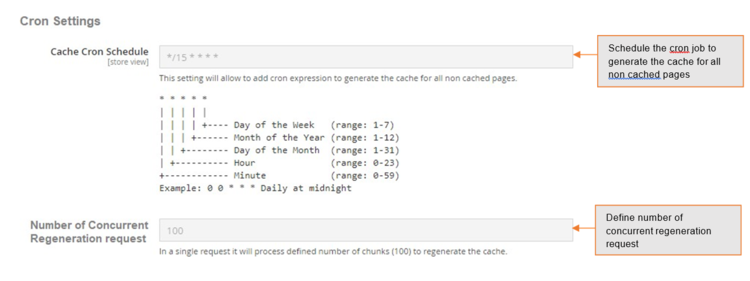
#### Cron Settings [](#bkmrk--14)
- **Cache Cron Schedule -** Schedule cron job to regenerate the cache for all non cached page(s).
- **Number of Concurrent Regeneration request -** Please define the number of concurrent request.
[](https://docs.scommerce-mage.com/uploads/images/gallery/2025-06/image-2025-06-05t141250-705.png)
### Cache Warmer Grid [](#bkmrk--15)
When you enable the module and set *General Settings > Can Regenerate Cache Manually >* to **"Yes"** then it adds an additional option "Regenerate" under the "Actions ->Select" drop-down at *Admin > System > Cache Warmer > Actions.* This grid will have Id, Page URL, Page Type - (Home, Product, Category, CMS), Status - (Cached/Un-cached), Last Cached - (Date, Time), and Action- (Regenerate, Delete).
[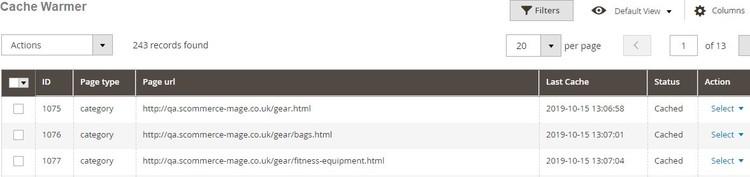](https://docs.scommerce-mage.com/uploads/images/gallery/2025-06/image-99.jpg)
- **Regenerate -** It regenerates cache manually for Category/Product/CMS pages. By clicking on the "Regenerate" action you can regenerate cache manually for a specific URL.
[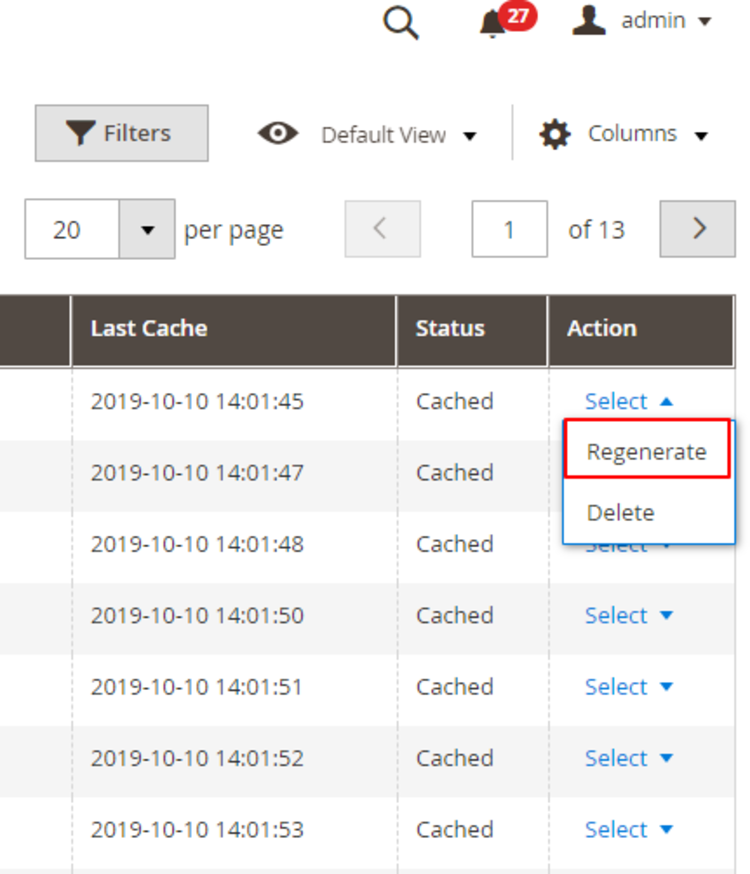](https://docs.scommerce-mage.com/uploads/images/gallery/2025-06/image-2025-06-05t141450-659.png)
### Console Commands [](#bkmrk--16)
You can regenerate cache for Product/Category/CMS page(s) by running the following console commands: -
- **Category Page -** If you want to regenerate cache for the category page then run this command **`scommerce:cachewarmer:category`**
**[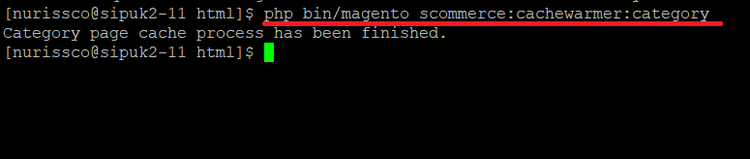](https://docs.scommerce-mage.com/uploads/images/gallery/2025-06/image-2025-06-05t161924-946.png)**
- **Product Page -** To regenerate cache for the product page(s), use this command **`scommerce:cachewarmer:product`**
**[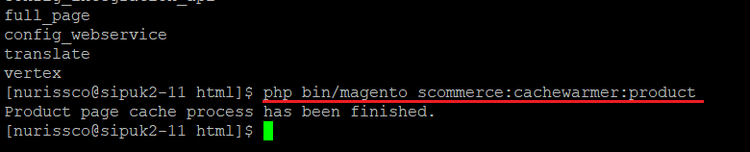](https://docs.scommerce-mage.com/uploads/images/gallery/2025-06/image-2025-06-05t162021-190.png)**
- **CMS Page -** To regenerate cache for CMS page please use this command **`scommerce:cachewarmer:cmspage`**
**[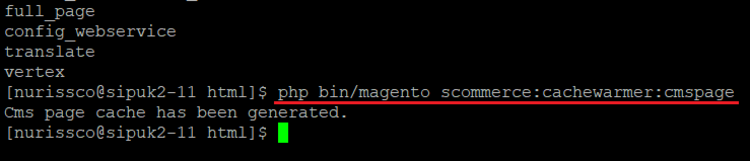](https://docs.scommerce-mage.com/uploads/images/gallery/2025-06/image-2025-06-05t162127-923.png)**
### Front-end Screenshots [](#bkmrk--17)
- **Cache Hit for the category page after the execution of category page command -** When you run the command for category then it regenerates the cache. On the front-end you can debug the cache and check the status "Hit" or "Miss" using browser tool (Inspect element) under *Network > Select Page URL > Header > Cache Debug: HIT*
*[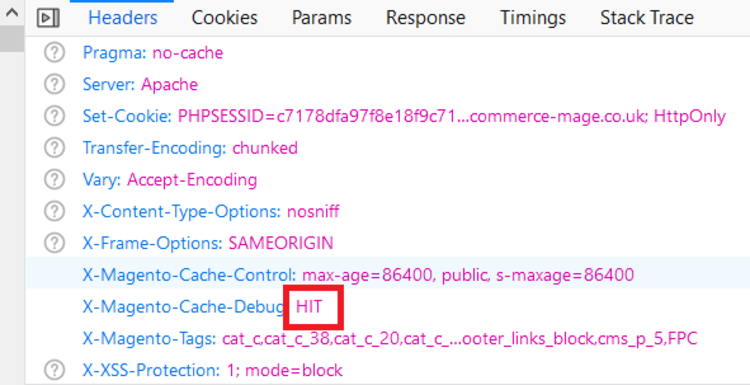](https://docs.scommerce-mage.com/uploads/images/gallery/2025-06/image-2025-06-05t162153-478.png)*
- **Cache Miss for the Category Page** - Flush the cache by executing the command (**c:f)** and then check cache using browser tool .
- [ ] [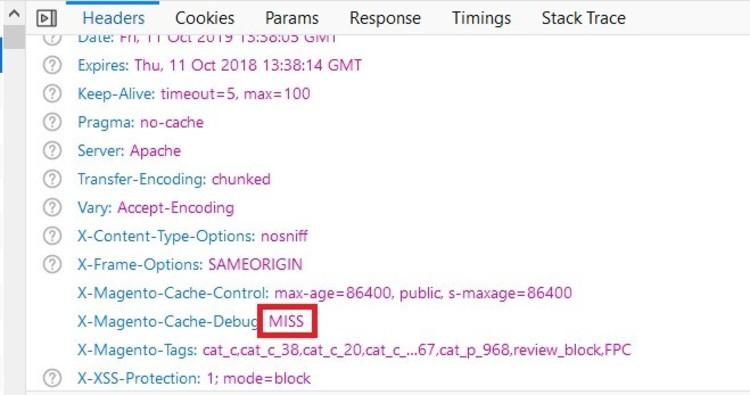](https://docs.scommerce-mage.com/uploads/images/gallery/2025-06/QQVimage-100.jpg)
### Set Primary Categories
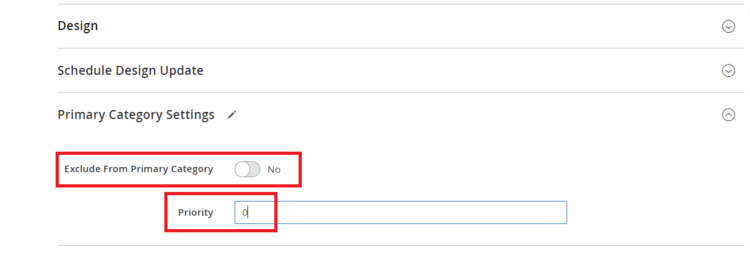
You can use a script provided with the extension to automatically add primary categories for products. Admin can exclude certain categories from primary category and also prioritise one category over the other to be picked as the primary category.
Go to Admin>Catalog>Categories select a category then scroll down to find the option "Primary Category Settings". Here click on "Exclude From Primary Category" to exclude this category from primary category or enter the priority 0 being the highes. The highest priority category will be picked first for the primary category.
[](https://docs.scommerce-mage.com/uploads/images/gallery/2025-06/image-2025-06-05t162541-040.png)
To automatically assingn primary category for all products run the command given below by going into the root directory of your store.
```php
scommerce:seo-base:set-primary-category
```
***N.B -*** *If you are using older version then run the script provided in the extension folder at the path Data/SetPrimaryCategoryM2.php from ssh*
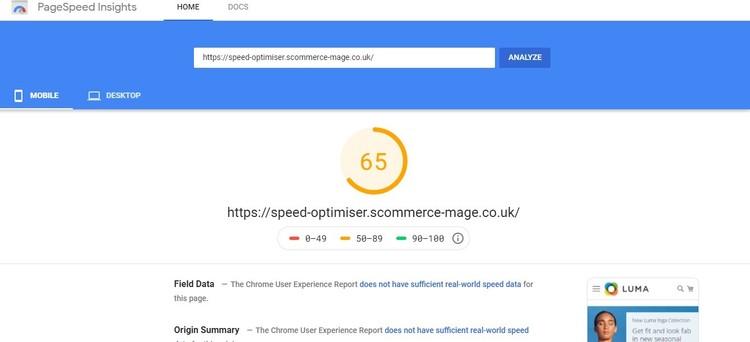
### Google Page Speed Tests [](#bkmrk--18)
#### Home Page Mobile [](#bkmrk--19)
[](https://docs.scommerce-mage.com/uploads/images/gallery/2025-06/image-2025-06-05t162752-442.jpg)
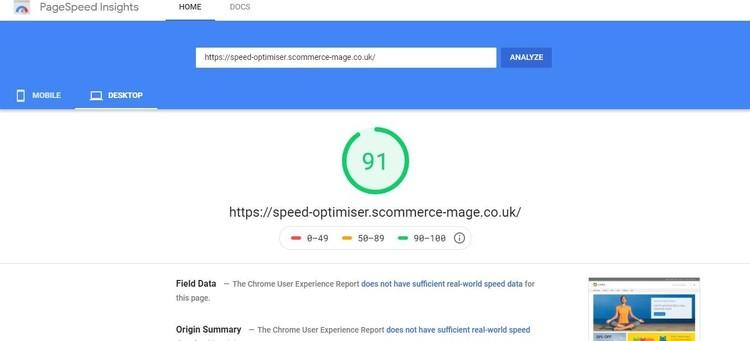
#### Home Page Desktop [](#bkmrk--20)
[](https://docs.scommerce-mage.com/uploads/images/gallery/2025-06/image-2025-06-05t162857-598.jpg)
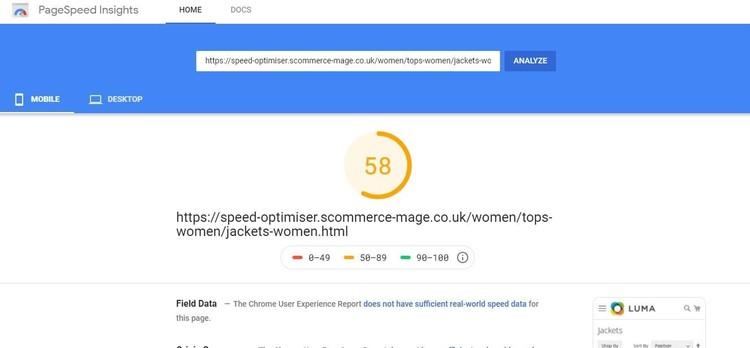
#### Category Page Mobile [](#bkmrk--21)
[](https://docs.scommerce-mage.com/uploads/images/gallery/2025-06/image-2025-06-05t162943-469.jpg)
#### Category Page Desktop [](#bkmrk--22)
[](https://docs.scommerce-mage.com/uploads/images/gallery/2025-06/image-2025-06-05t163044-294.jpg)
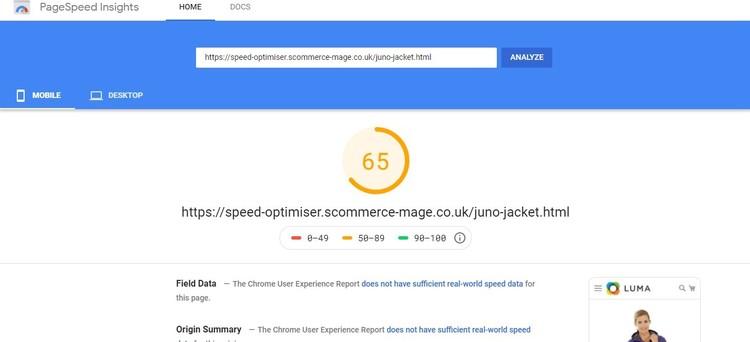
#### Product Page Mobile [](#bkmrk--23)
[](https://docs.scommerce-mage.com/uploads/images/gallery/2025-06/image-2025-06-05t163113-373.jpg)
#### Product Page Desktop [](#bkmrk--24)
[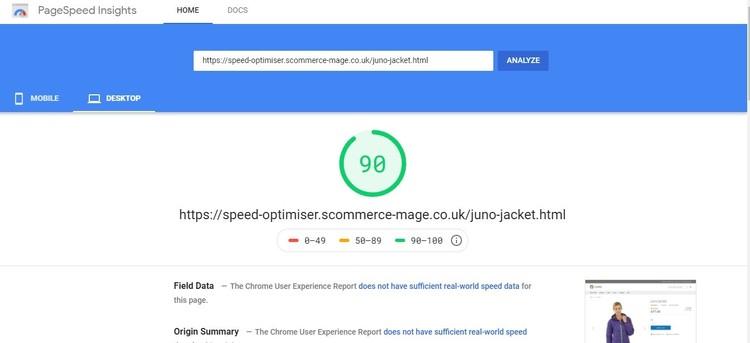](https://docs.scommerce-mage.com/uploads/images/gallery/2025-06/image-2025-06-05t163143-522.jpg)
If you have a question related to this extension please check out our [**FAQ section**](https://www.scommerce-mage.com/magento-2-google-page-speed-optimizer.html#customfaq) first. If you can't find the answer you are looking for then please contact [**support@scommerce-mage.com**](mailto:core@scommerce-mage.com).