
Magento 2 VAT Switcher
Installation and User Guide for Magento 2 VAT Switcher Extension
Table of Contents
- Installation
- Installation via app/code
- Installation via Composer
- Configuration Settings for VAT Switcher
- Order Tags Logs
- Order Tags Grid
- General Settings
- Types of Tags
- Static Tags
- Dynamic Tags
- Predefined Tags
- Assign Tags
- Manually Assign/Remove Tags
- Assign Tags Based on Conditions
- Tags in Action
- Order Grid
- Filter Order Grid
Installation
-
Installation via app/code: Upload the content of the module to your root folder. This will not overwrite the existing Magento folder or files, only the new contents will be added. After the successful upload of the package, run below commands on Magento 2 root directory.
php bin/magento setup:upgrade php bin/magento setup:di:compile php bin/magento setup:static-content:deploy -
Installation via Composer: Please follow the guide provided in the below link to complete the installation via composer.
Configuration Settings for VAT Switcher
Go to Admin > Stores > Configuration > Scommerce Configuration > VAT Switcher
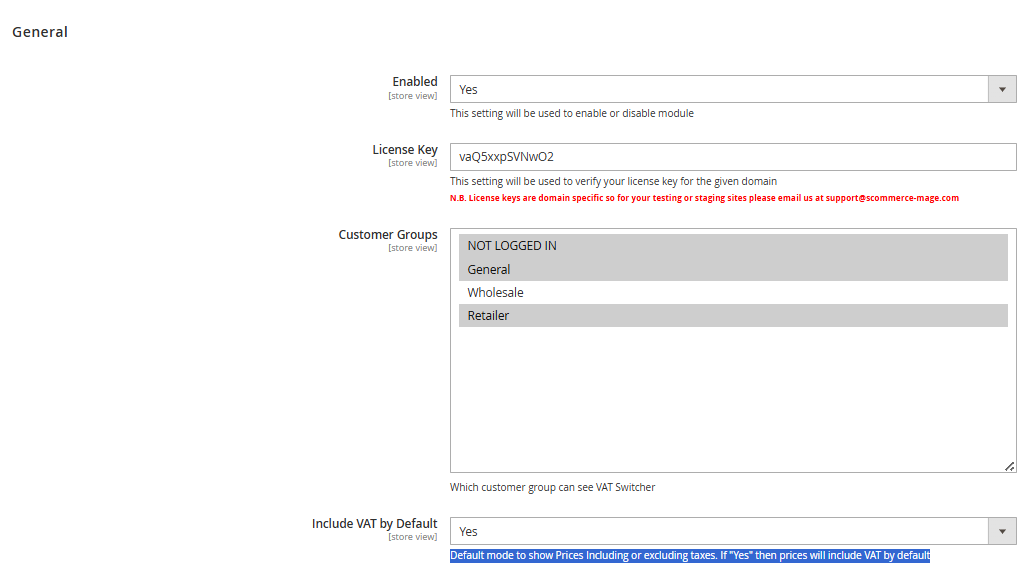
General Settings
- Enabled – Select "Yes" or "No" to enable or disable the module.
- License Key – Please add the license for the extension which is provided in the order confirmation email. Please note license keys are site URL specific. If you require license keys for dev/staging sites then please email us at support@scommerce-mage.com.
- Customer Groups - The VAT Switcher is visible only to users belonging to customer groups that have been explicitly granted access. Please refer to your store’s configuration settings to verify which customer groups are enabled for VAT visibility
- Include VAT by Default - This setting determines whether product prices are shown inclusive or exclusive of VAT by default.
If set to "Yes", prices will be displayed with VAT included

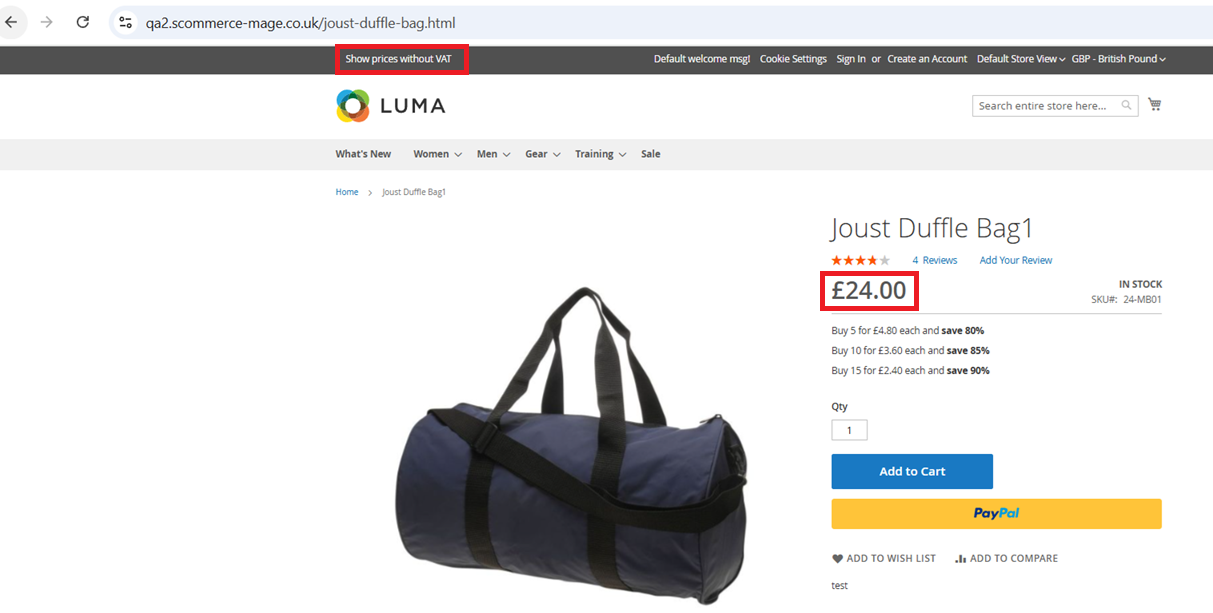
Show Price without VAT
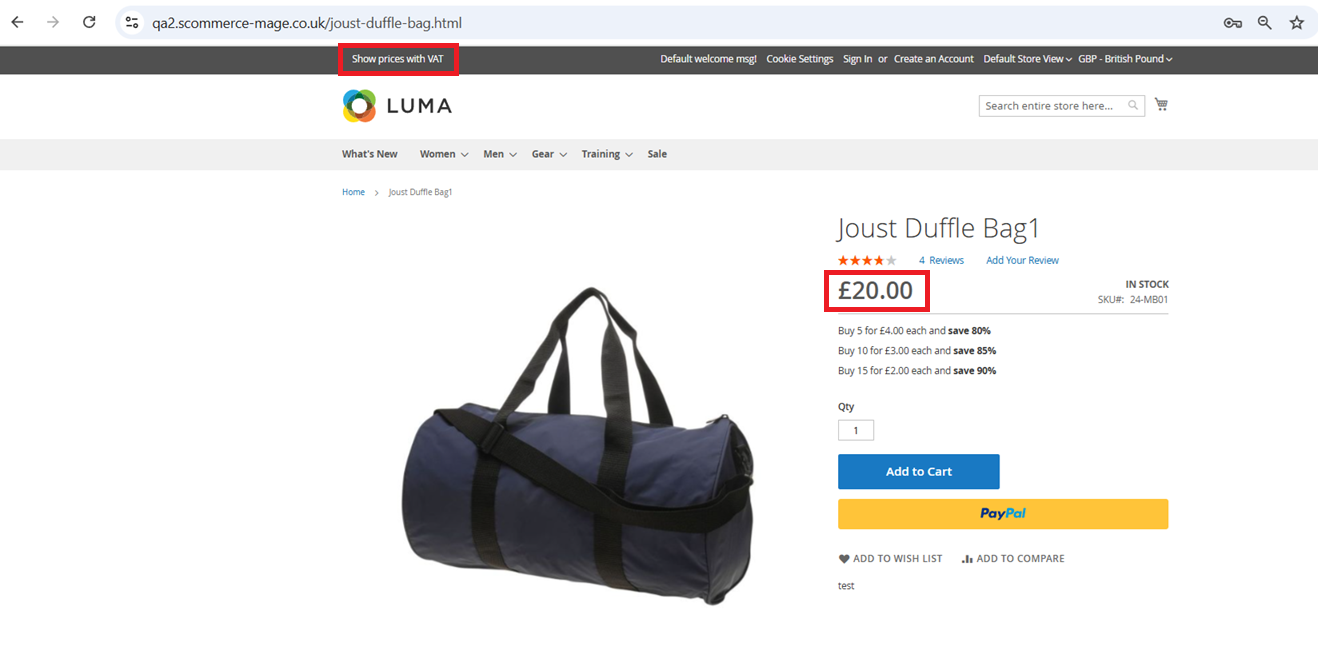
Show Price with VAT
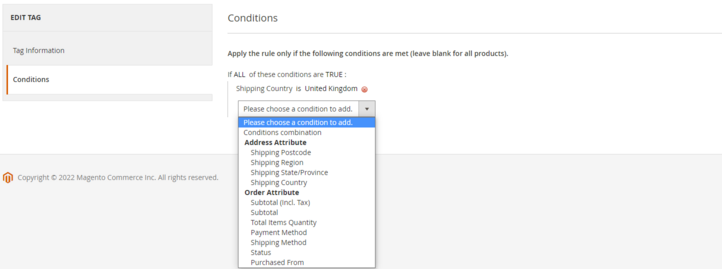
Conditions– Add the conditions using order or address attributes.
Order Tags Logs
Go to Admin>Sales>Scommerce Order Tagger>Order Tags Logs
The logs keep track of all the dynamic tags that are assigned to orders. It has its own set of filters which can be used to identify a specific assigned tag.
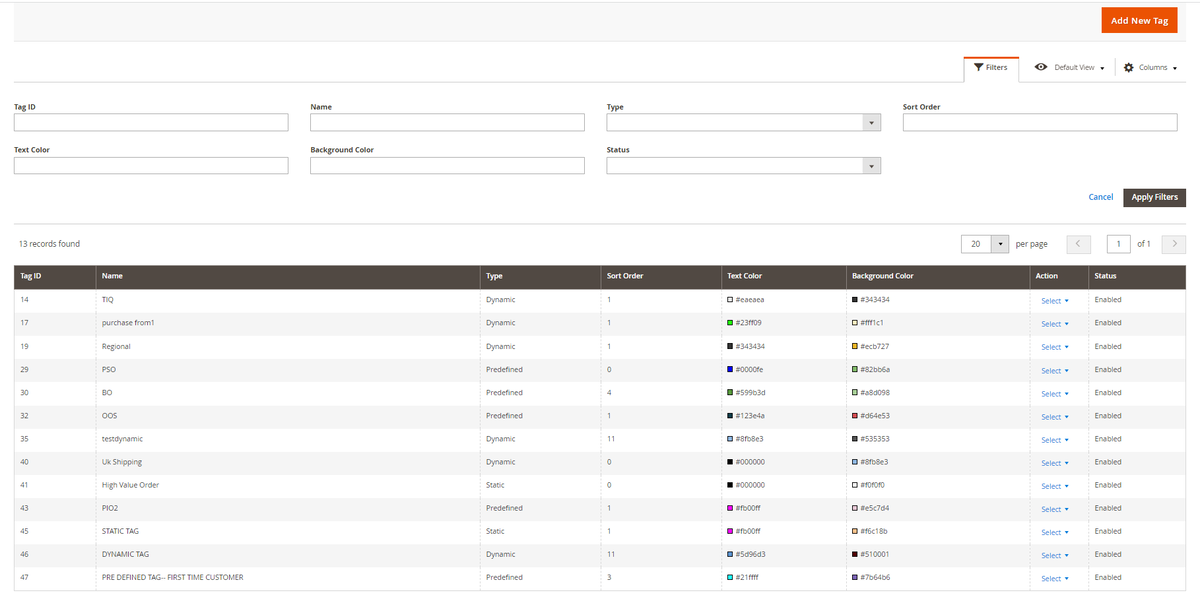
Types of Tags
There are three of tags within the extension static, dynamic, and predefined tags.
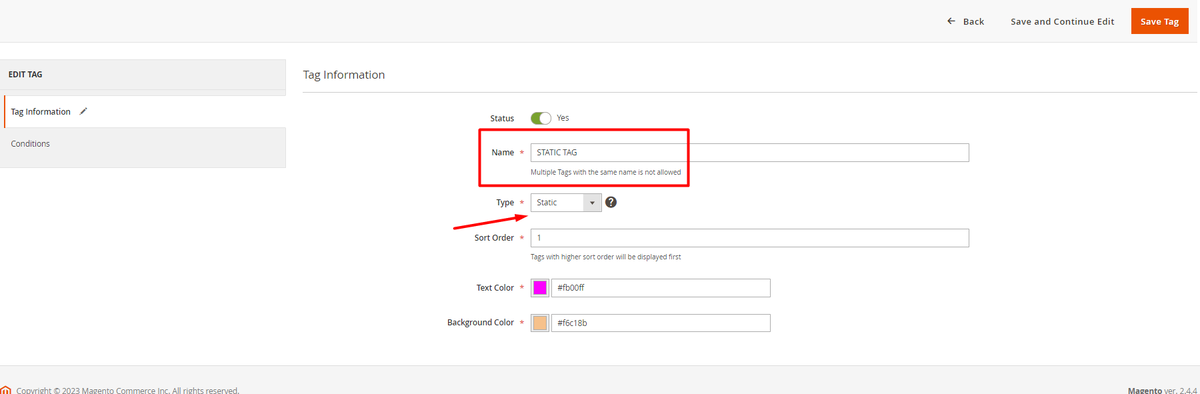
Static Tags
After creation, these types of tags are added manually via Magento order grid. Conditions are not added in these types of tags. They are not shown in order tags logs.
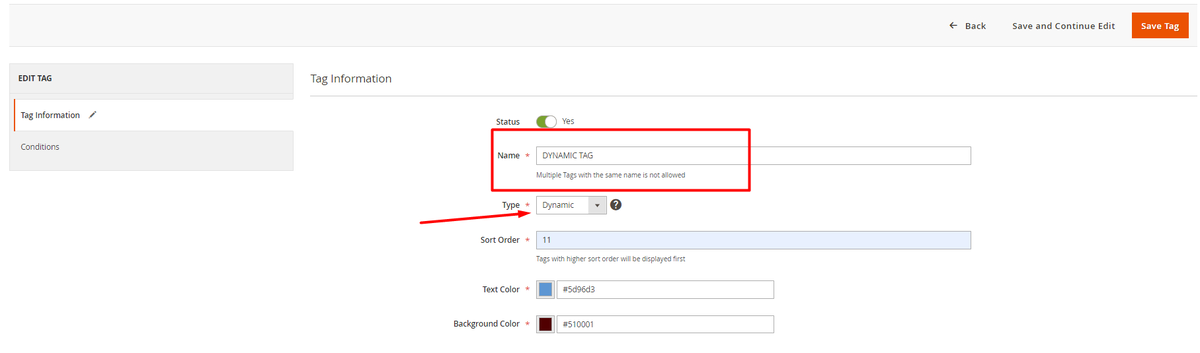
Dynamic Tags
After creation, these types of tags are added automatically to the orders applicable.Conditions are added in these types of tags.They are shown in the Order tags logs.
Predefined Tags
After creation, these types of tags are added automatically to the orders applicable.Conditions are not added in these types of tags as they are already set. They are shown in the Order tags logs Irrespective of the name, only one type of tag can be created for one 'Predefined' field.
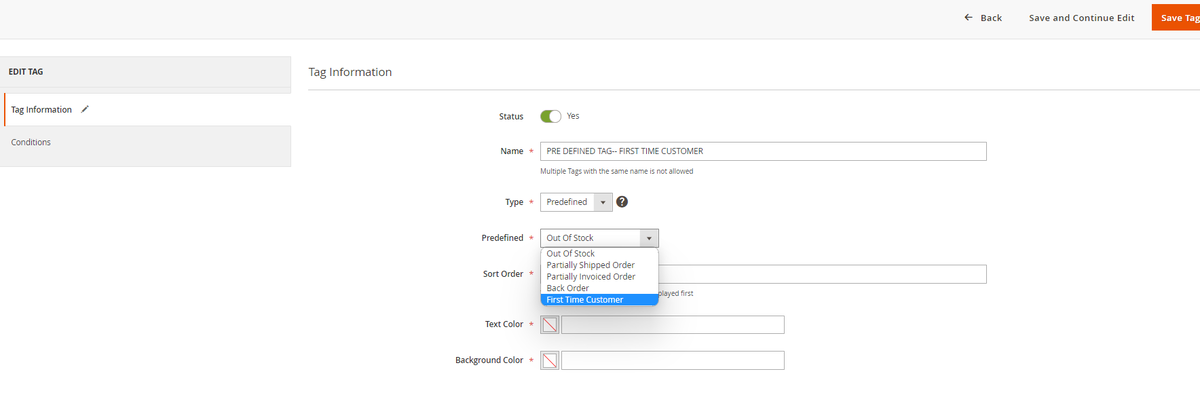
There are five types of predefined tags to choose from:-
- Out of Stock :- Gets automatically assigned to the orders whose products are out of stock. As soon as the product is available the tag gets removed automatically.
- Partially Shipped Order:- Gets automatically assigned to orders that are partially shipped i.e only a few quantities are shipped from the order. As soon all the entire order is invoiced the tag gets removed automatically.
- Partially Invoiced Order:- Gets automatically assigned to orders that are partially invoiced i.e only some quantity of the order is invoiced. As soon all the entire order is invoiced the tag gets removed automatically.
- Back Order:- Gets automatically assigned to backorders. This tag doesn't work with downloadable and virtual products. As soon as all the items in the order are shipped the tag gets removed automatically.
- First Time Customer:- Gets automatically assigned to the orders that are placed by first-time customers. This works for both guest/registered users.
Assign Tags
Manually Assign/Remove Tags
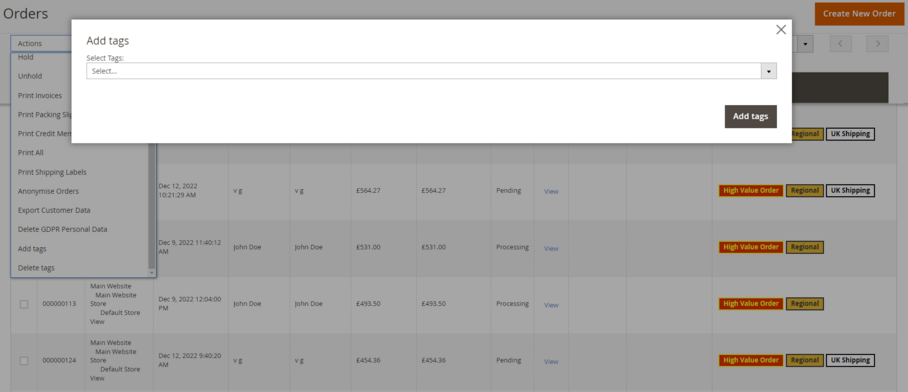
Go to Admin>Sales>Orders then select the order or multiple orders then click on the Actions dropdown and click on 'Add tags' or 'Remove tags'. Select the tag that you want add with the order from the 'Select Tags' dropdown and finally click on Add tags.
Note:- Only static Tags can be manually assigned.
Assign Tags Based on Conditions
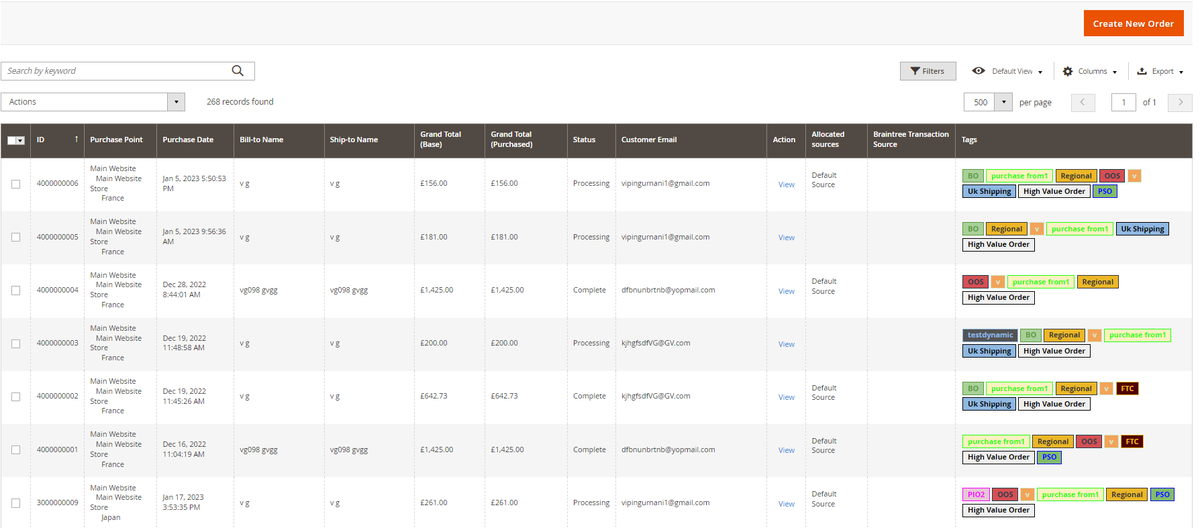
Tags in Action
Order Grid
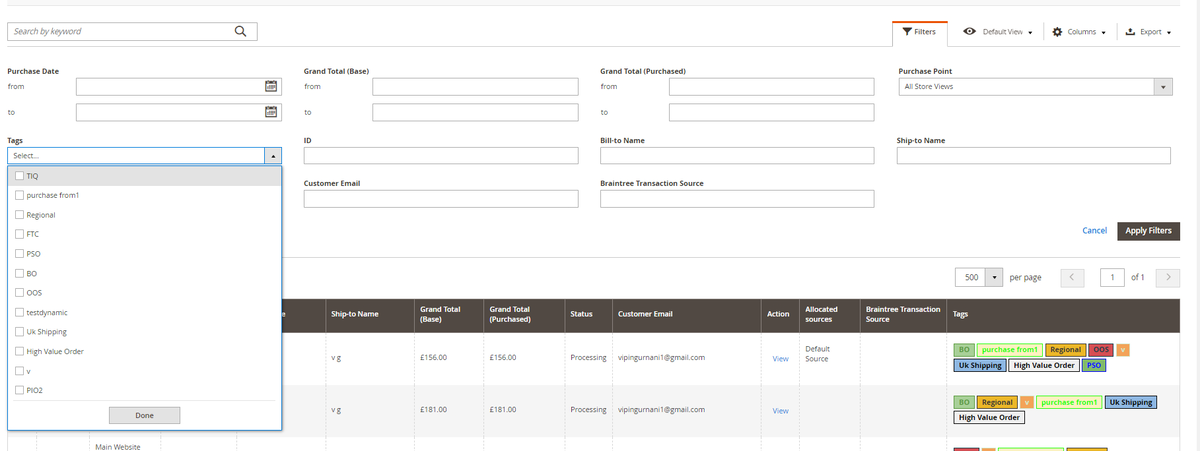
Filter Order Grid
Orders can be filtered based on the tags. New filter option can be found in the filters where orders can be sorted based on the tags selected. Go to Admin>Sales>Filters and click on the Tags dropdown to select the tags.
If you have a question related to this extension please check out our FAQ Section first. If you can't find the answer you are looking for then please contact support@scommerce-mage.com.