
Magento 2 PunchOut & ERP Integration
Installation and User Guide for Magento 2 PunchOut & ERP Integration
- Configuration Settings for PunchOut Integration
- General Settings
- Order Creation Settings
- Catalog Settings
- Punchout Session Settings
- UBL Configuration
- Managing PunchOut Clients
- Setting Up Catalogs and Pricing
- Testing the Integration
- Step-by-Step Testing Guide
- Handling Purchase Orders (End-to-End Workflow)
- Troubleshooting Common Issues
Installation
- Installation via app/code: Upload the content of the module to your root folder. This will not overwrite the existing Magento folder or files, only the new contents will be added. After the successful upload of the package, run below commands on Magento 2 root directory.
php bin/magento setup:upgrade php bin/magento setup:di:compile php bin/magento setup:static-content:deploy - Installation via Composer: Please follow the guide provided in the below link to complete the installation via composer.
Configuration Settings for PunchOut Integration
Go to Admin > Stores > Configuration > Scommerce Configuration > Punchout
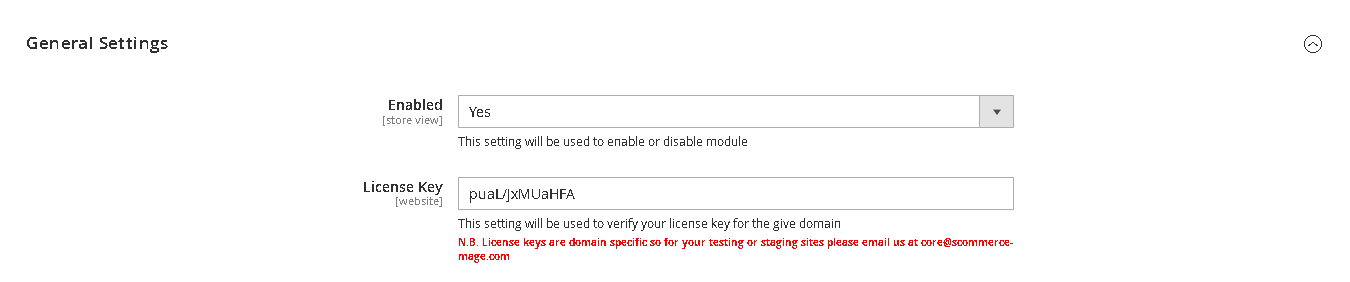
General Settings
- Enabled - Select "Yes" or "No" to enable or disable the module.
- License Key - Please add the license for the extension which is provided in the order confirmation email. Please note license keys are site URL specific. If you require license keys for dev/staging sites then please email us at support@scommerce-mage.com.
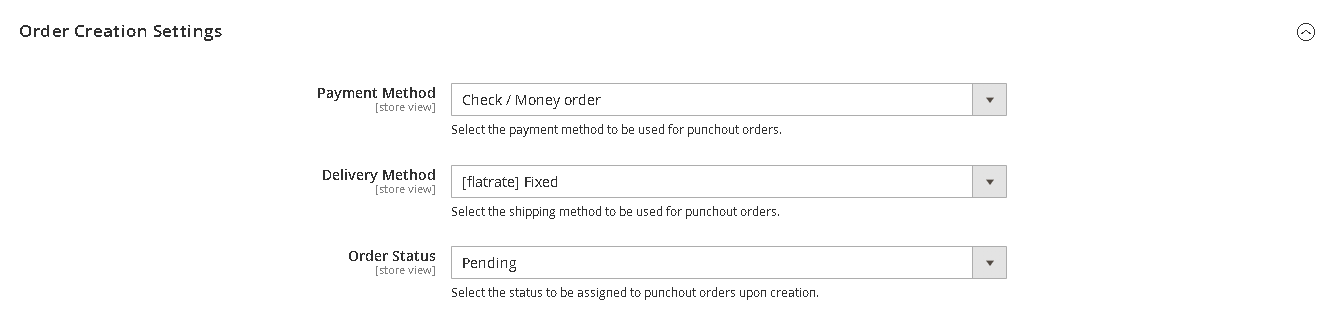
Order Creation Settings
- Payment Method – Select the payment method to be used for punchout orders from the dropdown.
- Delivery Method – Select the shipping method to be used for punchout orders from the dropdown.
- Order Status – Select the order status to be assigned to punchout orders upon creation.
Catalog Settings
- Remove Account Links – Set "Yes" to remove account links when punchout session is started
- Remove Footer – Set "Yes" to remove footer when punchout session is started

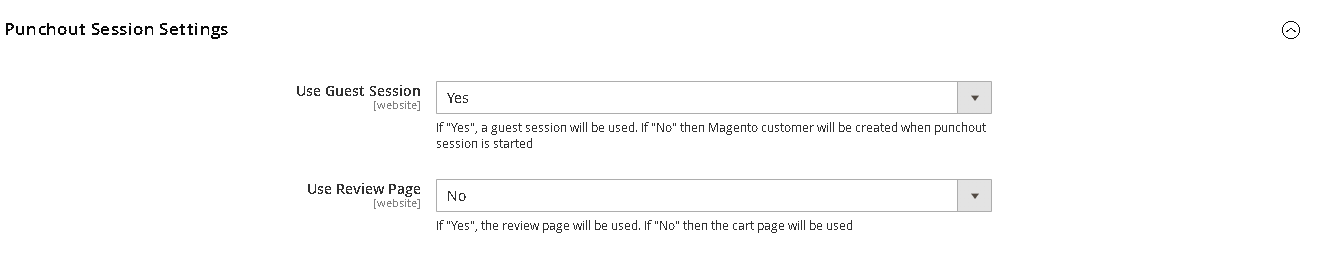
Punchout Session Settings
- Use Guest Session – Set "Yes" to create a guest session when punchout session is start and Set "No" to create a new Magento customer when punchout session is started
- Use Review Page – Set "Yes" to use the review page and "No" to use the cart page.
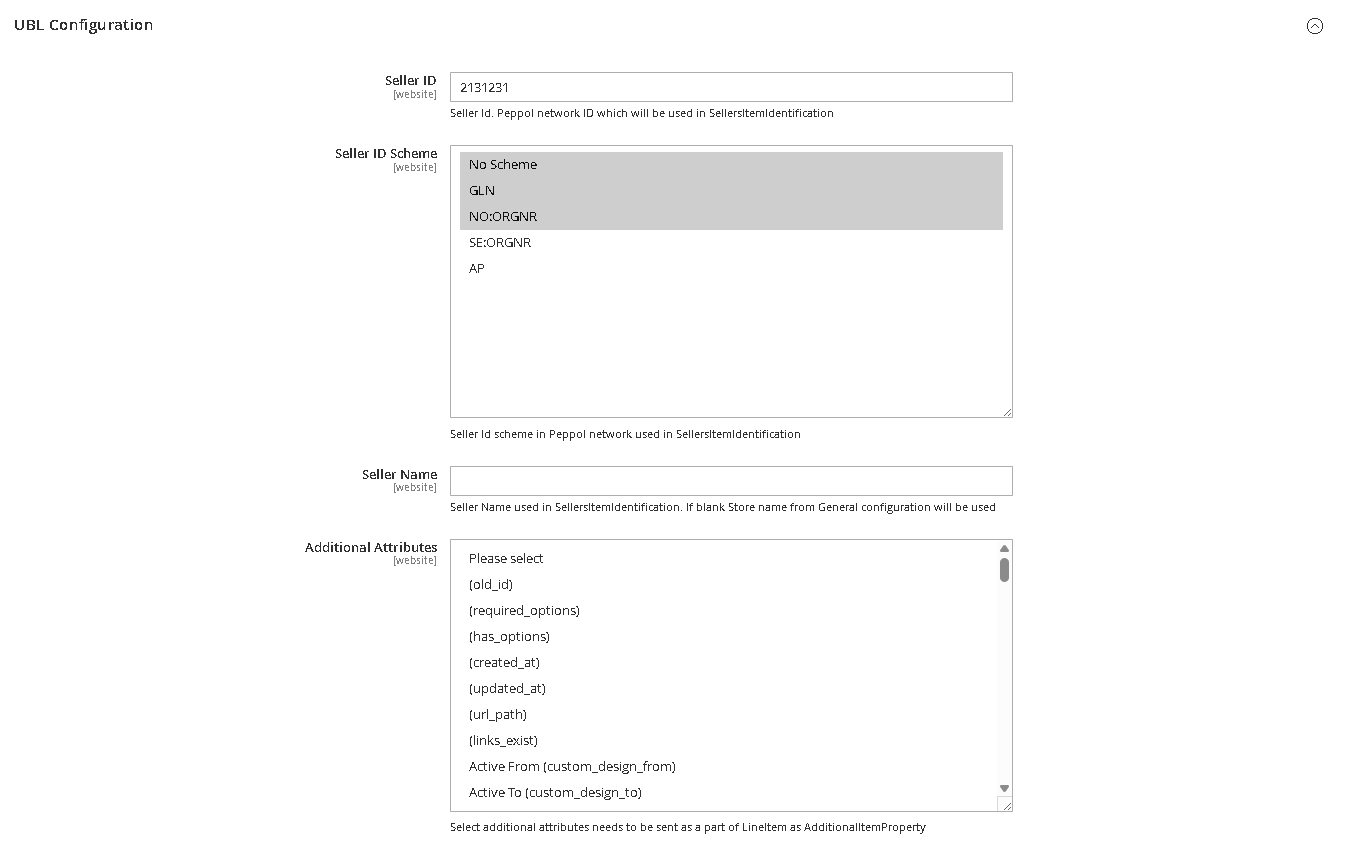
UBL Configuration
- Seller ID – Add the seller ID/Peppol network ID which will be used in SellersItemIdentification
- Seller ID Scheme– Select the Seller Id scheme in Peppol network that gets used in SellersItemIdentification
- Seller Name– Add the Seller Name used in SellersItemIdentification. If blank Store name from General configuration will be used.
- Additional Attributes– Select additional attributes needs to be sent as a part of LineItem as AdditionalItemProperty
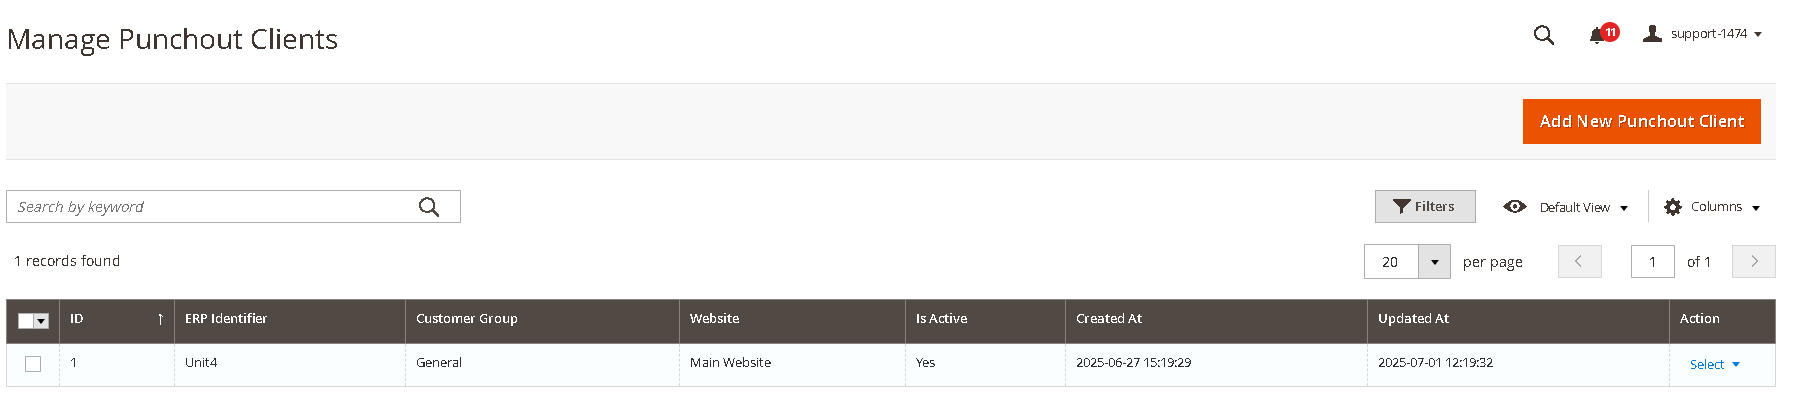
Managing PunchOut Clients
This is the most critical part of the setup. Each corporate client you wish to integrate with must be configured as a "PunchOut Client."
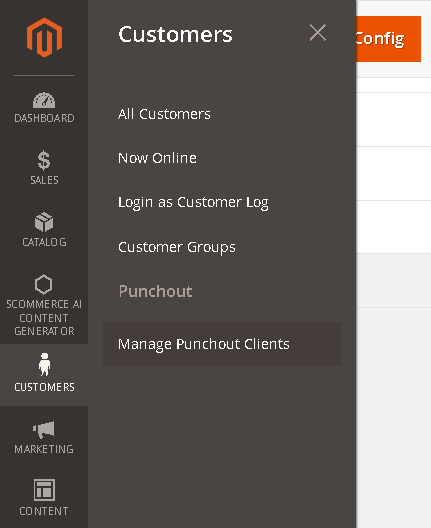
- Go to Admin>Customers>Punchout>Manage Punchout Clients
2. Click "Add New Punchout Client" to configure a new connection.
3. Fill in the following fields:
-
- General Information
- ERP Identifier: The unique identifier provided by the client's ERP system. This is often referred to as the
From IdentityorSender Identityin cXML. - Shared Secret: The password or secret key used for authentication, provided by your client. This must be an exact match.
- Customer Group: This is the key to personalizing the experience. Select the Magento customer group that this client's users should be assigned to upon logging in via PunchOut. This controls the catalog and pricing they see.
- Website: Select Website
- Is Active: Set to "Yes" to activate the connection for this specific client.
- ERP Identifier: The unique identifier provided by the client's ERP system. This is often referred to as the
- UBL Information
- Scheme ID:- Select the Scheme ID
- Endpoint ID:- Add the Endpoint ID
- General Information
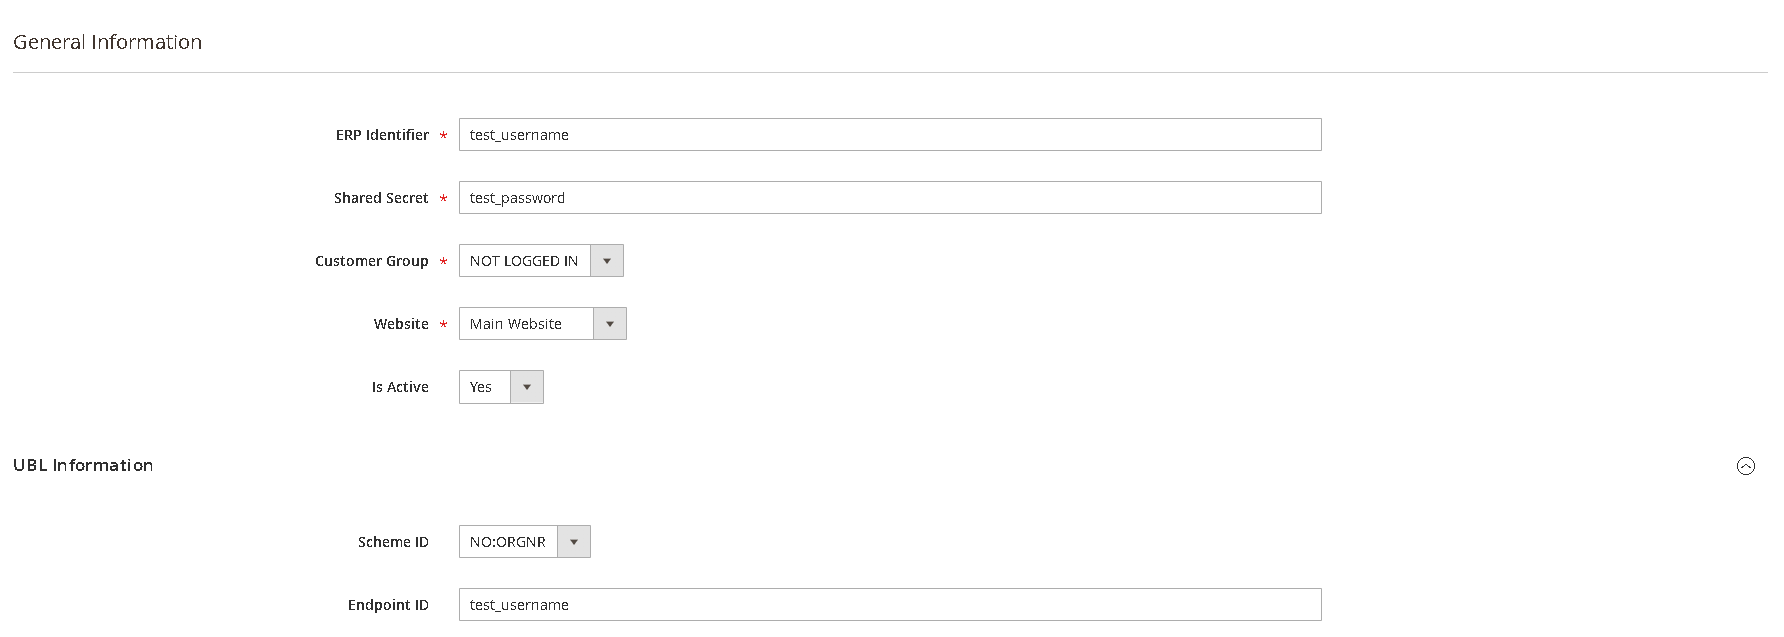
4. Click "Save Config."
Setting Up Catalogs and Pricing
The extension leverages Magento's native customer group functionality to deliver a personalized experience.
- Create a Customer Group: Before configuring a PunchOut client, navigate to Customers > Customer Groups and create a new group for them (e.g., "PunchOut - Global Office Inc.").
- Assign Custom Pricing: Use Marketing > Catalog Price Rules to create rules that apply specific discounts or fixed prices for products and assign the rule to the customer group you just created.
- Restrict Catalog (Optional): If you need to show only specific categories to a client, you may need to use native Magento functionality or a third-party category permissions module to restrict access for the designated customer group.
Testing the Integration
Our extension adheres strictly to industry standards, allowing you to validate your configuration using independent, third-party testing tools. We recommend using the PunchOut Commerce cXML Order Tester.
Step-by-Step Testing Guide:
- Get Your PunchOut URL: Your Magento PunchOut URL is typically your store's base URL followed by
/scpunchout/create/session/. For example:https://yourstore.com/scpunchout/create/session - Open the Testing Tool: Navigate to
https://punchoutcommerce.com/tools/cxml-order-tester. - Configure the Tester:
- PunchOut Login URL: Enter your Magento PunchOut URL from Step 1.
- cXML Payload: The tool provides a template. You must edit the
IdentityandSharedSecretvalues in the XML to exactly match the credentials you configured for your PunchOut Client in the Magento admin. - UBL Payload: The tool provides a template. You must edit the
Username,passwordandEndpoint IDvalues in the XML to exactly match the credentials you configured for your PunchOut Client in the Magento admin.
- Initiate the Session: Click the "Start Session" button on the tester website to test CXL and "Start UBL Session" to test the UBL2.1
- Shop in Magento: You should be redirected to your Magento storefront and automatically logged in as a member of the mapped customer group. Browse the site and verify that you see the correct products and contract pricing. Add one or more items to your basket.
- Transfer the Cart: Once you have items in your basket, click the "Transfer to ERP" button.
- Verify the Response: You will be redirected back to the PunchOut Commerce testing tool. It will now display the cXML response sent from your Magento store. Carefully inspect this XML to confirm that the correct SKUs, quantities, and prices are present. A successful test confirms your configuration is working correctly. You can validate the UBL output at:- https://ecosio.com/en/peppol-and-xml-document-validator/
Handling Purchase Orders (End-to-End Workflow)
The PunchOut process is typically two-phased.
- Phase 1 (Shopping): The buyer transfers their cart from Magento to their ERP for internal approval. This is what you validated during testing.
- Phase 2 (Ordering): After the cart is approved, the client's ERP system sends a formal Purchase Order (PO) back to Magento as a new cXML message.
Our extension can receive this incoming Purchase Order and automatically create a corresponding sales order in your Magento system, enabling a fully automated, end-to-end workflow. The specific endpoint URL for receiving POs (/scpunchout/order/) should be provided to your client's IT team.
Troubleshooting Common Issues
- Authentication Failed / Invalid Credentials: This almost always means the Identity or Shared Secret in your PunchOut Client configuration does not match what is being sent by the ERP or testing tool. They are case-sensitive and must be an exact match.
- User Sees Wrong Products or Pricing: Verify that the PunchOut Client is mapped to the correct Magento Customer Group. Then, check the Catalog Price Rules and any category permissions assigned to that specific group.
- Cart Transfer Fails or Returns an Error: Check the Magento exception and system logs for detailed error messages. Common causes include products being out of stock or disabled.
- Connection Timeouts: Ensure your server's firewall allows incoming POST requests from your client's ERP system IP addresses or from the testing tools you are using.
If you have a question related to this extension please check out our FAQ Section first. If you can't find the answer you are looking for then please contact support@scommerce-mage.com.