
Magento 2 Abandoned Basket Email
Installation and User Guide for Magento 2 Abandoned Basket email extension
Table of Contents
- Installation
- Installation via app/code
- Installation via Composer
- *Configuration Settings for Abandoned Basket Email
- General Settings
- 360 view settings
- Add 360 View Images to a Product
- Frontend
Installation
-
Installation via app/code: Upload the content of the module to your root folder. This will not overwrite the existing Magento folder or files, only the new contents will be added. After the successful upload of the package, run below commands on Magento 2 root directory.
php bin/magento setup:upgrade php bin/magento setup:di:compile php bin/magento setup:static-content:deploy -
Installation via Composer: Please follow the guide provided in the below link to complete the installation via composer.
[https://docs.scommerce-mage.com/magento-2-extensions/installation-via-composer/installation-via-composer]
Configuration Settings for Abandoned Basket Email
Go to Admin > Stores > Configuration > Scommerce Configuration > Abandoned Basket Email
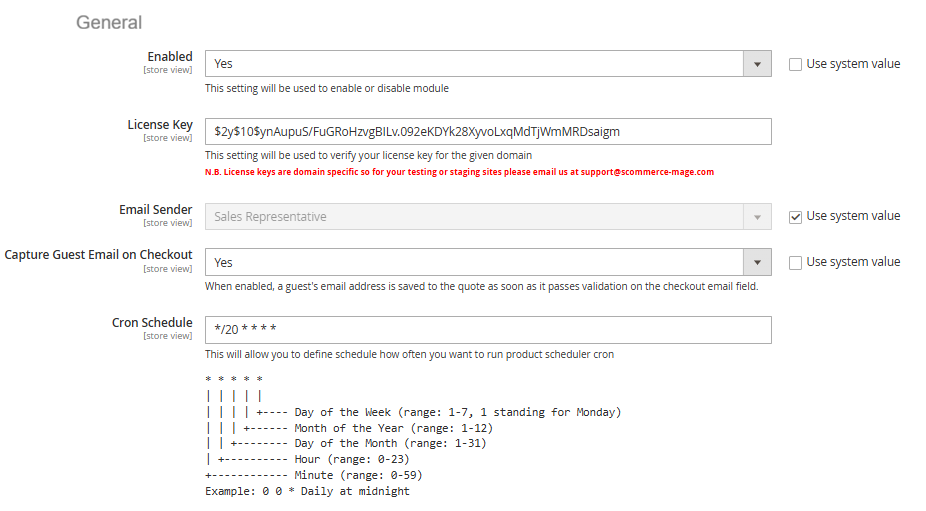
General Settings
- Enabled – Select "Yes" or "No" to enable or disable the module.
- License Key – Please add the license for the extension which is provided in the order confirmation email. Please note license keys are site URL specific. If you require license keys for dev/staging sites then please email us at support@scommerce-mage.com.
- Email Sender - Please Select the Email Sender.
- Capture Guest Email on Checkout - Select "Yes" to enabled a guest's email address is saved to the quote as soon as it passes validation on the checkout email field.
- Cron Schedule - This will allow you to define cron frequency, how often you want to run Abandoned Basket Email cron.
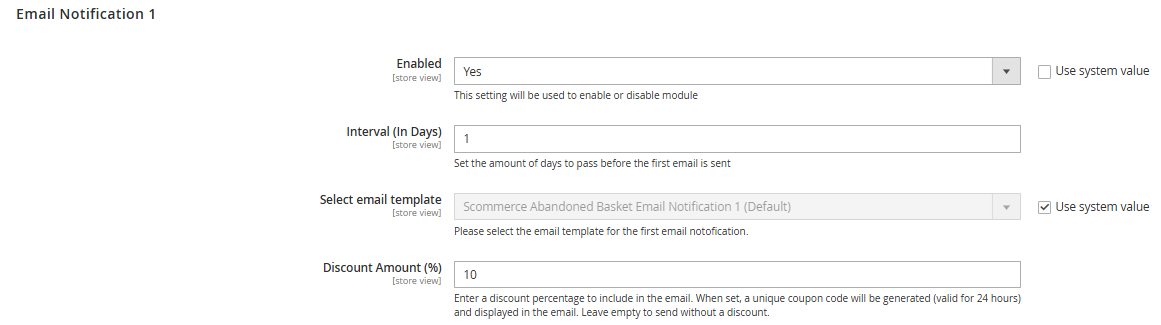
Email Notification 1
- Enabled – Select "Yes" or "No" to enable or disable module.
- Interval (In Days) – Please Set the amount of days to pass before the first email is sent.
- Select Email Template – Please select the email template for the first email notofication.
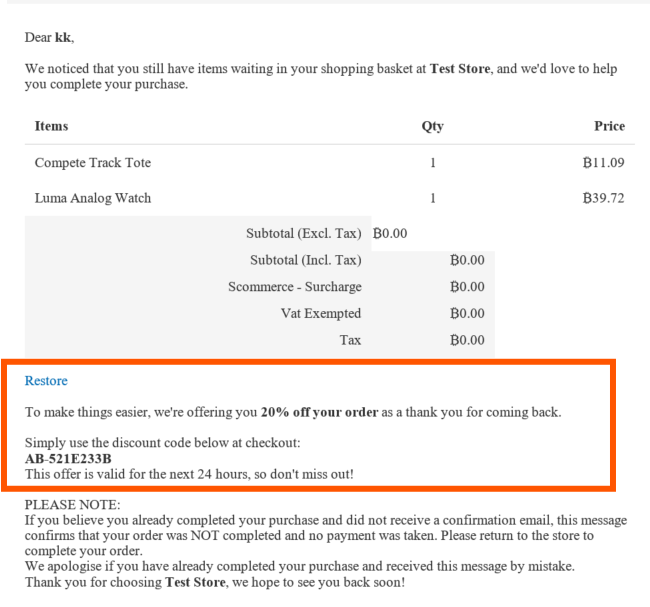
- Discount Amount (%) – Please enter a discount percentage to include in the email (10%).
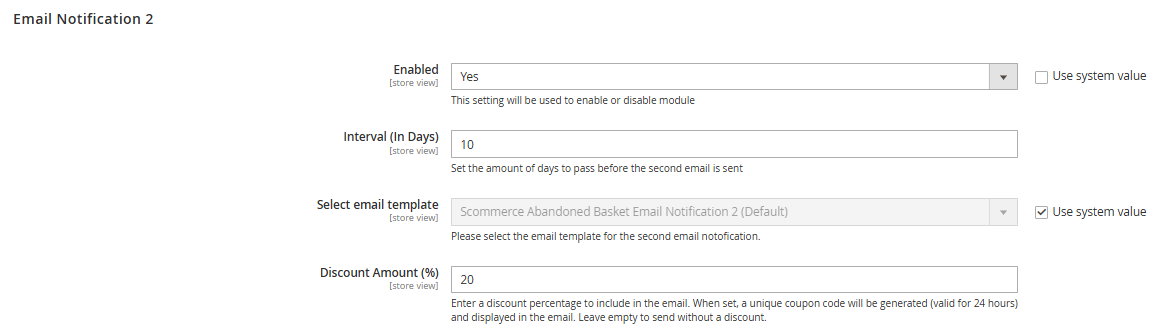
Email Notification 2
- Enabled – Select "Yes" or "No" to enable or disable module.
- Interval (In Days) – Please Set the amount of days to pass before the first email is sent.
- Select Email Template – Please select the email template for the first email notofication.
- Discount Amount (%) – Please enter a discount percentage to include in the email (20%).
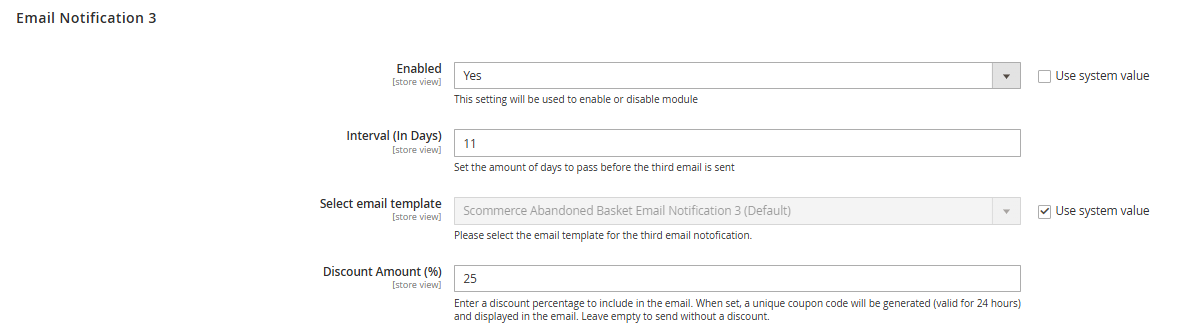
Email Notification 3
- Enabled – Select "Yes" or "No" to enable or disable module.
- Interval (In Days) – Please Set the amount of days to pass before the first email is sent.
- Select Email Template – Please select the email template for the first email notofication.
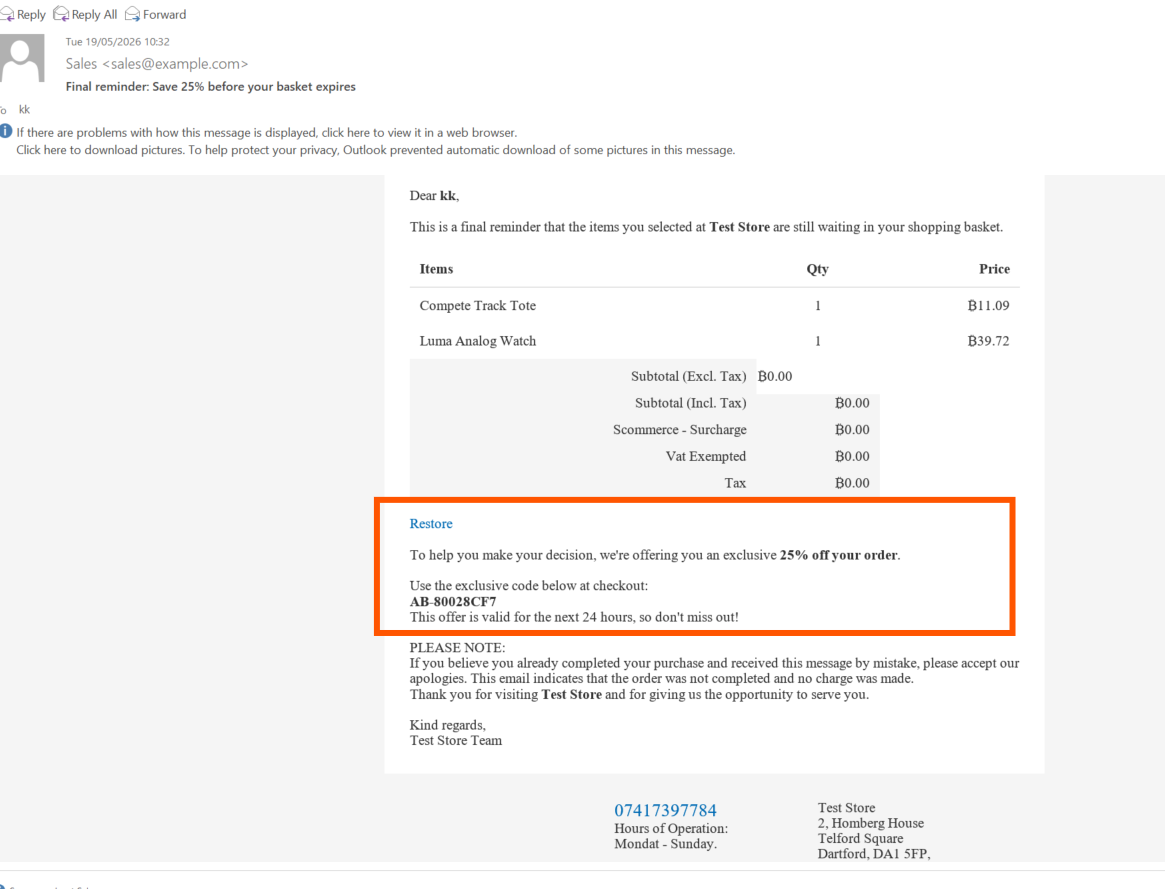
- Discount Amount (%) – Please enter a discount percentage to include in the email (25%).
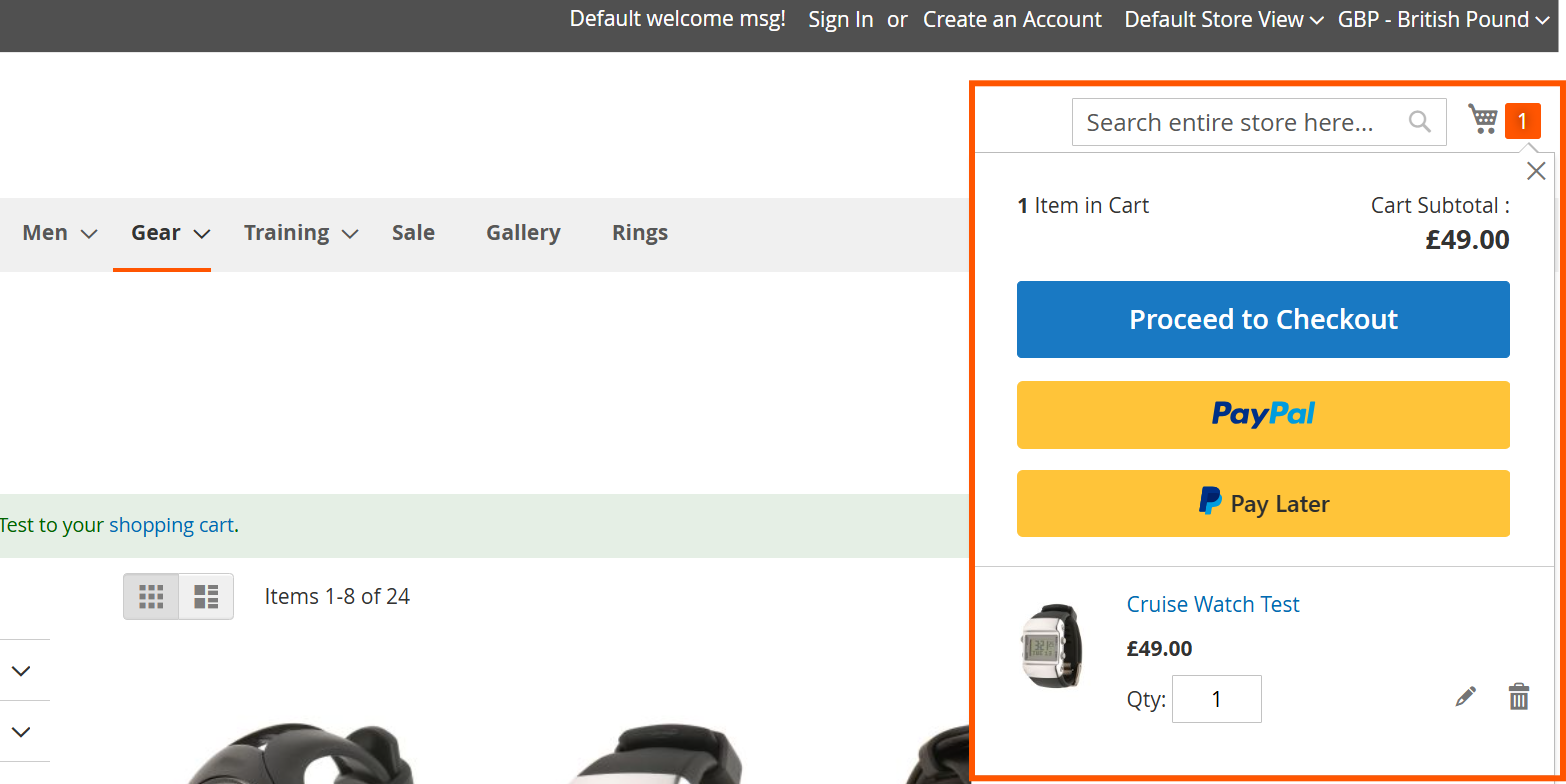
Abandoned Basket in Frontend
Email 1 (10% OFF)

Email 2 (20% OFF)
Email 3 (25% OFF)
If you have a question related to this extension please check out our FAQ Section first. If you can't find the answer you are looking for then please contact support@scommerce-mage.com.