
Testimonials
Installation and User Guide for Magento 1 Testimonials Extension
Table of Contents
- Installation
- Disable Compilation Mode
- Upload Package
- Clear Caches
- Configuration Settings for Testimonials
- General Settings
- Recaptcha
- Accessing Testimonials
- Testimonial Grid
- Testimonial Details
- Front-end site view
- Home Page
- Side Navigation
- Show all Testimonial
- Testimonial Form
Installation
- Disable Compilation Mode: To check that this is disabled, go to System >Tools> Compilation. If the compiler status is 'Disabled', you are ready to go. If not, simply click the 'Disable' button on the right hand side of the screen.
- Upload Package: Upload the content of the module to your root folder. This will not overwrite the existing Magento folder or files, only the new contents will be added.
- Clear Caches: This can be done from the admin console by navigating to the cache management page (System > Cache Management), selecting all caches, clicking 'refresh' from the drop-down menu, and submitting the change.
Configuration Settings for Testimonials
Go to Admin > Stores > Configuration > Scommerce Configuration > Testimonials
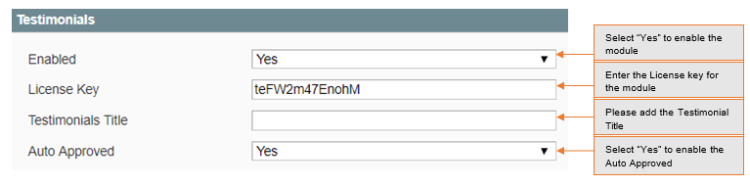
General Settings
- Enabled – Select "Yes" or "No" to enable or disable the module.
- License Key – Please add the license for the extension which is provided in the order confirmation email. Please note license keys are site URL specific. If you require license keys for dev/staging sites then please email us at support@scommerce-mage.com.
- Testimonials Title – Enter the title for the testimonial page
- Auto approved – Select Yes/No for auto approving submitted reviews
Recaptcha
- Enabled – Select "Yes" or "No" to enable or disable the Recaptcha on testimonial form.
- Public key – Enter Recaptcha public key.
- Private key – Enter Recaptcha private key.
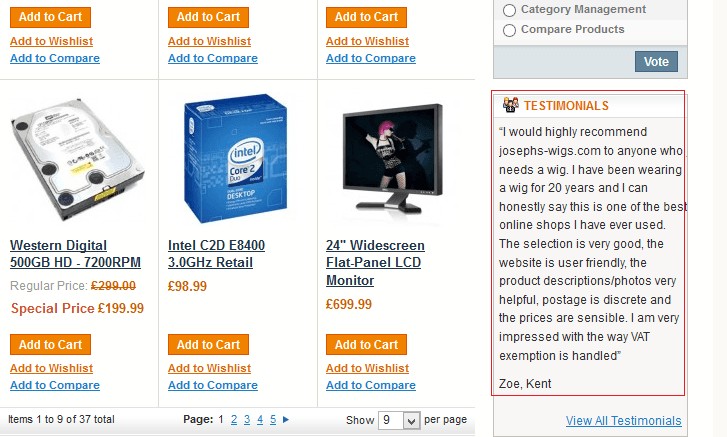
Accessing Testimonials
Go to Admin > CMS > Testimonials
-
Testimonial Grid – The grid will display all the testimonials added. Here you can filter, delete or change status of testimonials.
Testimonial Manager

-
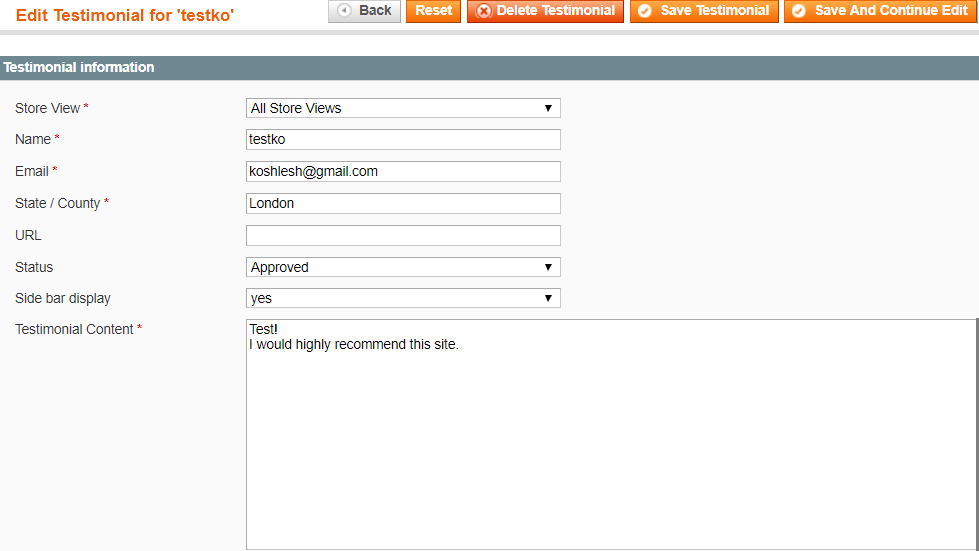
Testimonial Details – Clicking on any testimonials from Grid will show details of that particular testimonial.
- Store view – Store for which testimonial has been added.
- Name – Name of the year
- Email – Emails of the user
- State/Country – State/Country of user
- URL – Website URL of user
- Status – Approved/Pending
- Side bar display:Yes/No – Yes will show the review on side navigation
- Testimonial content – Content added for testimonial
-
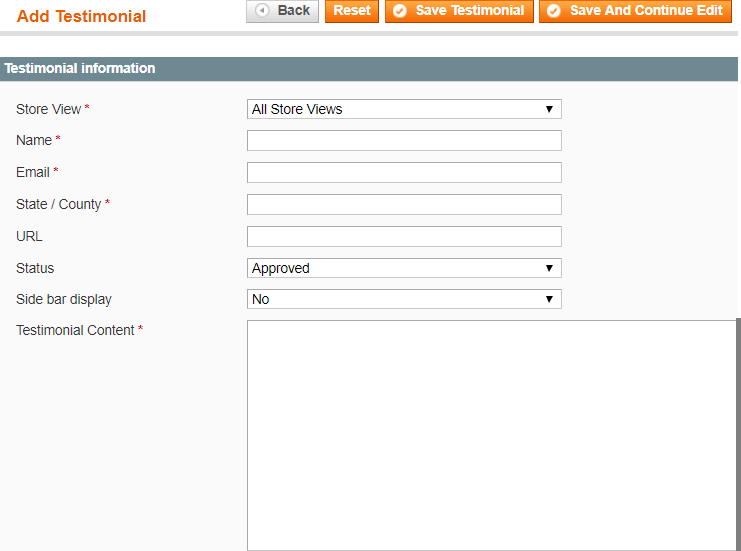
Adding Testimonial – Clicking on add testimonial from Grid will take you to form for adding new Testimonial.
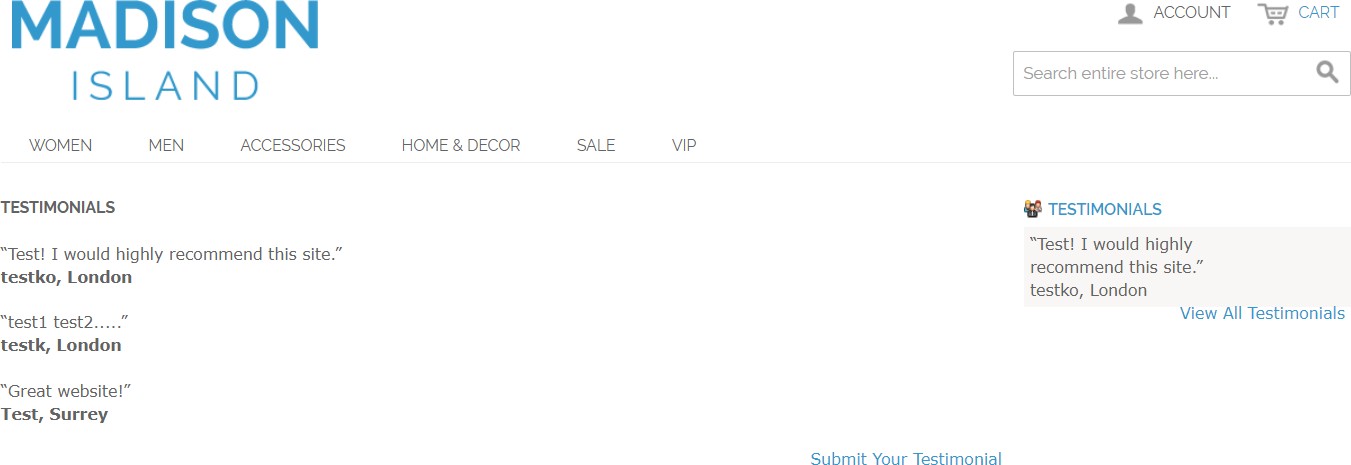
Front-end site view
Home Page
-
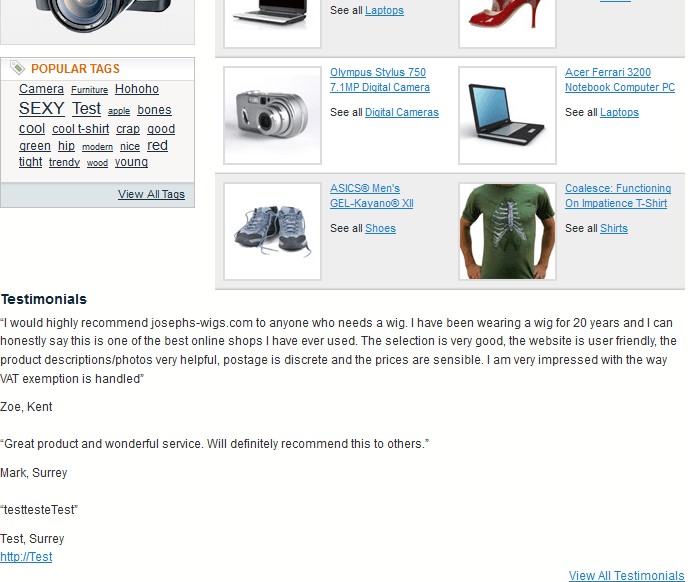
Show all Testimonial – This will show all approved testimonials.
-
Testimonial Form – To submit new testimonial for the site.

If you have a question related to this extension please check out our FAQ Section first. If you can't find the answer you are looking for then please contact support@scommerce-mage.com.