
Magento 2 Associated or Linked Product Stock Update
Installation and User Guide for Magento 2 Associated or Linked Product Stock Update Extension
Table of Contents
- Installation
- Installation via app/code
- Installation via Composer
- Configuration Settings for Associated Product
- General Settings
- Product Association at Product Level
- Product Association for Simple Product
- Product Association for Configurable/Child Product
- Product Grid at Product Level
- Associated or Linked Product Stock Update
- Fix Product Associations
- Import / Export
- Import
- Export
Installation
-
Installation via app/code: Upload the content of the module to your root folder. This will not overwrite the existing Magento folder or files, only the new contents will be added. After the successful upload of the package, run below commands on Magento 2 root directory.
php bin/magento setup:upgrade php bin/magento setup:di:compile php bin/magento setup:static-content:deploy -
Installation via Composer: Please follow the guide provided in the below link to complete the installation via composer.
Configuration Settings for Associated Product
Go to Admin > Stores > Configuration > Scommerce Configuration > Associated Product
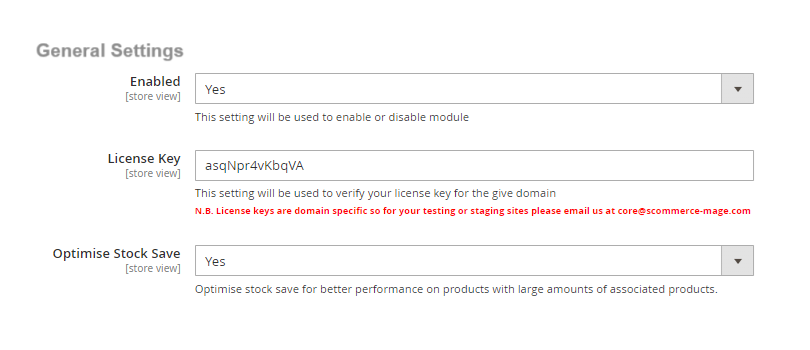
General Settings
-
Enabled - Select "Yes" or "No" to enable or disable the module.
-
License Key - Please add the license for the extension which is provided in the order confirmation email. Please note license keys are site URL specific. If you require license keys for dev/staging sites then please email us at support@scommerce-mage.com.
-
Optimise Stock save - Select "Yes" or "No". If set to "Yes" then it will optimise stock save for better performance on products with large amounts of associated products.
-
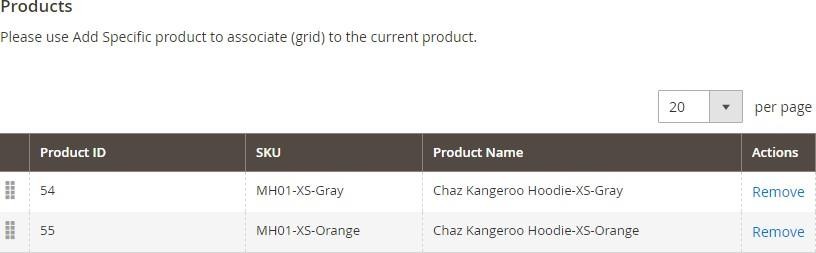
Product Association at Product Level – You can associate products from Admin > Catalog > Products > Select Product > Product Association > Click "AddProduct".
Product Association for Simple Product

Product Association for Configurable/Child Product
-
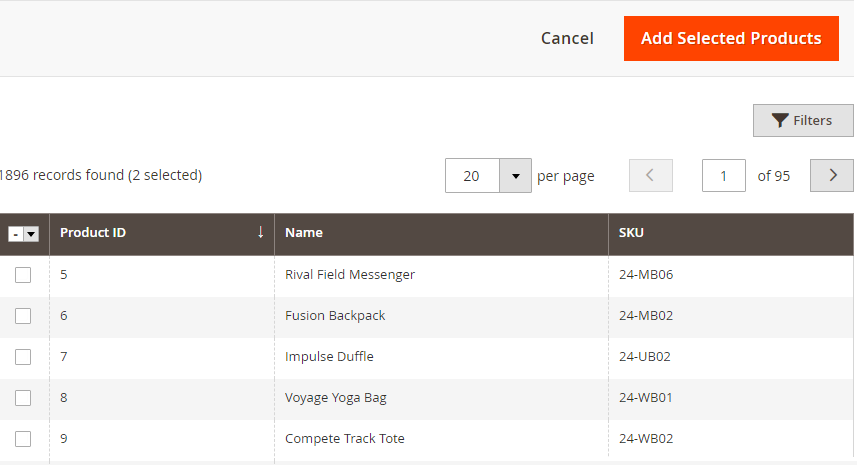
Product Grid at Product Level – You can add products from Admin > Catalog> Products > Select Product > Product Association > Click "Add Product" > Product Grid > Select Products > Click "Add Selected Products".
-
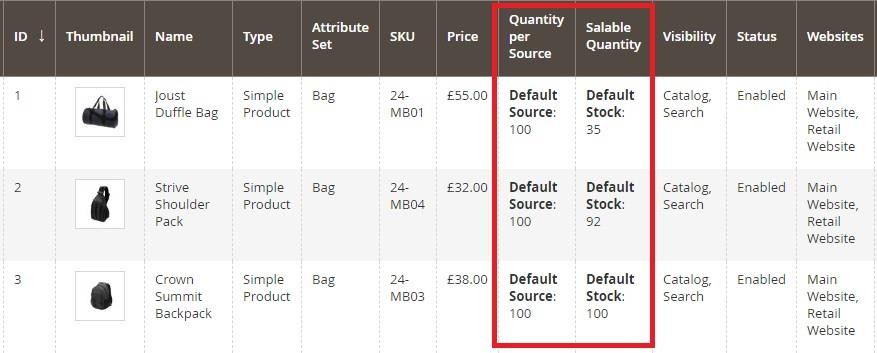
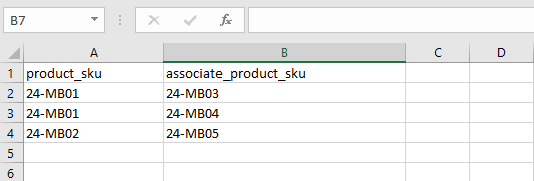
Associated or Linked Product Stock Update - Associated product stock/quantity will be updated based on the main product, which you can see in the below screen grab. It supports multiple linking where one product can have multiple associated products.
Fix Product Associations
Product associations can be fixed to make sure the following criterias are met:-
- Same product is not associated with itself
- One product is associated with only 1 parent
To fix product associations run the command given below:-
php bin/magento scommerce:associatedproducts:fixassociations -fImport / Export
Import
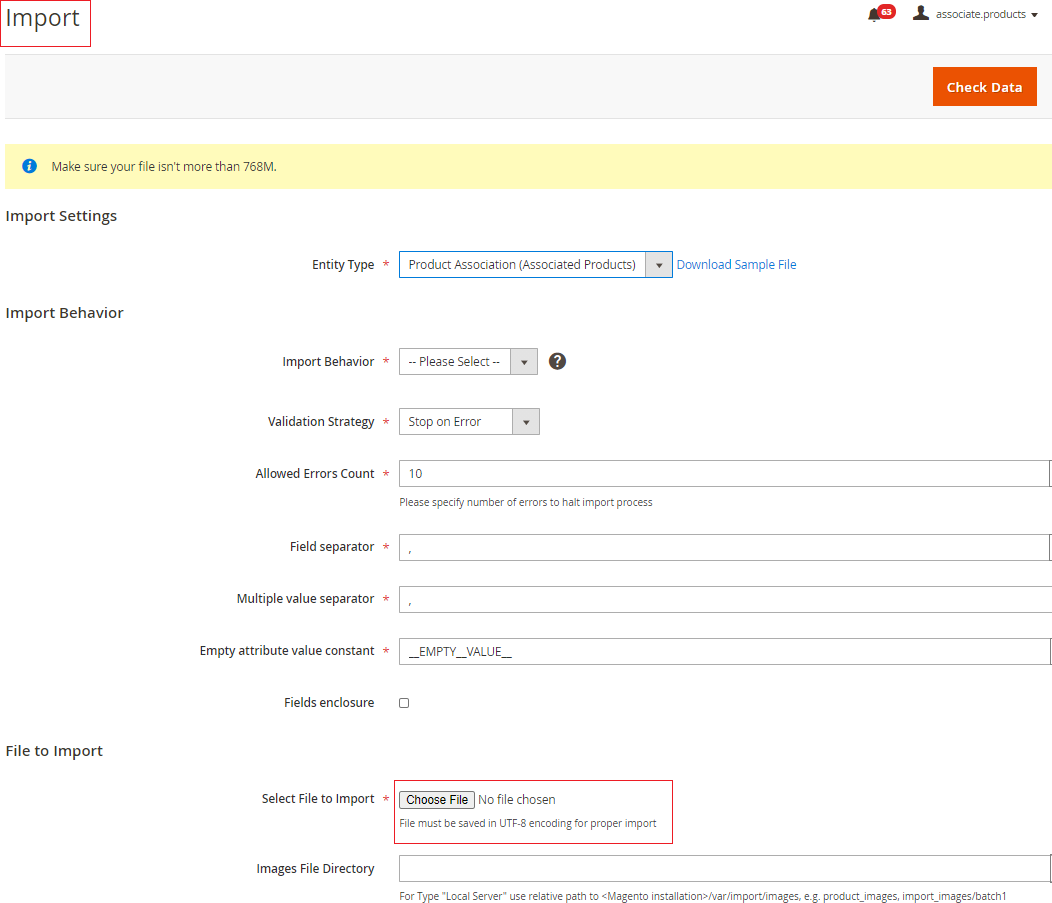
To import associated products go system > Data transfer > Import. Then select product association from the drop down list. You will see the importing menu opening on your screen as shown in the image below. Select the import file and add import behavior settings as per your preferences. Lastly click on check data button on the right corner of your screen.
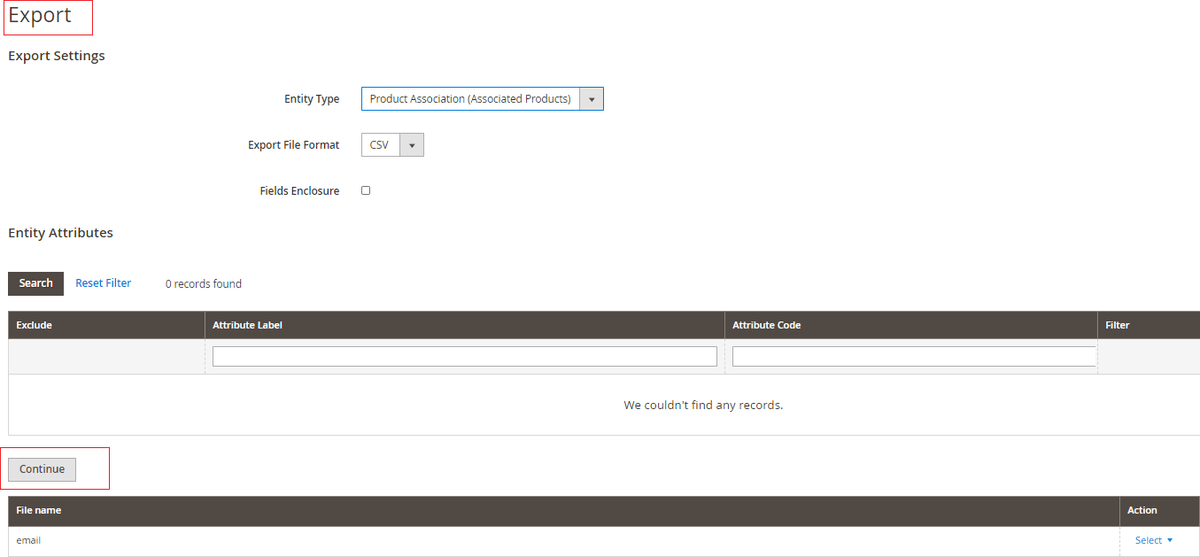
- Export – Go to System > Data Transfer > Export. Select product associated in the entity type dropdown list. You should see the export menu popup on your screen as shown in the image below: -
If you have a question related to this extension please check out our FAQ Section first. If you can't find the answer you are looking for then please contact support@scommerce-mage.com.