
Magento 2 Product Scheduler
Installation and User Guide for Magento 2 Product Scheduler Extension
Table of Contents
- Installation
- Installation via app/code
- Installation via Composer
- Configuration Settings for Product Scheduler
- General Settings
- Timer/Label Settings
- Cron Settings
- Setting UP Product Scheduler
- Start and End Date set up with product
- Enable Product on Scheduled Date
- Display Prelaunch Text and/or Countdown Timer (such as Launching Soon)
- Disable Product on Scheduled Date
- When Start and End Date is Same
- Front-end Site View
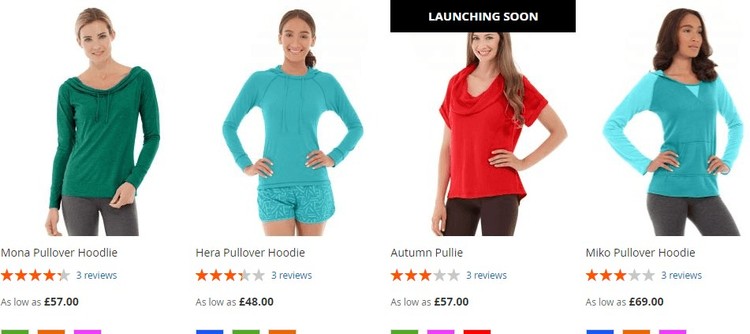
- "Launching Soon" Text for the New Product on the Category Page
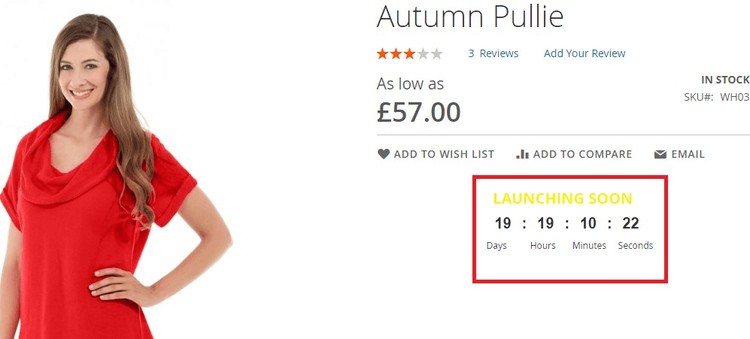
- Launching Soon Timer on the Product Page
Installation
-
Installation via app/code: Upload the content of the module to your root folder. This will not overwrite the existing Magento folder or files, only the new contents will be added. After the successful upload of the package, run below commands on Magento 2 root directory.
php bin/magento setup:upgrade php bin/magento setup:di:compile php bin/magento setup:static-content:deploy -
Installation via Composer: Please follow the guide provided in the below link to complete the installation via composer.
Configuration Settings for Product Scheduler
Go to Admin > Stores > Configuration > Scommerce Configuration > Product Scheduler
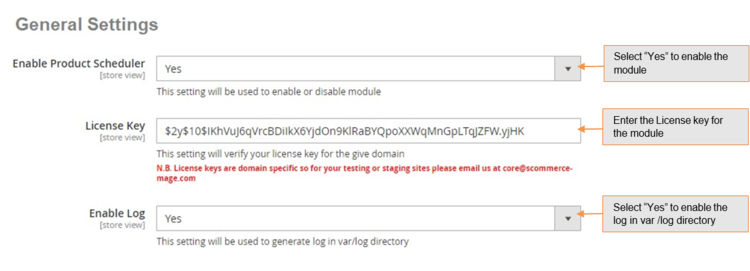
General Settings
- Enable Product Scheduler – Select "Yes" or "No" to enable or disable the module.
- License Key – Please add the license for the extension which is provided in the order confirmation email. Please note license keys are site URL specific. If you require license keys for dev/staging sites then please email us at support@scommerce-mage.com.
- Enable Log – Yes/No (If set to yes then this create a log file in var/log folder for each day with a time stamp like product_scheduler 20190125 log. The log file will record all details about products being set to enable/disable along with the dates/store values).
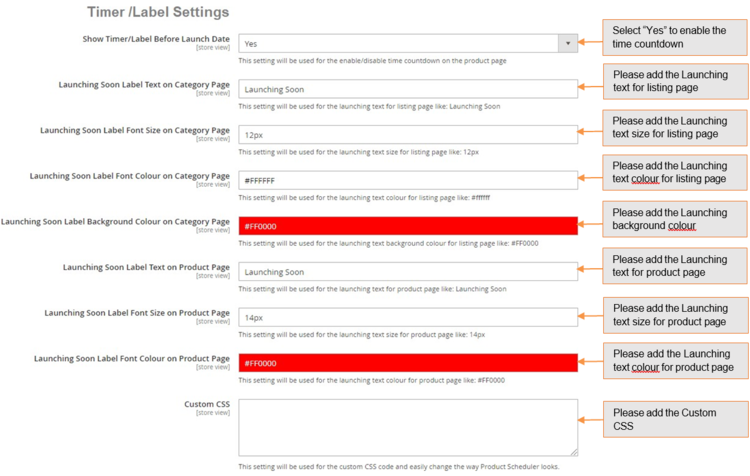
Timer / Label Settings
- Show Timer/Label Before Launch Date – Set yes to enable the module. If set to yes then the product status will be enabled and will show on the front end but there will be no add to basket on category or product page. Instead of Add to basket button it will either show timer on product page and launching soon label on category page.
- Launching Soon Label Text on Category Page – This is a text box. This option will only show if "Show timer/label before launch date" is set to yes This is a text for adding label text which will appear with product on category page. Default text should be "Launching Soon".
- Launching Soon Label Font Size on Category Page – This is a text box. This option will only show if "Show/timer before launch date" is set to yes. The user can enter the font size for the launching soon label text on the category page. Default size should be 12px.
- Launching soon Label Font Colour on Category Page – This is a text box. This option will only show if "Show timer/label before launch date" is set to yes. The user can enter the text colour for the launching soon label text on category page. Default colour should be #ffffff.
- Launching Soon Label Background Colour – This is a text box. This option will only show if "Show timer/label before launch date" is set to yes. The user can enter the background colour for the launching soon label text on category page. Default colour should be #FF0000.
- Launching soon Label Text on Product Page – This is a text box. This option will show if "Show timer/label before launch date" is set to yes. This is a text for adding label text which will appear with product on product page. Default text should be "Launching soon".
- Launching soon Label Font Size on Product Page – This is a text box. This option will only show if "Show timer/label before launch date" is set to yes. The user can enter the font size for the launching soon label text on product page. Default size should be 14px.
- Launching Soon Label Font Colour on Product Page – This is a text box. This option will only show if "Show timer/label before launch date" is set to yes. The user can enter the text colour for the launching soon label text on product page. Default colour should be #FF0000.
- Custom CSS – Enter custom CSS code and easily change the way Product Scheduler looks.
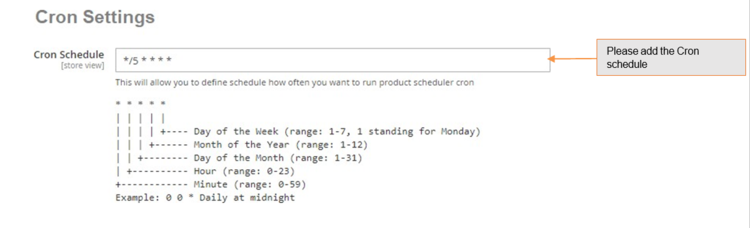
Cron Settings
- Cron Schedule – This will allow you to define cron frequency, how often you want to run product scheduler cron.
Setting UP Product Scheduler
The module enables you to pre-launch products with a custom label text such as “Coming Soon/Launching Soon”. This label appears on various pages of your store such as cross-sell products, up sell products, category pages, etc. The style of the label is completely customizable from the backend. We have provided several individual styling options in the configuration that allows you to style aspects such as font size, font color, label background color, etc.
You can add an start and End date to your products based on which a label or a timer or both can be displayed on products and category pages. The time on the timer or the duration in which the label is displayed is calculated from the start date in the product scheduler settings by going into Admin>catalog>Products.
The Product can be enabled and disabled based on start/end date. Upon completion of end date the product gets automatically disabled. It is disabled using the cron job configured as shown above, when the cron runs and the end date is reached the product will be disabled. The product is enabled on the day when the start date and time is set.
Let us look at how to set up start and end date for products.
-
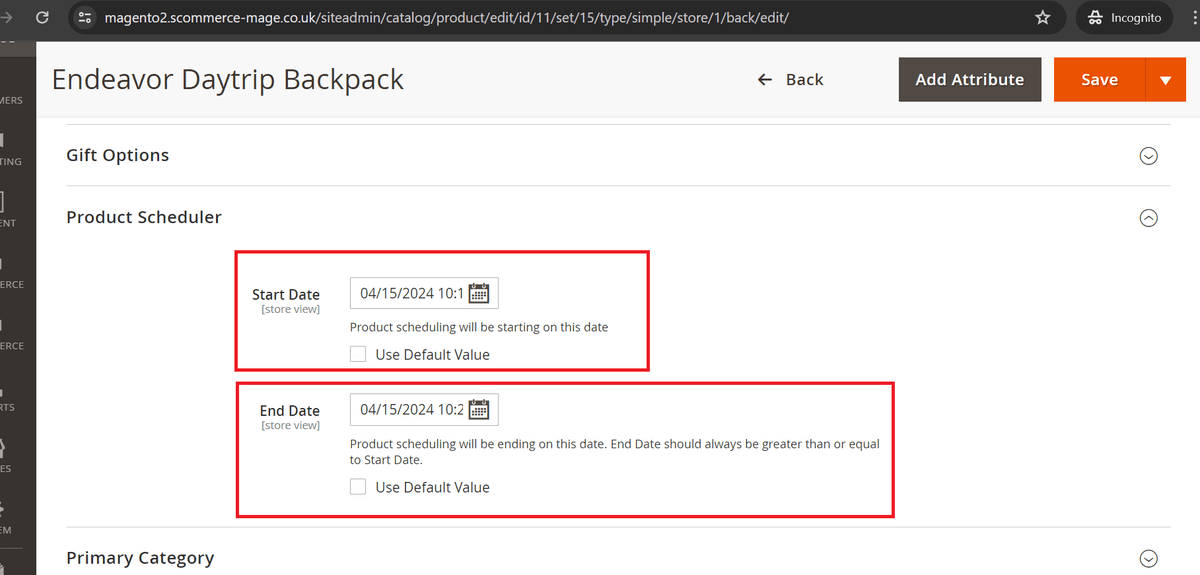
Start and End Date Setup at Product Level - You can schedule product for launching by selecting ''Start Date'' and ''End Date'' from Catalog > Products > Select Product > Start Date / End Date.
-
Enable Product on Scheduled Date- The product gets enabled based on the Start date added in the product settings. If the start date is set 2 days in the future then the product will be enabled/launched exactly after completion of 2days.
-
Display Prelaunch Text and/or Countdown Timer (such as Launching Soon)- The prelaunch text/Countdown timer gets displayed based on the Start date added in product settings. The time till which these are displayed are calculated based on the current date/time and the start date/time so Its current date and time minus the start date and time. It won't be displayed only when start date has already gone by, if its set in the future then it will always be displayed.
-
Disable Product on Scheduled Date- The product get's disabled on the completion of the end date. If no end date is set and this field is left empty then the product will be enabled unless disabled manually from the product settings.
-
When Start and End Date is Same- Only the Prelaunch text/ Countdown timer will be displayed given that the start date has already gone by i.e its in history. As the start date and end date is same product will be automatically disabled on this day.
Front-end Site View
-
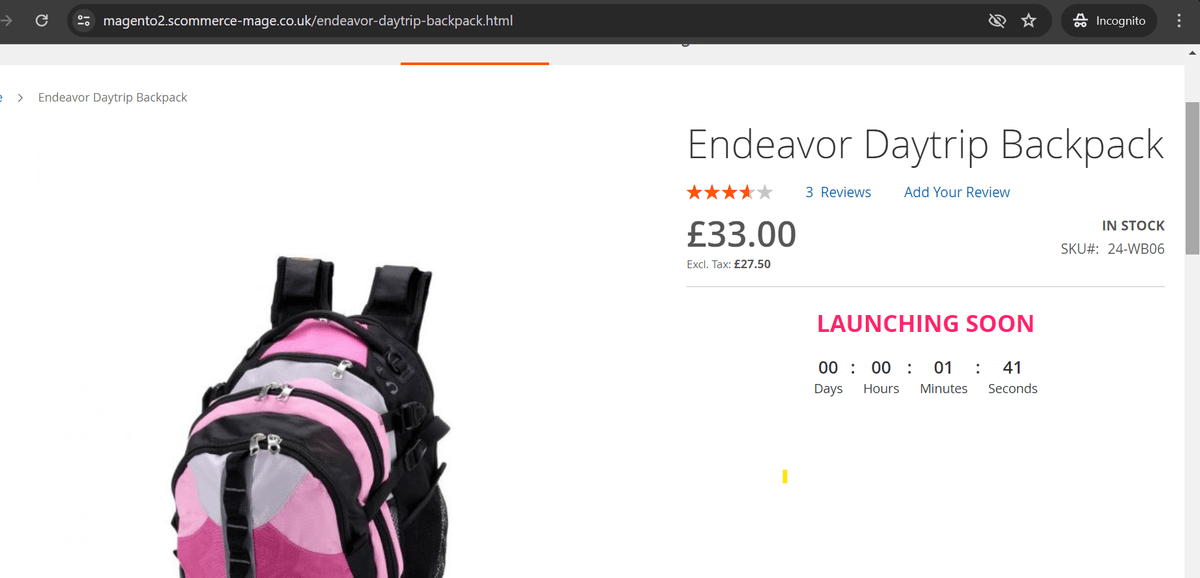
"Launching Soon" Text for the New Product on the Product Page – You can show "LAUNCHING SOON" on the category page for the new product from Admin > Stores > Configuration > Scommerce Configuration > Product Scheduler > Timer /Label Settings > Show Timer/Label Before Launch Date - "Yes".
-
Launching Soon Timer on the Product Page - To show launching soon timer on the product page, go to Admin > Stores > Configuration > Scommerce Configuration > Product Scheduler > Timer /Label Settings > Show Timer/Label Before Launch Date - Select "Yes".
If you have a question related to this extension please check out our FAQ Section first. If you can't find the answer you are looking for then please contact support@scommerce-mage.com.