
Magento 2 Full Page Cache Warmer
Installation and User Guide for Magento 2 Full Page Cache Warmer Extension
Table Of Contents
- Installation
- Installation via app/code
- Installation via Composer
- Configuration Settings for Optimiser Base
- General Settings
- Configuration Settings for Full Page Cache Warmer
- General Settings
- Cron Settings
- Cache Warmer Grid
- Regenerate
- Console Commands
- Category Page
- Product Page
- CMS Page
- Front-end Site View
- Cache Hit for the Category Page After the Execution of Category Page Command
- Cache Miss for the Category Page
Installation
- Installation via app/code: Upload the content of the module to your root folder. This will not overwrite the existing Magento folder or files, only the new contents will be added. After the successful upload of the package, run below commands on Magento 2 root directory.
php bin/magento setup:upgrade
php bin/magento setup:di:compile
php bin/magento setup:static-content:deploy
- Installation via Composer: Please follow the guide provided in the below link to complete the installation via composer.
Configuration Settings for Optimiser Base
Go to Admin > Stores > Configuration > Scommerce Configuration > Optimiser Base
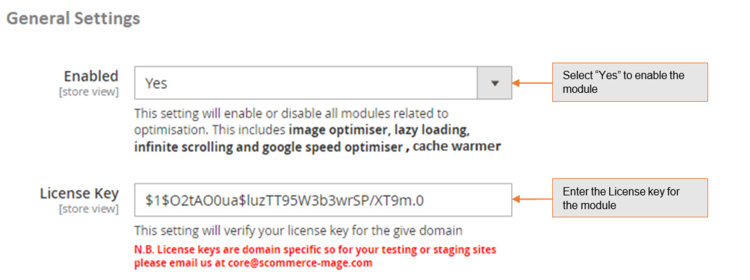
General Settings
- Enabled – Select “Yes” or “No” to enable or disable the module.
- License Key – Please add the license for the extension which is provided in the order confirmation email. Please note license keys are site URL specific. If you require license keys for dev/staging sites then please email us at support@scommerce-mage.com.
Configuration Settings for Full Page Cache Warmer
Go to Admin > Stores > Configuration > Scommerce Configuration > Cache Warmer
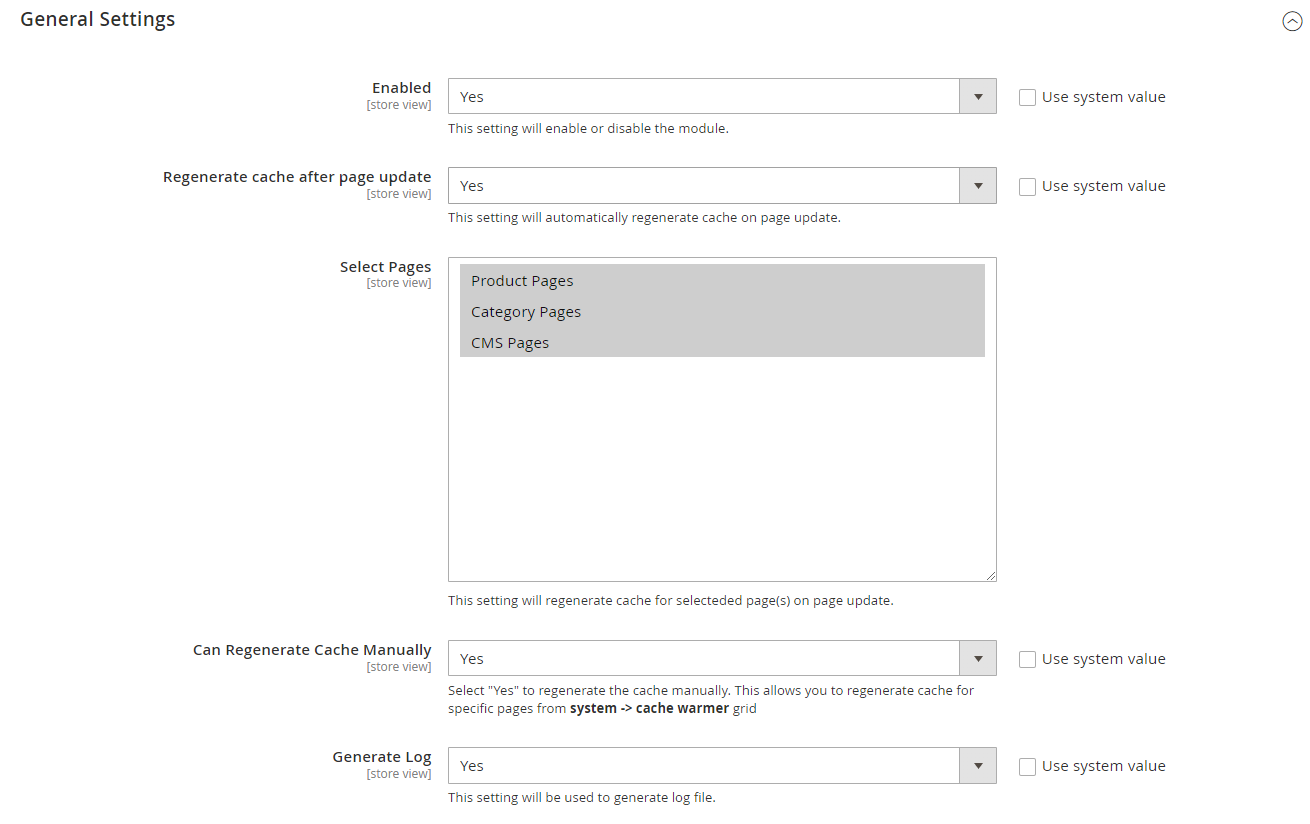
General Settings
- Enabled - Select “Yes” or “No” to enable or disable the module.
- Regenerate cache after page update - Please select "Yes" or "No" to regenerate cache for updated page.
- Select Pages - Please select the page(s) from the multi-select option . This will regenerate the cache selected page(s) on page update.
- Can Regenerate Cache Manually - Please select " Yes" or "No". If set to "Yes" then you can regenerate cache manually from cache warmer grid.
- Generate Log - Select "Yes" to generate the log.
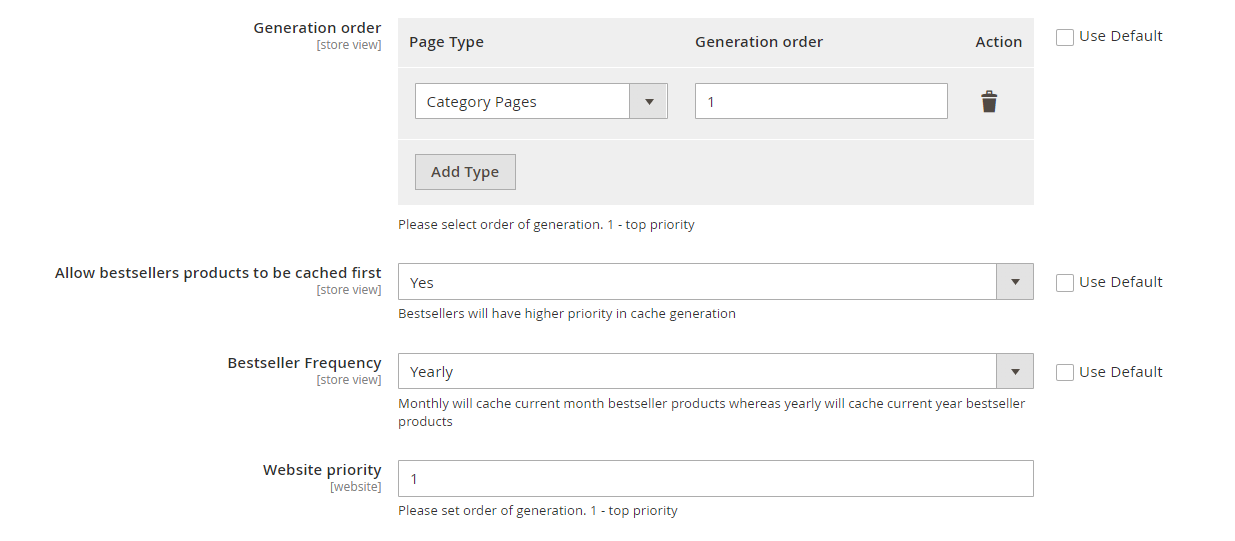
- Generation order - Select which page will be generated first by adding the generation order alognside the page type. 1 is the highest priority.
- Allow bestsellers products to be cached first - Select "Yes" to give best seller products the highest priority in cache generation.
- Bestseller Frequency - Choose the range of bestleer products monthly/yearly. Based on your selection these products will be cached.
- Website priority - In multi website structures change the website in order to prioritize which will be cached first. 1 is highest priority.
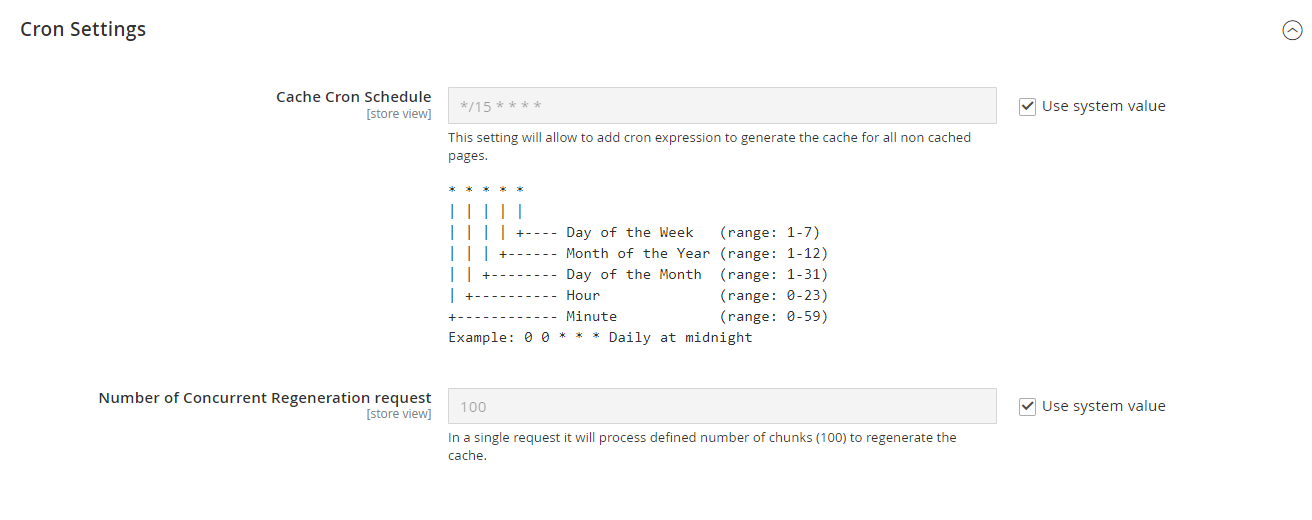
Cron Settings
- Cache Cron Schedule - Schedule cron job to regenerate the cache for all non cached page(s).
- Number of Concurrent Regeneration request - Please define the number of concurrent request.
Cache Warmer Grid
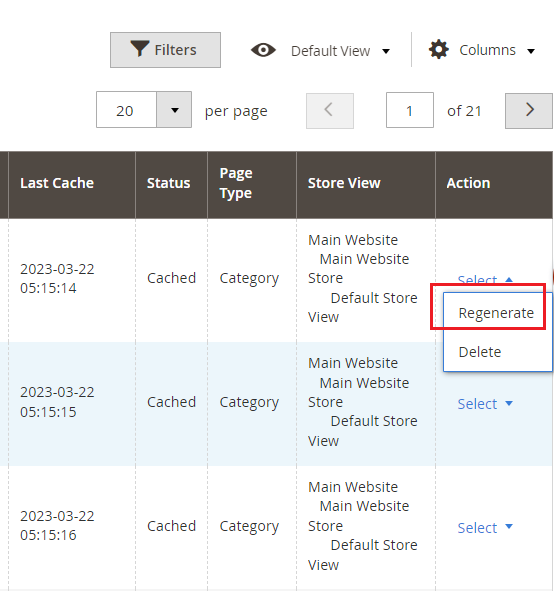
When you enable the module and set General Settings > Can Regenerate Cache Manually > to "Yes" then it adds an additional option "Regenerate" under the "Actions > Select" drop-down at Admin > System > Cache Warmer > Actions. This grid will have Id, Reference Id, Processed Time, Request Path, Page URL, Last Cache - (Date, Time ), Status - (Cached/Un-cached), Page Type - (Home, Product, Category, CMS), Store View, and Action- (Regenerate, Delete).
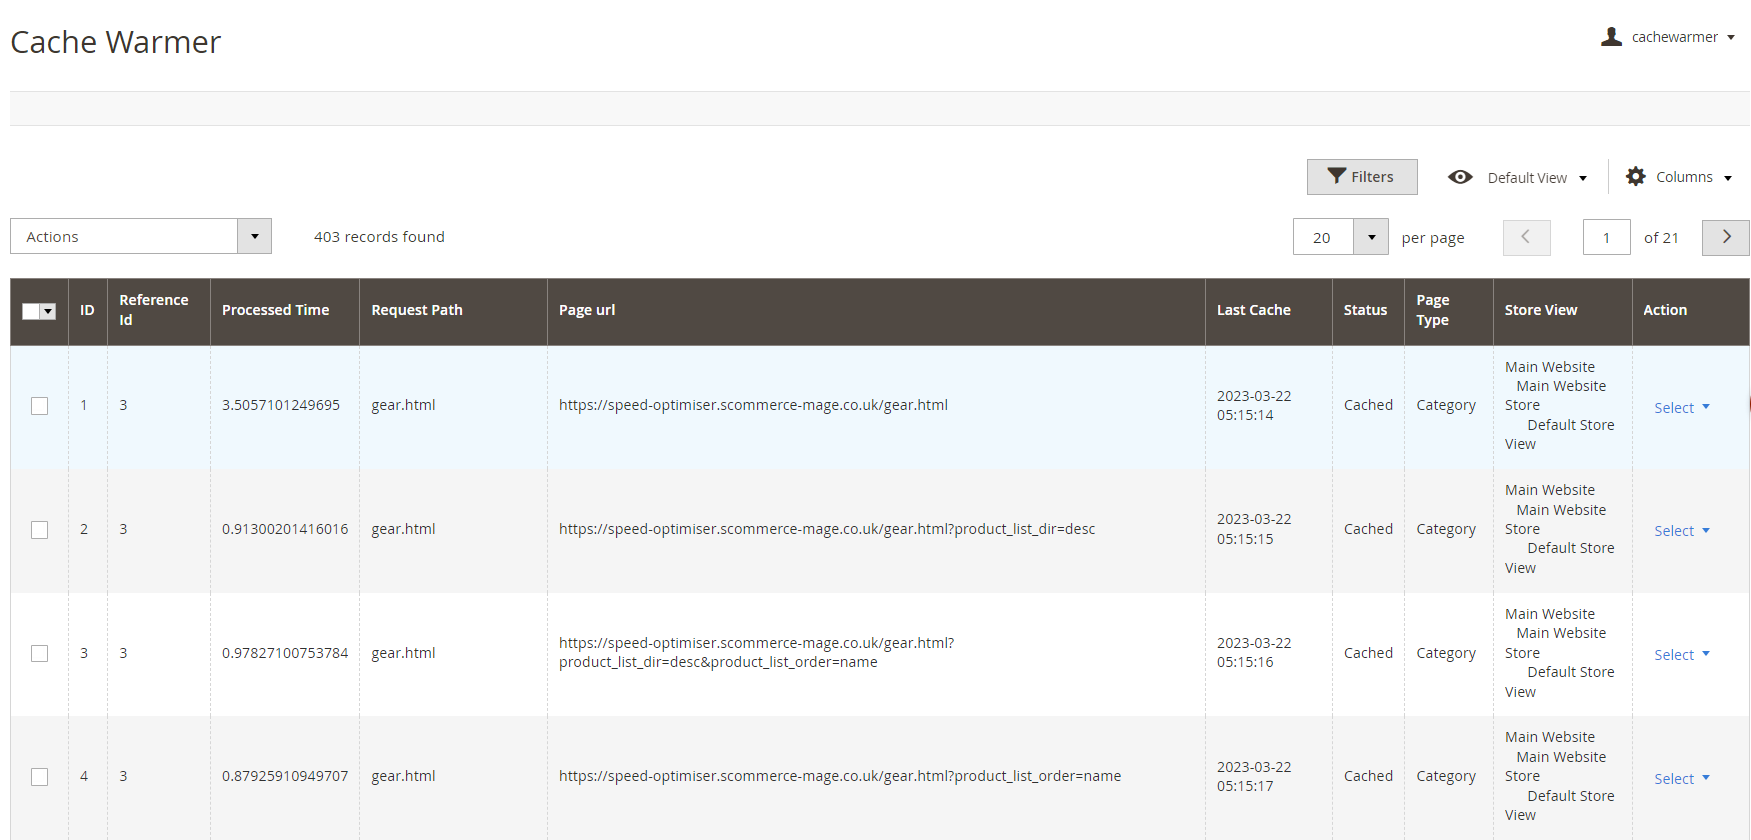
- Regenerate - It regenerates cache manually for Category/Product/CMS page(s). By clicking "Regenerate" action you can regenerate cache manually for a specific URL.
Console Commands
You can regenerate cache for Product/Category/CMS page(s) by running the following console commands:-
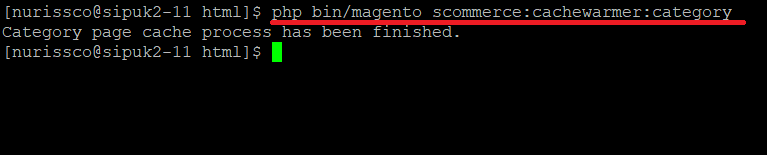
- Category Page - To regenerate cache for the category page, execute the below command.
scommerce:cachewarmer:category
- Product Page - To regenerate cache for the product page(s), execute the below command.
scommerce:cachewarmer:product

- CMS Page - To regenerate cache for CMS page, run the below command.
scommerce:cachewarmer:cmspage

Front-end Site View
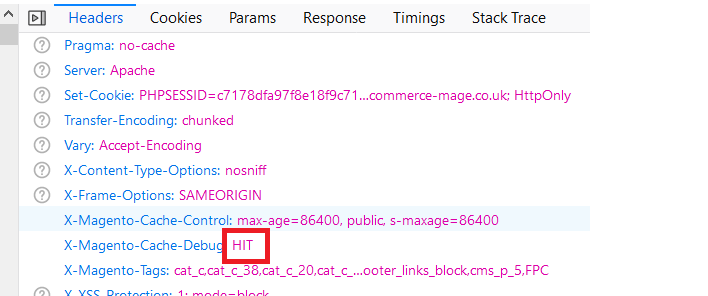
- Cache Hit for the Category Page After the Execution of Category Page Command - When you execute the command for category page then it regenerates the cache and on the front-end you check the status "Hit" or "Miss" using browser tool (Inspect element) at Network > Select Page URL > Header > X- Magento-Cache-Debug : HIT
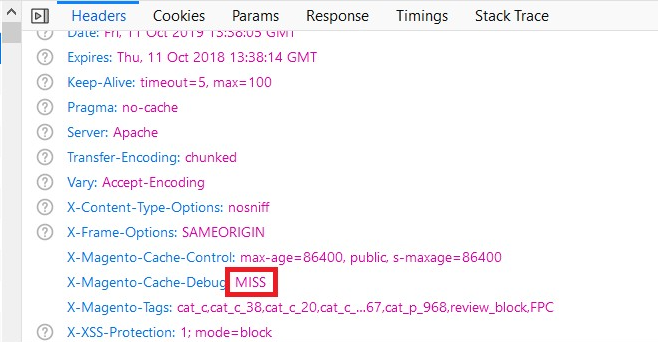
- Cache Miss for the Category Page - Flush the cache by executing the command, c:f and then check cache using browser tool at, Network > Select Page URL > Header > X-Magento-Cache-Debug : MISS
If you have a question related to this extension please check out our FAQ Section first. If you can't find the answer you are looking for then please contact support@scommerce-mage.com.