
Magento 2 Social Login
Installation and User Guide for Magento 2 Social Login Extension
Table of Contents
- Installation
- Installation via app/code
- Installation via Composer
- Configuration Settings for Social Login
- General Settings
- Create Facebook App Id
- Create Google App Id
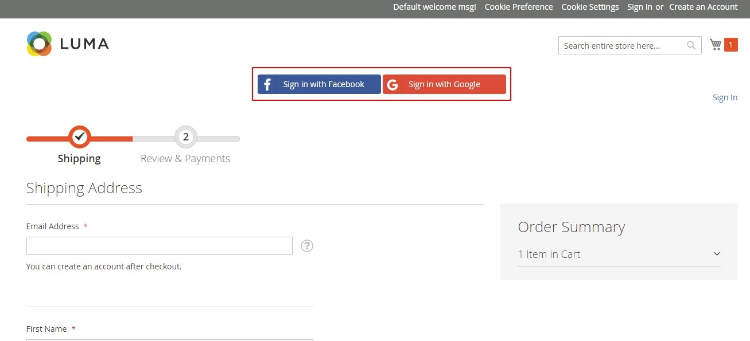
- Front-end Site View
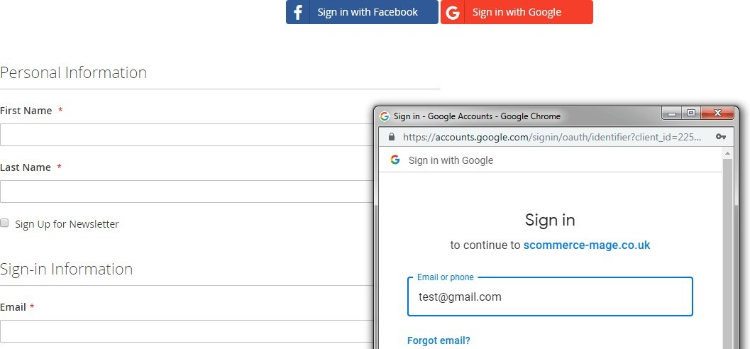
- Social Login Options on the Front-end
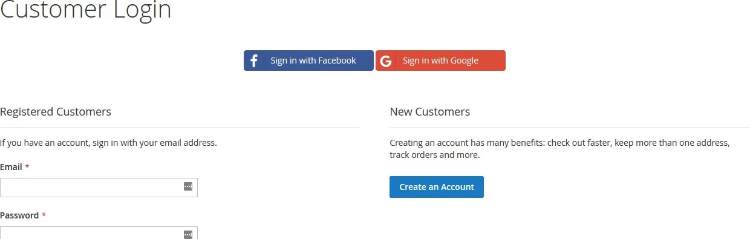
- Social Login Options on the Sign In Page
- Social Login Options on the Registration Page
- Social Login Options on the Checkout Page
Installation
- Installation via app/code: Upload the content of the module to your root folder. This will not overwrite the existing Magento folder or files, only the new contents will be added. After the successful upload of the package, run below commands on Magento 2 root directory.
php bin/magento setup:upgrade php bin/magento setup:di:compile php bin/magento setup:static-content:deploy - Installation via Composer: Please follow the guide provided in the below link to complete the installation via composer.
Configuration Settings for Social Login
Go to Admin > Stores > Configuration > Scommerce Configuration > Social Login
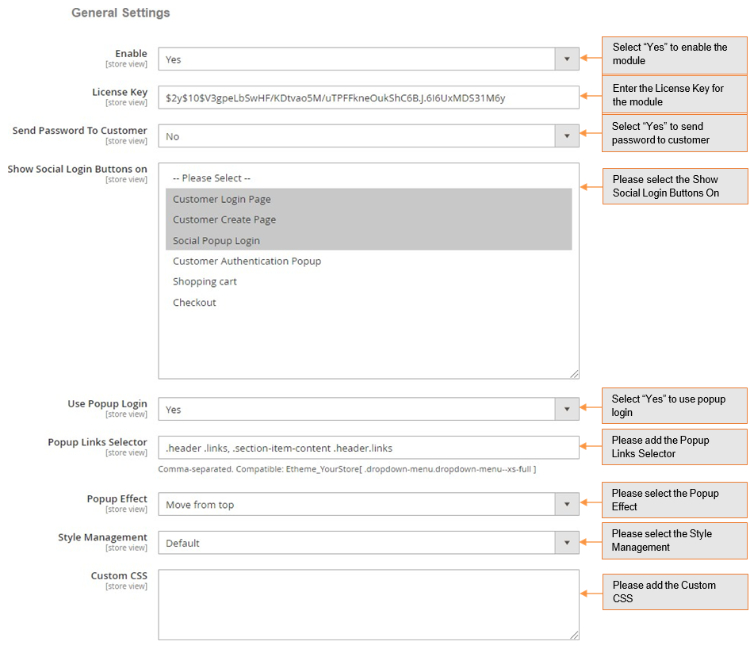
General Settings
- Enabled – Select "Yes" or "No" to enable or disable the module.
- License Key – Please add the license for the extension which is provided in the order confirmation email. Please note license keys are site URL specific. If you require license keys for dev/staging sites then please email us at support@scommerce-mage.com.
- Send Password to Customers – Set yes or no for send password to customers.
- Show Social Login Buttons on – Select where all you want to show the social login options.
- Use Popup Login – Set yes or no to enable/disable the popup.
- Popup Links Selector – Comma-seperated. Compatible: Etheme_YourStore [ dropdown-menu.dropdown-menu—xs-full ]
- Popup effect – Select pop up appearing effect.
- Style Management – Select color for the popup.
- Custom CSS – Enter your Custom CSS.
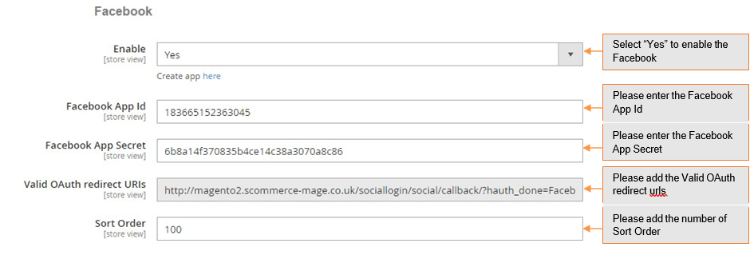
- Enabled – Select "Yes" or "No" to enable or disable the module.
- Facebook App Id – Enter your Facebook App Id. To create App Id, check Facebook Developer.
- Facebook App Secret – Enter your Facebook App secret.
- Valid OAuth redirect URLs – Enter the redirect URLs.
- Sort Order – Enter the sort order for display.
-
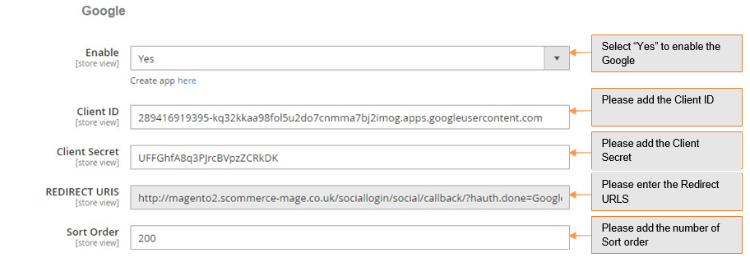
Enabled – Select "Yes" or "No" to enable or disable the module.
-
Client Id – Enter your Google Client Id. To create Client Id, check Google App.
-
Client Secret – Enter your Secret Id.
-
Redirect Urls – Enter the redirect urls.
-
Sort Order – Sort order for display.
-
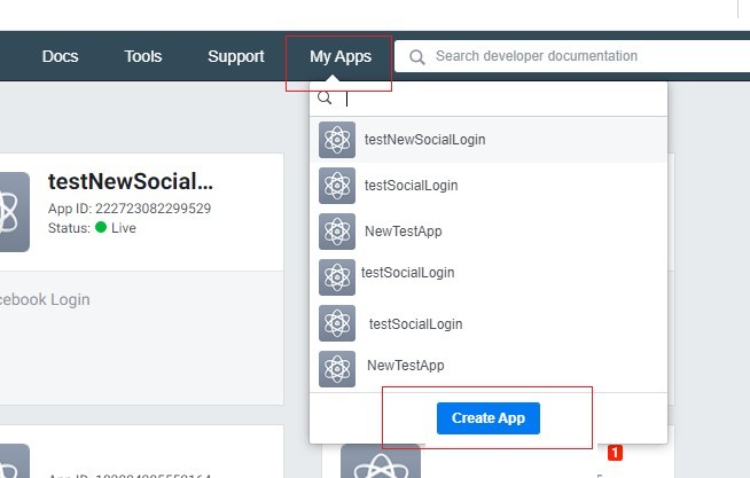
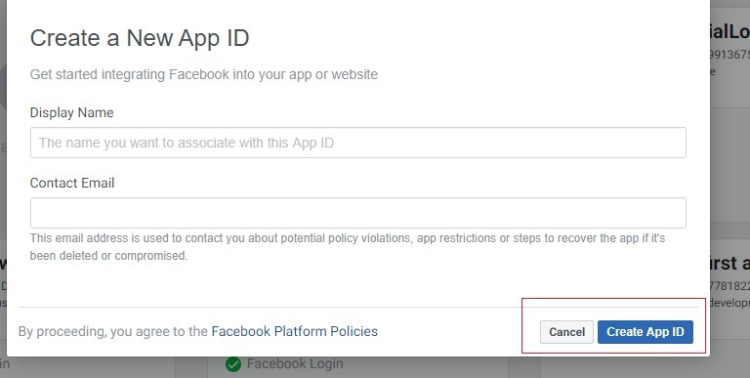
Create Facebook App Id - To create Faceook app Id go to Facebook Developers, login as a developer and choose "Create App" in the "My Apps" drop-down.
Specify the "Display Name" and "Contact Email" for your app. After that, click the "Create App ID".
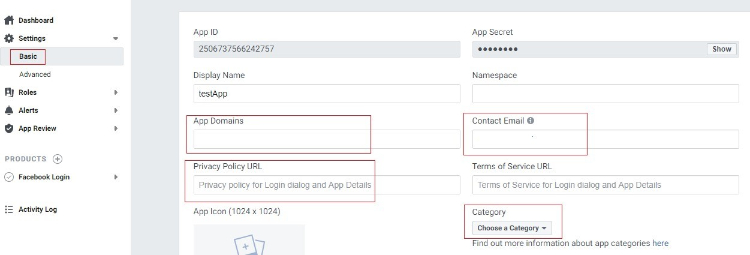
Go to the Settings > Basic tab to configure your app. The App ID and App Secret will be generated automatically. Fill the App Domains field and choose your app Category.
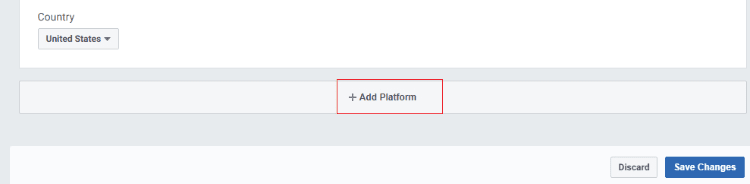
Click on the "Add Platform" button to choose the platform for your social apps.
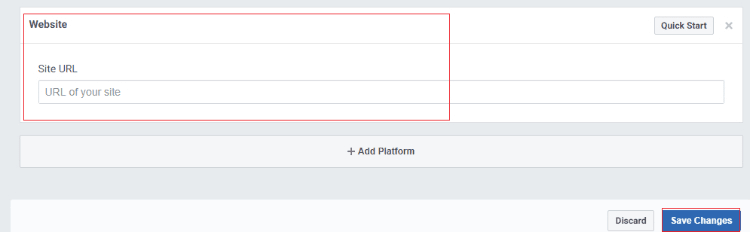
After clicking on the Add Platform button you will see the grid with various platform types. Please select Web.
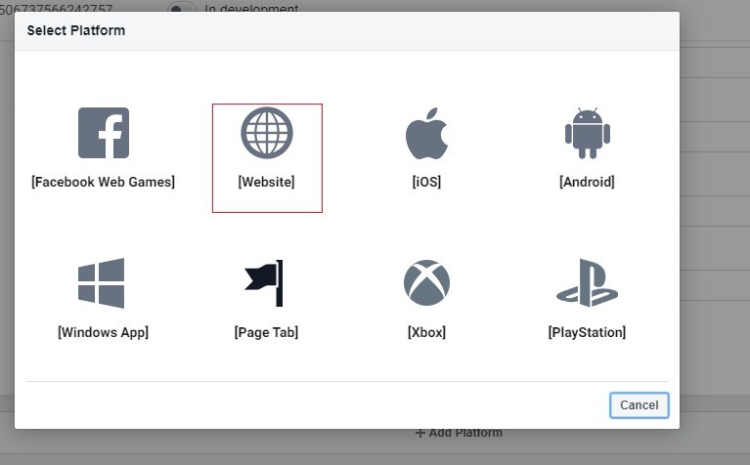
After specifying the platform type, insert your website URL and click on the "Save Changes" button.
Enable the "Client OAuth Login" from Facebook Login > Settings and provide the "Valid OAuth Redirect URLs".

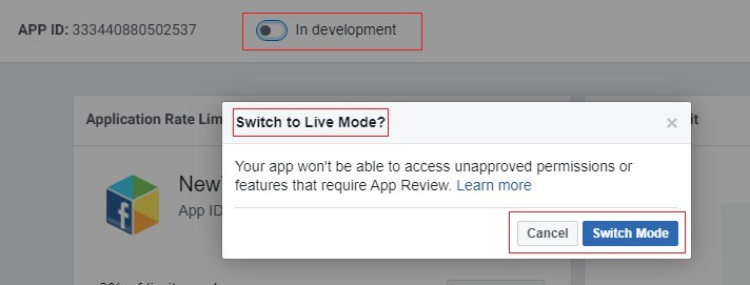
To apply the configuration, change the Status from "In development" to "Live".
Insert your Facebook App Id and Secret Key in Facebook settings and Save the configuration.
Create Google App Id – To create Google App go to Google App. Click on the "CREATE PROJECT" button and configure your app settings.
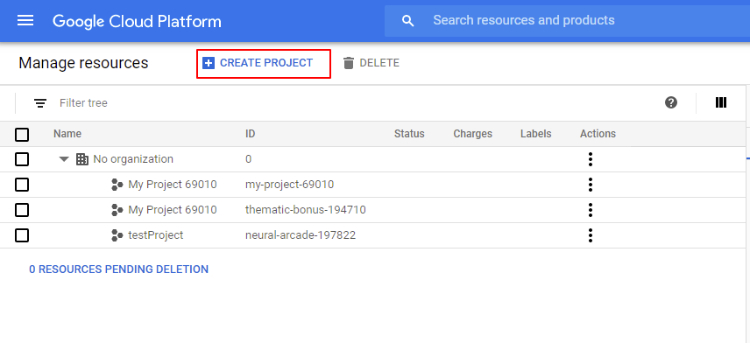
Specify your "Project name", the project ID will be generated automatically.

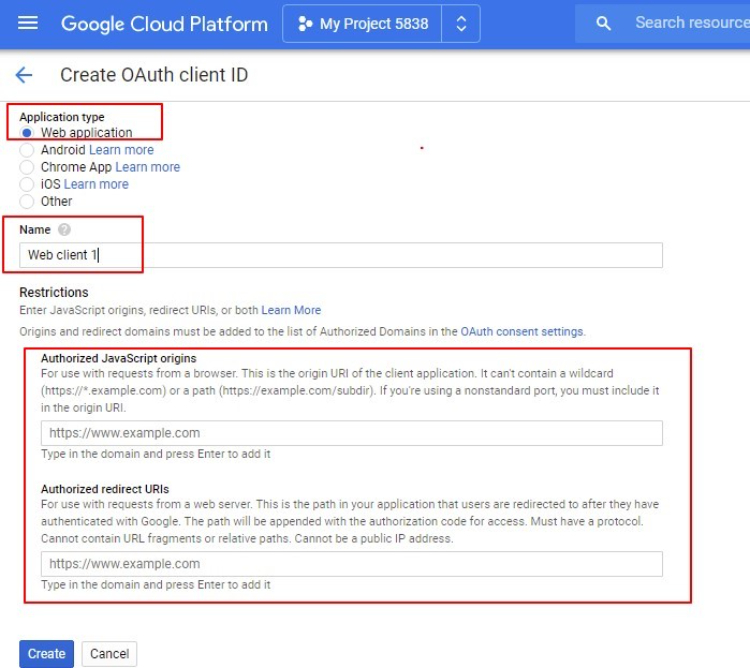
Go to the Credentials tab and create a client ID to integrate your website with Google.

Insert your website URL in the required field. In the field "Authorized Redirect URLs" add redirect website URL. Then, press the Create button.
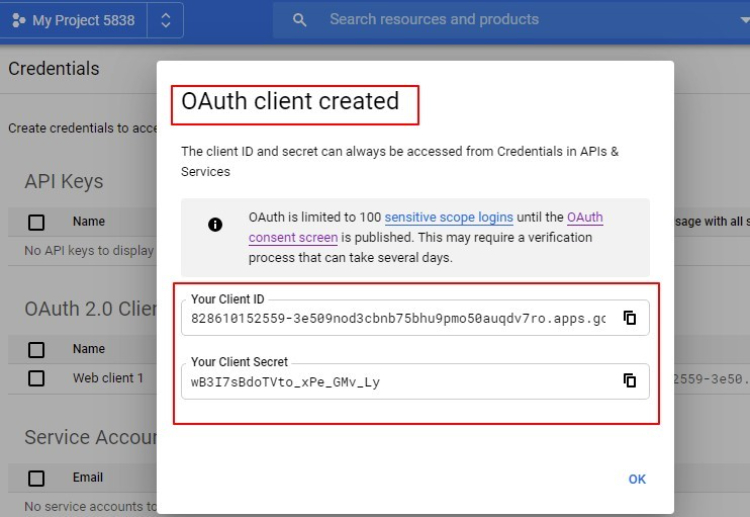
Please copy the Client ID and Client Secret. Insert your API KEY (Client ID) and API Secret (Client Secret) in the appropriate fields in the backend Google settings and save the configuration.
Front-end Site View
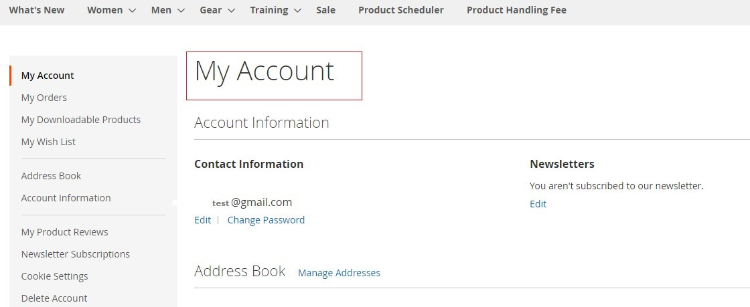
After successful login, it redirects to My Account page.
If you have a question related to this extension please check out our FAQ Section first. If you can't find the answer you are looking for then please contact support@scommerce-mage.com**.