
Magento 2 Product Feed
Installation and User Guide for Magento 2 Data Feed for Google, Amazon, Facebook Extension
Table of Contents
- Installation
- Installation via app/code
- Installation via Composer
- Configuration Settings for Product Feed Generator
- General Settings
- Create Data Feeds
- General
- Content
- Format
- Conditions
- Facebook Product Feed XML
- Google Product Feed XML
- Google Product Feed CSV
- Facebook Product Feed CSV
- Make attribute visible in the Google Feed under Rule Conditions
- Product Feed with Swatches
Installation
-
Installation via app/code: Upload the content of the module to your root folder. This will not overwrite the existing Magento folder or files, only the new contents will be added. After the successful upload of the package, run below commands on Magento 2 root directory.
php bin/magento setup:upgrade php bin/magento setup:di:compile php bin/magento setup:static-content:deploy -
Installation via Composer: Please follow the guide provided in the below link to complete the installation via composer.
Configuration Settings for Product Feed Generator
Go to Admin > Stores > Configuration > Scommerce Configuration > Product Feed Generator
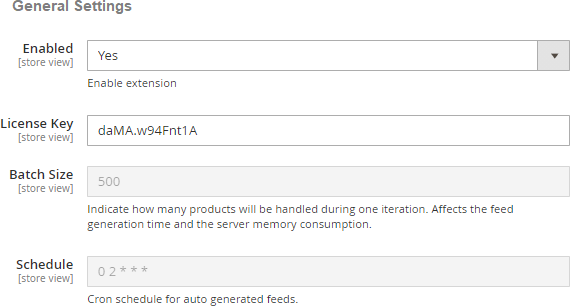
General Settings
- Enabled - Select "Yes" or "No" to enable or disable the module.
- License Key - Please add the license for the extension which is provided in the order confirmation email. Please note license keys are site URL specific. If you require license keys for dev/staging sites then please email us at support@scommerce-mage.com.
- Batch Size – Indicate how many products will be handled during one iteration.
- Schedule – Please add the cron schedule for auto generated feeds.
Create Data Feeds
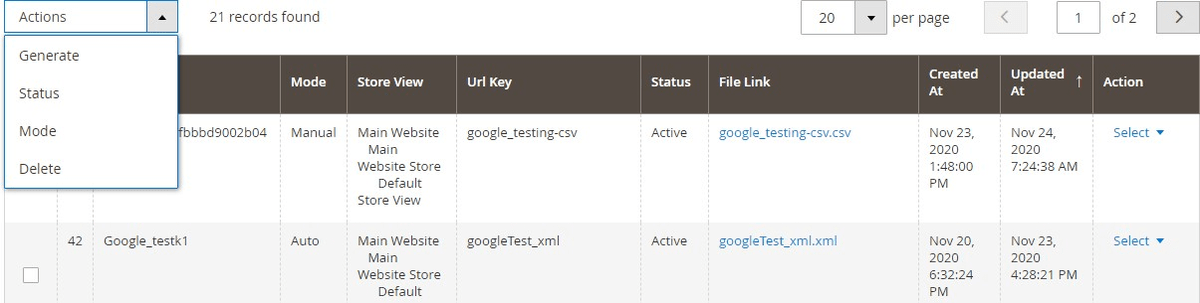
You can create/manage/edit data feeds from Admin > Scommerce > Manage feed list > Click "Add Feed", it redirects on Edit Feed page which contains all the settings required to create a new feed. You can do any custom adjustments while creating a feed or you can do them later. You will find an ACTIONS drop-down on the top left of the list. It contains the following option: -
- Generate: - Click on it to generate the feed manually.
- Status: - Select the feed and you can change the status to active or inactive from this option.
- Mode: - You can also change the mode of a feed Auto or Manual from this option
- Delete: - Click on it to delete a feed.
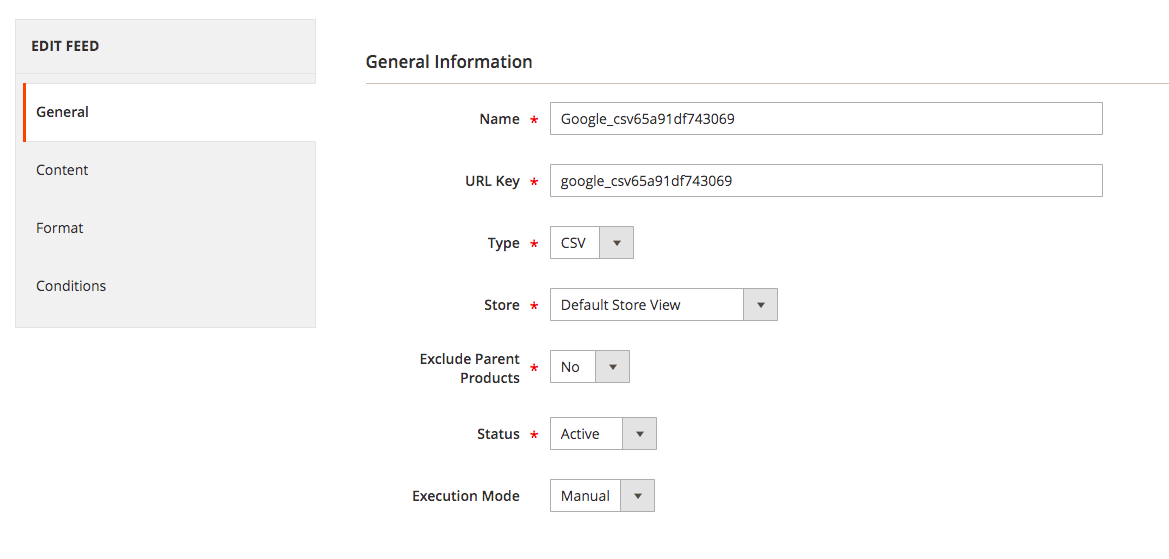
General
The general tab contains all the general settings such as Name of the feed, URL key, type of feed, store, status, and execution mode.
- URL Key: - Here enter the URL key
- Type: - You can specify the type of feed here such as XML, CSV, TXT etc.
- Store: - Choose the store view
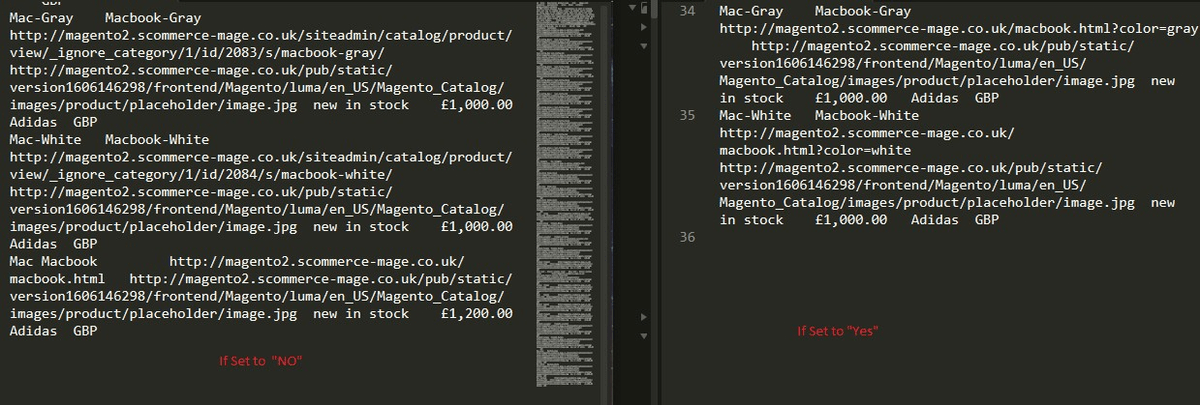
- Exclude Parent Products: - If "Yes" then the feed will contain only child product links and if set to "NO" Then the feed will contain both child and parent products.
- Status: - Status needs to be active to generate the feed.
- Execution Mode: - Execution mode can be Manual or Auto. For the Manual mode you will have generate the feed manually. As for the auto mode, the feed will be generated by the scheduled cron on the time specified in the configurations.
Content
In the content section, you will notice that our extension generates the code automatically for you. You can also make the changes if you want.
- <g:google_product_category>: - Leave this empty but if you want to then please add the category relevant to google categories.
- Tag: - You can add a tag into your content
- Attribute: - Select attribute such as brand, price etc.
- Format: - Now you can also select Price and Date in the format
- Parent: - Select "Yes" to add parent product in the feed and "No" to only include child products.
- Use Attribute Label: - Select "Yes" to display the attribute (in text format) and "No" to display attribute in a identifier format.
- Fill From Child: - If set to "yes" and product is configurable - value will be taken from first child
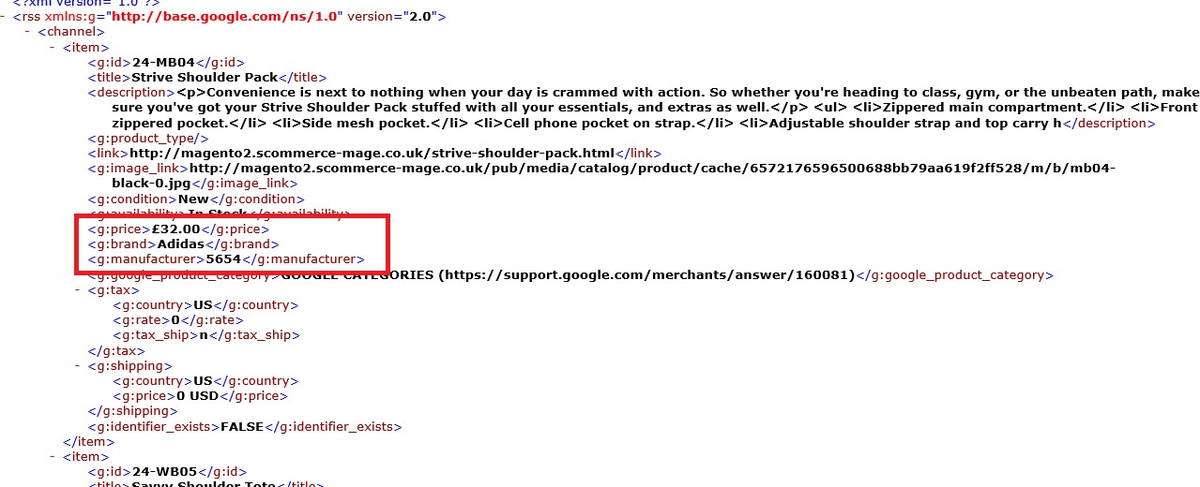
Eg: - Suppose you want to add GBP in the price attribute then you can change it by simply navigating to the tag <g:price> and add "GBP" before closing the tag. Similarly you can customize any part of the data.

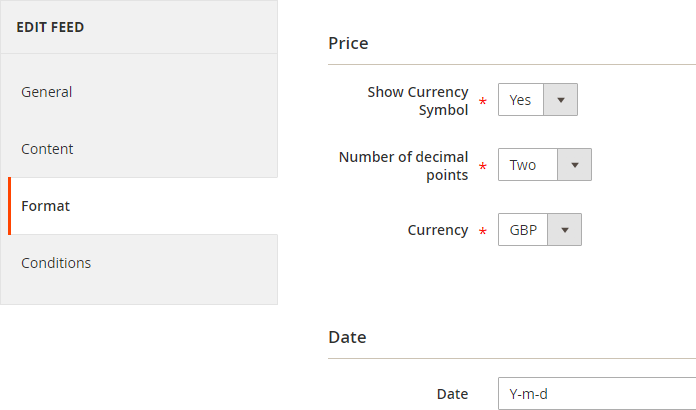
Format
Here, you can customize the format of several parts of the data such as Price, date, etc.
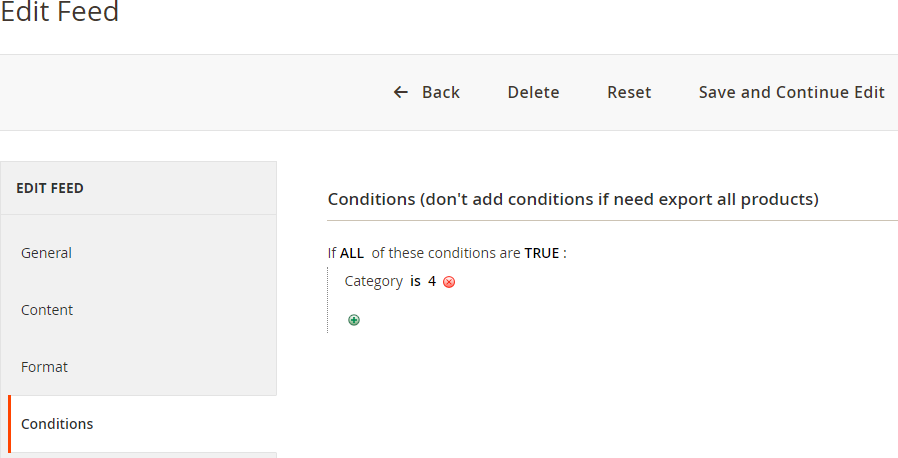
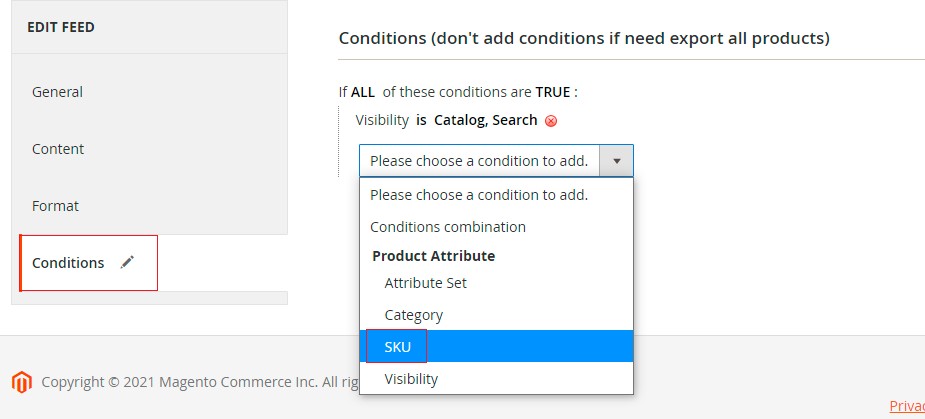
Conditions
The conditions tab allows you to add custom conditions specific to the feed. For instance, you can apply a condition to generate the feed for only one product by referring to its specific SKU. You can also apply several other conditions from the drop-down list.\
- Facebook Product Feed XML – When you click on the feed from Admin > Scommerce > Manage Feed List > Click "facebook.xml", then it opens the product feed.
- Google Product Feed XML – To generate Google feed go to Admin > Scommerce > Manage Feed List > Click "google.xml", it opens the product feed.

- Google Product Feed CSV – When you click on any CSV feed, it opens the product feed in CSV format.

- Facebook Product Feed CSV – Here is the Facebook product feed in CSV format.

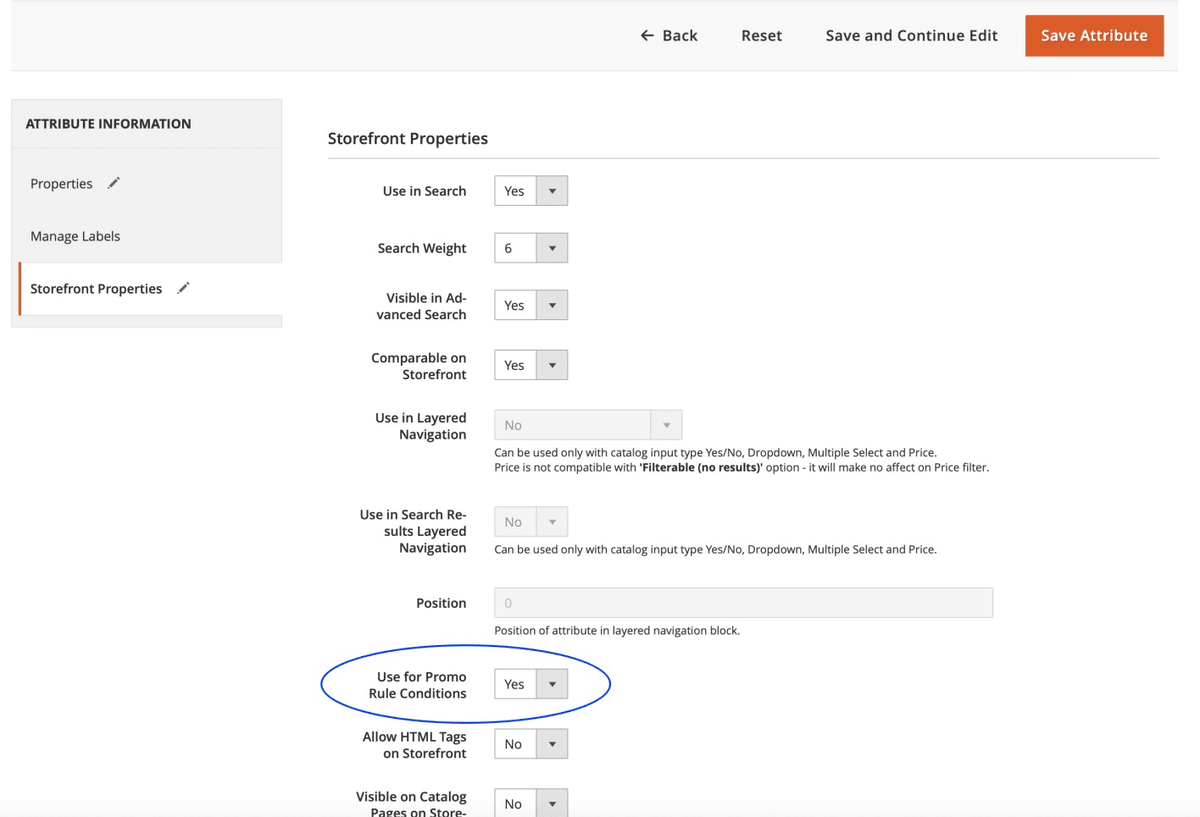
Make attribute visible in the Google Feed under Rule Conditions
You can add from Admin > Stores > Attributes > Product > Select Product Attribute (e.g. sku) > Use for Promo Rule Conditions - 'Yes'
In the below image you can see that attribute "SKU" added under conditions.
Product Feed with Swatches
To allow colour and size to be auto selected on product page, the URL needs to be created like show below.
attribute name and value of the attribute
for example - size=s&color=red
https://magento2.scommerce-mage.co.uk/orion-two-tone-fitted-jacket.html?size=s&color=redIf you have a question related to this extension please check out our FAQ Section first. If you can't find the answer you are looking for then please contact support@scommerce-mage.com.